Let’s discuss Calculate and Configure Perfect Defender Scan Time Value to Boosts Device Speed using Intune. Schedule Scan Time policy setting that controls the time of day for the weekly Windows Defender Antivirus scheduled scan on endpoint devices.
The policy setting allows administrators to define the exact minute past midnight (00:00) when the weekly Windows Defender scan should begin. The policy setting allows administrators to define the exact minute past midnight (00:00) when the weekly Windows Defender scan should begin.
By enabling this policy, organization an reduce Minimize User Impact or Disruption. The scan is a resource-intensive process that can slow down a computer and affect productivity. Organizations set the scan for off-peak hours (e.g., late at night or early morning) when employees are not actively using their devices.
By preventing performance slowdowns during peak hours, admins drastically reduce the number of help desk tickets filed under “My computer is slow!” or “My laptop froze.” Administrators can coordinate the timing of the large scan workload with other scheduled network tasks (like updates, backups, and security intelligence downloads).
Table of Contents
Calculate and Configure Perfect Defender Scan Time Value to Boosts Device Speed using Intune
The policy is a component of a larger maintenance strategy. It helps the organization manage its total cost of ownership (TCO) by reducing the time IT spends on troubleshooting performance issues and improving the reliability of the entire endpoint fleet.
- How to Configure Check for Signatures before Running Scan Policy using Intune
- How to Allow or Block Email Scanning using Intune Policy
- Allow or Disallow Scanning of Archives using Intune Policy
Configure Policy from Intune Portal
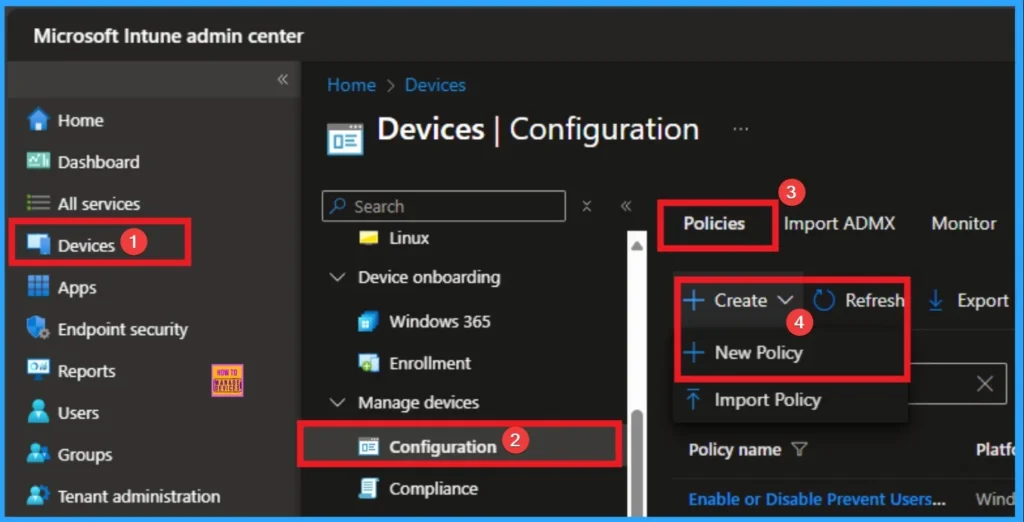
As an admin, you can easily configure this policy from Intune Portal. For this, Sign in to Microsoft Intune Portal with your credentials. Then go to Devices > Configuration > +Create >+ New Policy.
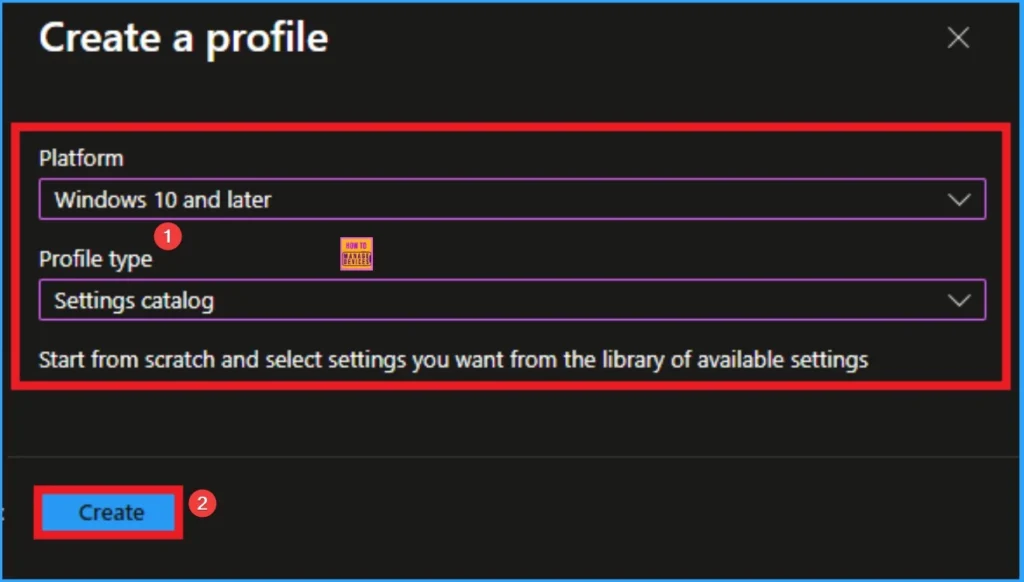
Choosing Platform and Profile Type
Choosing Platform and Profile is the next step after selecting New policy. It is very necessary step to effectively configure the policy to appropriate platform. Here I would like to configure the policy to Windows 10 and later platform and settings catalog profile. Then click on the Create button.
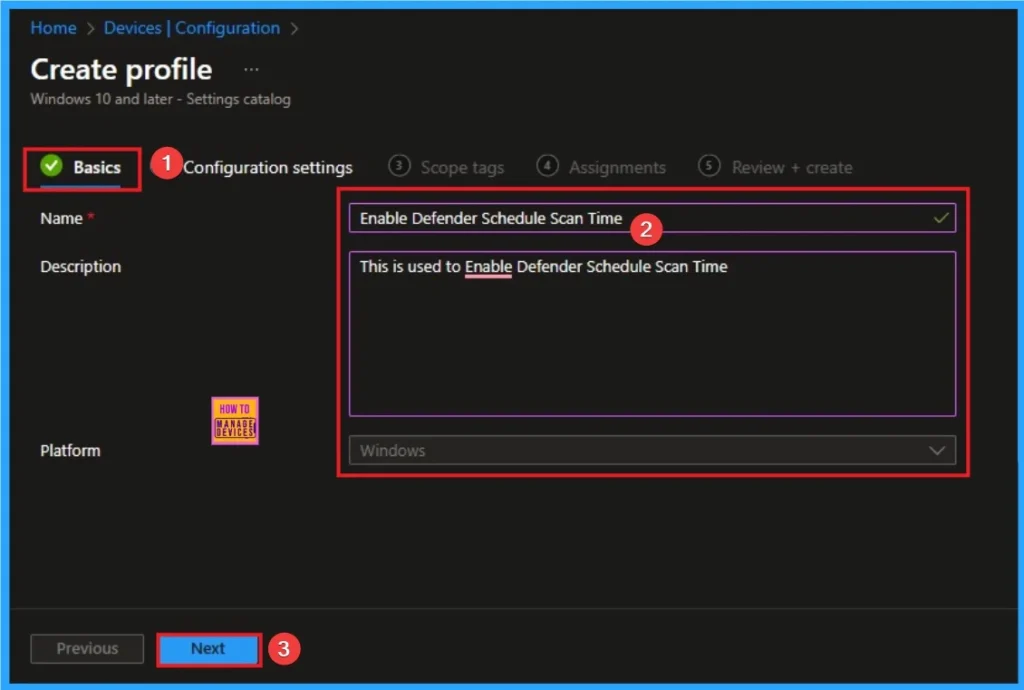
Basic Tab for Naming Policy
Basic Tab is used to give an identity for the policy by adding name and description. Here Name is Mandatory and Description is optional. After adding these details click on the Next button.
Configure Schedule Scan Time
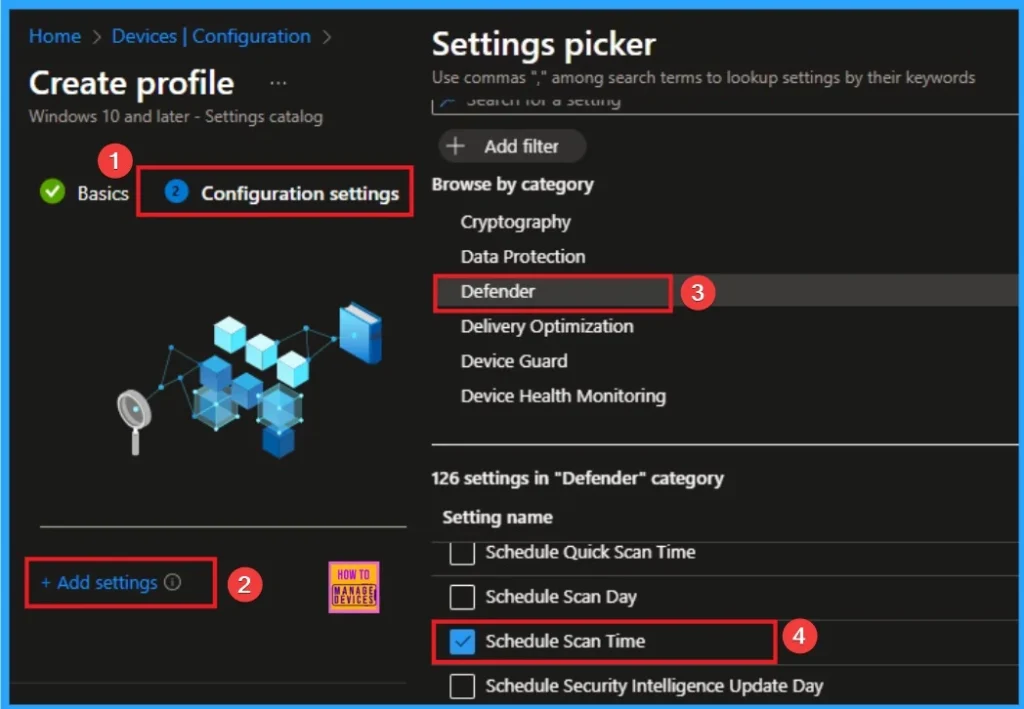
On this tab you can access +Add settings hyperlink to access specific settings. When you click on this hyperlink, you will get Settings Picker. Here, I would like to select the settings by browsing by Category. I choose Defender. Then, I choose Schedule Scan Time settings.
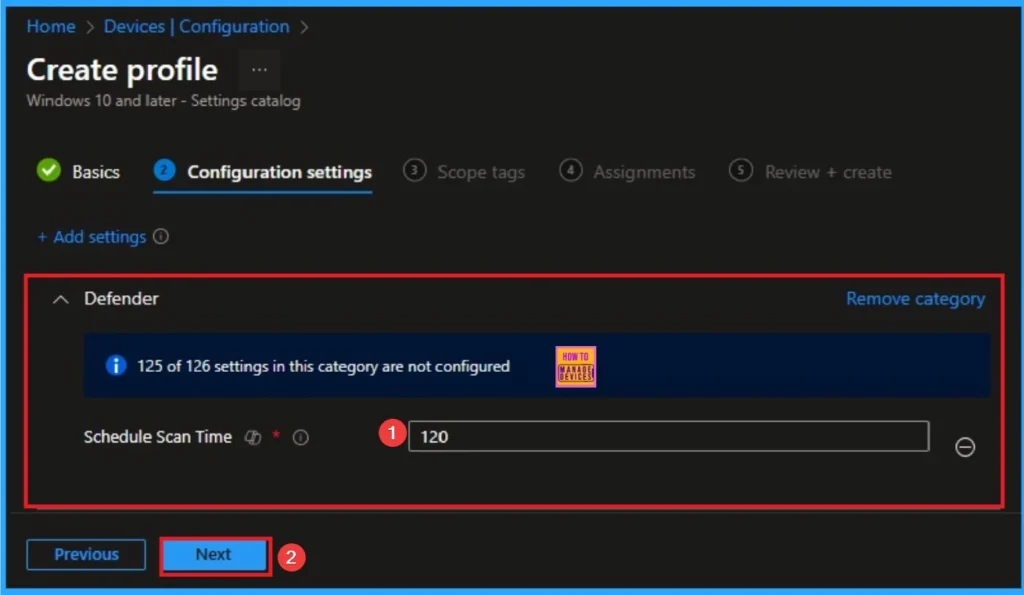
Default Value Schedule Scan Time
The built-in default time if the policy is not configured. The value is 120 (0x78 in hex) is the default value that is schedule for 2:00 AM. If you want to go with this default value, click on the next button.
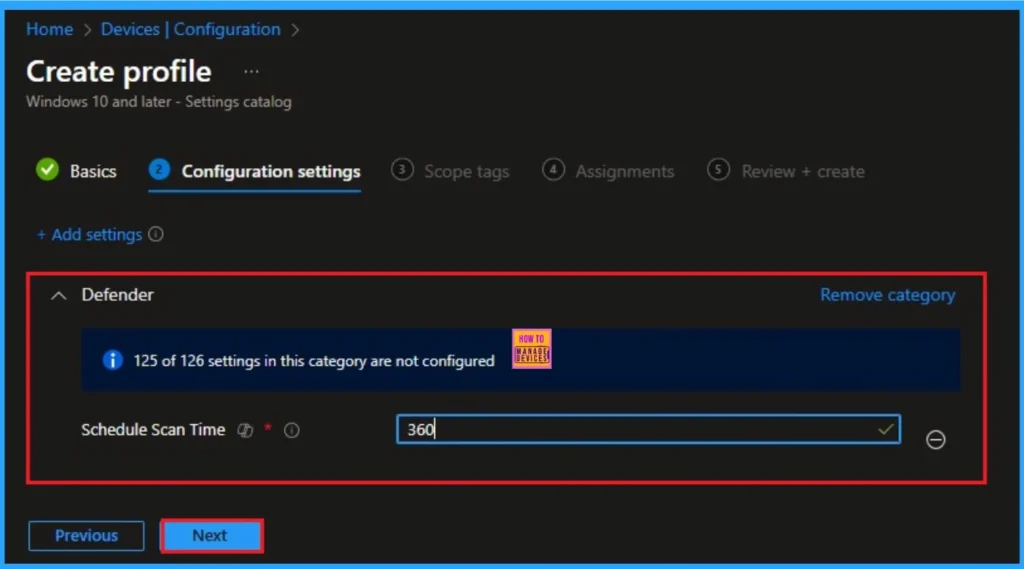
Schedule Scan for 6:00 AM
Scheduling Scan 6:00 AM ideal for devices that power on just before the workday starts. To schedule scan for 6:00 AM you can add value 360. The hexadecimal value of the decimal integer 360 is 0x168 Click on the Next button.
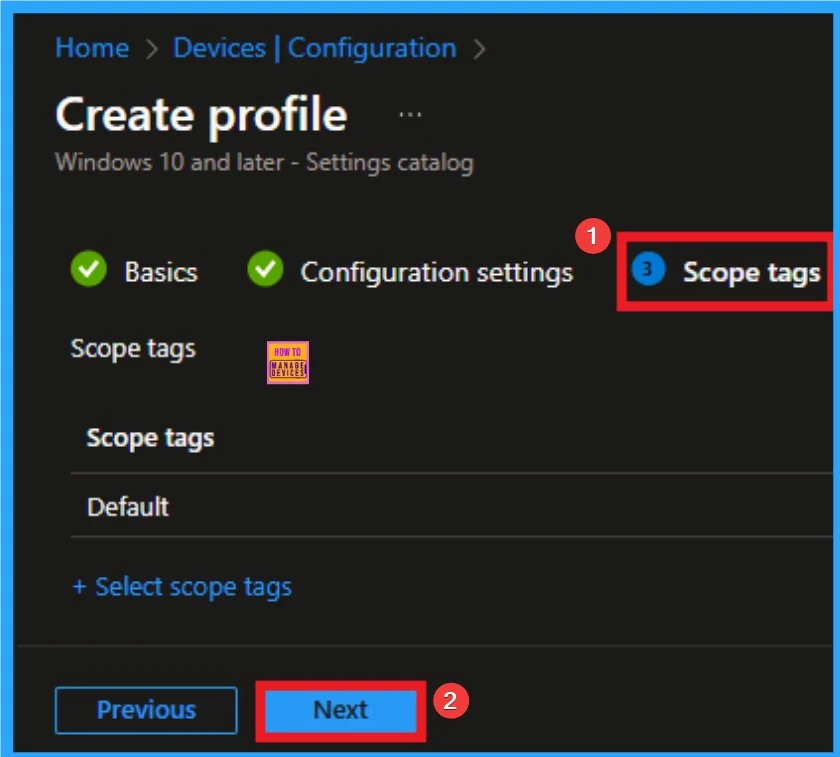
Scope Tag for Schedule Scan Time Policy
Scope Tags sections help you add restrictions to the visibility of the Policy. But it is not a mandatory step, so you can skip this step. Here, I don’t add scope tags for Schedule Scan Time Policy. Click on the Next button.
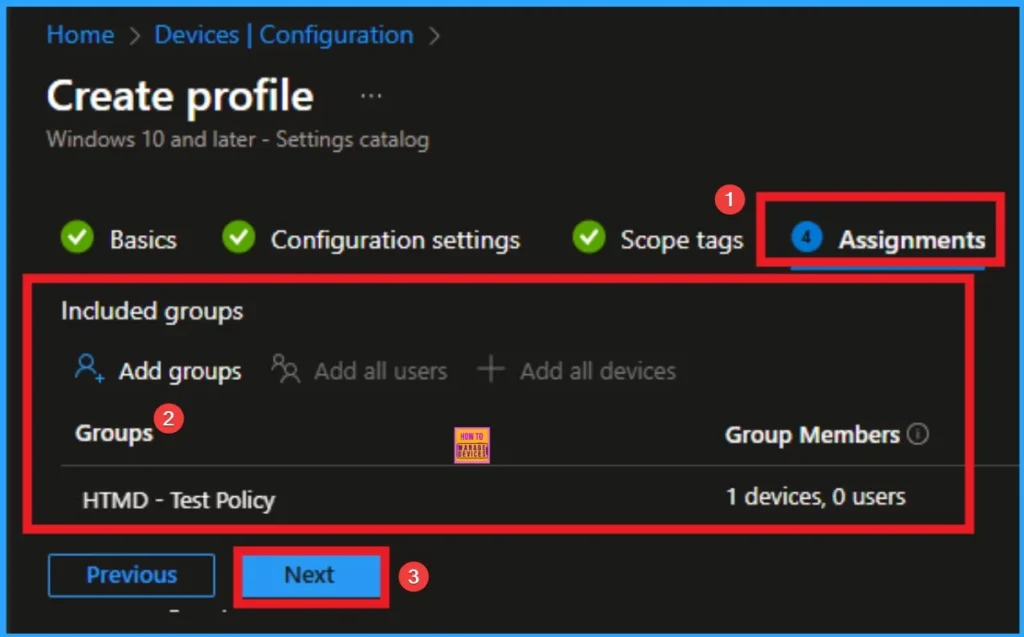
Assignment Tab for Selecting Group
To assign the policy to specific groups, you can use the Assignment Tab. Here I click, +Add groups option under Included groups. I choose a group from the list of groups and click on the Select button. Again, I click on the Select button to continue.
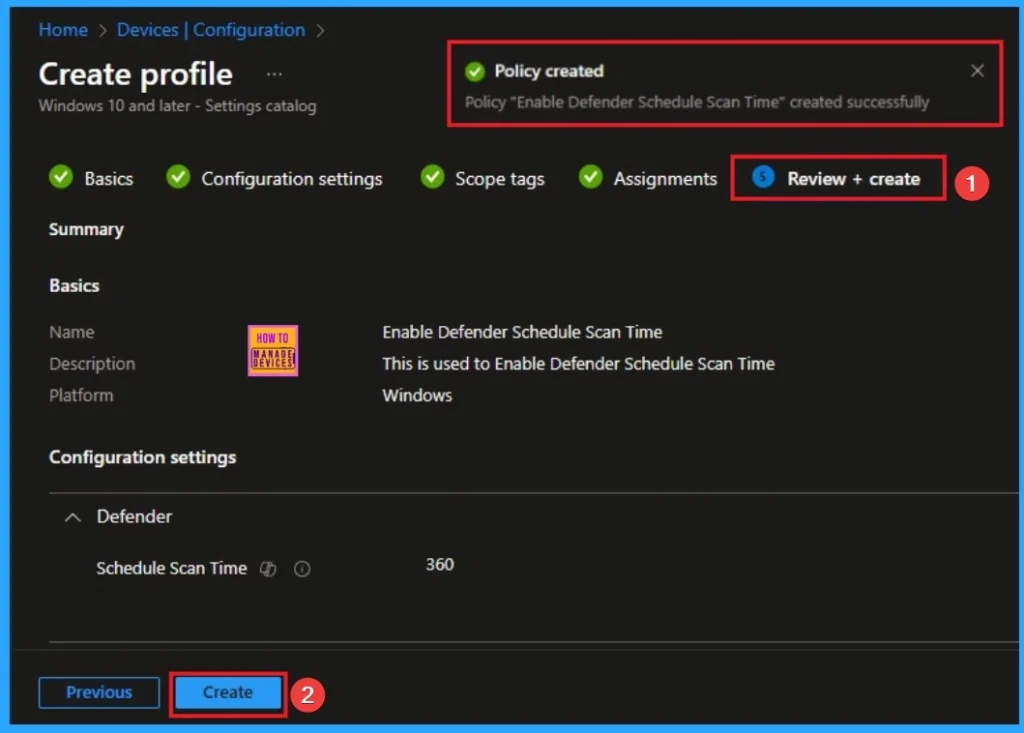
Review + Create Tab
Before completing the policy creation, you can review each tab to avoid misconfiguration or policy failure. After verifying all the details, click on the Create Button. After creating the policy, you will get a success message.
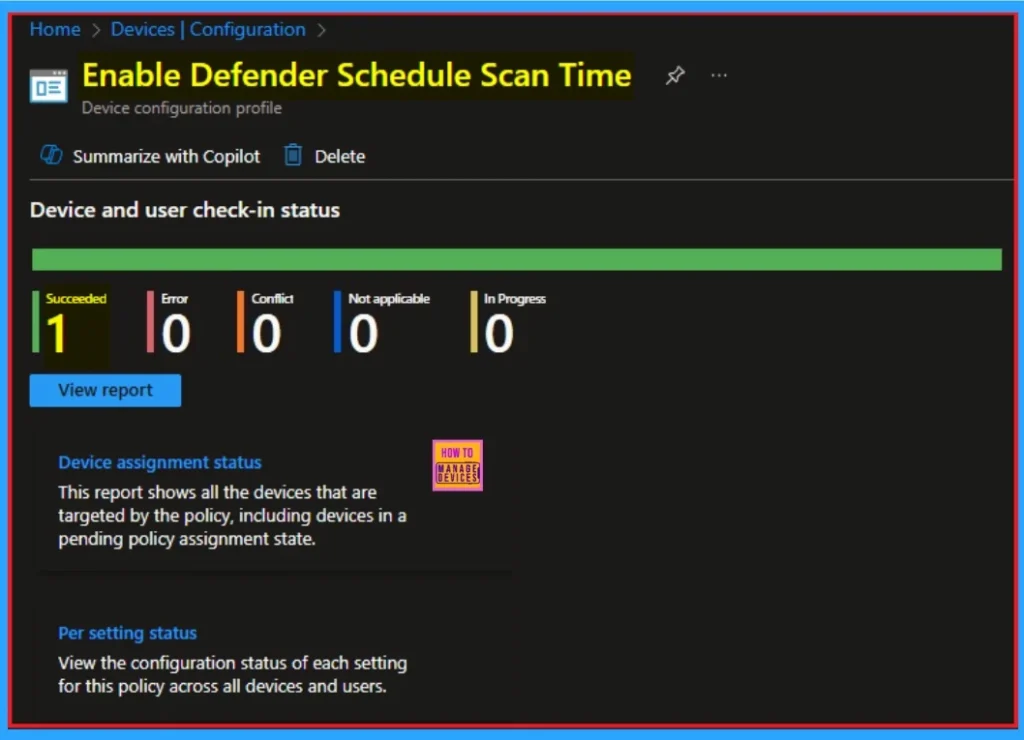
Monitoring Status
The Monitoring Status page shows whether the policy has succeeded or not. To quickly configure the policy and take advantage of the policy sync, the device on the Company Portal, Open the Intune Portal. Go to Devices > Configuration > Search for the Policy. Here, the policy shows as successful.
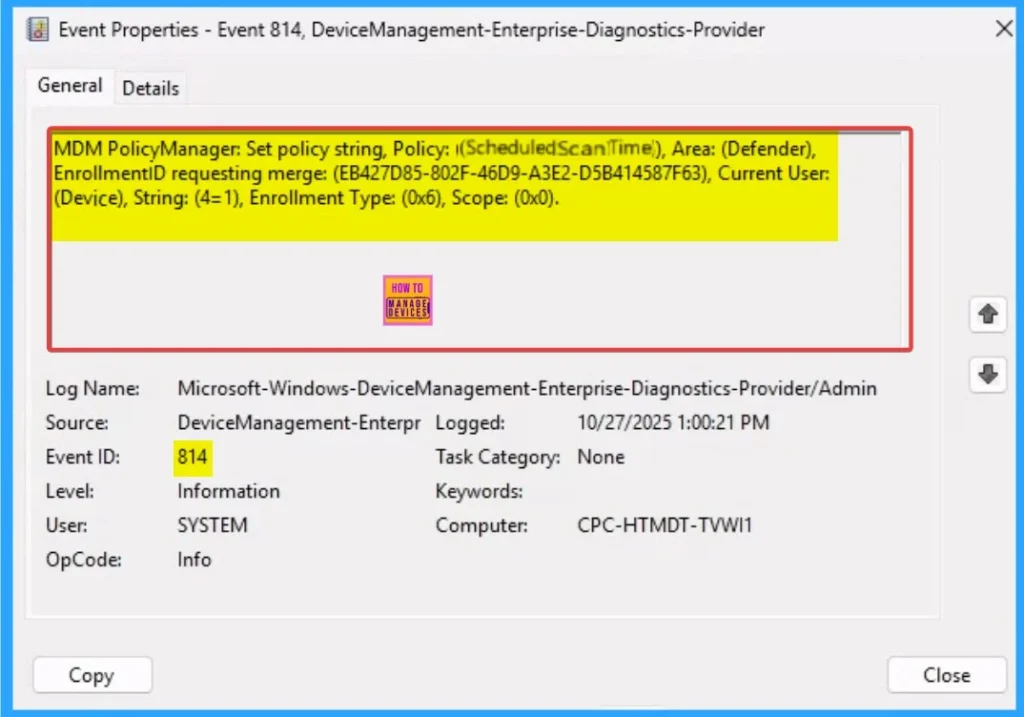
Client Side Verification through Event Viewer
It helps you check the client side and verify the policy status. Open the Client device and open the Event Viewer. Go to Start > Event Viewer. Navigate to Logs: In the left pane, go to Application and Services Logs > Microsoft > Windows > DeviceManagement-Enterprise-Diagnostics-Provider > Admin.
| Event Viewer |
|---|
| MDM PolicyManager: Set policy string, Policy: (ScheduledScanTime), Area: (Defender), EnrollmentiD requesting merge: (EB427D85-802F-46D9-A3E2-D5B414587F63), Current User: (Device), String: (4=1), Enrollment Type: (0x6), Scope: (0x0). |
Removing the Assigned Group from Schedule Scan Time Settings
If you want to remove the Assigned group from the policy, it is possible from the Intune Portal. To do this, open the Policy on Intune Portal and edit the Assignments tab and the Remove Policy.
To get more detailed information, you can refer to our previous post – Learn How to Delete or Remove App Assignment from Intune using by Step-by-Step Guide.

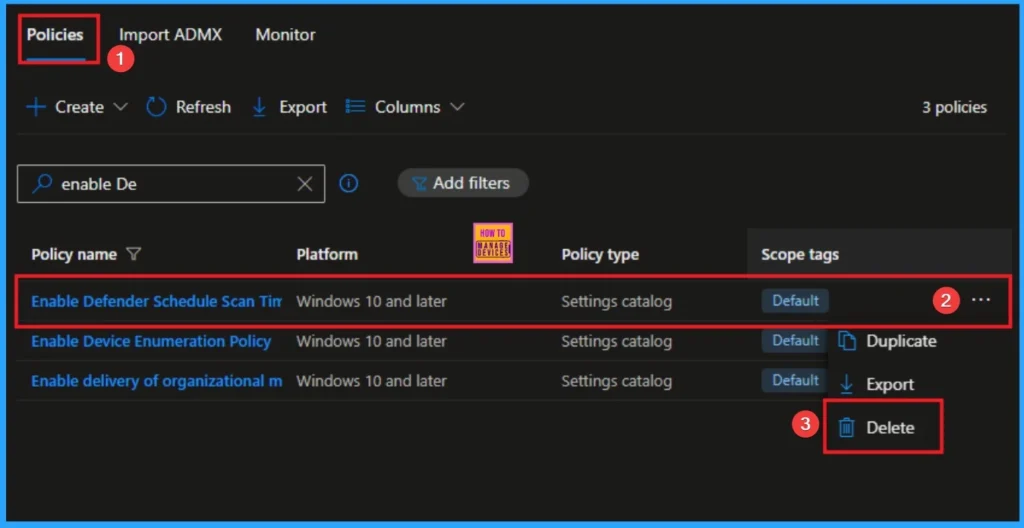
How to Delete Schedule Scan Time
You can easily delete the Policy from the Intune Portal. From the Configuration section, you can delete the policy. It will completely remove it from the client devices.
For detailed information, you can refer to our previous post – How to Delete Allow Clipboard History Policy in Intune Step by Step Guide.
Need Further Assistance or Have Technical Questions?
Join the LinkedIn Page and Telegram group to get the step-by-step guides and news updates. Join our Meetup Page to participate in User group meetings. Also, Join the WhatsApp Community to get the latest news on Microsoft Technologies. We are there on Reddit as well.
Author
Anoop C Nair has been Microsoft MVP for 10 consecutive years from 2015 onwards. He is a Workplace Solution Architect with more than 22+ years of experience in Workplace technologies. He is a Blogger, Speaker, and Local User Group Community leader. His primary focus is on Device Management technologies like SCCM and Intune. He writes about technologies like Intune, SCCM, Windows, Cloud PC, Entra, Microsoft Security, Career, etc.

