Hey there, let’s discuss on the topic enable or disable Background Template List Updates policy in MS Edge Browser using M365 Admin Center. It lets us turn background updates for the available templates for Collections and other features that use templates on or off.
Templates are there to pull rich metadata from a webpage when you save it to a collection. If we turn on this setting or leave it unconfigured, the list of available templates will be downloaded in the background from a Microsoft service every 24 hours.
If we turn off this setting, the list of available templates will be downloaded only when we ask for it. This kind of download could slow down collections and other features a bit. When Background Template List Updates are enabled, the system automatically fetches and refreshes the list of available templates.
Through this blog post, we can see how to Enable or Disable Background Template List Updates in MS Edge Browser using M365 Admin Center. Here we will get step by step guidance on how to deploy this policy in Edge.
Table of Contents
What is the Background Template List in Microsoft 365?
The Background Template List in Microsoft 365 refers to the system that automatically manages and updates policy templates across M365 services. These templates define rules for security.
Enable or Disable Background Template List Updates Policy
Background Template List Updates refer to the automatic synchronization of policy, compliance, and configuration templates between Microsoft Intune and enrolled devices. We are going to deploy this policy using Microsoft 365 admin center.
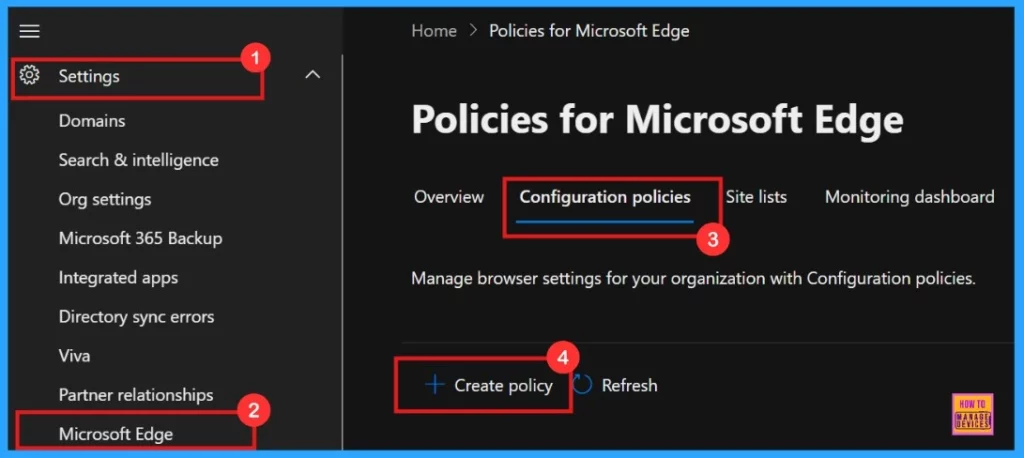
- Microsoft 365 admin center > Settings > Microsoft Edge > Configuration Policies > Create Policy.
- Enable Disable Ask Before Closing a Window with Multiple Tabs Policy in Edge Browser using M365 Admin Center
- Enable or Disable Component Updates Policy in MS Edge Browser using M365 Admin Center
- Enable or Disable Mouse Gesture Policy in MS Edge Browser using M365 Admin Center
Basics
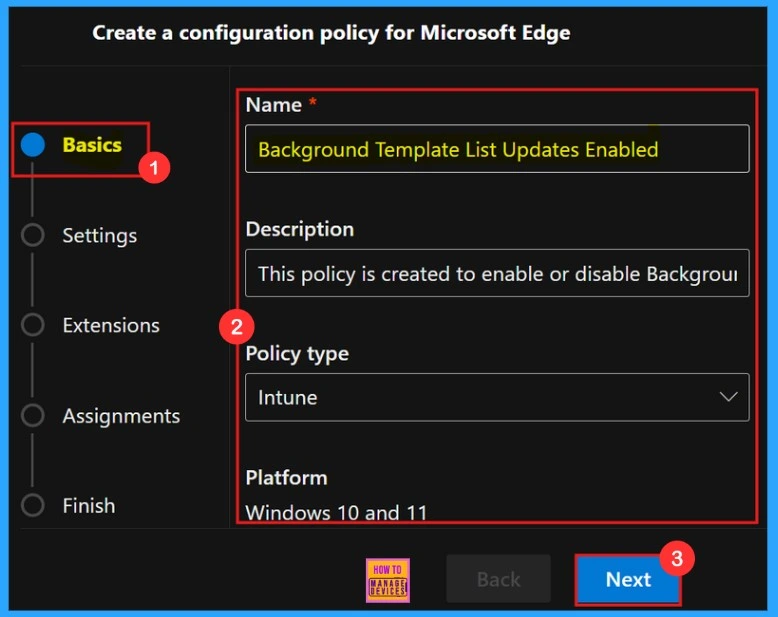
In the Basics window, we need to give a Name for our policy, which is a required field. Add a Description to the policy, it help us easily identify and understand the policy’s purpose later. Additionally, this section displays the Policy Type and the Platform for which the policy is being created.
| Name of the Policy | Policy Type | Platform |
|---|---|---|
| Background Template List Updates Enabled | Intune | Windows 10 and 11 |
Settings
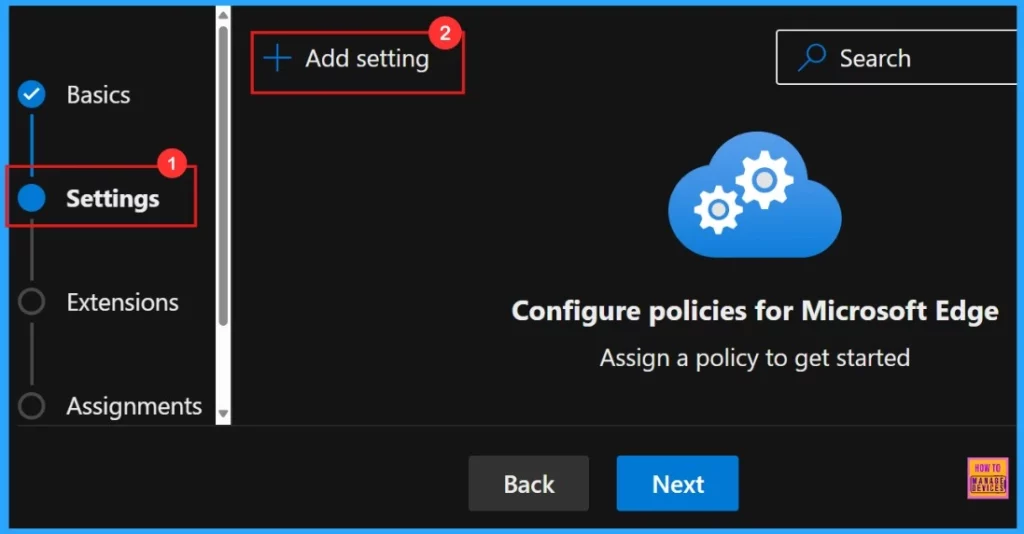
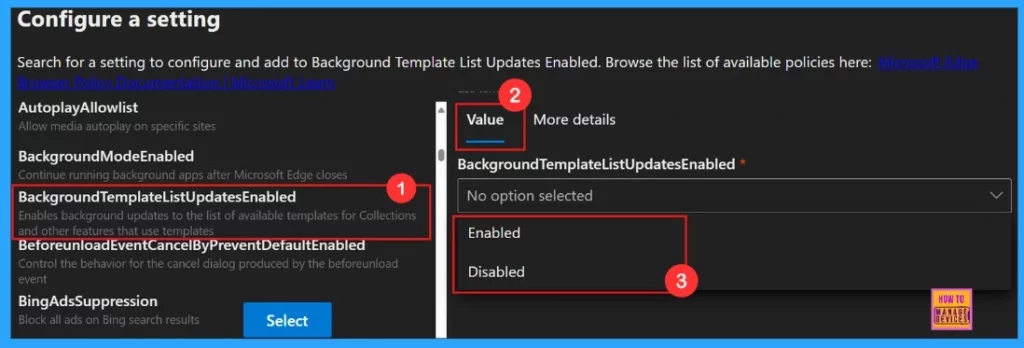
To add settings, simply click the +Add Settings button. This allows us to choose from a range of options to modify the policy to our organization’s needs. The screenshot below shows the settings tab.
By clicking the policy name, a value tab will open. On the Value tab, we have the option to enable or disable the selected policy. In this case, we can chose the Enabled option because the purpose of our policy is to activate a specific feature. If our goal is to disable the feature instead, we can select the Disabled option.
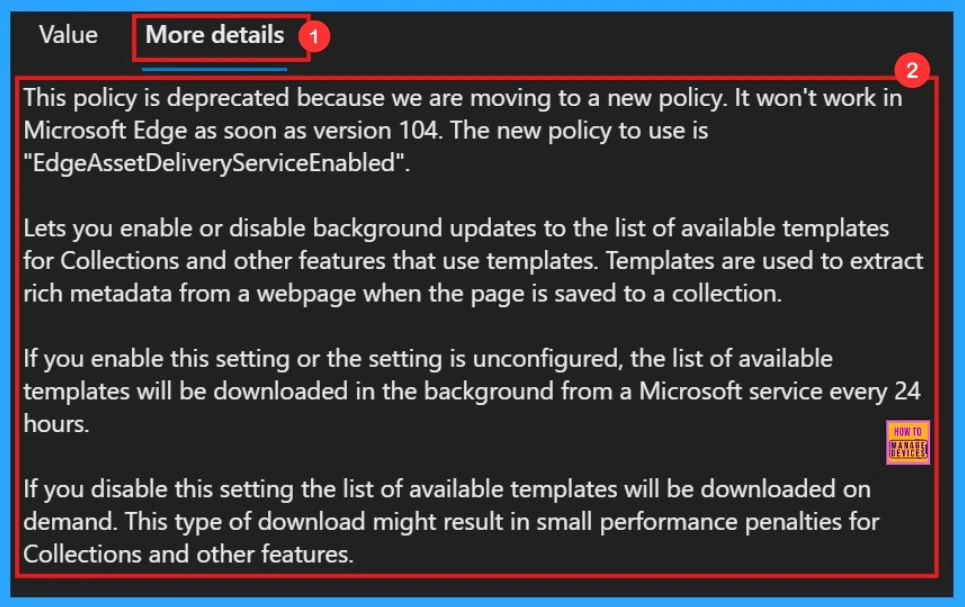
On the More Details tab,it gives us more understanding of how the policy works. Once we click the Select button, a notification will appear to confirm that the policy has been successfully updated.
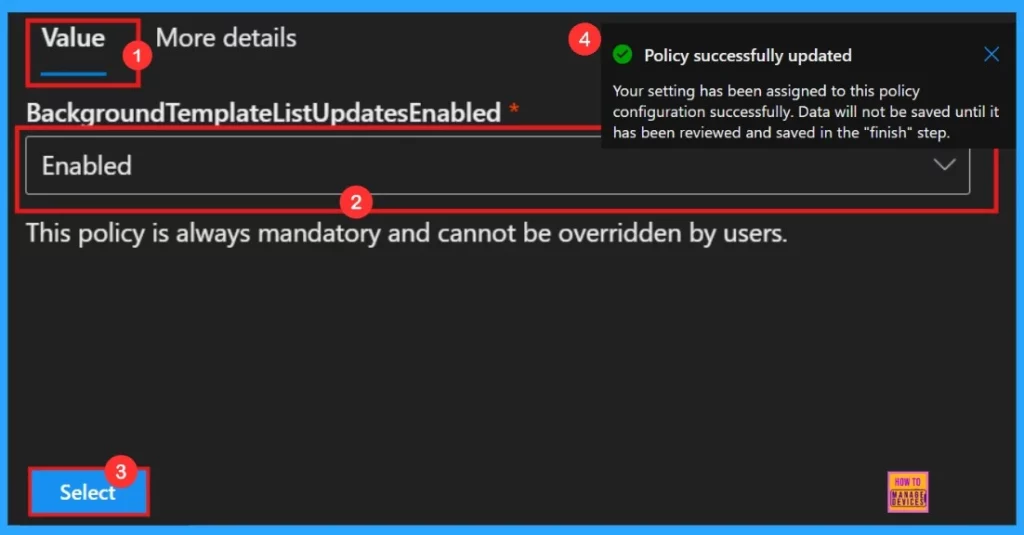
After reviweing more details, we need to choose enable or disable the policy functions. Here we are going to enable the Background Template List Updates policy. Then a notification will pop-up saying poicy successfully updated.
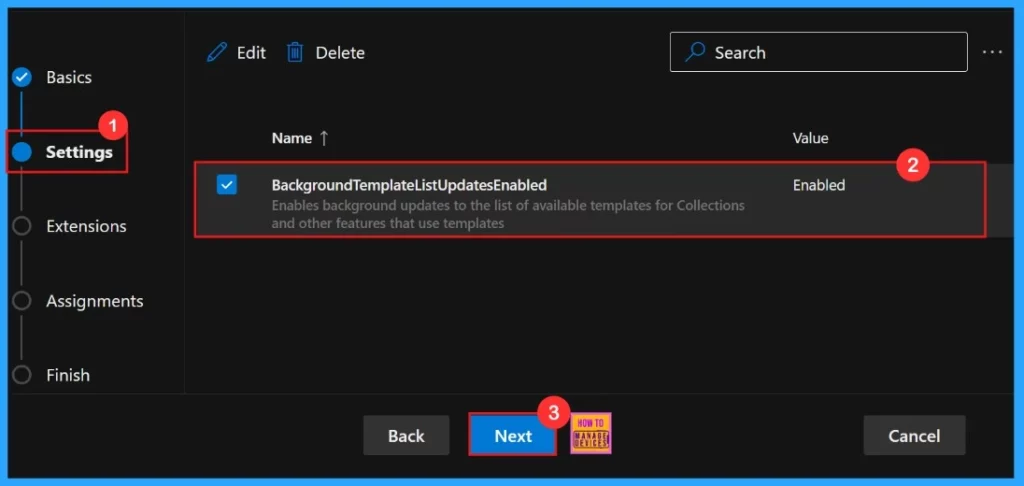
After selecting the policy, our settings, including the policy chosen name and value, will appear on the Settings page. Here, we need to click on the checkbox near the Policy name and click on the Next button.
Extensions
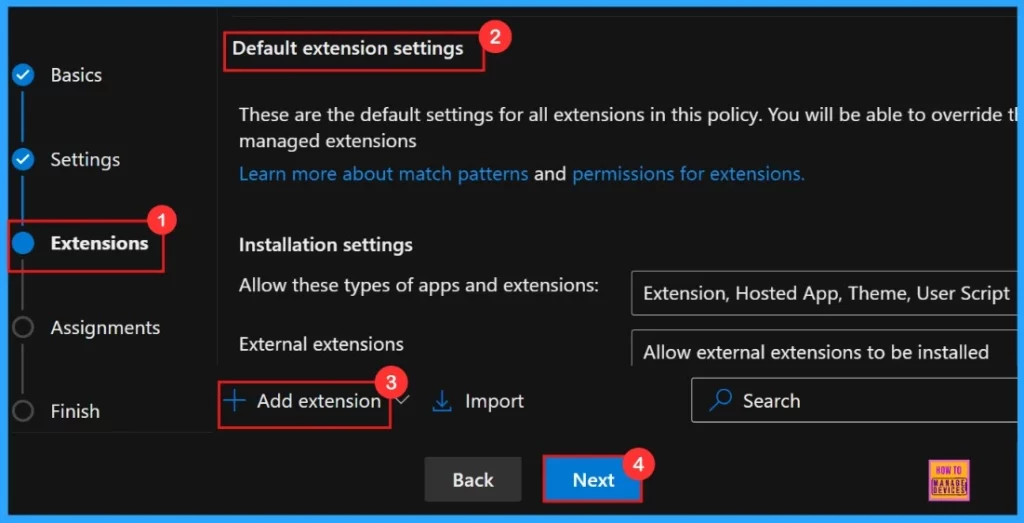
If we want to include an extension, simply click the + Add extension button, or we can skip the Extensions section, as it is not a mandatory step for creating policies in the Microsoft 365 Admin Center.
Assignments
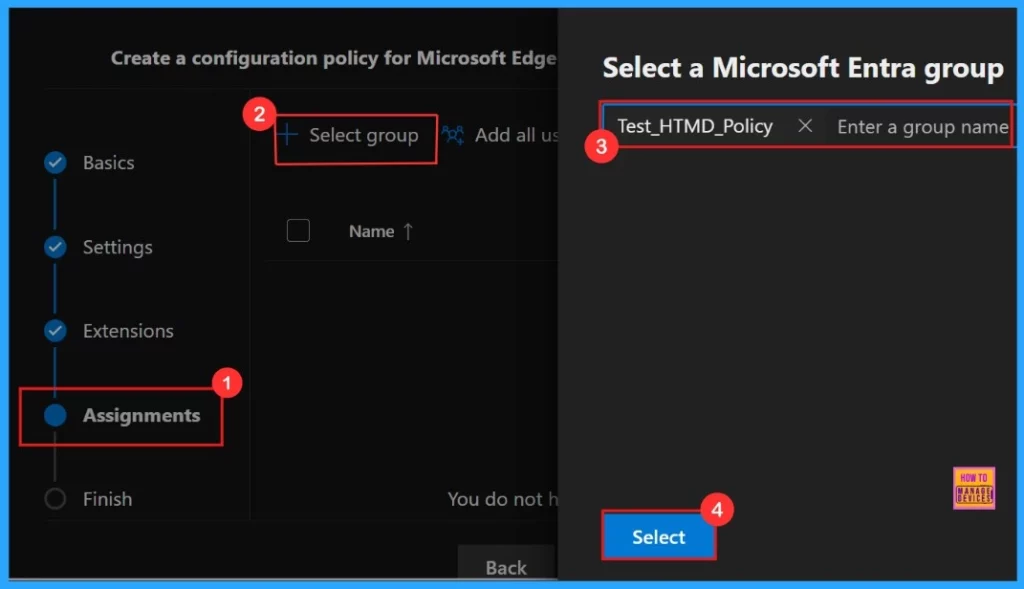
The Assignments tab allows us to specify the groups to which we want to apply the settings. To use this feature, click the +Select group option, choose a Microsoft Entra Group, and then click the Select button.
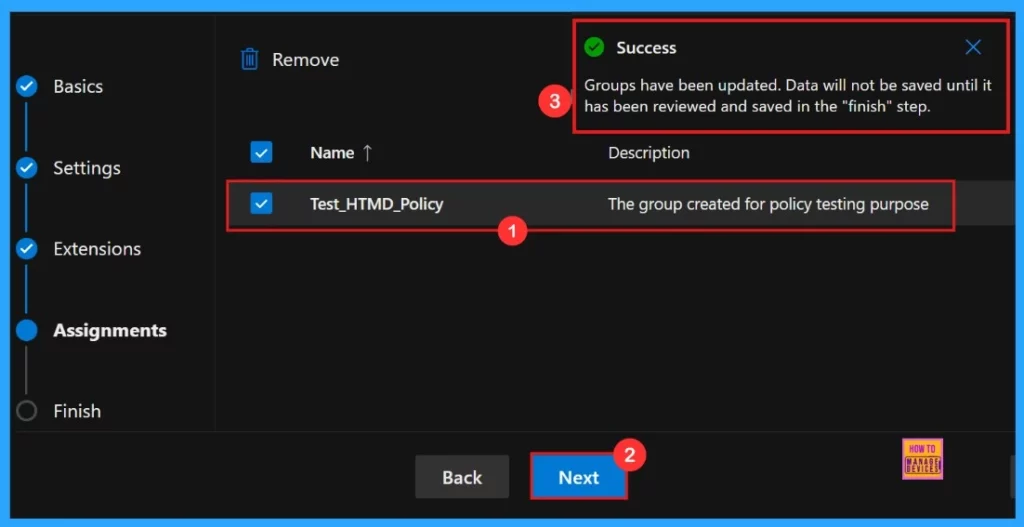
After selecting the group, a notification will confirm that the group have been updated. Description of the group is “The group was created for policy testing purposes“.
Review + Create
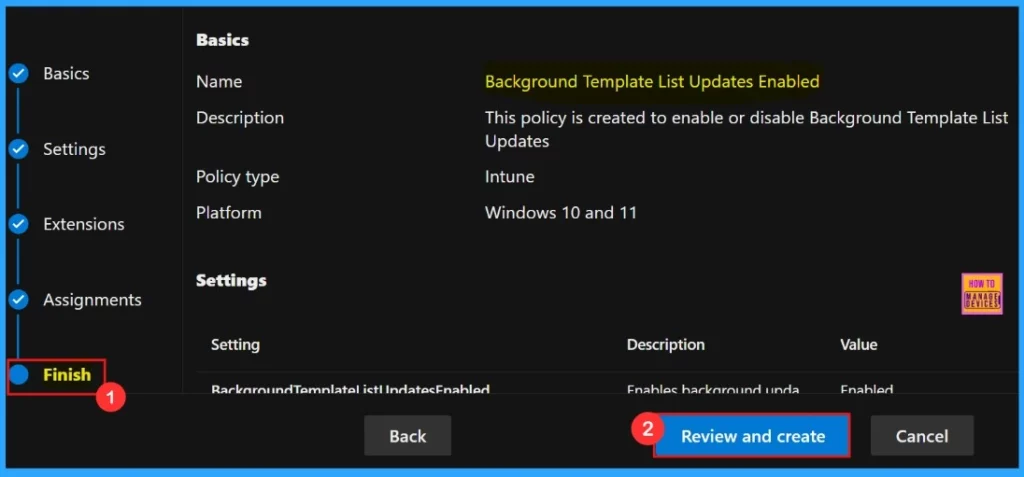
In the final step “Finish“, we can do any adjustments that needed, we can click the Back button to make changes. When we are satisfied with the configuration, click Review and Create to save our policy.
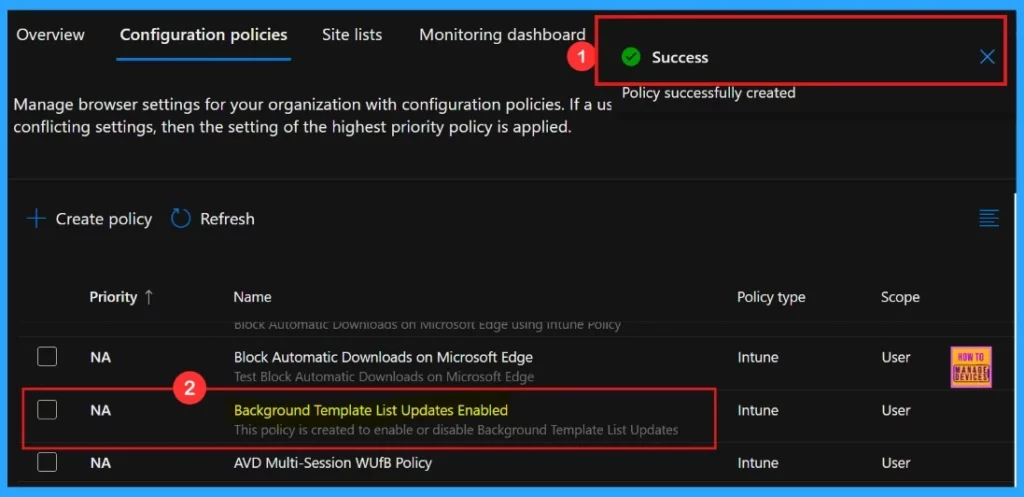
The notification regarding policy succeeded, confirming that the policy has been successfully created. The newly created policy will then appear in the Configuration Policies section.
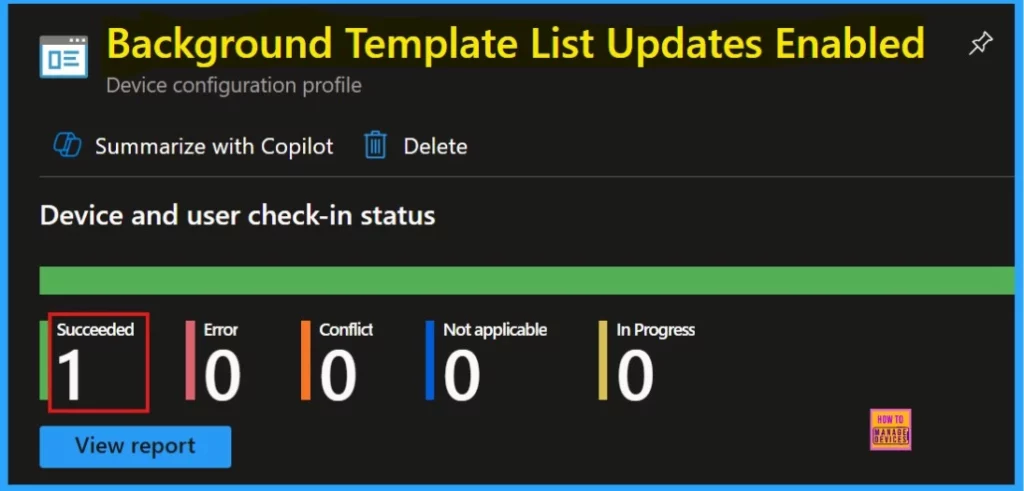
Device and User Check-in Status
To verify the monitoring status, go to the device configuration and locate the policy you created. We are able to see our succeeded result as 1. If we want more information, click the view report.
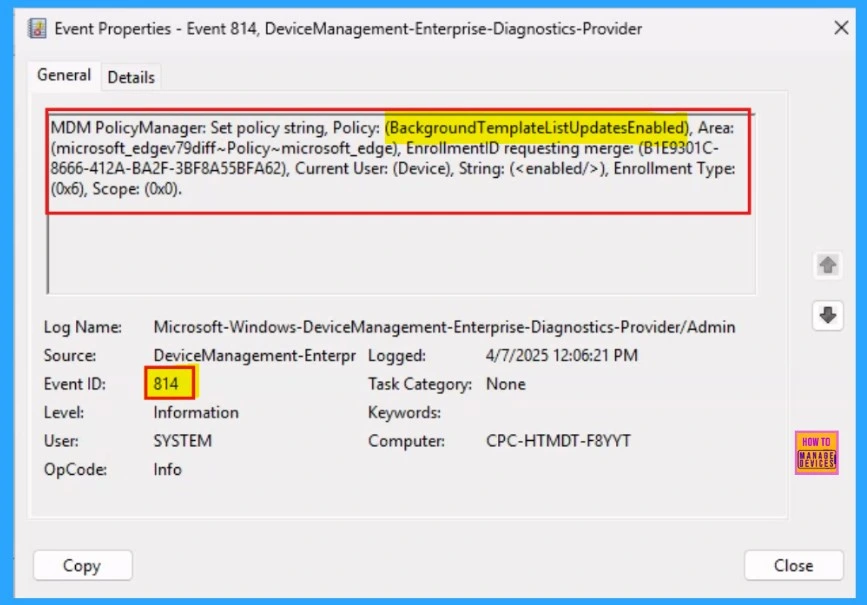
Client-Side Verification
To check the Client-Side Verification, go to Applications and Services Logs > Microsoft > Windows > Devicemanagement-Enterprise-Diagnostics-Provider > Admin to open it.
The event ID 814 confirms that a string policy is applied to the devices.
Need Further Assistance or Have Technical Questions?
Join the LinkedIn Page and Telegram group to get the latest step-by-step guides and news updates. Join our Meetup Page to participate in User group meetings. Also, Join the WhatsApp Community to get the latest news on Microsoft Technologies. We are there on Reddit as well.
Author
Anoop C Nair has been Microsoft MVP for 10 consecutive years from 2015 onwards. He is a Workplace Solution Architect with more than 22+ years of experience in Workplace technologies. He is a Blogger, Speaker, and Local User Group Community leader. His primary focus is on Device Management technologies like SCCM and Intune. He writes about technologies like Intune, SCCM, Windows, Cloud PC, Windows, Entra, Microsoft Security, Career, etc.
