Let’s discuss How to Force Entra ID Devices with UPN Name Hints Policy to Find On-Prem AD DCs using Intune. UPN Name Hints Policy in Microsoft Intune is related to Microsoft Entra joined (formerly Azure AD joined) in a hybrid environment.
This policy is used to addresses challenge in hybrid-joined devices face when trying to authenticate or interact with on-premises Active Directory Domain Controllers (AD DCs). Unlike a traditional domain-joined device, a hybrid Microsoft Entra joined device lacks the automatic DC discovery mechanism for the on-premises AD forest.
When such a device tries to authenticate a user whose UPN needs to be resolved by an on-premises AD DC, it can fail because it doesn’t know which AD domain or DC to ask. As a solution for this, This policy provides a static, pre-configured list of Active Directory domains that the device should use as “hints” or fallback options when the automatic resolution process fails.
This policy provide many advanatges for admins, users and organization. By configuring this policy, you can Enhances user experience and productivity by enabling seamless Single Sign-On (SSO) to on-premises services like file shares, legacy applications, and intranets.
Table of Contents
How to Force Entra ID Devices with UPN Name Hints Policy to Find On-Prem AD DCs using Intune
The UPN Name Hints policy is critically important in a hybrid environment because it bridges the authentication gap between cloud-centric (Microsoft Entra ID) device identity and on-premises (Active Directory) resource identity.
It is a necessary configuration to ensure that hybrid Microsoft Entra joined devices can still participate fully in the on-premises Kerberos authentication ecosystem, thus maintaining business continuity and a smooth user experience during the transition to a cloud-first infrastructure.
- How to Restrict Microsoft 365 Azure VPN from High-Risk Entra ID Joined Devices using Intune
- How to Track User Registration Details in Entra ID using Microsoft Graph API
- Enable Copilot Access to Page Context for Microsoft Entra ID Profiles for Edge Sidebar using Intune
Configure UPN Name Hints Policy from Intune Portal
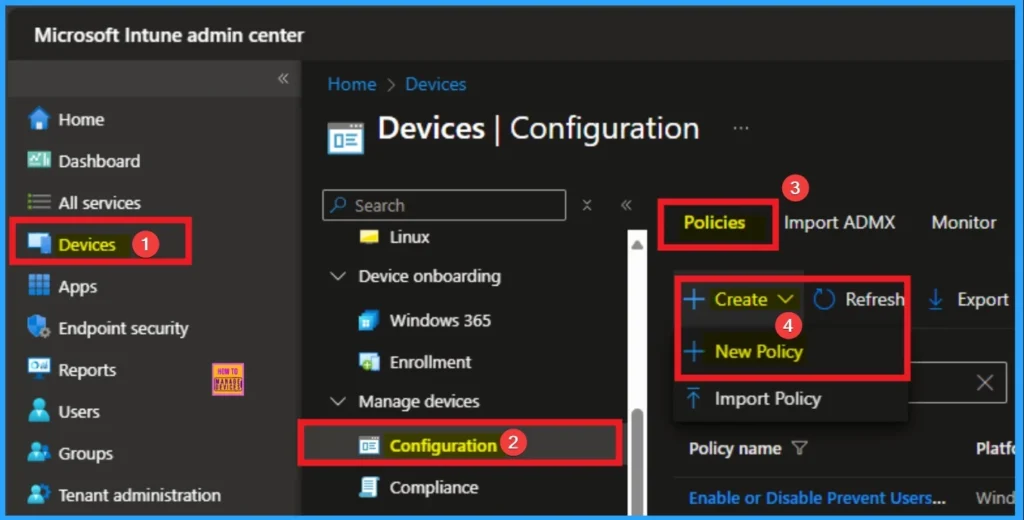
You can easily configure UPN Name Hints Policy from Microsoft Intune Portal. For this, Sign in with Microsoft Intune Admin center. Go to Devices > Configuration > +Create >+ New Policy.
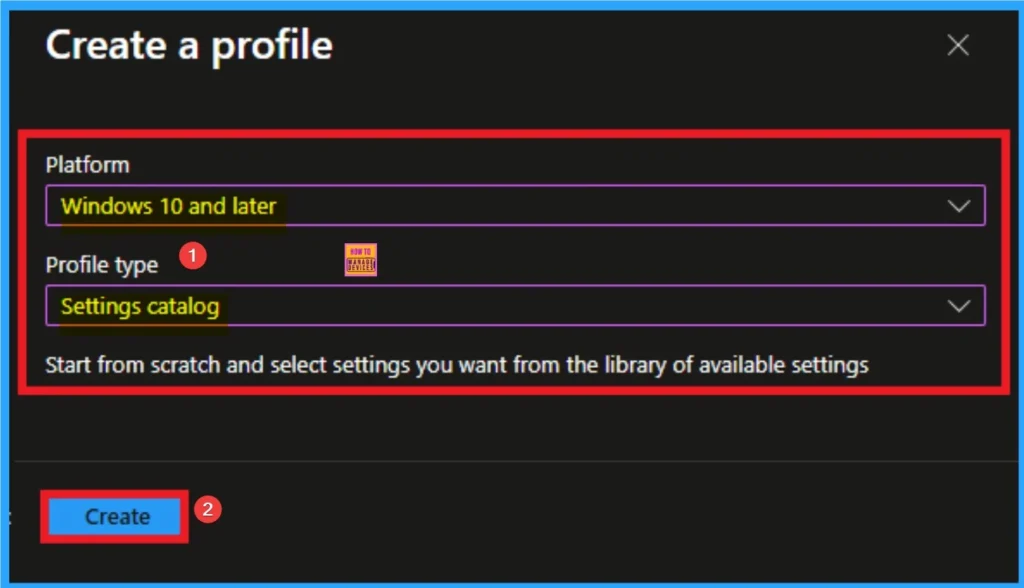
Create a Profile
After that, you can Create a Profile for the policy which you want to configure. To create a profile you have to select platform and profile type. Here I selected Windows 10 and later as the Platform and Settings catalog as the profile type. Then click on the Create button.
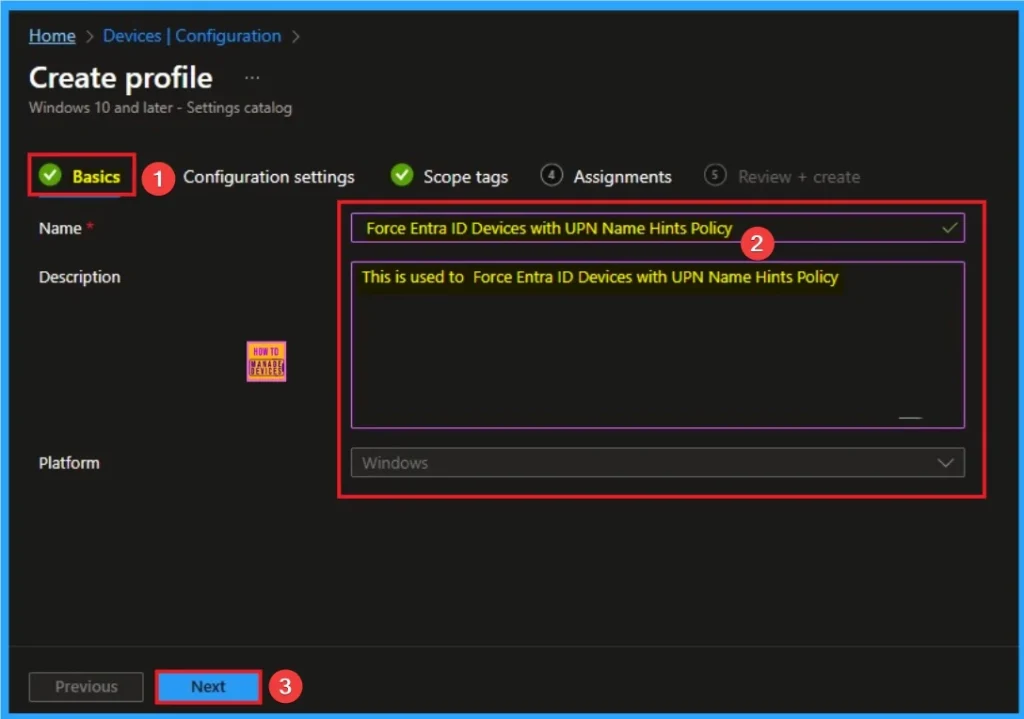
Adding Basic Details
On the Basic tab you can add Name and Description for the policy for further reference. The Name field is necessary to identify the purpose of the policy and description shows more information. The Name is mandatory and if you like to add description you can add. Click on the Next Button.
Configure the Windows Apps Access Tasks
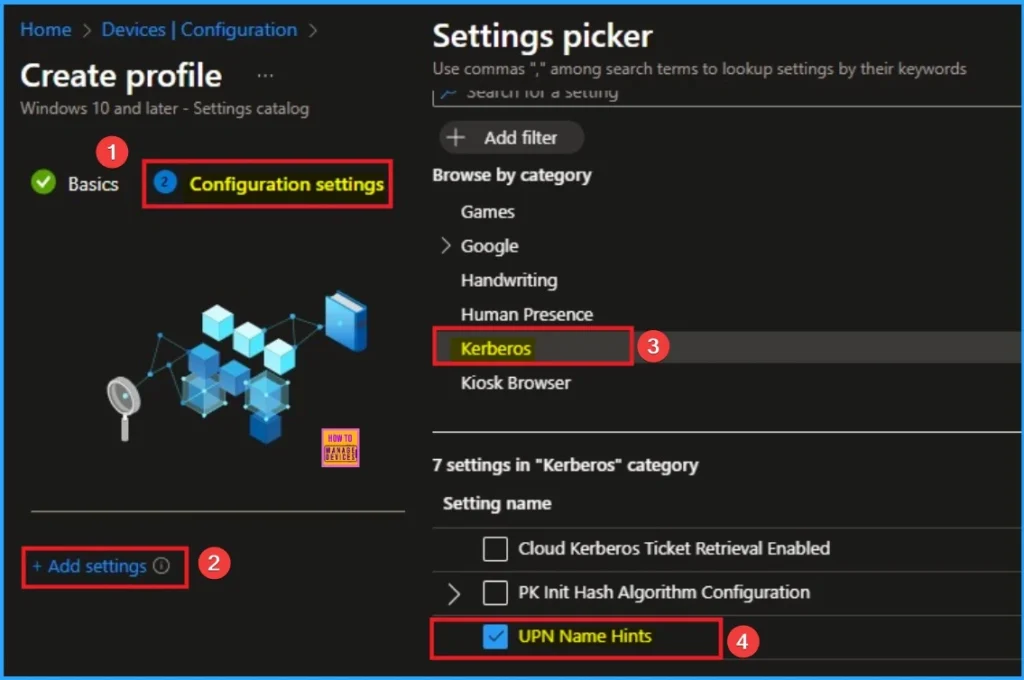
The Configuration settings page is provided to select the settings to create the policy. The Settings Catalog provides a huge number of settings. To select a settings click on the +Add settings hyperlink. Then you will get Settings Picker. Choose Kerberos and select UPN Name Hints. Then I close the Settings Picker.
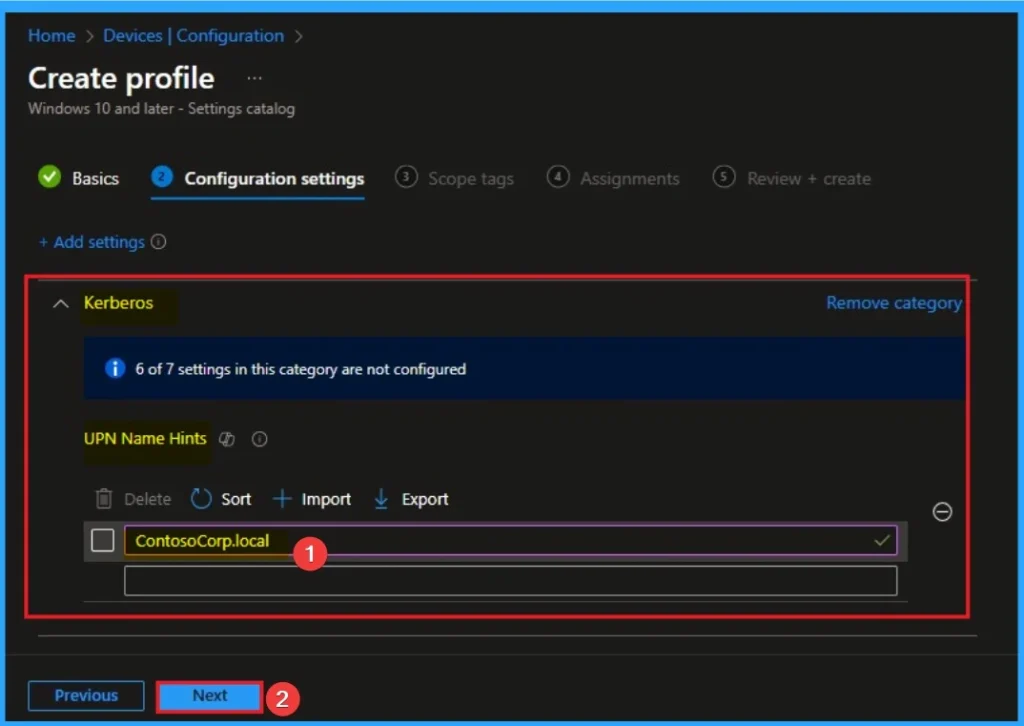
Selecting Value
If your organization has a single on-premises Active Directory domain called corp.contoso.local. If contoso.com is the UPN suffix and/or the forest root, listing it is often enough to allow the device to find a Domain Controller within that forest. This is generally the most effective way to configure the hint. After that click on the Next button.
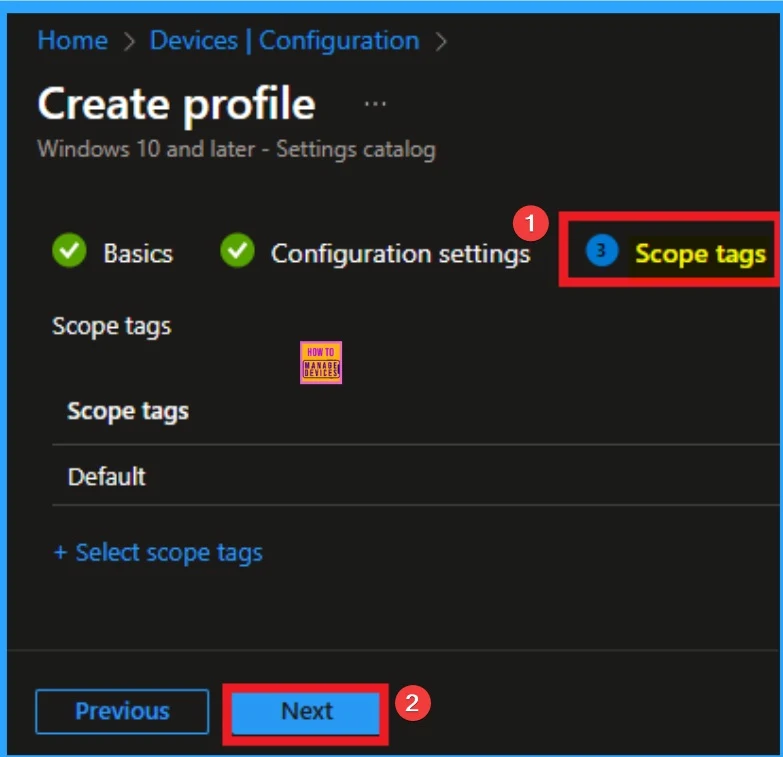
How to Add Scope Tags
By using scope tags you can restrict the visiblity of Windows Apps Access Email Settings. It is helps to organize resources as well. Here I would like to skip this section, because it is not mandatory. Click on the Next button.
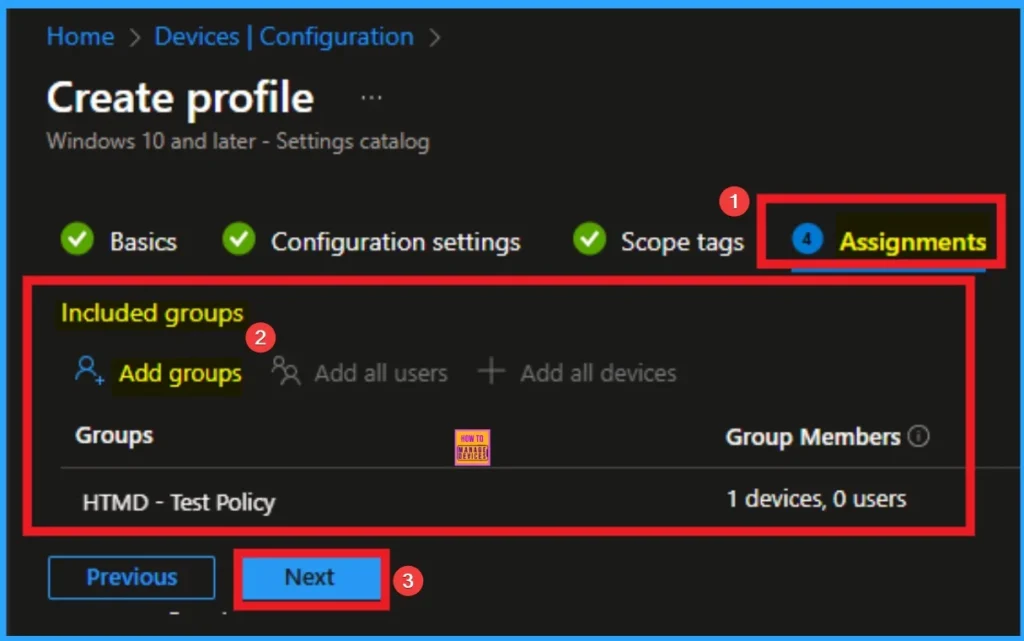
Assignment Tab for Choosing Group
To assign the policy to specific groups, you can use the Assignment Tab. Here I click, +Add groups option under Included groups. I choose a group from the list of groups and click on the Select button. Again, I click on the Select button to continue.
Last Step of Policy Creation
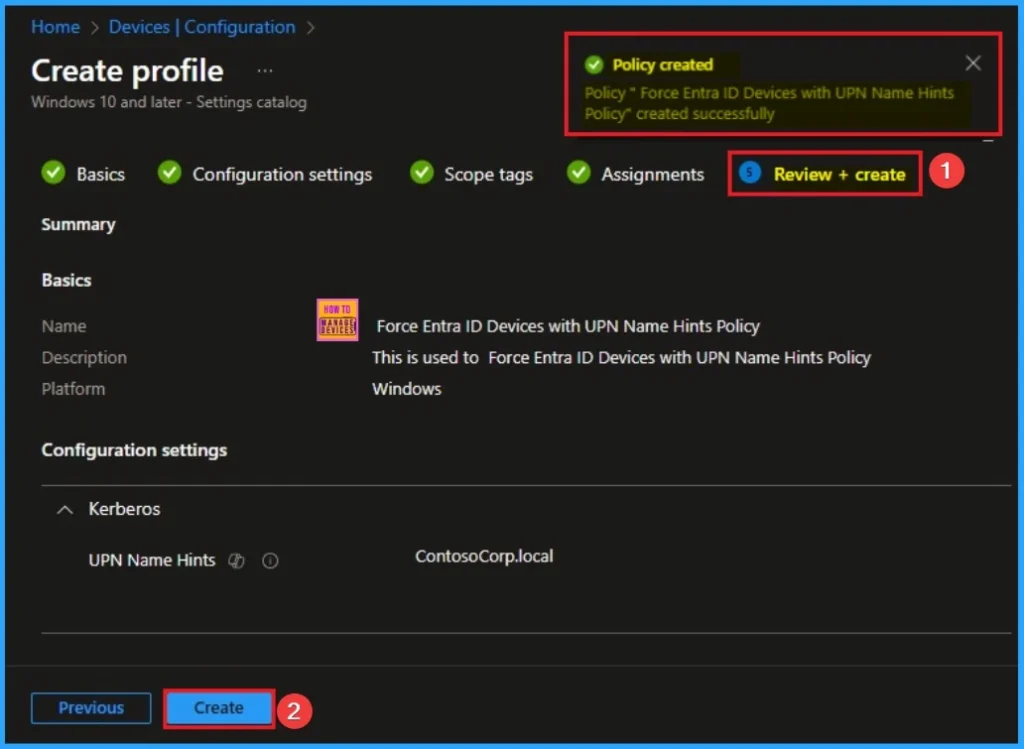
To complete the policy creation you can review all the policy details on the Review + create tab. It helps to avoid mistakes and successfully configure the policy. After varifying all the details click on the Create Button. After creating the policy you will get success message.
Device Check-in Status
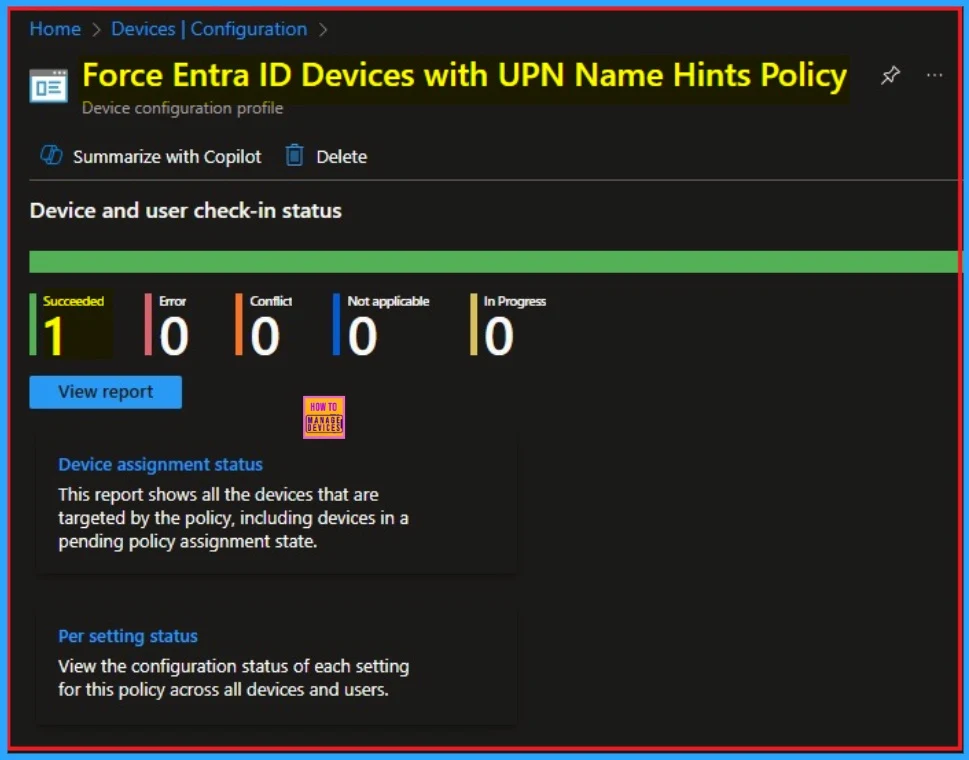
The Device Check-in Status page shows whether the policy has succeeded or not. To quickly configure the policy and take advantage of the policy sync, the device on the Company Portal, Open the Intune Portal. Go to Devices > Configuration > Search for the Policy. Here, the policy shows as successful.
Event Viewer
If you get success message, that doesn’t means you will get the policy advanatges. To varify the policy successfully configured to client device check the Event Viwer. Filter for Event ID 814: This will help you quickly find the relevant logs.
Open Event Viewer: Go to Start > Event Viewer. Navigate to Logs: In the left pane, go to Application and Services Logs > Microsoft > Windows > DeviceManagement-Enterprise-Diagnostics-Provider > Admin.
MDM PolicyManager: Set policy string, Policy: (UPNNameHints), Area: (Kerberos), EnrollmentID
requesting merge: (EB427D85-802F-46D9-A3E2-D5B414587F63), Current User: (Device), String:
(ContosoCorp.local), Enrollment Type: (0x6), Scope: (0x0).
Removing the Assigned Group from UPN Name Hints Policy
If you want to remove the Assigned group from the policy, it is possible from Intune Portal. To do this open the Policy on Intune Portal and Edit the Assignments tab and Remove the Policy.
To get more detailed information, you can refer to our previous post – Learn How to Delete or Remove App Assignment from Intune using by Step-by-Step Guide.

How to Delete UPN Name Hints
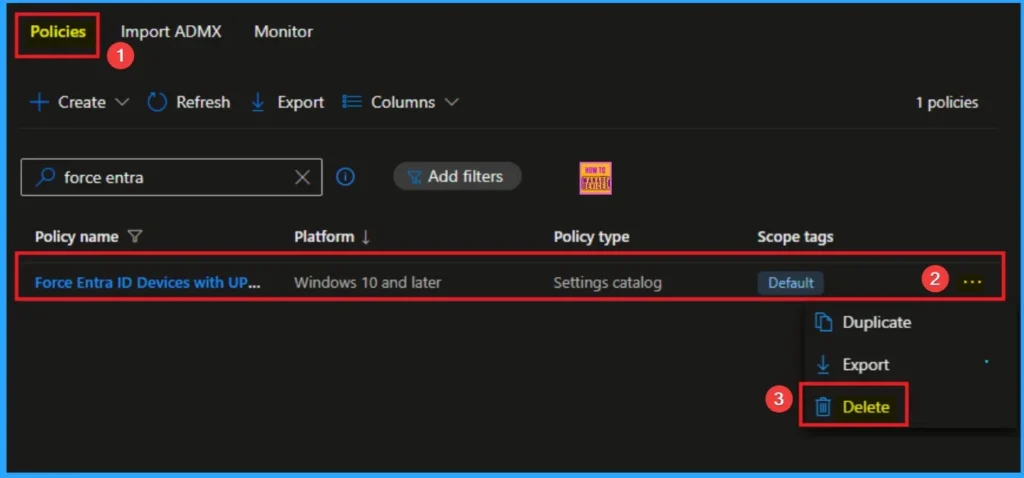
You can easily delete the Policy from Intune Portal From the Configuration section you can delete the policy. It will completely remove from the client devices.
For detailed information, you can refer to our previous post – How to Delete Allow Clipboard History Policy in Intune Step by Step Guide.
Windows CSP Details
Enable/disable kiosk browser’s end session button. When the policy is enabled, the Kiosk Browser app shows a button to reset the browser. When the user selects the button, the app will prompt the user for confirmation to end the session. When the user confirms, the Kiosk browser will clear all browsing data (cache, cookies, etc.) and navigate back to the default URL.
| Value | Description |
|---|---|
| 1 | Enable. |
| 0 (Default) | Disable. |

Need Further Assistance or Have Technical Questions?
Join the LinkedIn Page and Telegram group to get the step-by-step guides and news updates. Join our Meetup Page to participate in User group meetings. Also, Join the WhatsApp Community to get the latest news on Microsoft Technologies. We are there on Reddit as well.
Author
Anoop C Nair has been Microsoft MVP for 10 consecutive years from 2015 onwards. He is a Workplace Solution Architect with more than 22+ years of experience in Workplace technologies. He is a Blogger, Speaker, and Local User Group Community leader. His primary focus is on Device Management technologies like SCCM and Intune. He writes about technologies like Intune, SCCM, Windows, Cloud PC, Entra, Microsoft Security, Career, etc.

