Let’s discuss Eliminate Security Blind Spots Control Cloud Endpoints with Intune Network Isolation. Enterprise Cloud Resources, policy is designed to define which specific cloud-hosted domains should be treated by Windows Store apps (Universal Windows Platform – UWP apps) as being part of the organization’s enterprise network.
Enterprise Cloud Resource Policy is only applies to Windows Store apps (UWP apps), not traditional desktop applications. It works with the Windows Network Isolation feature. UWP apps are sandboxed and must declare the network resources they need to access.
Organizations can enforce this policy for several reasons. Organizations primarily enable this policy to enhance security, maintain compliance, and optimize network traffic for UWP apps. Disabling it (by leaving it unconfigured) means UWP apps treat these cloud resources as standard internet connections.
When this policy is correctly configured, UWP applications that need to connect to restricted cloud resources are able to do so without connection errors, leading to a smooth, reliable workflow. This policy protect personal and corporate data.
Table of Contents
Eliminate Security Blind Spots Control Cloud Endpoints with Intune Network Isolation
Different Organizations can enable this for ensuring security. An organization wants all UWP apps (like the Mail or Teams UWP app) connecting to Microsoft 365 to be filtered and monitored by its on-premises security appliances.
- How to Configure Proxy Settings in Windows 11 and Server 2022
- Intune Firewall Proxy Requirements Modern Windows 10 Windows 11 Deployment
- Intune Firewall Proxy Requirements Modern Windows 10 Windows 11 Deployment
Configure Policy from Intune Portal
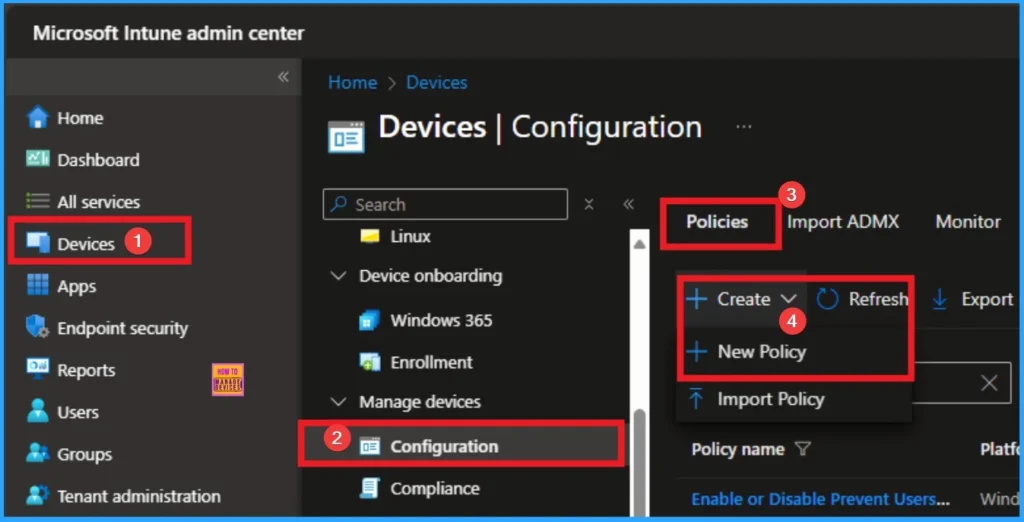
As an admin, you can easily configure this policy from Intune Portal. For this, Sign in to Microsoft Intune Portal with your credentials. Then go to Devices > Configuration > +Create >+ New Policy.
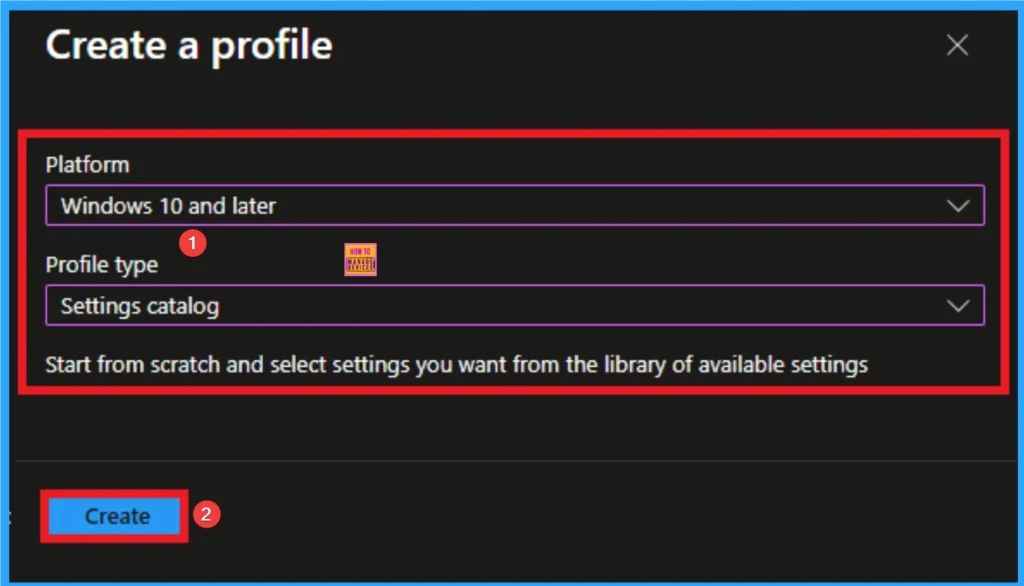
Profile Creation
To create a policy you have to specify profile type and Platform. From this window you can select that. Here, I choose Windows 10 and later as Platform and Profile type as Settings catalog. Then click on the Next button.
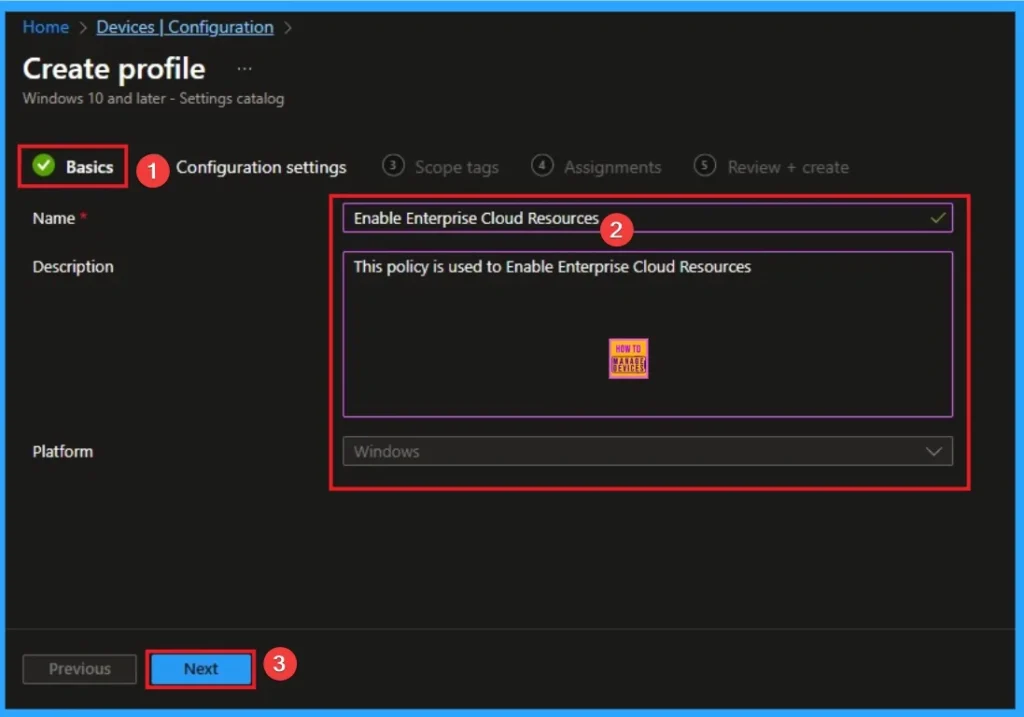
Basic Tab
Basic tab, helps you to add the Name and Description for the policy that you want to create. The Name is the Mandatory file, and you must enter the Name here. The Description is optional,and it is better to give the Description.
- Name – Enable Enterprise Cloud Resources
- Description – This is used to Enable Enterprise Cloud Resources
- Click on the Next button
Configuration Settings Tab
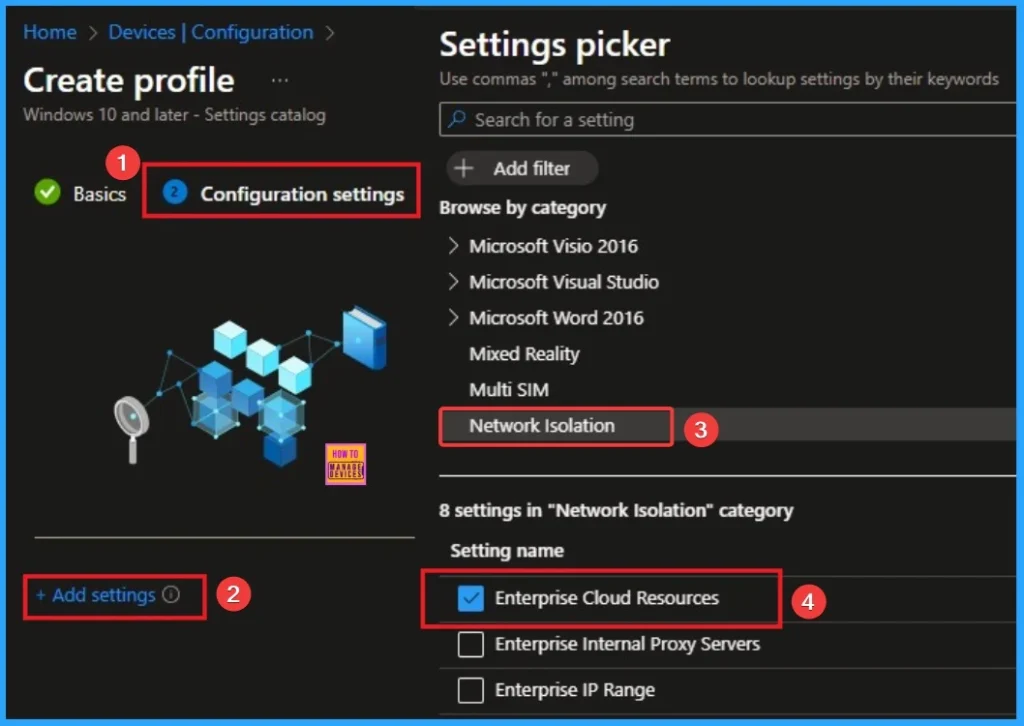
The Configuration tab is very crucial it helps you to select a specific setting. On the Configuration tab, click on the +Add settings hyperlink, and then you will get the Settings Picker. From the Settings Picker, you can choose settings quickly by browse by category or Search bar.
- Choose the Network Isolation Settings category
- Select Enterprise Cloud Resources
- Then close the Settings Picker window
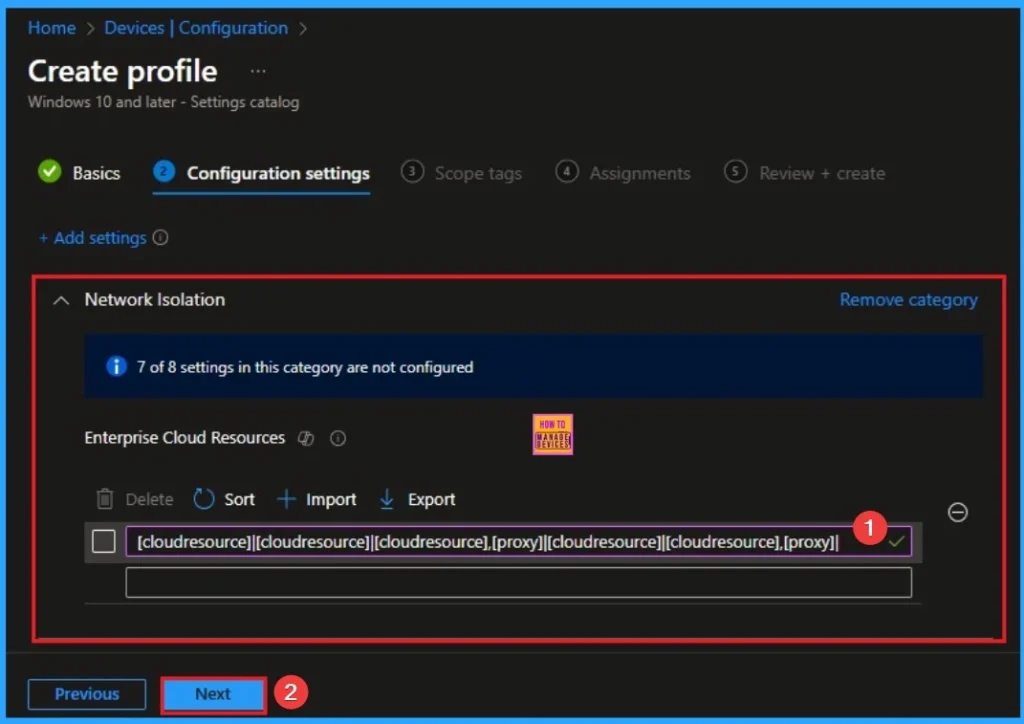
Add Value
If a proxy is paired with a cloud resource, traffic to the cloud resource will be routed through the enterprise network via the denoted proxy server (on Port 80). A proxy server used for this purpose must also be configured using the Intranet proxy servers for apps policy.
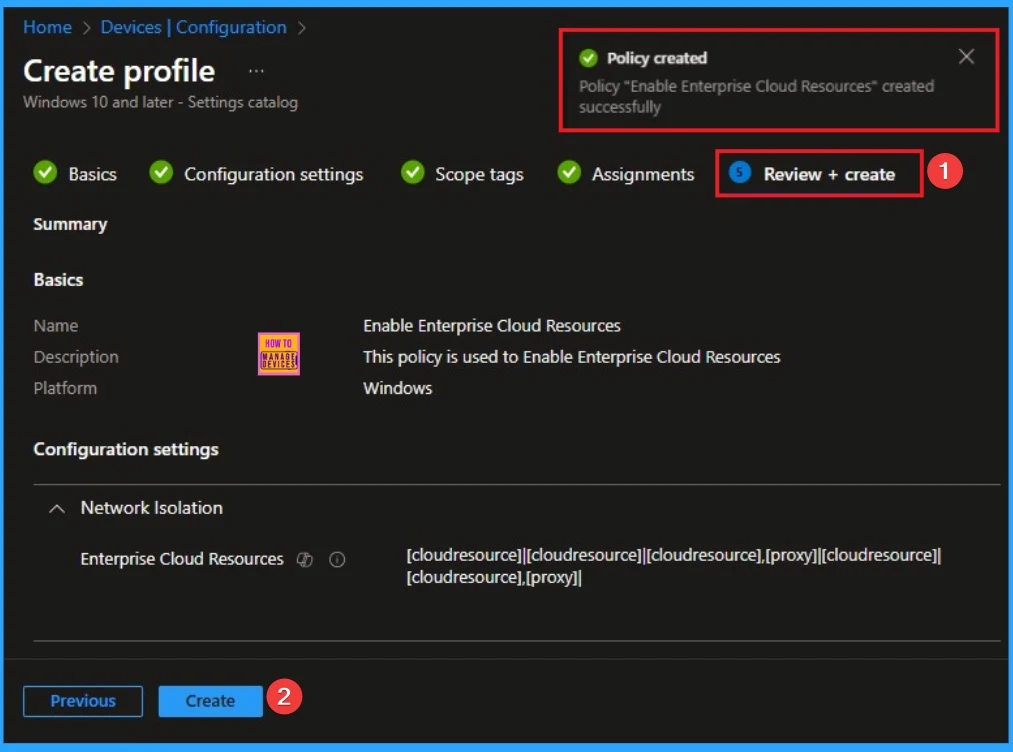
- [cloudresource]|[cloudresource]|[cloudresource],[proxy]|[cloudresource]|[cloudresource],[proxy]|.
Scope Tags
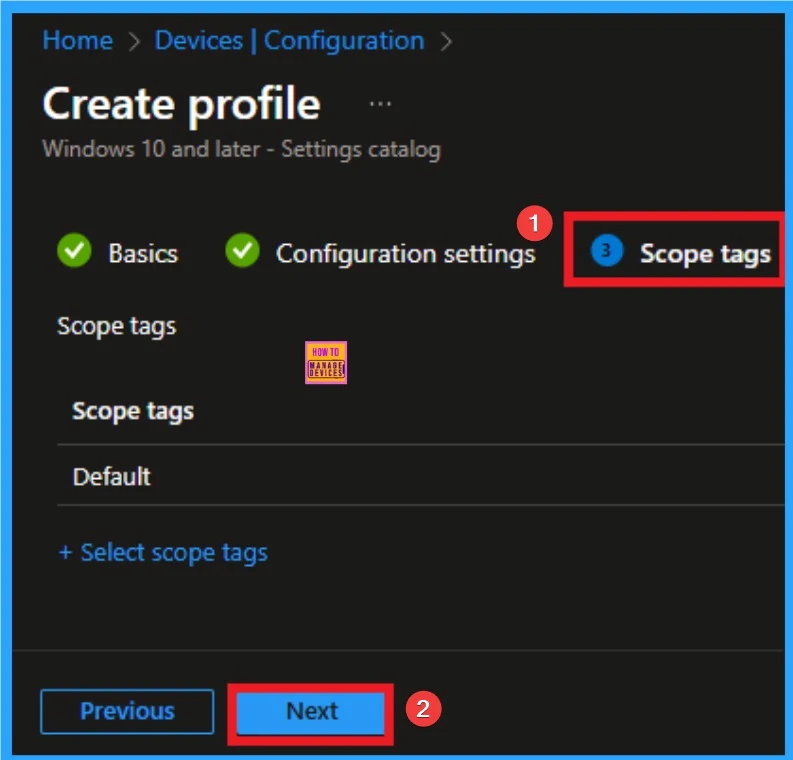
On the scope tag, you can add the scope tag so simply skip this section. This is not a mandatory tab, and this is completely up to your choice. Here I skip this section. So click on the Next button.
Assignments Tab
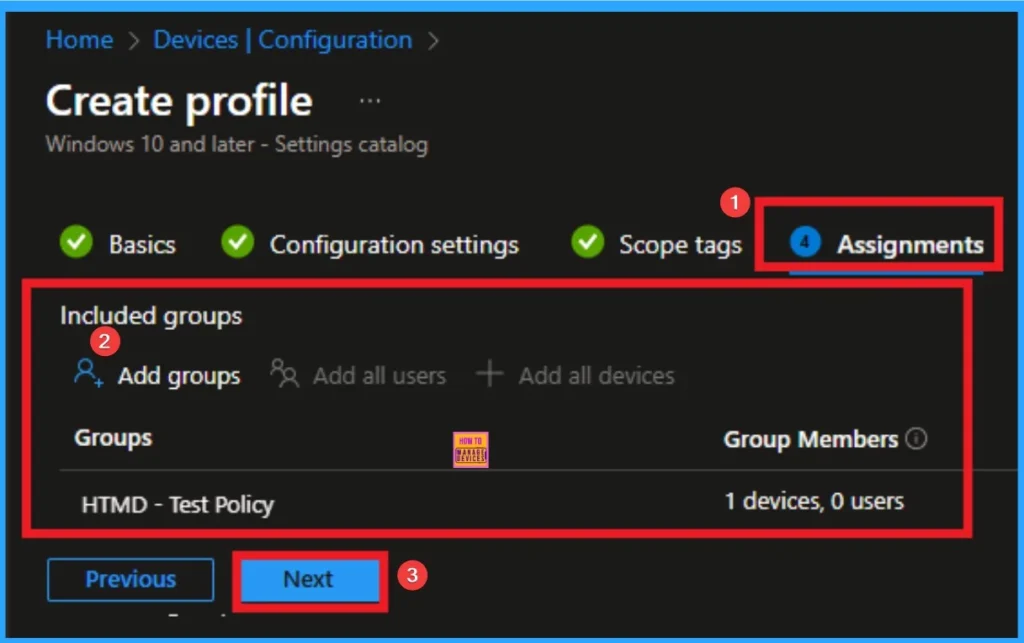
The Assignment tab is a very crucial section that determines which groups can be choose to assign the Internet Sharing Policy. Click on the +Add groups option under Included groups. Select the group from the list of groups and click on the Select button. Then the selected group is shown on the Assignment tab.
Review + Create Tab
The Review + Create tab is the last stage of the policy creation. On this tab, you can verify the details and continue. If you want to make any changes, click on the previous button. Otherwise, click on the Create button. Then you will get the success notification.
Device Check-in Status
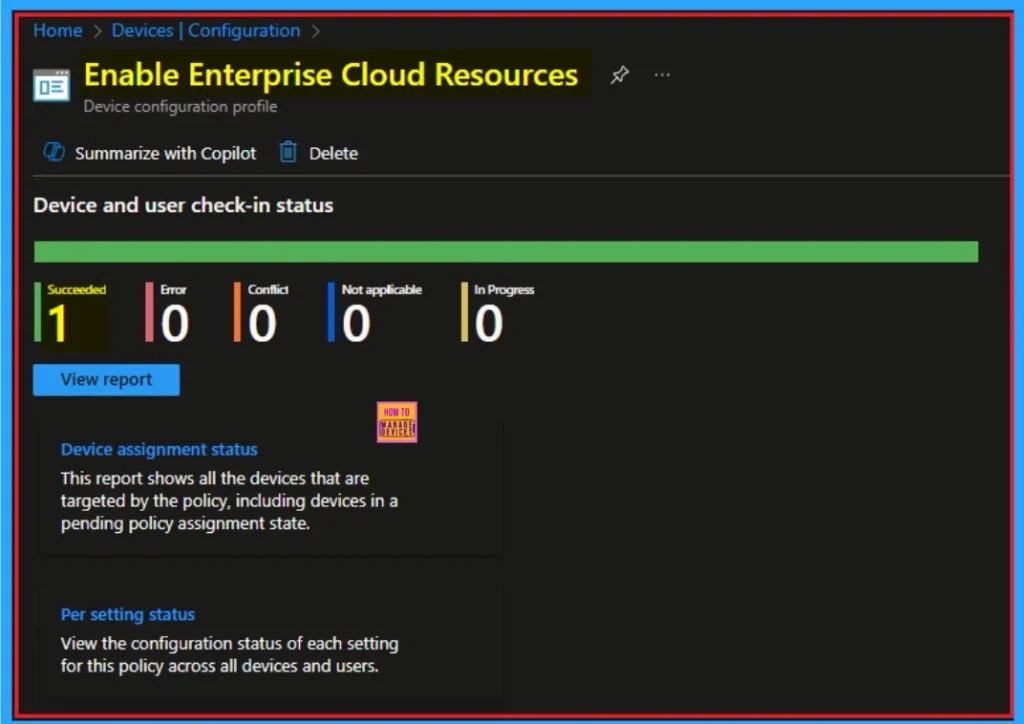
When the policy is created successfully, you can sync the device on the Company portal for faster deployment. After syncing is completed, you can check the status on the Intune Portal. Go to Devices > Configuration and search for the policy.
- Here the Policy succeeded as 1
Client-Side Verification – Event Viewer
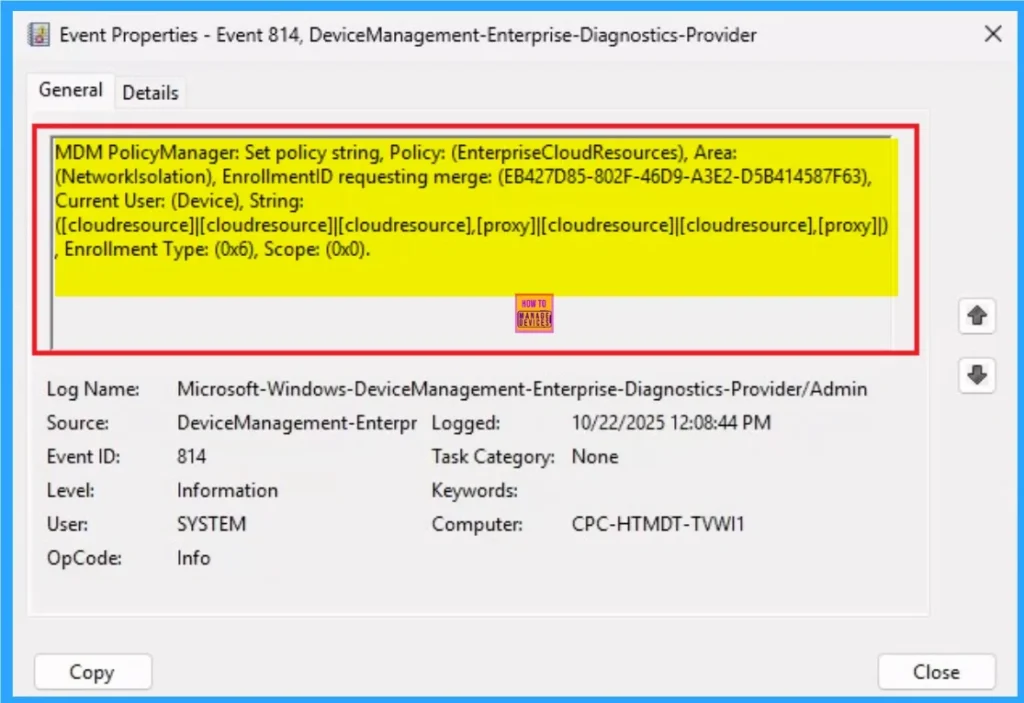
Event Viewer helps you to check if the policy suceeded or not. Event Viewer can be used as a client side verification. Here first go to the Event Viewer and check the Event ID that is usually in 813 or 814. Navigate to Applications and Services Logs > Microsoft > Windows > Device Management > Enterprise
How to Remove Enterprise Cloud Resources Policy
If you want to remove the Enterprise Cloud Resources policy on the Intune portal, it is a very easy process. To do this, open the policy from the Configuration tab., and click on the Edit button on the Assignment tab. Click on the Remove button on this section to remove the policy.
For more detailed information, you can check our previous post – Learn How to Delete or Remove App Assignment from Intune using by Step-by-Step Guide.

How to Delete Enterprise Cloud Resources Policy
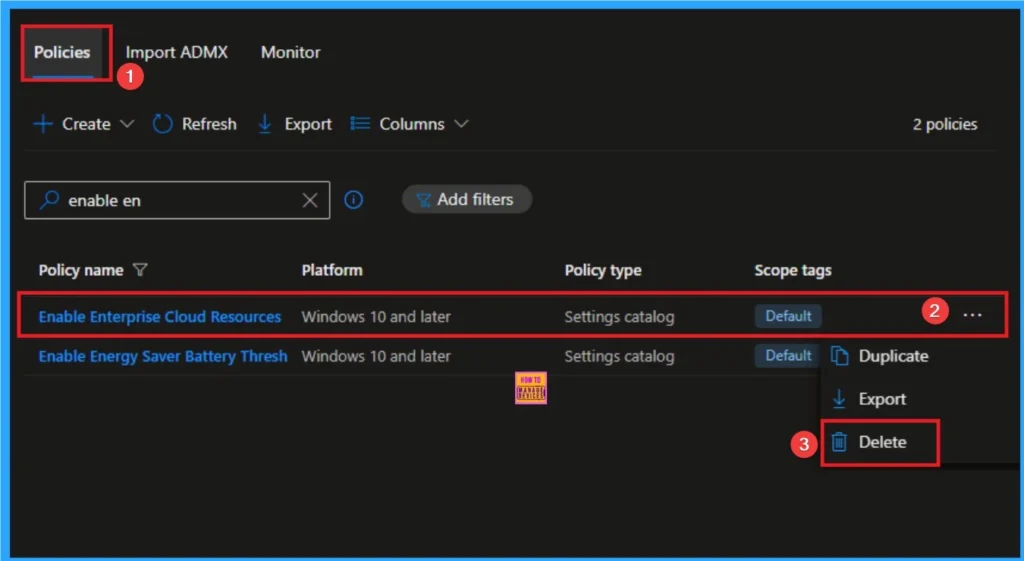
Intune allows you to easily delete a policy within the Intune Portal. Policy deletion is necessary in an organization due to different reasons. To delete the policy, click on the 3-dot option and then click on the Delete button.
For more information, you can refer to our previous post – How to Delete Allow Clipboard History Policy in Intune Step by Step Guide.
Windows CSP Details
This setting doesn’t apply to desktop apps. A pipe-separated list of domain cloud resources. Each cloud resource can also be paired optionally with an internal proxy server by using a trailing comma followed by the proxy address.
Contains a list of Enterprise resource domains hosted in the cloud. Connections to these resources are considered connections to enterprise networks.
| Name | Value |
|---|---|
| Name | WF_NetIsolation_EnterpriseCloudResources |
| Friendly Name | Enterprise resource domains hosted in the cloud |
| Element Name | Enterprise cloud resources. |
| Location | Computer Configuration |
| Path | Network > Network Isolation |
| Registry Key Name | SOFTWARE\Policies\Microsoft\Windows\NetworkIsolation |
| ADMX File Name | NetworkIsolation.admx |

Need Further Assistance or Have Technical Questions?
Join the LinkedIn Page and Telegram group to get the latest step-by-step guides and news updates. Join our Meetup Page to participate in User group meetings. Also, Join the WhatsApp Community to get the latest news on Microsoft Technologies. We are there on Reddit as well.
Author
Anoop C Nair has been Microsoft MVP for 10 consecutive years from 2015 onwards. He is a Workplace Solution Architect with more than 22+ years of experience in Workplace technologies. He is a Blogger, Speaker, and Local User Group Community leader. His primary focus is on Device Management technologies like SCCM and Intune. He writes about technologies like Intune, SCCM, Windows, Cloud PC, Windows, Entra, Microsoft Security, Career, etc.

