Today we are discussing Enhance Device Battery Life by Managing Peer-to-Peer Uploads using Intune Policy. This policy setting that specifies the minimum battery level required for uploading to peers while the device is running on battery power.
This policy helps administrators control when devices are allowed to participate in peer-to-peer uploads, such as content sharing or updates, while operating on battery. In Microsoft Intune, the Settings Catalog provides a user-friendly interface to configure device policies.
When configuring this policy, an administrator specifies a minimum percentage of battery charge required before uploading to peers is allowed. For example, if the policy is set to 40%, the device will only participate in uploads when the battery level is above 40%.
his helps prevent excessive battery consumption during critical tasks or travel when users depend on battery life the most. So in this post let’s look how tis policy to be configured to the Intune admin center. By setting a minimum battery threshold, the system ensures that laptops and tablets do not drain their battery unnecessarily during background uploads, helping maintain device performance.
Table of Contents
How this Policy Helpful to the Organizations?
This policy is useful in organizations where devices frequently share updates or files over the network, such as in environments that use Delivery Optimization. Uploading to peers can be beneficial for saving bandwidth, but it can also drain the battery if not managed properly.
Enhance Device Battery Level by Managing Peer-to-Peer Uploads using Intune Policy
The main benefit of this policy is that it helps organizations maintain better battery health, improve energy efficiency, and provide consistent performance for users. It also enhances user satisfaction by avoiding unnecessary battery drain.
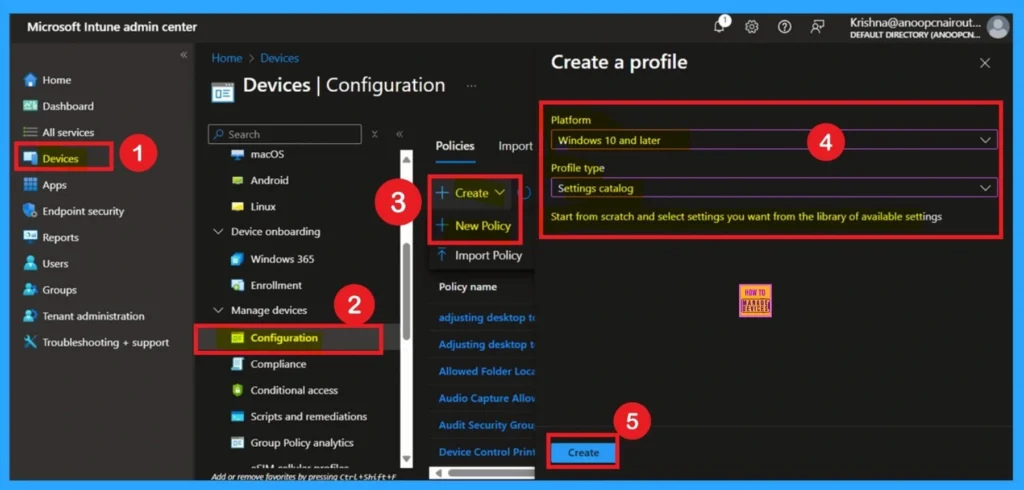
By sign in to Microsoft Intune Admin center you can easily configure this policy. Go to the Intune Admin Center portal. Go to Devices > Windows > Configuration > Create > New Policy.
- In this window, you can create the profile for this policy. For this, you have to select the platform and profile.
- Here, I choose Windows 10 and Later as Platform and Settings Catalog as Profile Type.
- Then click on the Next Create Button.
- How to Remove Assigned Group from Energy Saver Battery Threshold Policy in Intune Settings Catalog
- Improve Windows PC Performance by using New Efficiency Mode
- How to Set an Absolute Max Cache Size in GBs for Delivery Optimization using Intune
Filling Basic Details
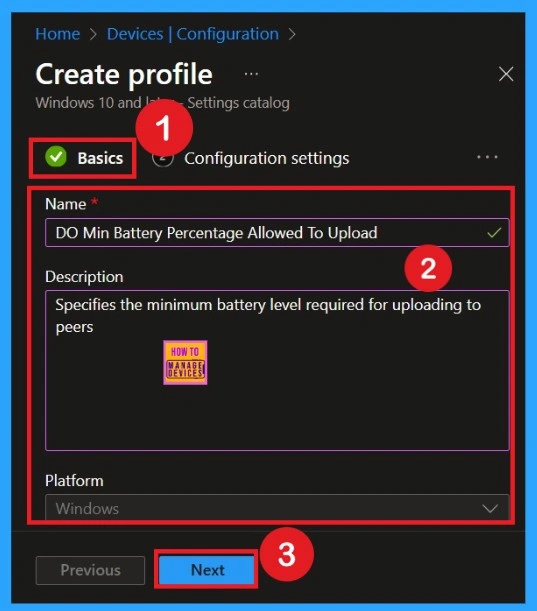
On the Basic tab you can add Name and Description for the policy for further reference. The Name field is necessary to identify the purpose of the policy and description shows more information. The Name is mandatory and if you like to add description you can add. Click on the Next Button.
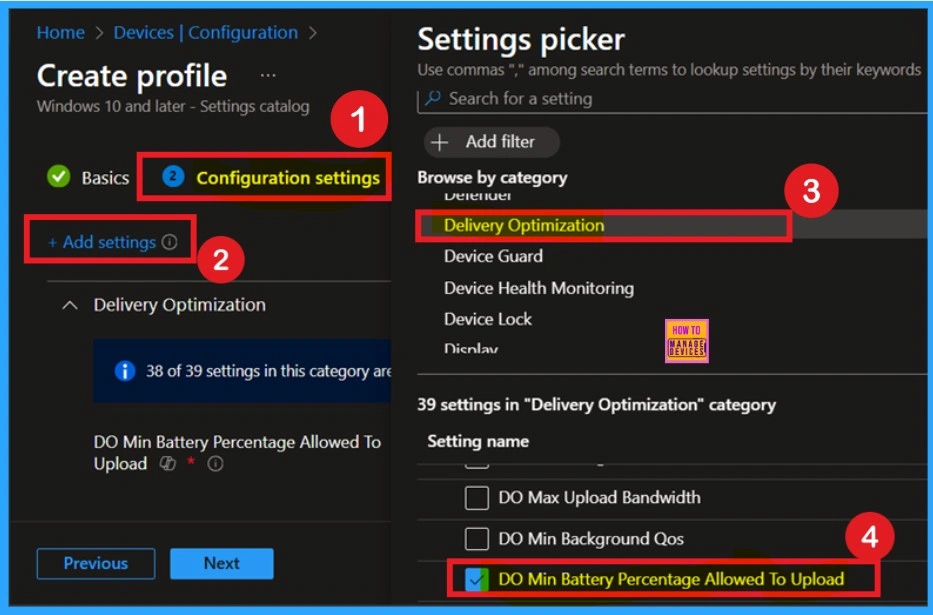
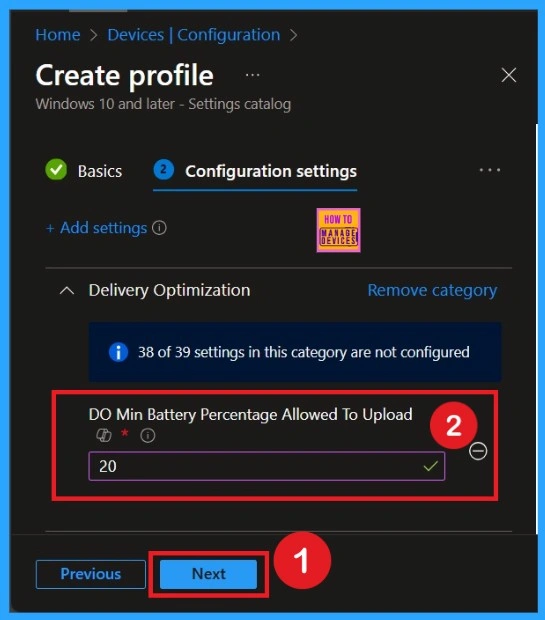
The Configuration settings page is provided to select the settings to create the policy. The Settings Catalog provides a huge number of settings. To select a settings click on the +Add settings hyperlink. Then you will get Settings Picker. Choose Delivery Optimization and select the DO Min Battery Percentage Allowed To Upload.
Enable the Device Battery Life by Managing Peer-to-Peer Uploads
After selecting the setting now you have to enable the policy with an appropriate value. I have enabled this policy with a value of 20, which means the device will only upload data to peers if the battery level is above 20%. When the battery charge drops below this threshold, the device will automatically stop uploading to peers, saving battery power for essential operations.
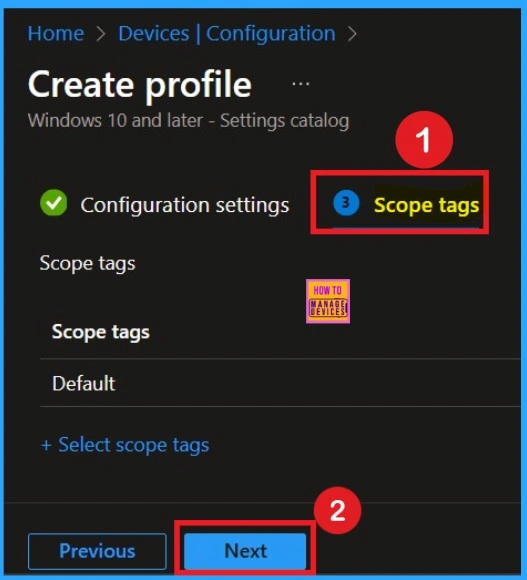
Scope Tags
By using scope tags, you can give control to which admin can see and manage specific settings. This is not a mandatory setting, so you can skip this. Here I skip these settings and Click on the Next button to continue.
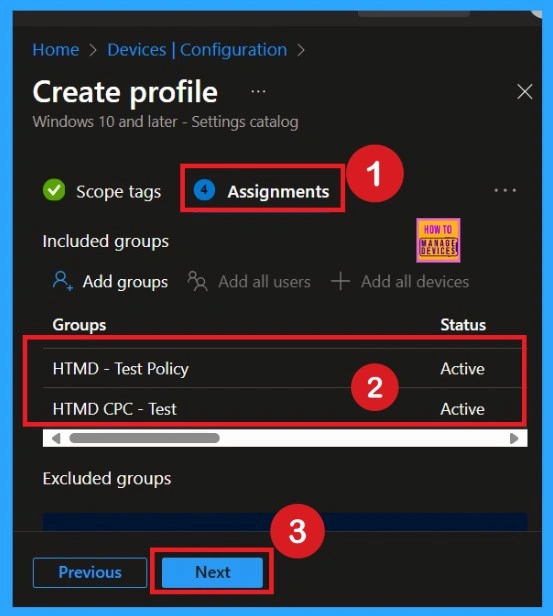
Assign this Policy to Specific Groups
To assign the policy to specific groups you can use Assignment Tab. Here I click, +Add groups option under Included groups. I choose a group from the list of group and Click on the Select button. Again I click on the Select button to continue.
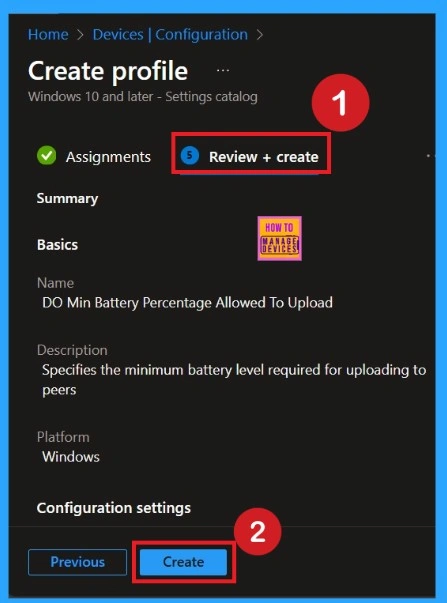
Final Step of Policy Creation
To complete the policy creation you can review all the policy details on the Review + create tab. It helps to avoid mistakes and successfully configure the policy. After varifying all the details click on the Create Button. After creating the policy you will get success message.
Monitoring Status
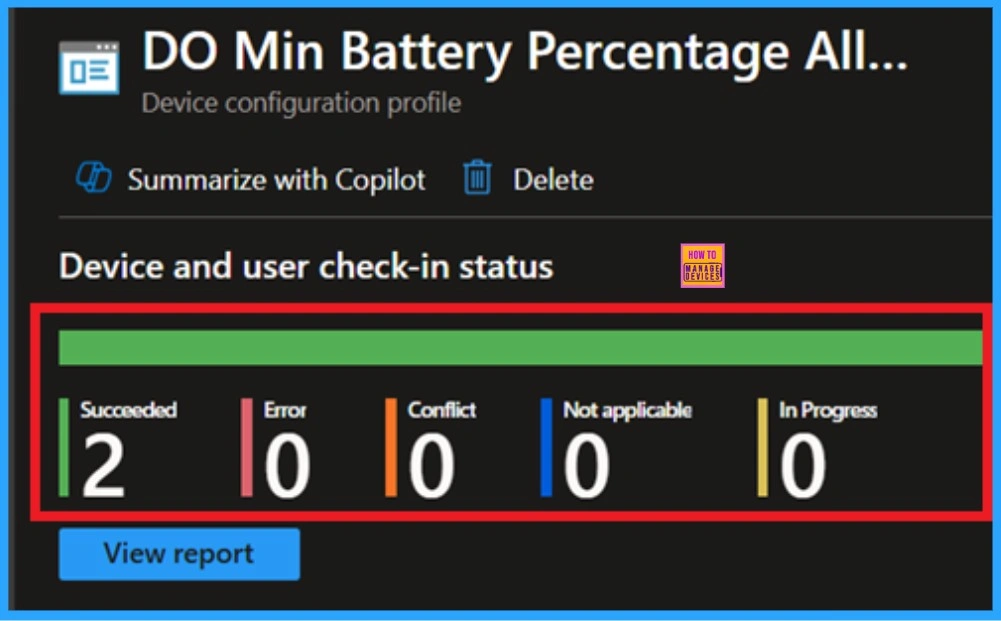
The Monitoring Status page shows whether the policy has succeeded or not. To quickly configure the policy and take advantage of the policy sync, the device on the Company Portal, Open the Intune Portal. Go to Devices > Configuration > Search for the Policy. Here, the policy shows as successful.
Client Side Verification with Event Viewer
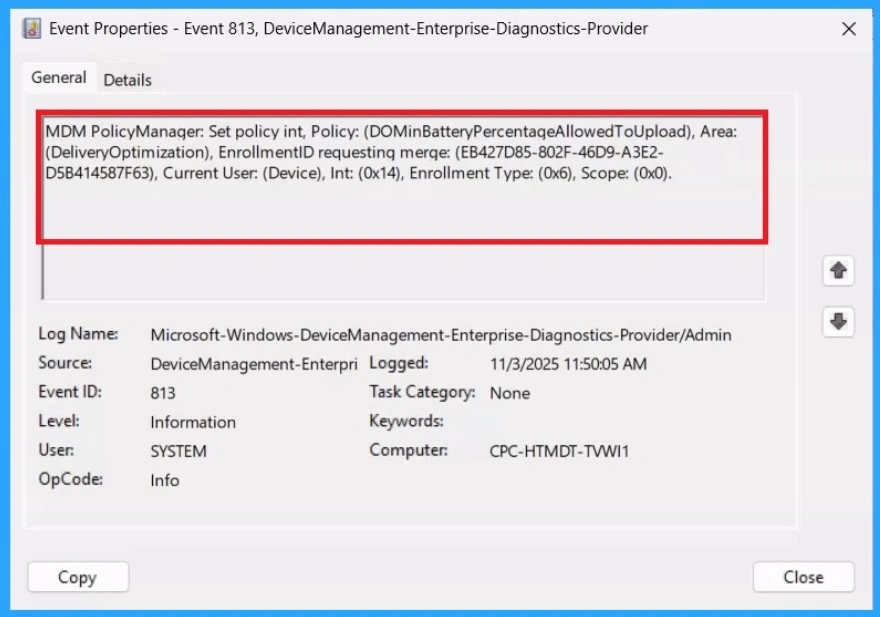
If you get success message, that doesn’t means you will get the policy advanatges. To varify the policy successfully configured to client device check the Event Viwer.
- Filter for Event ID 813 or 814: This will help you quickly find the relevant logs.
- Open Event Viewer: Go to Start > Event Viewer.
- Navigate to Logs: In the left pane, go to Application and Services Logs > Microsoft > Windows > DeviceManagement-Enterprise-Diagnostics-Provider > Admin.
| Policy Info |
|---|
| MDM PolicyManager: Set policy int, Policy: (DOMinBatteryPercentaqeAllowedToUpload), Area: (DeliveryOptimization), EnrollmentID requestinq merqe: (EB427D85-802F-46D9-A3E2- D5B414587F63), Current User: (Device), Int: (0x14), Enrollment Type: (0x6), Scope: (0x0). |
Remove Groups
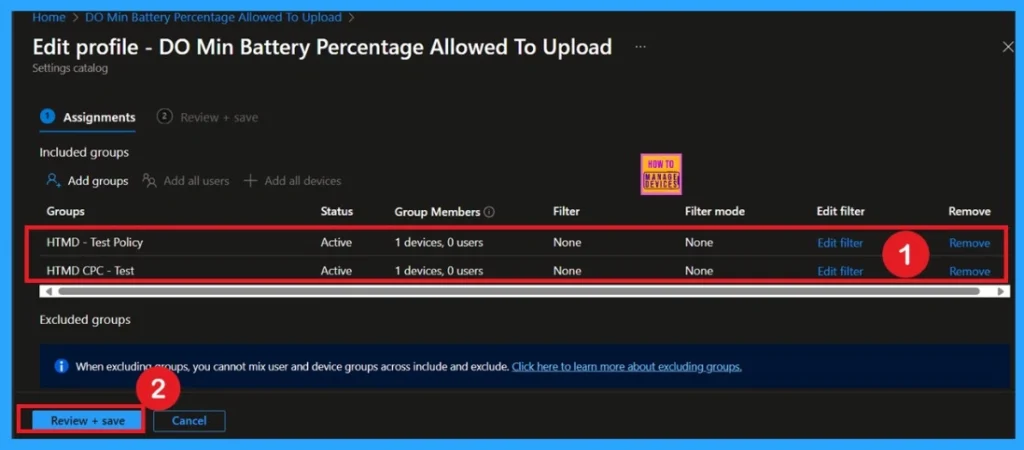
If you want to remove the Assigned group from the policy, it is possible from Intune Portal. To do this open the Policy on Intune Portal and Edit the Assignments tab and Remove the Policy.
To get more detailed information, you can refer to our previous post – Learn How to Delete or Remove App Assignment from Intune using by Step-by-Step Guide.
Delete the Policy Permenantly
You can easily delete the Policy from Intune Portal From the Configuration section you can delete the policy. It will completely remove from the client devices.
For detailed information, you can refer to our previous post – How to Delete Allow Clipboard History Policy in Intune Step by Step Guide.

Need Further Assistance or Have Technical Questions?
Join the LinkedIn Page and Telegram group to get the step-by-step guides and news updates. Join our Meetup Page to participate in User group meetings. Also, Join the WhatsApp Community to get the latest news on Microsoft Technologies. We are there on Reddit as well.
Author
Anoop C Nair has been Microsoft MVP for 10 consecutive years from 2015 onwards. He is a Workplace Solution Architect with more than 22+ years of experience in Workplace technologies. He is a Blogger, Speaker, and Local User Group Community leader. His primary focus is on Device Management technologies like SCCM and Intune. He writes about technologies like Intune, SCCM, Windows, Cloud PC, Windows, Entra, Microsoft Security, Career, etc

