Let’s discuss the Azure AD Application Proxy Browser Addon My Apps Secure Sign-in. Azure AD Application Proxy is the recommended solution for accessing on-premise web applications from an external network (outside corporate).
The end-user can log in to the My Apps portal to access all the applications assigned to the user. With the My Apps Browser add-on installed, users can use the same Web URL to access both internal and external corporate networks.
This means users don’t have to remember different URLs to access applications. The “My Apps Secure Sign-in” browser add-on redirects the internal URL to the external URL.
What is the Premium Version of AAD App Proxy? Entra Internet and Private Access Products Available What Is Entra Global Secure Access?
Table of Contents
- Windows 365 Cloud PC Azure AD Joined Provisioning Process
- AVD Troubleshooting Options Tips Tricks – Azure Virtual Desktop
- Manage Microsoft Intune Devices using ControlUp Enrich Monitoring Tool
Azure AD Application Proxy
Entra Private Access is the enhanced version of App Proxy. Microsoft aims to develop and upgrade these components using a client agent called Global Secure Access. In this post, we will cover the below topics:
Server Side
- Azure Active Directory Application Proxy architecture
- Azure Active Directory Application Proxy pre-requisite
- Benefits of Azure Active Directory Application Proxy
- Limitations of Azure Active Directory Application Proxy
- Azure Active Directory Application Proxy connector configuration
- How to publish internal applications in the My Apps portal for external users
Client-Side
- What is My Apps Secure Sign-in Extension / Addon?
- Install browser addon – My Apps Secure Sign-in
- End-user experience with browser addon – My Apps Secure Sign-in
Server Side Configurations
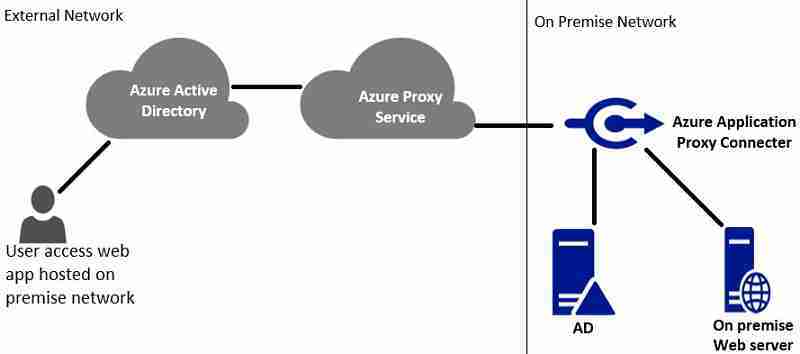
Azure AD Application proxy architecture
Azure AD Application Proxy provides a secure remote access solution to on-premises Web applications. You need the Azure AD Application Proxy Connector installed on your on-premise server. This connector works as a proxy for communication between Azure and on-premises web apps.
Benefits of Azure AD application proxy
- Easy to set up and Secure
- Don’t require VPN or DMZ: If you are already in Azure, the only component you need to install is the Azure AD application proxy connector.
- Conditional Access: You can leverage Conditional access for the applications published in the Azure AD application proxy
Azure AD application proxy pre-requisite
- Microsoft Azure AD basic or premium (P1 or P1) subscription
- On-premise Windows Server to install the Azure AD Application Proxy Connector
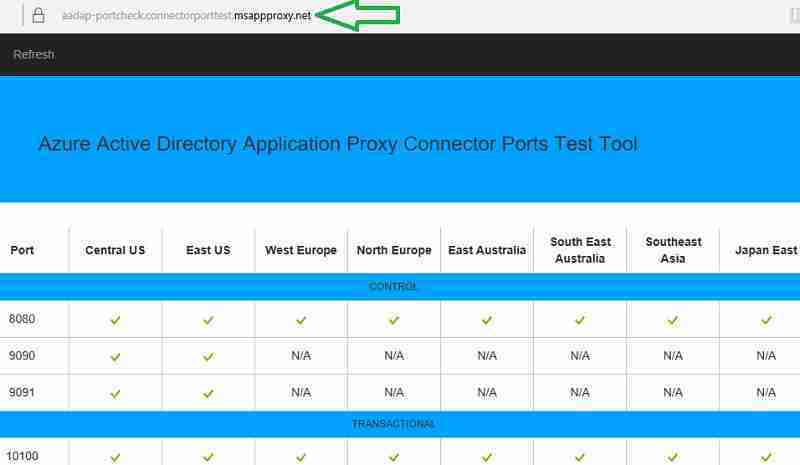
- Required ports and websites should be accessible for Azure AD Application Proxy Connector. You can use the Azure AD Application Proxy Connector Ports Test Tool to test the connectivity.
Limitations of Azure AD application proxy
Azure application proxy doesn’t support all types of authentication. It would help if you considered what authentication method Web applications use. Azure application proxy supports Web applications that use Integrated Windows Authentication. For more details, refer.
Azure AD application proxy connector configuration
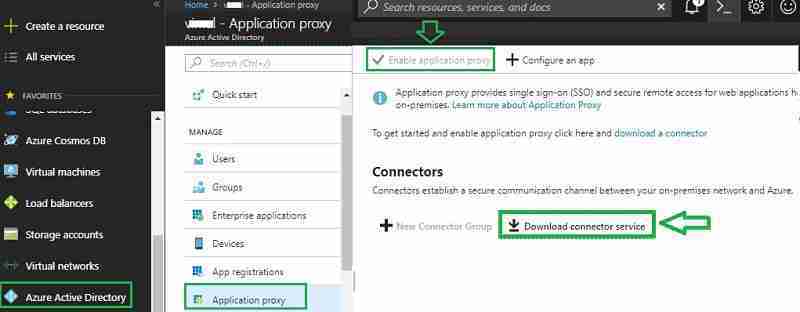
Log in to the Azure portal as a global administrator. Navigate to Azure Active Directory – > Application Proxy and Enable Application Proxy. Next, Download the Connector service.
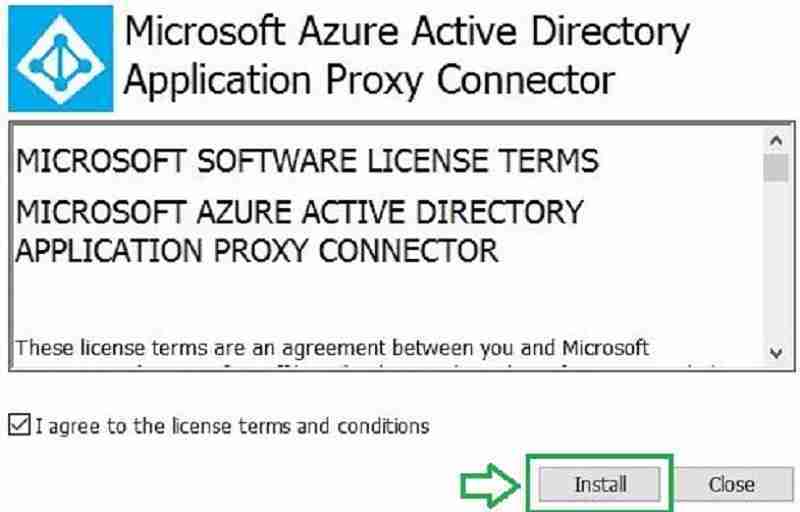
The connector is 6 MB in size. Install it as an administrator on your on-premise server. You will see the installation wizard below. Click on Install. During installation, provide Azure AD global admin credentials if prompted.
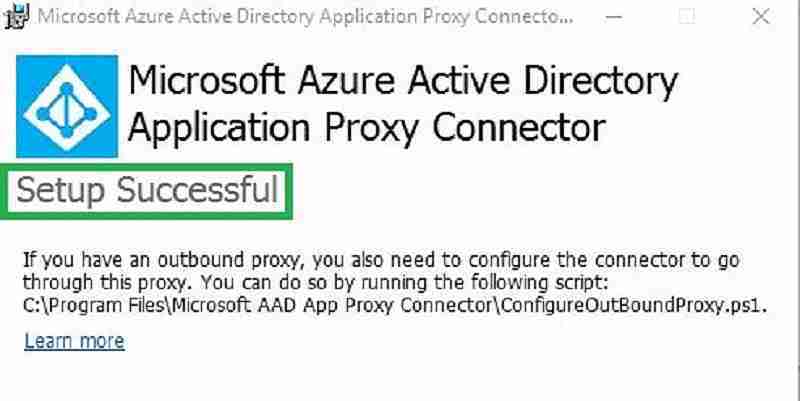
You will receive the below message after successful installation.
After the Connector installation, it is recommended to test the connectivity using the Azure AD Application Proxy Connector Ports Test Tool.
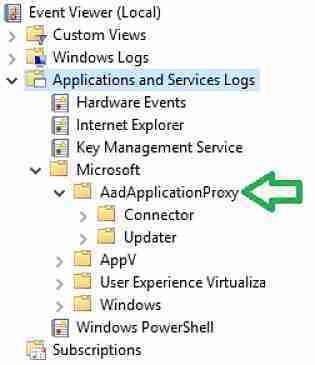
You can also verify the event viewer to ensure no errors related to the Proxy connector.
Two new Azure AD Application Proxy connector services get created.
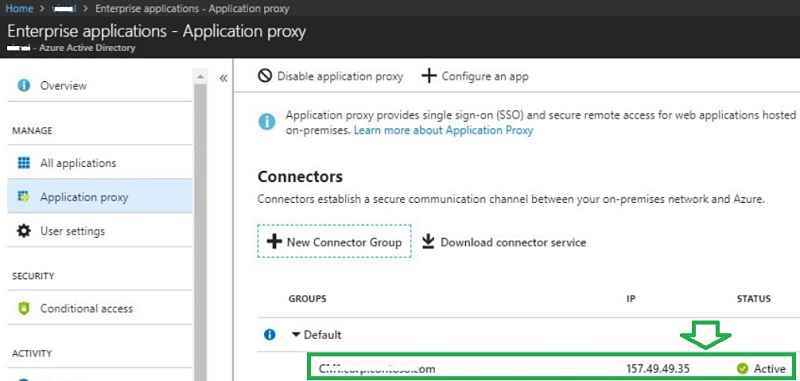
In the Azure portal, you can see the status of the server on which we installed the connector.
How to publish the internal application to the My Apps portal
I have a simple HTML web page hosted on an on-premise web server for the demo. We will configure the internal website below for external users to access.
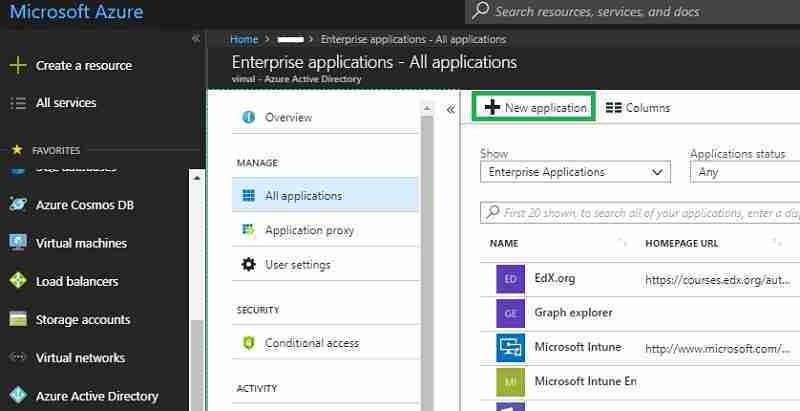
Log in to the Azure portal as a global admin. Navigate to Azure Active Directory – > Enterprise Applications
- Click on “New application.”
Select “On-premise application.”
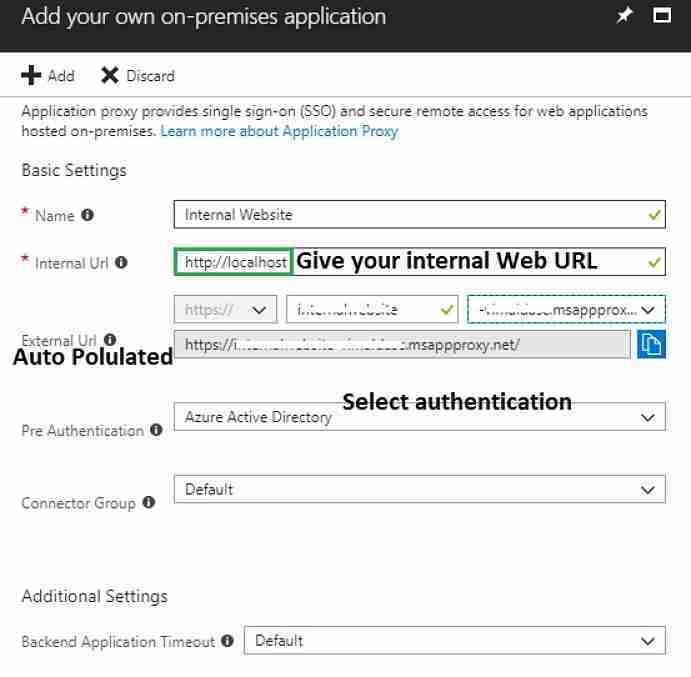
Update the below form and click on Add. External URL is pre-populated based on application and domain name.
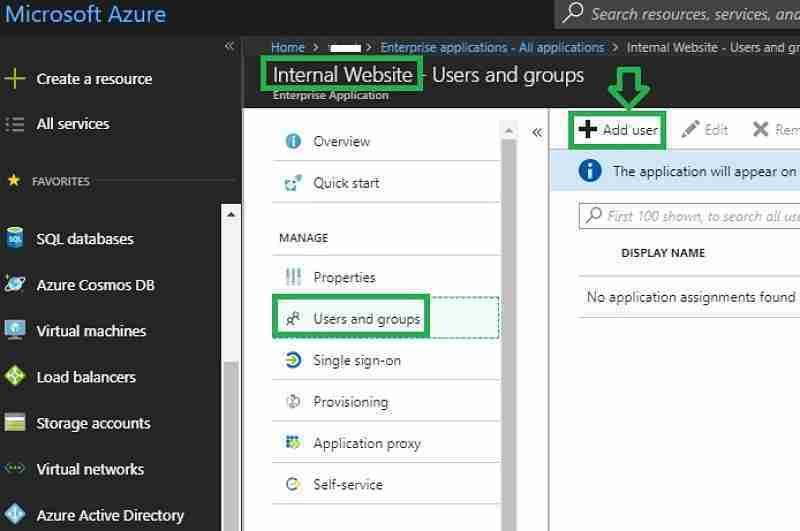
Next, we will assign the application to users. Navigate to Azure Active Directory – > Enterprise Applications. Select the application that we created. Add the users to whom we need to deploy the internal application.
Client Side Configurations
What is My Apps Secure Sign-in Extension / Addon?
This extension is required to launch specific applications at https://myapps.microsoft.com, also known as My Apps, which provides single sign-on to cloud applications within your organization.
With this extension, you can:
• Sign in directly to applications from the application’s login page
• Launch any application through the search bar
• Find shortcuts to your recently used applications and customize the number of recently used applications saved
• Access internal company URLs while remote
Install My Apps Browser Addon
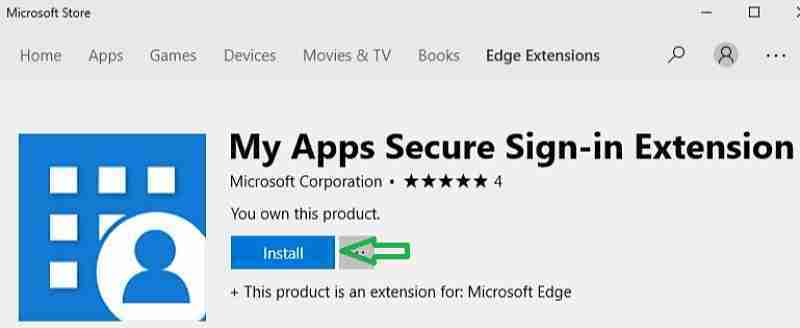
This post will install the Edge add-on from the Microsoft store. You can also download the Browser add-on for Edge, Chrome, and Firefox.
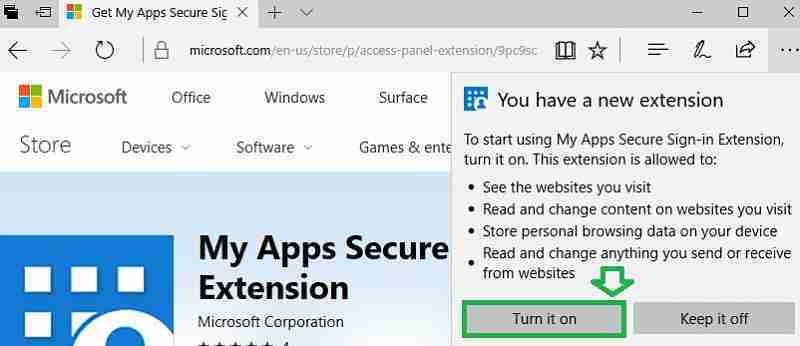
After installation is completed, you will receive a prompt to turn on Addon. Click on “Turn On” and sign in with your account.
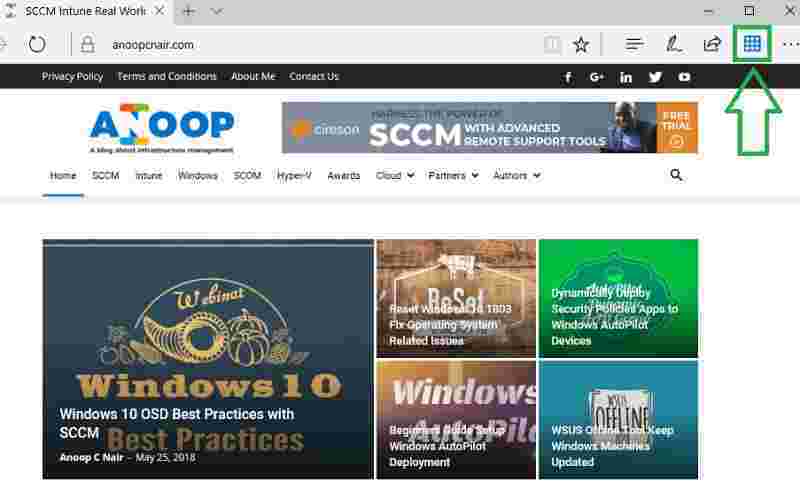
After Signing in, you will see an icon as shown below. Click on the below icon.
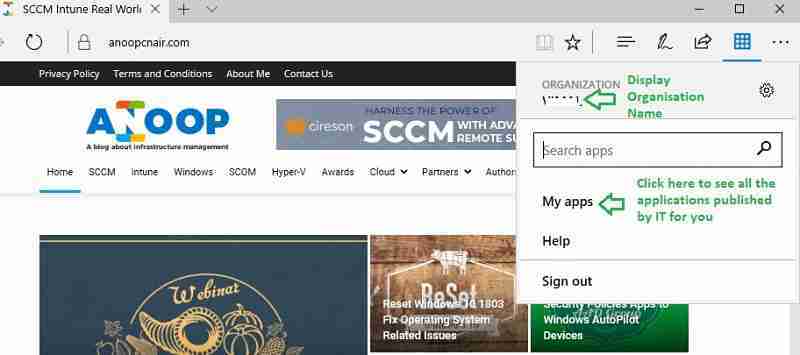
As shown below, the browser add-on provides a single interface and a single sign-on for all the applications published by IT for you.
End Result
Now, let’s try accessing the internal website URL—http://localhost. As seen below, the browser add-on automatically performs the DNS translation to the external URL. I suggest using this browser add-on and the Azure AD Web application proxy.
This provides benefits to both end-users and IT admins. From an end-user perspective, they don’t have to remember different URLs for internal and external access. From the IT Admin perspective, they don’t have to create a public DNS record for the internal web URLs.
We are on WhatsApp. To get the latest step-by-step guides and news updates, Join our Channel. Click here –HTMD WhatsApp.
Author
Vimal has more than 10 years of experience in SCCM device management solutions. His main focus is on Device Management technologies like Microsoft Intune, ConfigMgr (SCCM), OS Deployment, and Patch Management. He writes about SCCM, Windows 10, Microsoft Intune, and MDT.

