Let’s discuss how to Deploy Blender Application using Intune App Model. As you all know, the Enterprise App Catalog app is one of the best features in Microsoft Intune. With this feature, administrators can easily install various types of apps into the organization.
In our previous posts, we discussed many app installations throughout the enterprise app catalog feature. Here, we are looking forward to installing the Blender App version 4.3.2 . One of the best ways to install an app is to select its version.
Blender is a free, open-source tool for creating 3D content, such as modelling, animation, and video editing. It also allows different types of versions. These tools are very helpful in creating a project. Also, Blender works on Windows, macOS, and Linux so users can use it on any operating system for their projects.
Blender’s advanced sculpting tools let artists create detailed and precise models. This tool is much needed for users to improve their productivity in their work. In this post, let’s look at how to install this app through the Entertprise app catalog app.
Table of Contents
What are the Importance of Blender App?
Blender is a free and open-source 3D creation suite. It supports the entirety of the 3D pipeline modelling, rigging, animation, simulation, rendering, compositing and motion tracking, video editing and 2D animation pipeline.
Deploy Blender Application using Intune App Model
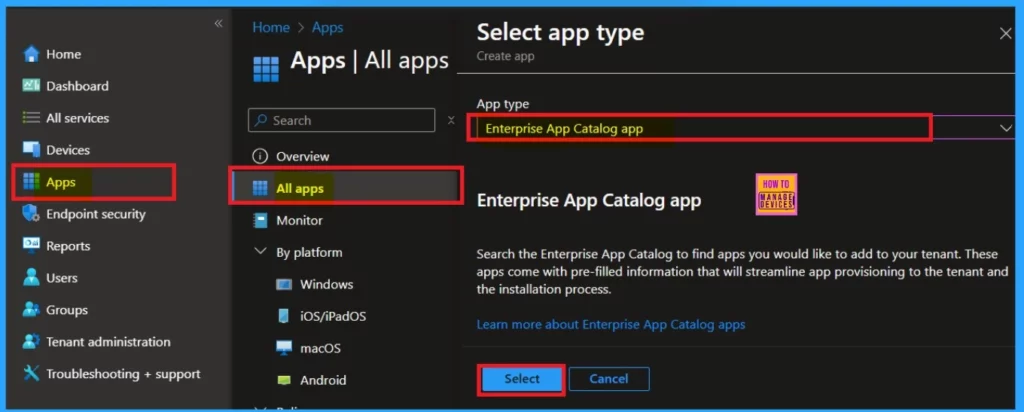
First, sign in to the Microsoft Intune admin centre using your credentials to install this app in Intune. Next, navigate to Apps > All Apps. When you click on All Apps, a window will appear, allowing you to select an app type. You will find various app types available. Choose either the Enterprise app catalog app, then click on Select.
- Deploy Windows Catalog App type using Intune Enterprise Application Catalog
- 6 Exciting Features Coming to Intune Enterprise App Management
- Install GNU Image Manipulation Program using Enterprise App Catalog App in Intune
App Information
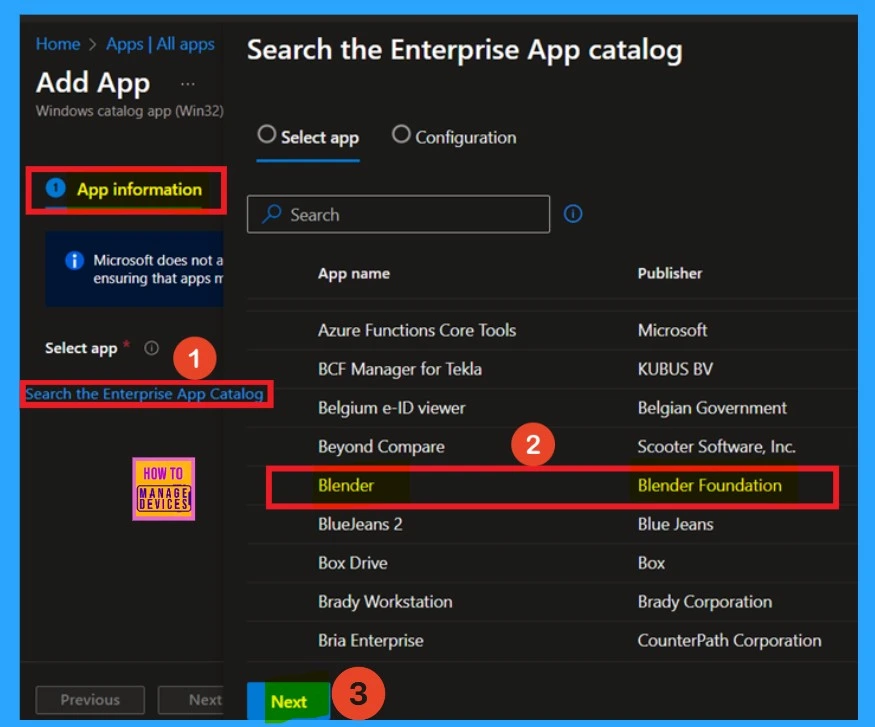
After selecting the app type, you will be taken to the App information page. Here, you need to choose the Enterprise app catalog app. There are different types of apps available in the enterprise app catalog.
You should look for the Blender app. You can search for it or scroll down to find it, as the apps are listed alphabetically, making them easier to locate. Once you find the Blender app, please select it and click the next button.
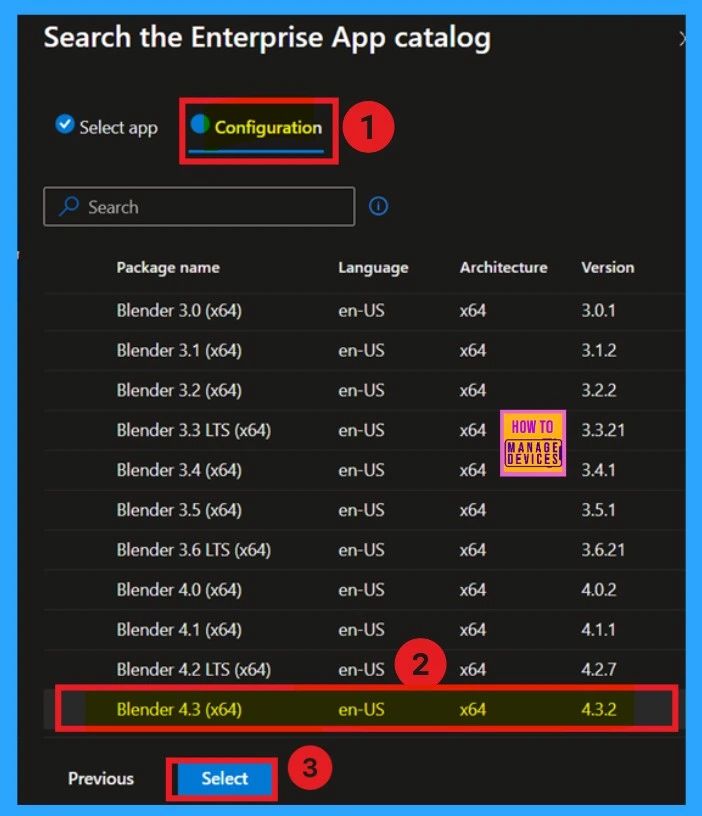
After selecting the Blender app, you will go through the configuration process in the configuration tab, where you will see different versions available. You can choose the version you want. I selected Blender 4.3.2. If you prefer another version, please select it and click the Select button.
| Package Name | Language | Architecture | Version |
|---|---|---|---|
| Blender 4.3 (x64) | en-US | x64 | 4.3.2 |
How to Add a Logo
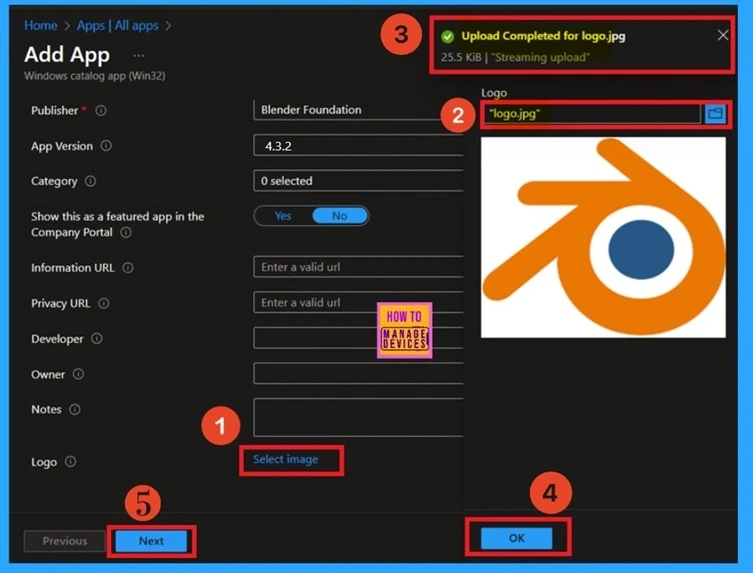
After selecting the version, you can easily close the window. Once you do that, you’ll be on the app information page. On this page, you can add a logo for your app, a Simple process that can help to recoginize the app later. To add a logo, scroll down the app information page. You will find the option Select Image in a hyperlink. When you do, you’ll see an option to upload a logo.
- I had already downloaded my logo, so I selected it from my files and uploaded it.
- Once the logo is uploaded, you will be notified that the upload is complete.
- Click “OK,” and the logo appears on your app information page.
- You can proceed by clicking Next to continue the process.
Program
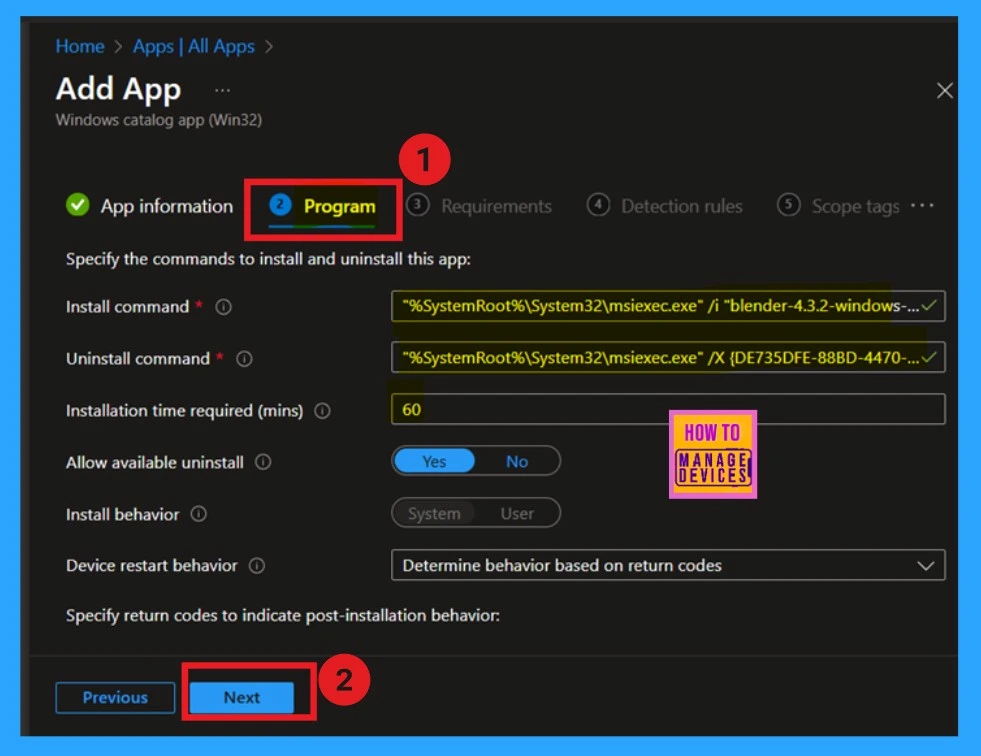
You are currently in the program tab. In this section, you’ll find specific commands, such as install and uninstall commands. However, you don’t need to take any action here because this is an enterprise app catalog, and as you know, everything will already be pre-packaged. Therefore, there’s no need to add any specific information. I will skip this section and click continue next.
Requirements
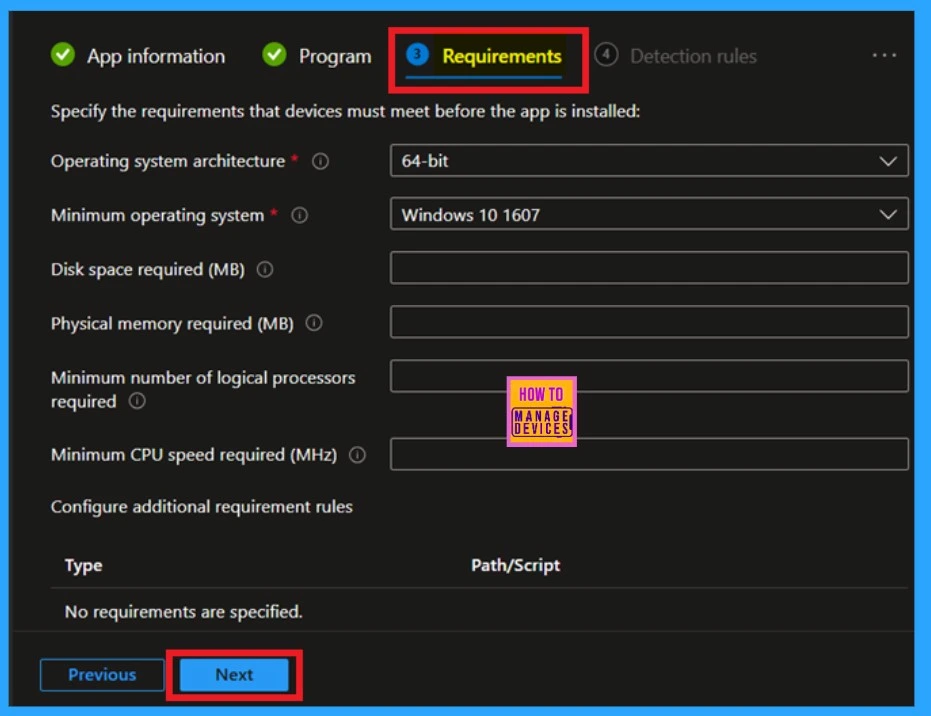
Now you are on the requirement page. It is similar to the program page, as the information is already filled in. You don’t need to add anything; this is a mandatory section. You can click on next.
Detection Rules
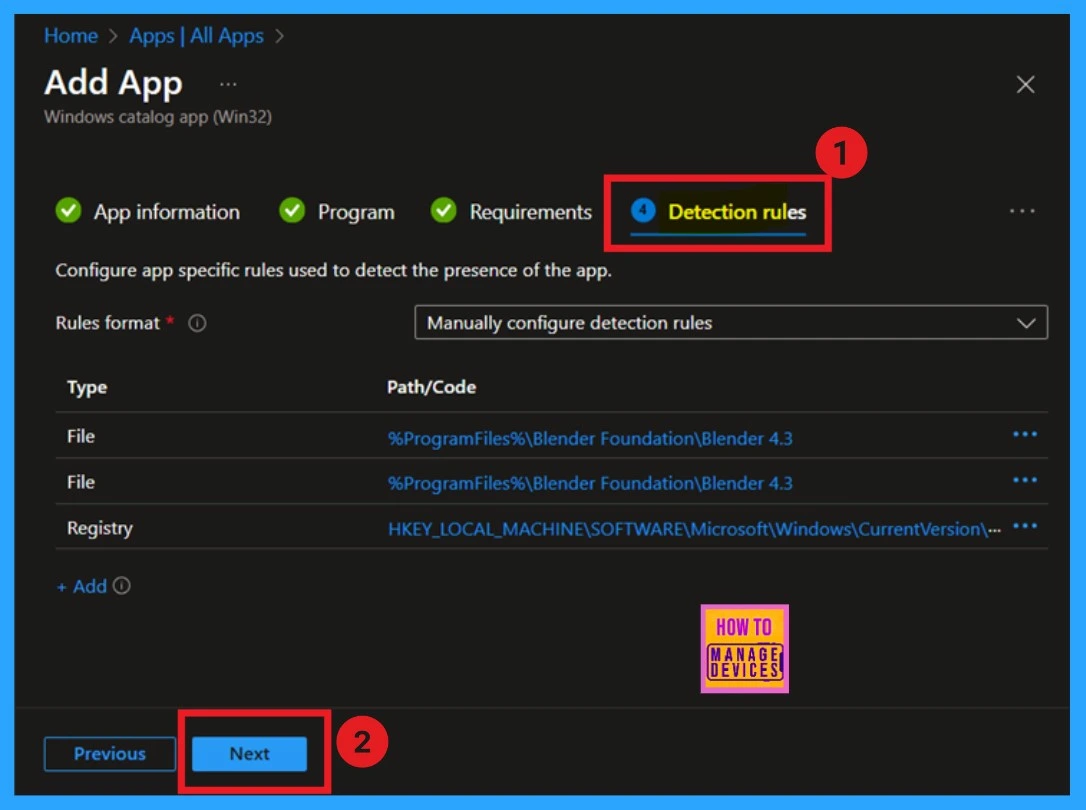
Now, you are on the Detection Rules page. This page shows some path information. You can see the file path, registry path, etc. This is also a mandatory page. You don’t need to do anything. Click on the next for further proceedings.
Scope Tags
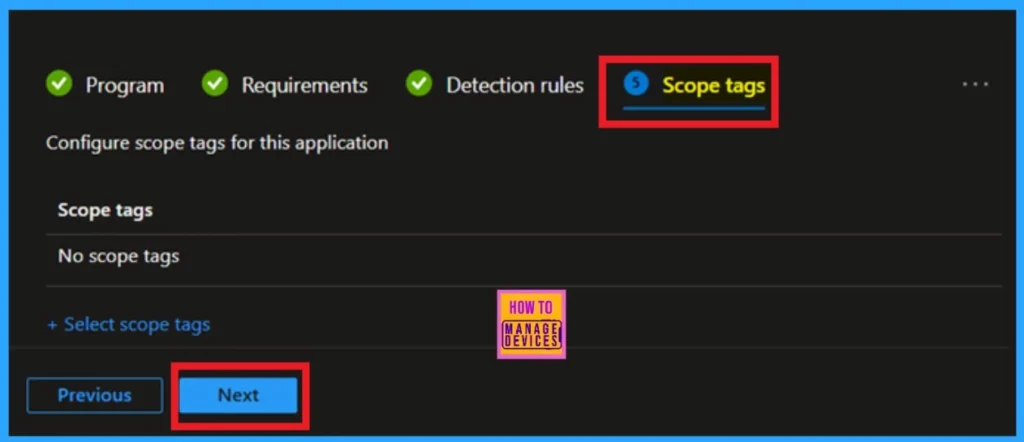
The next section is the Scope tag, which is used for policy creation and defines which objects administrators can view. This section is mandatory. You can easily add a scope tag to the app deployment, but I have skipped this section.
Assignments
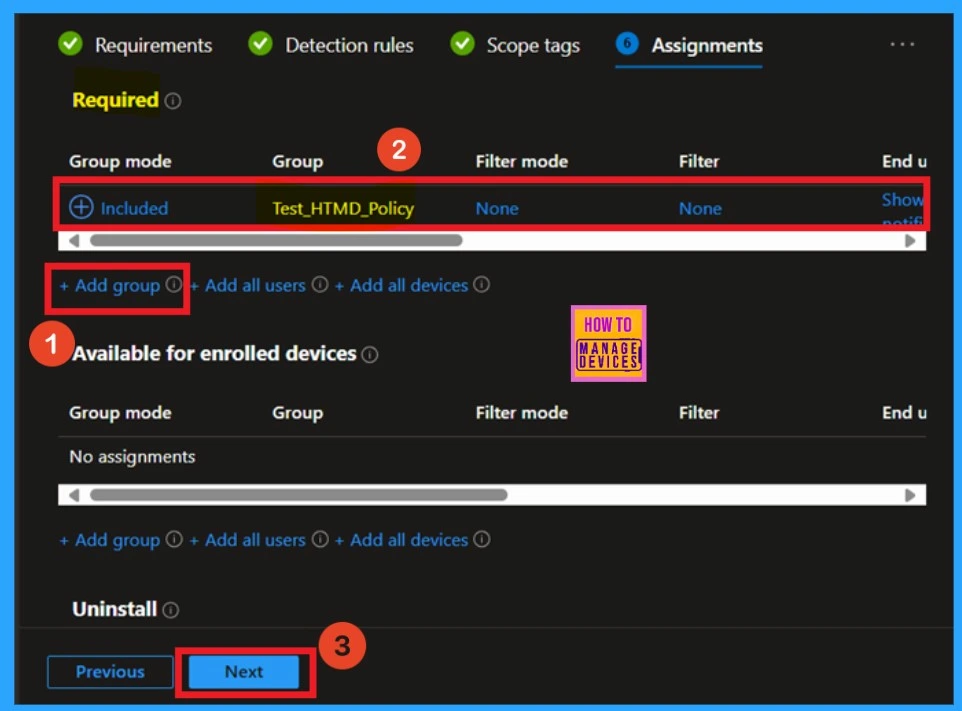
The next step is assignment, which is crucial for App deployment. In this section, you can specify the group you need to install the app. You will notice the ‘Required’ option; under that, you will get the Add group option, which allows you to select the group to which the app will be deployed.
- Here, I selected our test group.
- Once you’ve chosen, you can easily click ‘Next‘ to proceed.
Review + Create
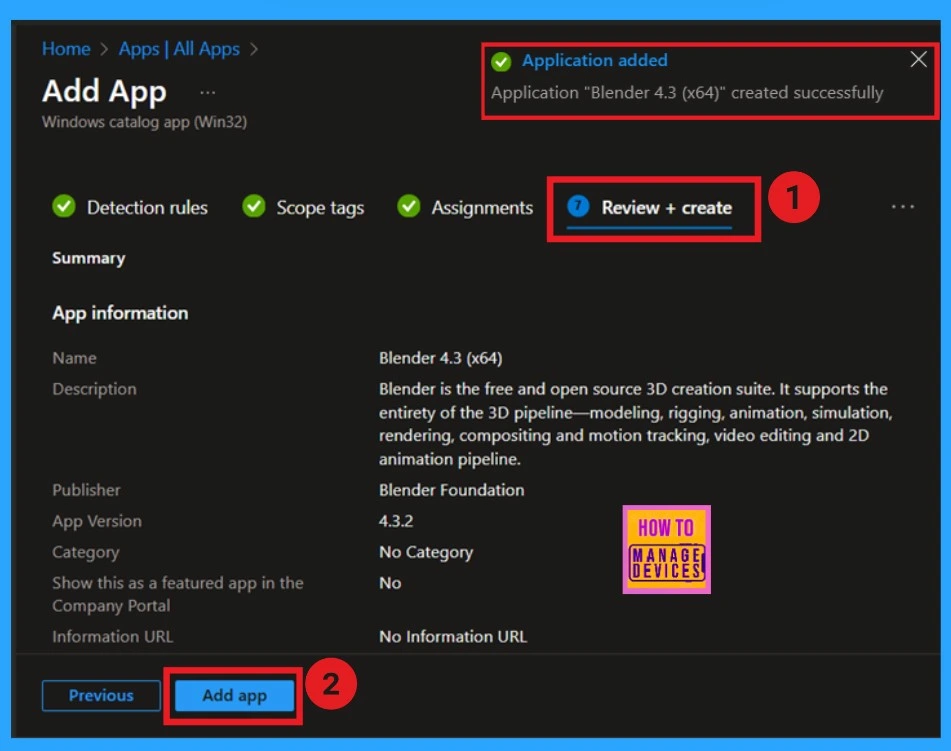
The final steps for app installation are to review and create. On this page, you will find all the information about the App deployment, including the name, description, publisher, and app version. You can verify all the details without needing to make any changes. Once you have reviewed everything, click the Add App option.
- Now your Application is created Successfully.
Monitor Status
After clicking the Add App option, you must wait 8 hours for the app to be installed in your organization. To shorten this waiting period, go to the Cloud PC, select the Company Portal, click on the settings within the Company Portal, and then click on the sync option.
- After completing these steps, you can check whether the app has been installed by reviewing the monitoring status.
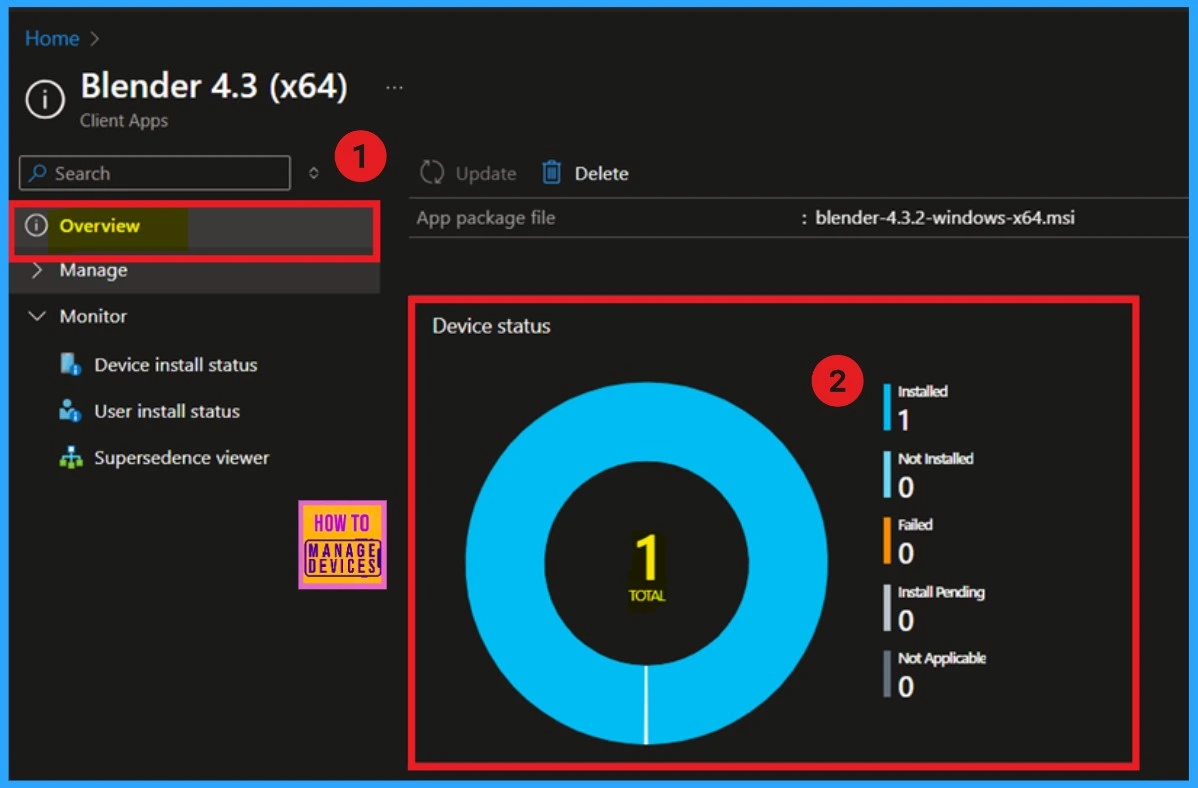
- For Monitor Status, navigate through Apps> All Apps> Search for the Blender app.
- You can see that 1 Installed report
Client-Side Verification
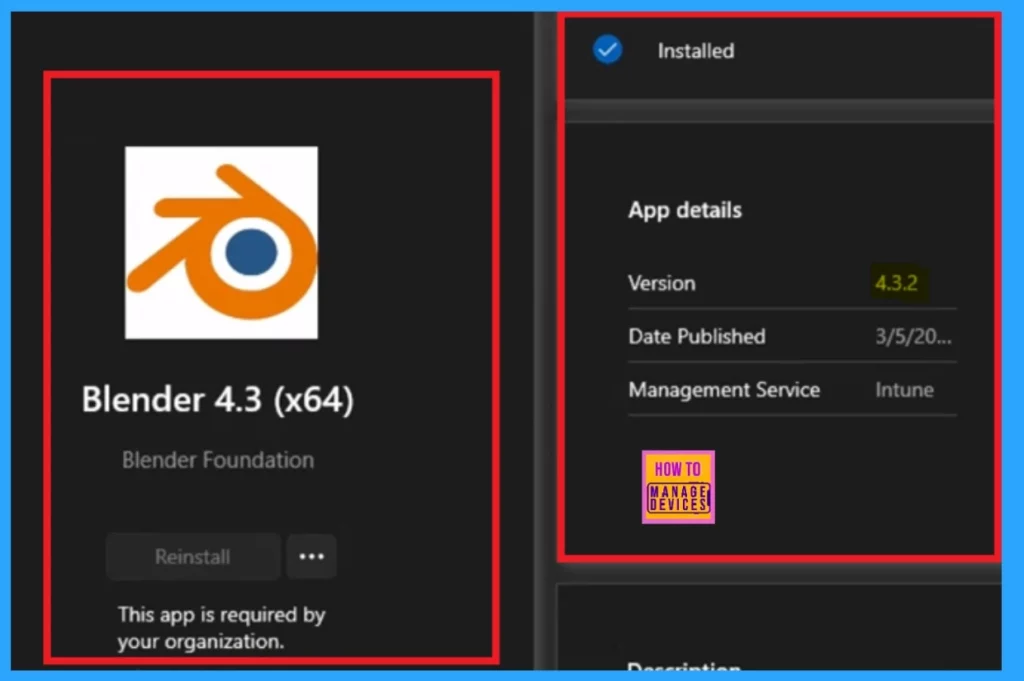
To check the End User Experience, go to the Cloud PC and select the Company Portal option. In the Company Portal, navigate to the “Downloads and Updates” section. Search for the Blender app. If you find it, click on it to view the details.
Need Further Assistance or Have Technical Questions?
Join the LinkedIn Page and Telegram group to get the latest step-by-step guides and news updates. Join our Meetup Page to participate in User group meetings. Also, Join the WhatsApp Community to get the latest news on Microsoft Technologies. We are there on Reddit as well.
Author
Anoop C Nair has been Microsoft MVP for 10 consecutive years from 2015 onwards. He is a Workplace Solution Architect with more than 22+ years of experience in Workplace technologies. He is a Blogger, Speaker, and Local User Group Community leader. His primary focus is on Device Management technologies like SCCM and Intune. He writes about technologies like Intune, SCCM, Windows, Cloud PC, Windows, Entra, Microsoft Security, Career, etc.

