Let’s learn how to enable or disable App Execution Aliases in Windows 11. Applications can declare an alias (name) used to run the app, such as an executable file, from the command prompt or Run dialogue box. If multiple apps use the same name, you can choose which one to use by turning on and off app execution aliases.
If you try to open an app, such as Microsoft Paint, Microsoft Word, or Excel, in the Run dialogue and see an error message, it could be caused by your app aliases.
In Windows 11, apps can declare a unique alias name used to run the application from Command Prompt. When the App Execution Aliases feature is turned on, you can use an alias to start your app without specifying the full path to your application.
Entering commands into tools such as Command Prompt and PowerShell can be laborious. You can streamline that process by enabling or creating aliases for apps that commonly feature in those commands. There is no need to type out a full path to an executable file; using a few key stores enables you to access the app.

Table of Contents
What Are App Execution Aliases?

An alias is an alternative name for something. The most obvious example is the codename given to an undercover person. On Windows, aliases have nothing to do with spying. Instead, they are used for streamlining tasks, such as entering commands.
Windows 10 and 11 allow default aliases to be declared for some apps. The available apps vary but are commonly associated with command-line tools. Giving an app an alias will enable it to be executed using a shorter title rather than the full name or path.
Apps aliases can be used in several Windows Command Line Interfaces, including the Run Dialog, Command Prompt, and PowerShell. If you use these tools regularly, app aliases can help streamline entering commands.
Are there Registry Editor, Group Policy, or Intune Policy Settings that Enable or Disable App Execution Aliases in Windows 11?
The answer is no. We cannot find any Intune Policy or Group Policy to Enable or Disable App Execution Aliases in Windows 11. Only if you want to create a new app execution alias in Windows 11 can you try the registry editor shown below to create one. If you have anything, let us know in the Comments.
How to Enable or Disable App Execution Aliases
You can enable and disable aliases for compatible apps in the Windows settings app in both Windows 10 and 11. If more than one app uses the same alias name, you can choose which has the alias applied to it.
- Fix Intune is Unable to Uninstall Apps Installed from Apple App Store Issue
- Secure AI Applications using Microsoft Defender for Cloud Apps
- Top 83 Windows 11 Desktop Admin Interview Questions
Windows Settings
To enable or disable App Execution Aliases, you can use the Windows settings to make any modifications. To do so, click the Windows button, select Settings, or press Win Key + I to open settings directly.
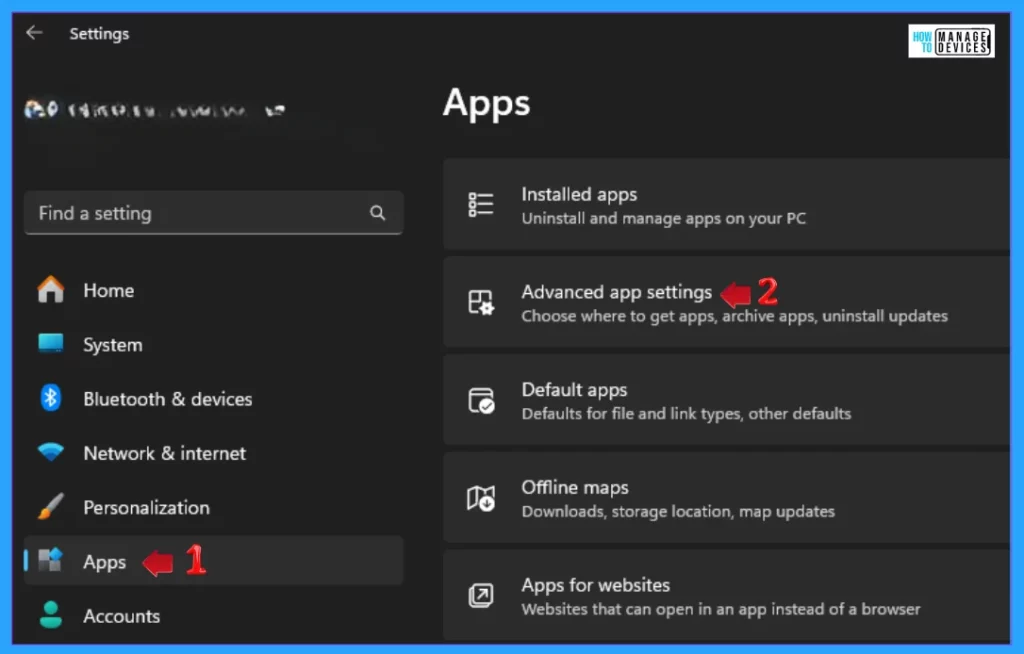
Then, under settings, click the Apps option on the left panel. Find the Advanced App Settings option in the right panel, then click on it to open.
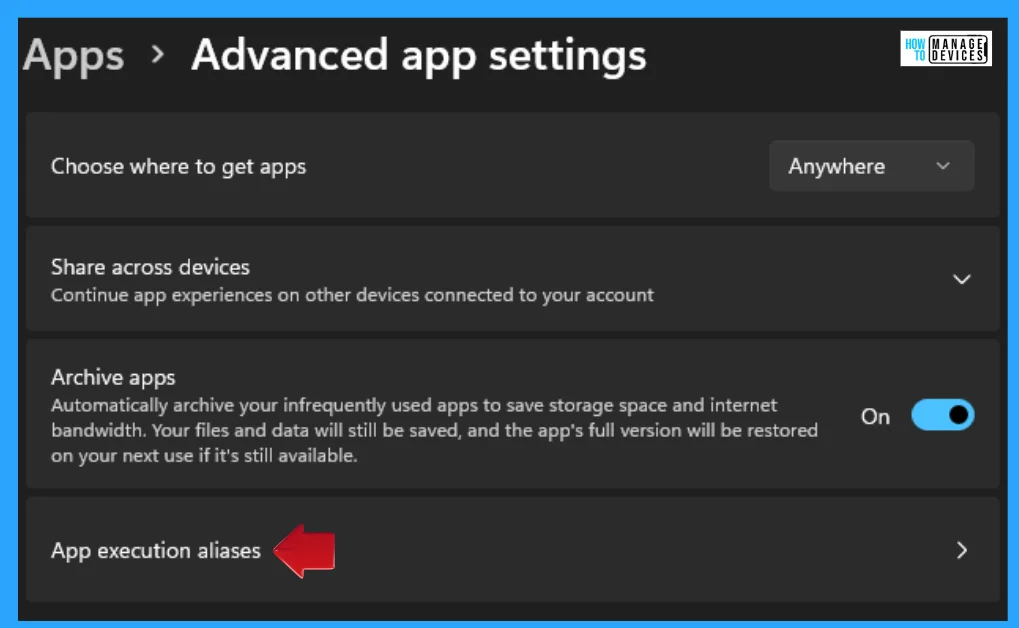
The Advanced App Settings are used to choose where to get apps, archive apps, and install updates. It also contains some options. From those options, select the App Execution Aliases option and click on it.
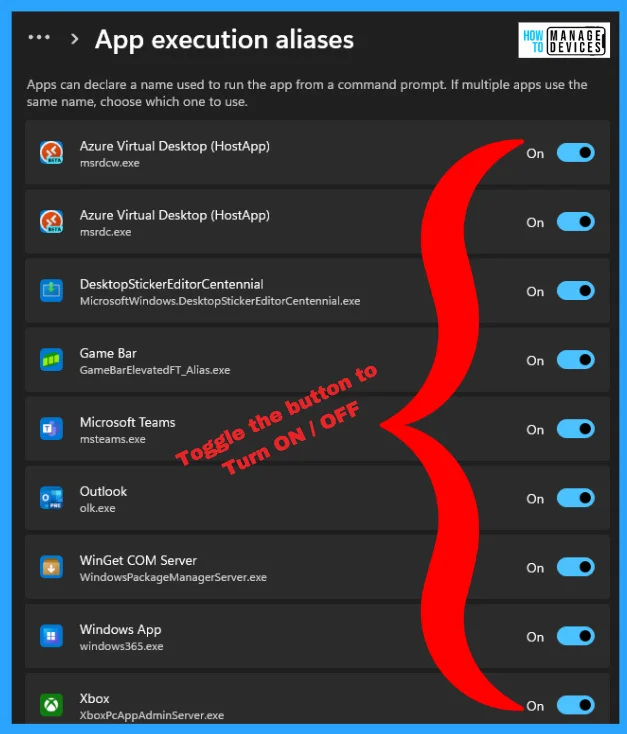
In the App Execution Aliases, apps can declare a name used to run the app from a command prompt. If multiple apps use the same name, choose which one to use. Every app contains one short name along with the .exe extension used in the command prompt to open it. You can toggle the buttons adjacent to the applications to turn the app execution aliases feature on or off.
Registry Editor
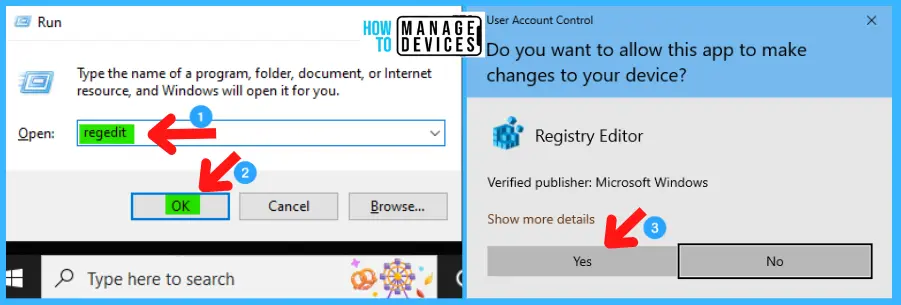
Open the Run Window and simultaneously press Windows Key + R from the keyboard. This is the keyboard shortcut to open the Run window. Now, type regedit and click on OK to continue. Then, it asks for the Admin’s permission to change the Device. Click Yes.
| Registry Editor |
|---|
| Window Key + R (To open run command) |
| Type ‘regedit‘ and press OK |
| Administrator Permission press Yes |
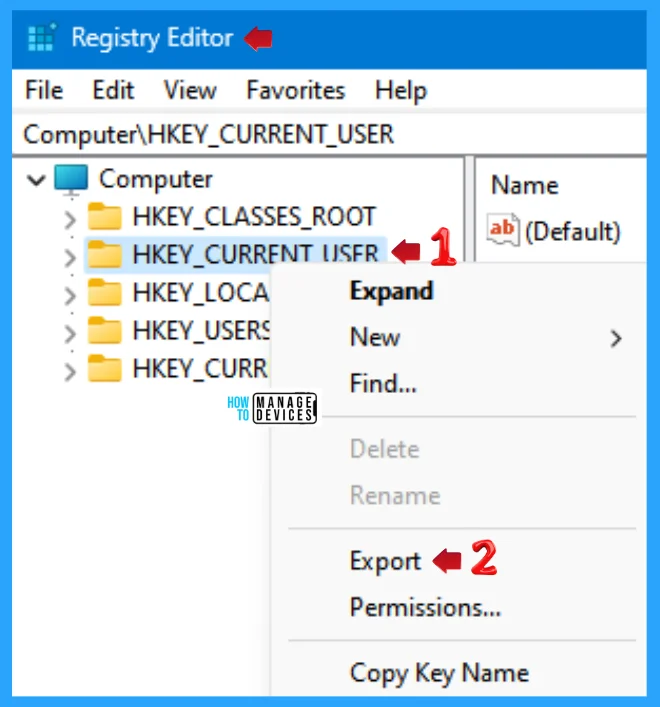
NOTE! Take Backup—If any mistake occurs in the Registry Editor, it may affect the system. It is advisable to take a backup of the Registry before proceeding. To back up, go to File in the top left corner of the Registry Editor. Click on it, then select Export and save the backup.
- Go to File.
- Right-click on HKEY_CURRENT_USER.
- Click on Export.
- Please save it.
Now, the Registry Editor opens. Find the path ‘HKEY_CURRENT_USER\Software\Microsoft\Windows\CurrentVersion/App Paths.’ Following the trail, reach the required folder for further modification.
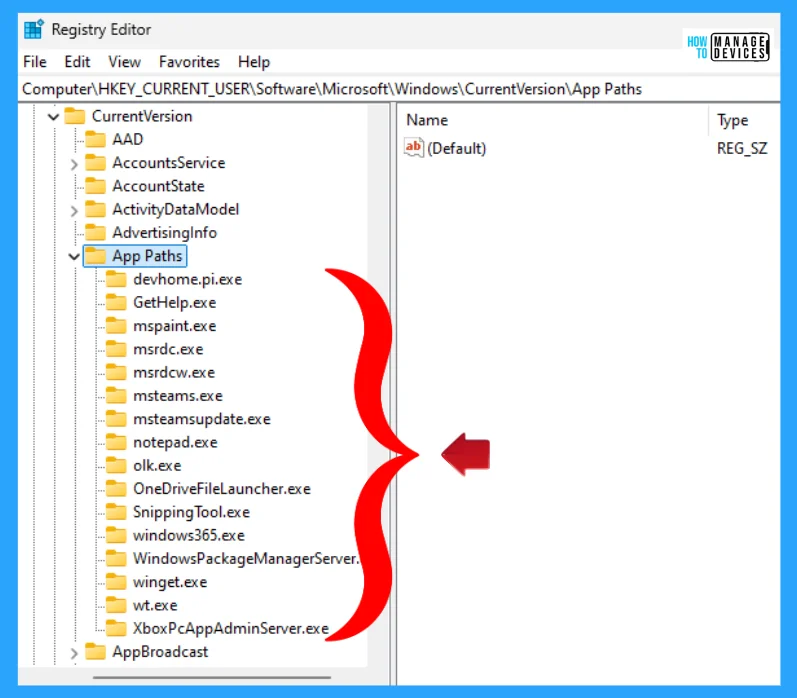
Now right-click on the App Paths in Registry Editor, click on New, select Key, and name the folder using the .exe extension, as you can see in the above image, wt.exe, winget.exe, etc.
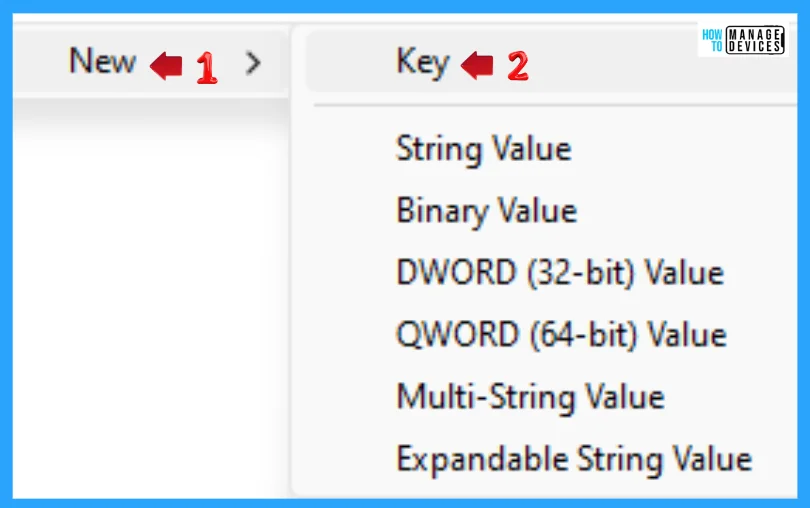
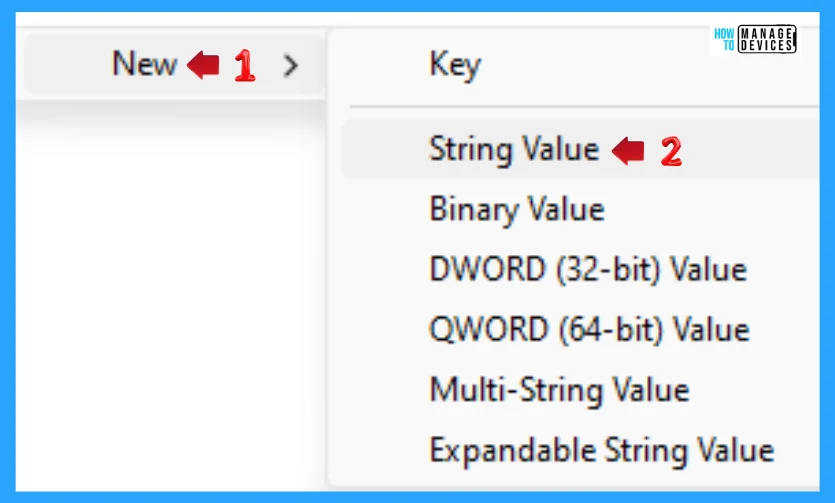
When the key is created, click on it, right-click on the blank space, click on New, and select String Value. When the new Sting Value is created, name it Paths. Double-click on paths, put your required path in the value and hit Enter.
I hope the information on How to Enable or Disable App Execution Aliases in Windows 11 is helpful. Please follow us on the HTMD Community and visit our website, HTMD Forum, if you like our content. Suggest improvements, if any, and we would love to know which topic you want us to explore next.
We are on WhatsApp. To get the latest step-by-step guides and news updates, Join our Channel. Click here – HTMD WhatsApp.
Author
Alok graduated with a Master of Computer Applications (MCA) degree. He loves writing on Windows 11 and related technologies. He likes to share his knowledge, quick tips, and tricks with Windows 11 or Windows 10 with the community.

The redirect is performed by some stub files located here userprofile\AppData\Local\Microsoft\WindowsApps
Deleting them seems to resolve the issue, but the Aliases page still shows the alias as active, FYI. From my testing, playing on/off in the aliases page with other aliases than the ones targeted does not recreate the stub files that were manually deleted.