Let’s discuss Step-by-Step Guide to Enforce Proxies for UWP Apps and Stop Data Leaks using Intune Policy. This policy defines the list of proxy servers that UWP apps must use to reach the public internet. Enterprise Proxy Server policy is only applies to Universal Windows Platform (UWP) apps.
This policy is part of the broader Windows Network Boundary settings and directly supports advanced security features like Windows Information Protection (WIP) and Microsoft Defender Application Guard (MDAG).
With Enterprise Proxy Server Policy, admins can ensure that modern apps and Windows services know exactly which trusted proxies they must use to reach the internet. This is the most crucial function for security. It prevents proxy setting overrides, ensures security inspection (SSL decryption) always happens.
This policy can be implemented for Security-Focused Enterprises like Large Corporations with Strict Network Policies, Large Corporations with Strict Network Policies and Organizations Using Advanced Security Features.
Table of Contents
Step-by-Step Guide to Enforce Proxies for UWP Apps and Stop Data Leaks using Intune Policy
Enterprise Proxy Server Policy provides many advantages for users. Users can access internal applications, cloud resources, and network drives securely without having to manually configure proxy settings. When browsing to an untrusted site, the session is automatically isolated by Application Guard, protecting the user’s device and the company network.
- How to Configure Proxy Settings in Windows 11 and Server 2022
- Intune Firewall Proxy Requirements Modern Windows 10 Windows 11 Deployment
- Intune Firewall Proxy Requirements Modern Windows 10 Windows 11 Deployment
Configure Policy from Intune Portal
Admins can enforce this policy for large number of devices in an organization. This policy allows admins to configure for complex network boundaries (IPs, domains, proxies) from a single Intune console, with explicit control over network traffic routing.
- Sign in to the Microsoft Intune Portal with Credentials
- Navigate to Devices > Configuration > + Create > New Policy
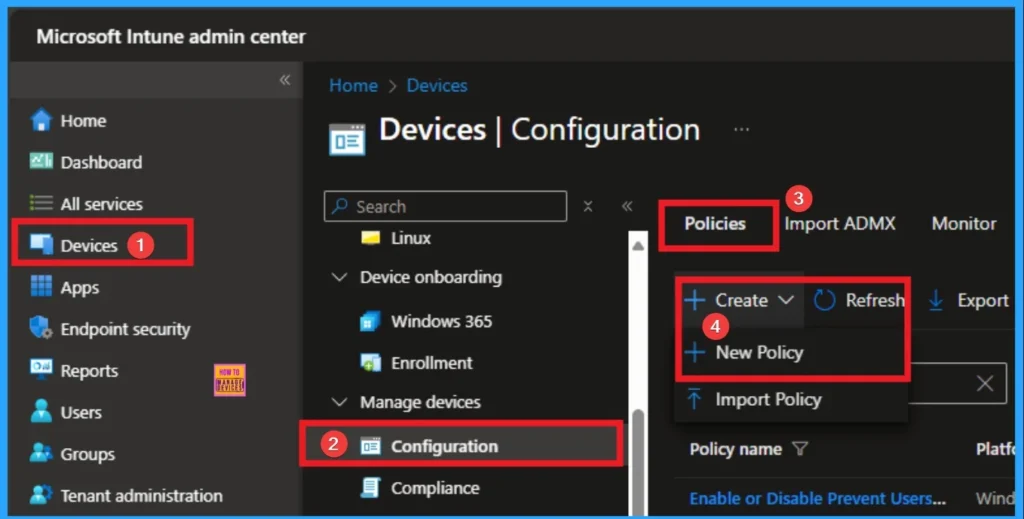
Profile Choosing Step
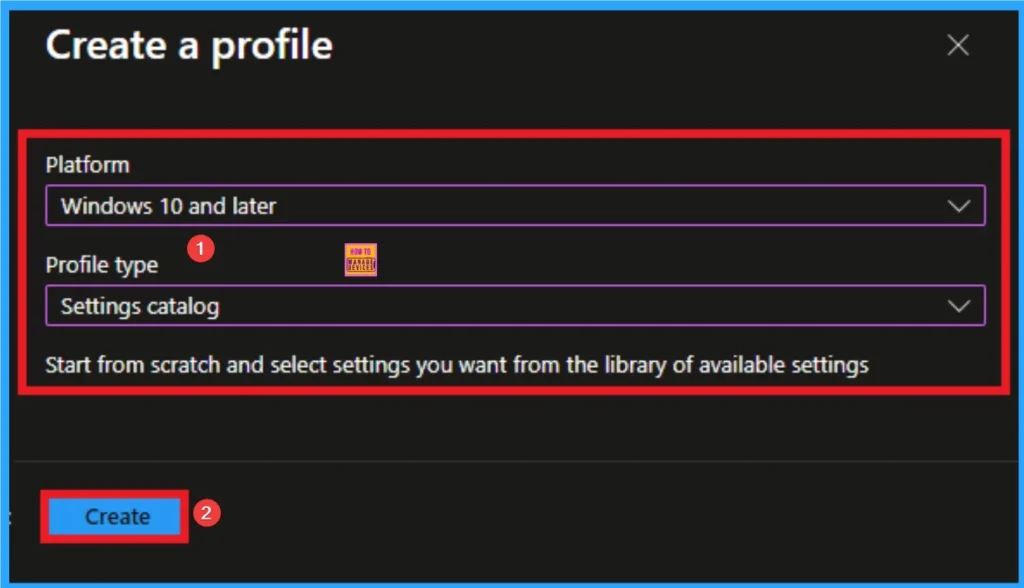
After that you can choose appropriate platform and profile type. This is necessary step for policy creation and you cannot change profile and platfrom after creating profile. Here I would like to configure the policy to Windows 10 and later platform and settings catalog profile. Then click on the Create button.
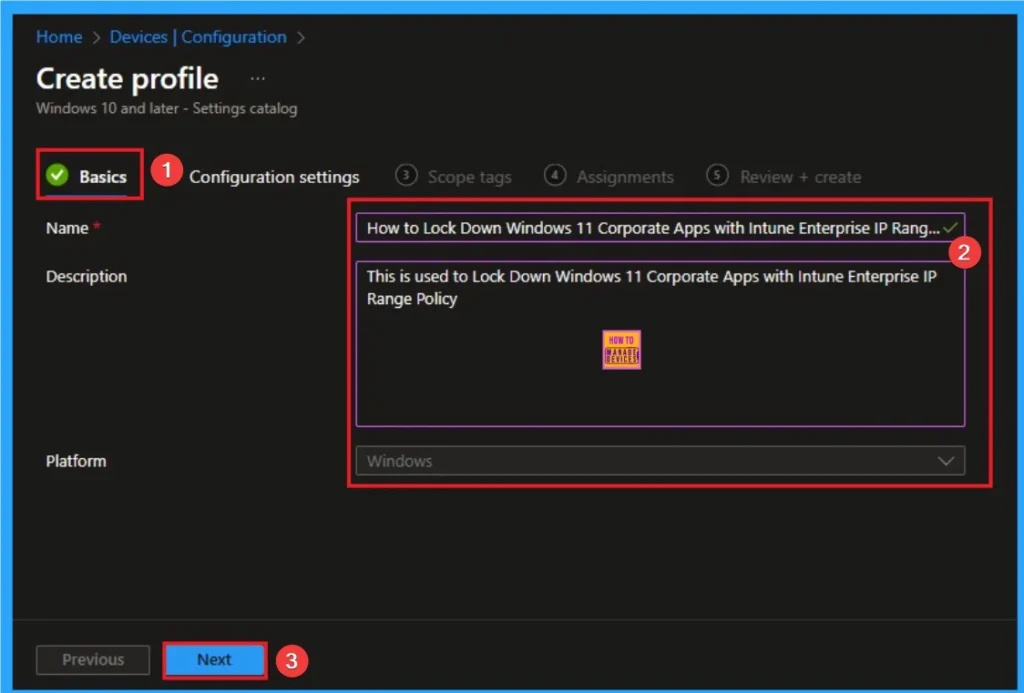
Begin Policy with Basic Tab
Basic Tab is the first tab that helps users to give identity for policy. For this you can add Name and description for the settings you want to select for policy creation. Here is Name is mandatory and description is optional. After adding this click on the Next button.
Configure Enterprise Proxy Servers Policy
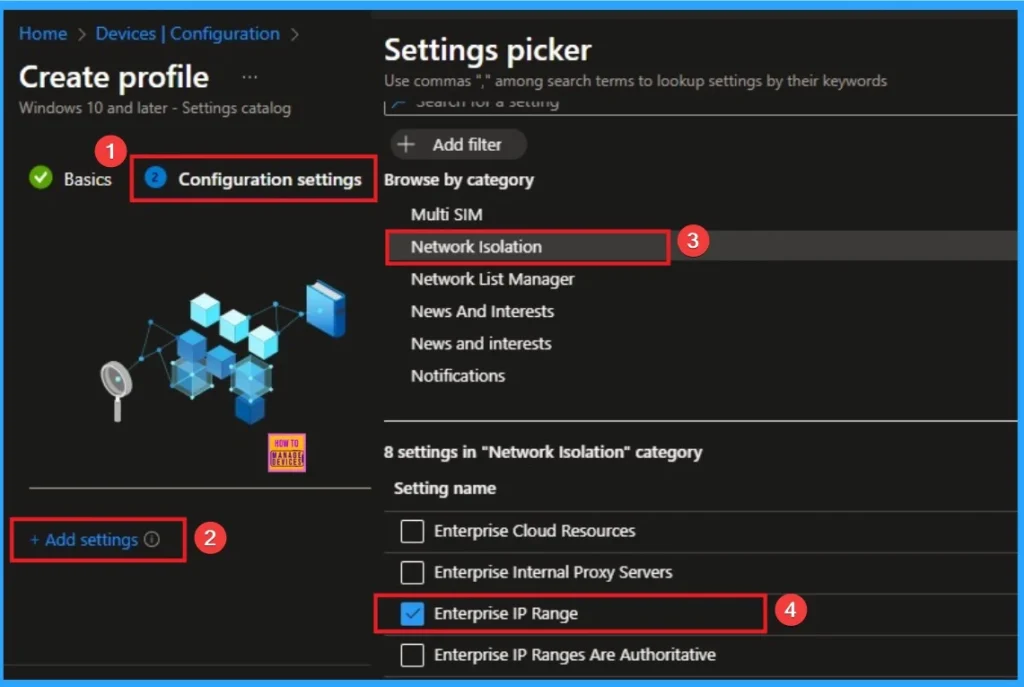
After that you will get Configuration settings tab which helps you to access specific settings. To get the settings click on the +Add settings hyperlink and select specific settings from Settings Picker. Here, I would like to select the settings by browsing by Category. I choose Network Isolation. Then, I choose Enterprise Proxy Servers Policy settings.
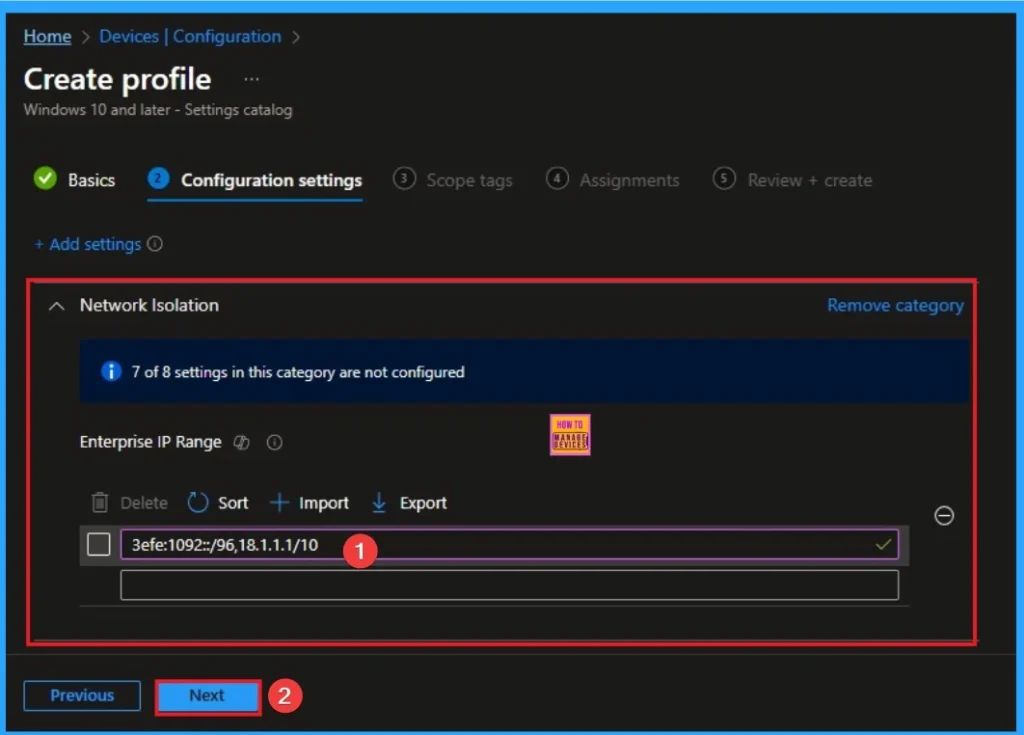
Add Value
If you enable this policy setting, apps on proxied networks can access the Internet without relying on the Private Network capability. However, in most situations Windows Network Isolation will be able to correctly discover proxies. By default, any proxies configured with this setting are merged with proxies that are auto-discovered.
To make this policy configuration the sole list of allowed proxies, enable the “Proxy definitions are authoritative” setting. If you disable or don’t configure this policy setting, apps will use the Internet proxies auto-discovered by Windows Network Isolation.
- [3efe:3022::1000];18.0.0.1;18.0.0.2
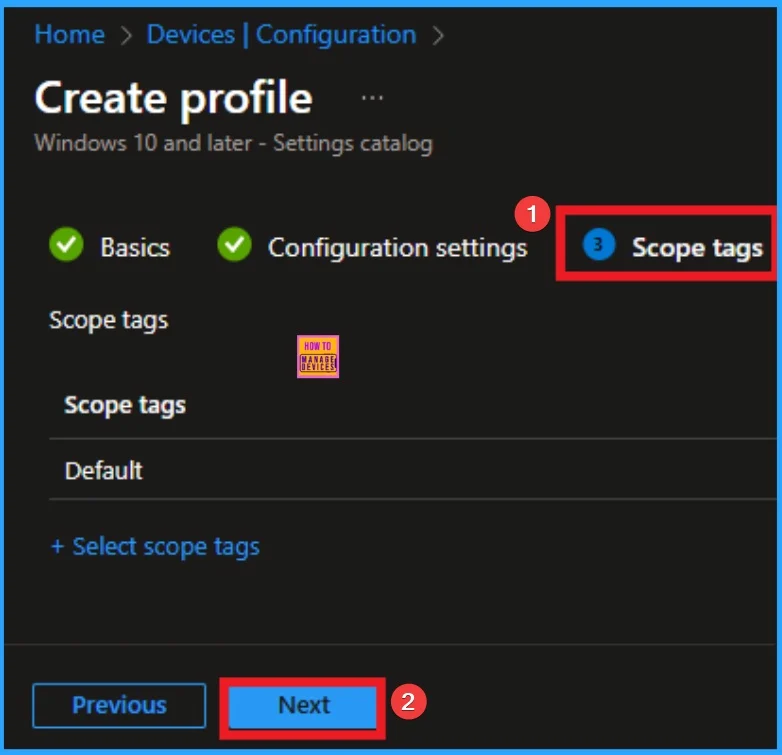
Adding Scope Tags
Scope Tag is not a mandatory step for policy creation. But you can add Scope tags for visibility restrictions. Here, I don’t add scope tags for Enterprise IP Range Policy. Click on the Next button.
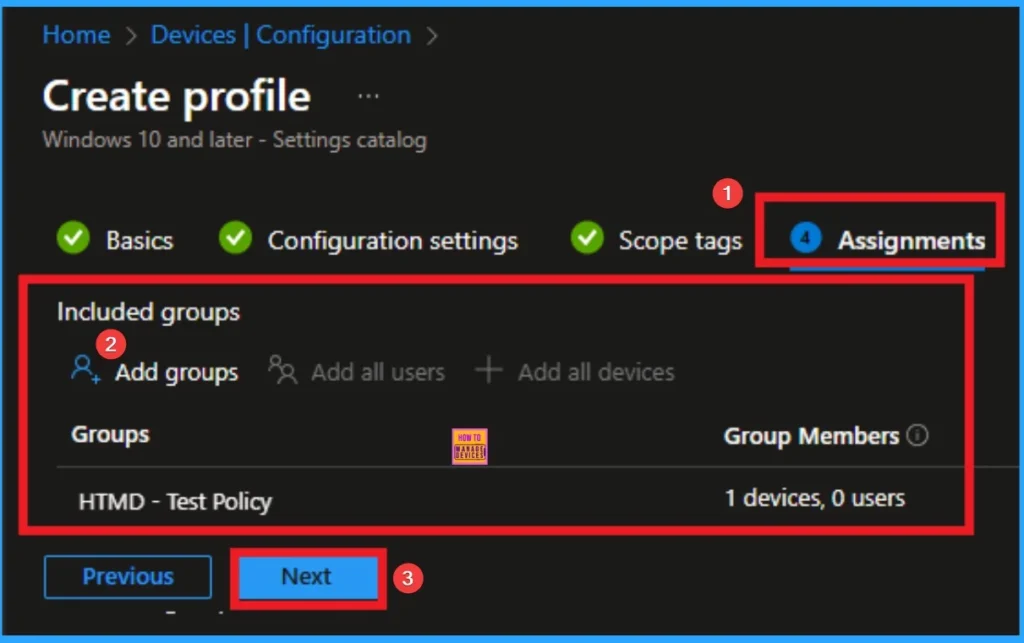
Selecting Group from the Assignment Tab
To assign the policy to specific groups, you can use the Assignment Tab. Here I click, +Add groups option under Included groups. I choose a group from the list of groups and click on the Select button. Again, I click on the Select button to continue.
Finalize Policy
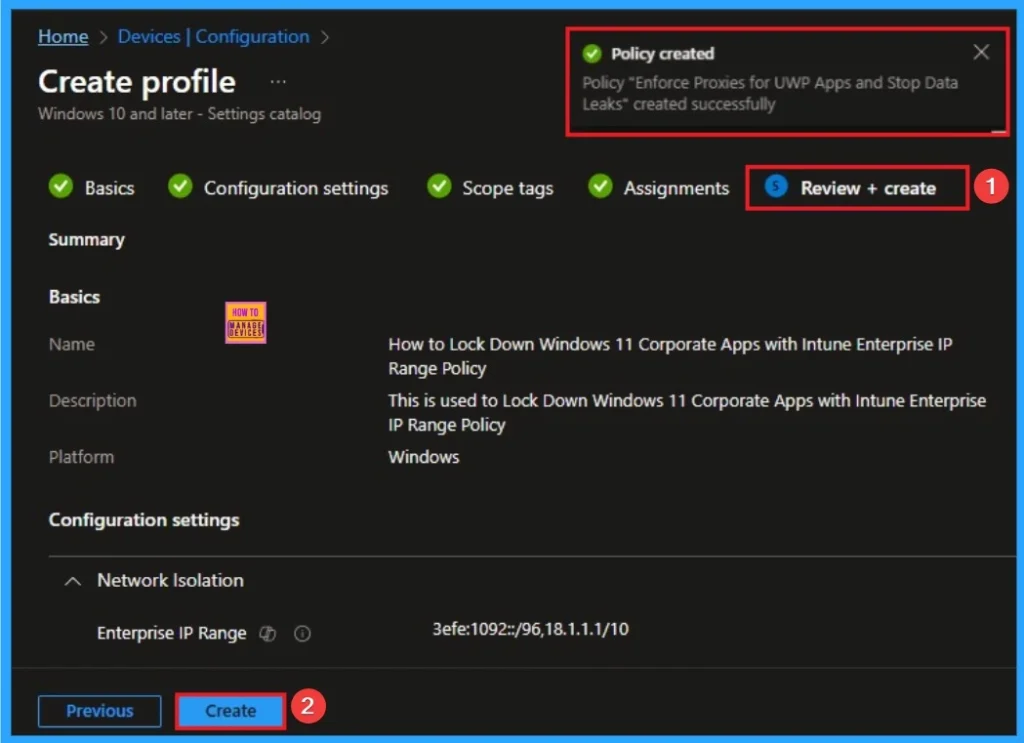
This is the Fina step for policy creation. You can review all the details on this tab and avoid misconfiguration. After verifying all the details, click on the Create Button. After creating the policy, you will get a success message.
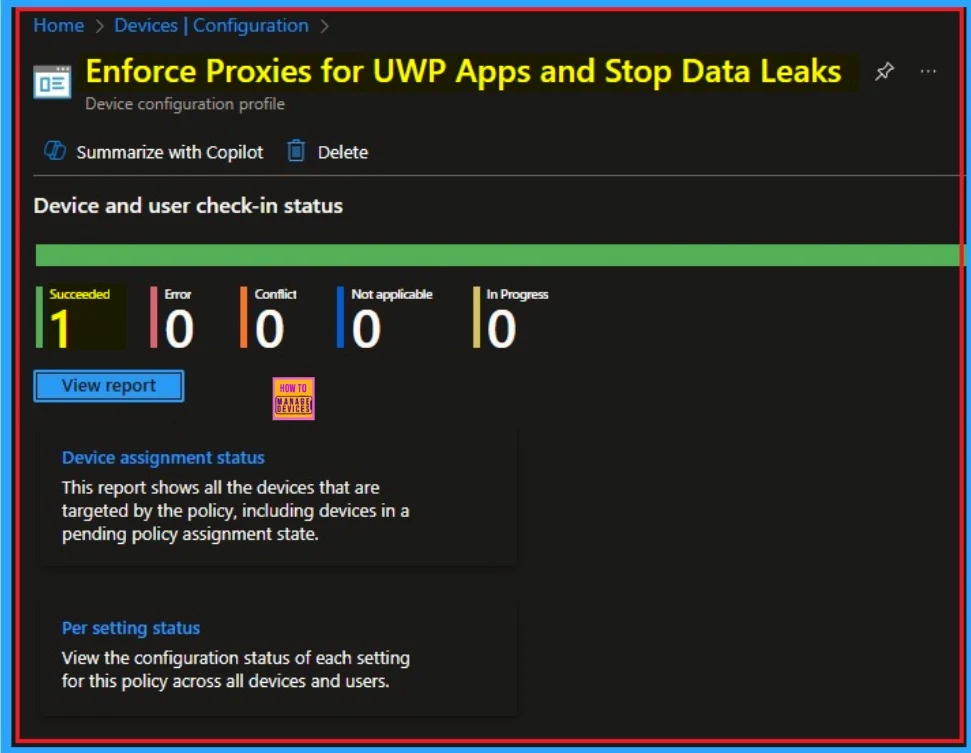
Device Check-in Status
Device Check-in Status Page shows if the Policy is succeeded or Not. Before checking this, you can sync the device on Company Portal for Faster policy deployment. Then Go to Devices > Configuration > Search for the Policy. Here, the policy shows as successful.
Client Side Verification
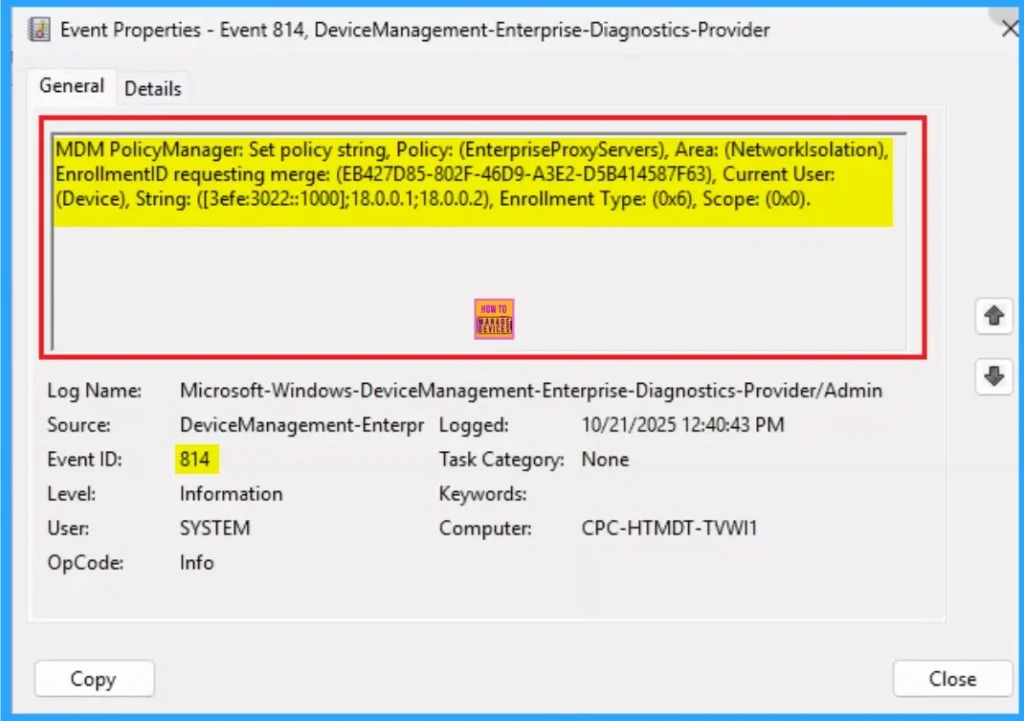
It helps you check the client side and verify the policy status. Open the Client device and open the Event Viewer. Go to Start > Event Viewer. Navigate to Logs: In the left pane, go to Application and Services Logs > Microsoft > Windows > DeviceManagement-Enterprise-Diagnostics-Provider > Admin.
MDM PolicyManager: Set policy string, Policy: (EnterpriseProxyServers), Area: (Networklsolation),
EnrollmentID requesting merge: (EB427D85-802F-46D9-A3E2-D5B414587F63), Current User:
(Device), String: ([3efe:3022 :: 1000];18.0.0.1;18.0.0.2), Enrollment Type: (0x6), Scope: (0x0).
Removing the Assigned Group from Enterprise Proxy Servers Policy Settings
If you want to remove the Assigned group from the policy, it is possible from the Intune Portal. To do this, open the Policy on Intune Portal and edit the Assignments tab and the Remove Policy.
To get more detailed information, you can refer to our previous post – Learn How to Delete or Remove App Assignment from Intune using by Step-by-Step Guide.

How to Delete Enterprise Proxy Servers Policy
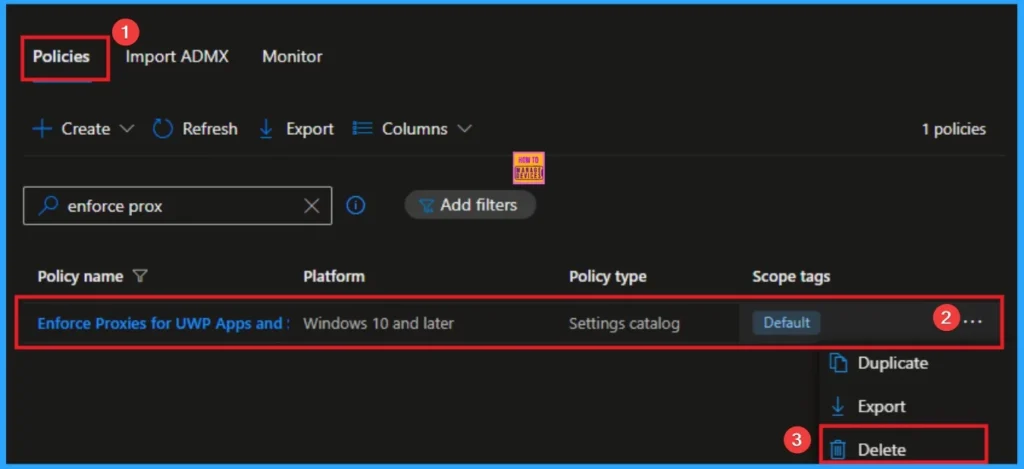
You can easily delete the Policy from the Intune Portal. From the Configuration section, you can delete the policy. It will completely remove it from the client devices.
For detailed information, you can refer to our previous post – How to Delete Allow Clipboard History Policy in Intune Step by Step Guide.
Windows CSP Details
This setting doesn’t apply to desktop apps. A semicolon-separated list of Internet proxy server IP addresses. These addresses are categorized as Internet by Windows Network Isolation and are accessible to apps that have the Internet Client or Internet Client/Server capabilities.
| Name | Value |
|---|---|
| Name | WF_NetIsolation_Domain_Proxies |
| Friendly Name | Internet proxy servers for apps |
| Element Name | Domain Proxies. |
| Location | Computer Configuration |
| Path | Network > Network Isolation |
| Registry Key Name | SOFTWARE\Policies\Microsoft\Windows\NetworkIsolation |
| ADMX File Name | NetworkIsolation.admx |

Need Further Assistance or Have Technical Questions?
Join the LinkedIn Page and Telegram group to get the step-by-step guides and news updates. Join our Meetup Page to participate in User group meetings. Also, Join the WhatsApp Community to get the latest news on Microsoft Technologies. We are there on Reddit as well.
Author
Anoop C Nair has been Microsoft MVP for 10 consecutive years from 2015 onwards. He is a Workplace Solution Architect with more than 22+ years of experience in Workplace technologies. He is a Blogger, Speaker, and Local User Group Community leader. His primary focus is on Device Management technologies like SCCM and Intune. He writes about technologies like Intune, SCCM, Windows, Cloud PC, Windows, Entra, Microsoft Security, Career, etc

