Let’s check how to add Custom Domain to office 365 and other Microsoft cloud services. You need to make sure that you and the team performing this activity are aware of all the downtime and DNS propagation delays related to this activity.
The default domain in Office 365 is .onmicrosoft.com. Most of the staging environment requires a custom domain to test all the scenarios in Microsoft 365 world. All the users in your tenant will have the default onmicrosoft.com domain name until you add your own domain.
This article helps with a step-by-step guide to add a domain in Office 365. Once your custom domain is added in Office 365, you can use the same users with your own domain name for email, Teams chat, Login to Azure AD, etc.
Read More – Remove Domain from Office 365 Best Method How-to Guide.
Add Domain to Office 365 & Microsoft Cloud Services
Let’s check the technical steps you need to go through to add a custom domain to Office 365. You need global admin access on the tenant to perform the following activities. Also, you should have access to change the DNS records for your domain.
- Launch Microsoft Admin portal https://admin.microsoft.com/Adminportal/Home#/Domains
- Click on Show All button to explore all the options.
- Navigate to Settings -> Domains.
- Click on + Add Domain button to start the process.

You will need to enter the custom domain you have already purchased from Godaddy or another domain registration authority. You will add this domain to your Microsoft online services, including Office 365.

Connect Domain Options – How do you want to connect your domain?
The following are the three default options that Microsoft provides. The third option is not recommended at all. I’ve selected the first option to add custom domain to Office 365 or Microsoft 365.
You can connect a domain to Office 365/Microsoft services so you can use email and Teams. There are a couple of options to consider, depending on how you’d like to manage domain name service (DNS) records for your domain htmd.com. You can click on the Continue button to go to the next page.
- Let Microsoft add your DNS records (recommended) – This is end to end automated process.
- Add your own DNS records.
- Skip and do this later (not recommended option).

How do you want to verify your domain?
Before setting up htmd.com, we were hoping you could sign in to your domain host and verify that you own the domain. Learn how to find your domain host. If you are already using this domain somewhere else within a different tenant, you might get the following error. You can fix this issue using the domain removal guide.
we can't add it to your account because the domain is already added to a different Microsoft 365 organization: anoopcnair.onmicrosoft.com.
- You can Select Verify button to continue.
- Microsoft will take you to DNS server (Godaddy or CloudFlare etc..) to sign in so you can give Microsoft authorization to verify your domain.

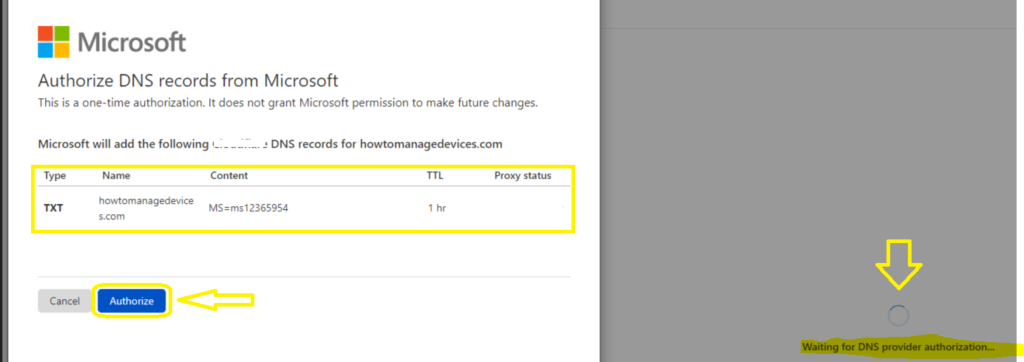
You can click on Authorize button to allow Microsoft to verify DNS records. This is a one-time authorization. It doesn’t grant Microsoft permission to make future changes. Microsoft will add the following DNS records for the domain.
| Type | Name | Content | TTL | Proxy Status |
| TXT | htmd1.com | MS=ms12365954 | 1 hr |

How to Add DNS Record to Domain
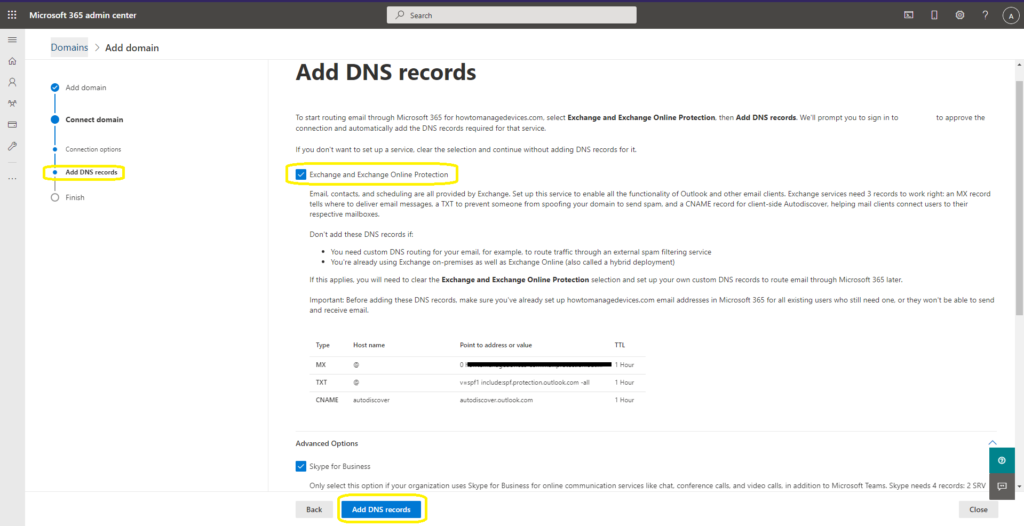
To start routing email through Microsoft 365 for htmd1.com, select Exchange and Exchange Online Protection, then Add DNS records. Microsoft will prompt you to sign in to the DNS hosting provider service to approve the connection and automatically add the DNS records required for that service. The Exchange and Exchange Online Protection details are given below.
- Email, contacts, and scheduling are all provided by Exchange.
- Set up this service to enable all the functionality of Outlook and other email clients.
- Exchange services need 3 records to work right:
- An MX record tells where to deliver email messages,
- a TXT to prevent someone from spoofing your domain to send spam,
- and a CNAME record for client-side Autodiscover, helping mail clients connect users to their respective mailboxes.
NOTE! Before adding these DNS records, make sure you’ve already set up HTMD.com email addresses in Microsoft 365 for all existing users who still need one, or they won’t be able to send and receive email.
| Type | Host Name | Point to address or value | TTL |
| MX | @ | 0 htmd-com.mail.protection.outlook.com | 1 Hour |
| TXT | @ | v=spf1 include:spf.protection.outlook.com -all | 1 Hour |
| CNAME | Autodiscover | autodiscover.outlook.com | 1 Hour |
You will need to select all the Microsoft services you will use in this scenario. I have chosen all the options available. Click on Add DNS Records button to continue the process.

How to Authorize DNS records from Microsoft
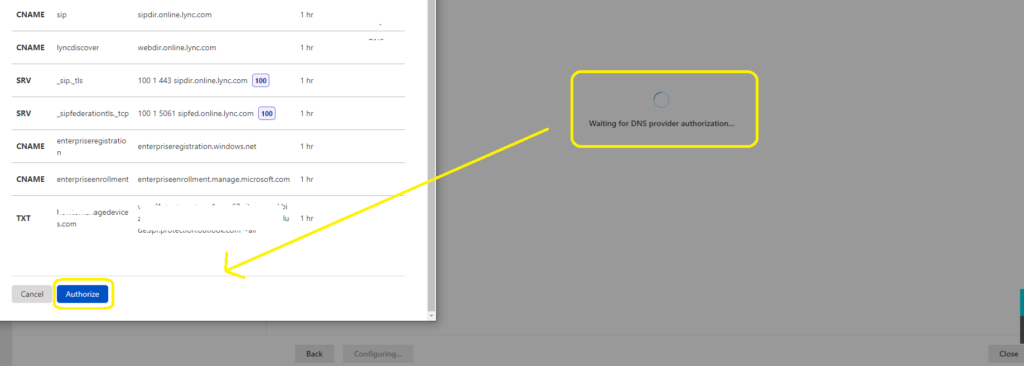
In this step, you will need to authorize DNS record changes discussed in the above section with the DNS provider’s service. This is a one-time authorization. It does not grant Microsoft permission to make future changes. Microsoft will add the following DNS records for htmd.com.
- You can click on Authorize button to complete the DNS changes for the domain.

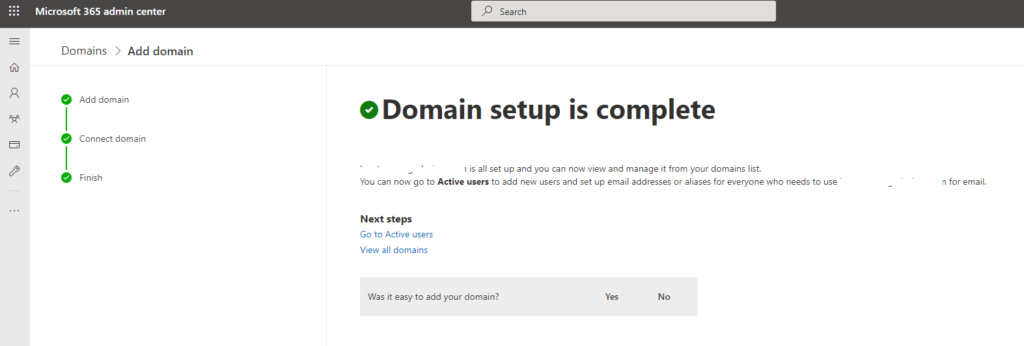
Confirmation – Domain setup is complete
From this page, you will come to know whether your domain htmd.com is all set up and whether you can now view and manage it from your domains list or not.
You can now go to Active users to add new users and set up email addresses or aliases for everyone who needs to use htmd.com for email.


Hi guys,
Does Microsoft DNS support the DNSSEC option? I didn’t find any option yet.
Best regards,
Florian