Let’s learn about How to Create Rules in Outlook 365. In Microsoft Outlook, there is a provision to create some rules to organize the emails as per the requirement of the particular user. Like other emails, do not make your Outlook inbox unorganized.
With the help of Outlook, you can create a rule for the Inbox to make it organized. When organizing the Microsoft Outlook email & calendar will provide you with proper categorization of the emails you receive and make easy access to the required emails.
Use the inbox rules to automatically perform specific actions on the email that arrives in your Outlook inbox. Create rules that change the importance level of messages as they come in. They can automatically move to other folders or arrange some specific action points that delete some emails based on certain criteria.
To be an effective communicator, first, you need to be an effective organizer; this is applicable in the Outlook folders. One disorganized Inbox inhibits your ability to communicate and collaborate. This article will discuss creating rules for messages and organizing the Inbox.
- Now Use Mobile Outlook App as MFA Authenticator App
- First Windows 11 Controlled Feature Rollout Coming Soon
What are Outlook Rules?
Some actions that you would do manually in Outlook. To automate those actions are called Outlook Rules. Rules are actions if a message fulfills the criteria defined earlier. When you receive a lot of mail from different organizations, then you could automate the sorting process by creating a rule to send them to their desired folders automatically.
How to Create Rules in Outlook 365
Use Inbox rules to perform specific actions on the email in your Inbox automatically. Rules are applied to incoming messages and can be created from any folder. Rules only run on your Inbox. They do not run on other folders.
You can create rules that tell Outlook how to handle incoming email messages. You choose the conditions that trigger a rule and the actions the rule will take. Rules will run in the order as listed, starting with the rule at the top to bottom.
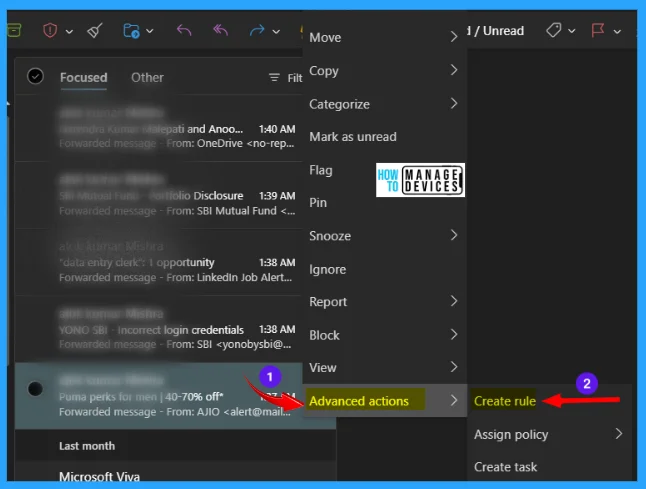
- Right-click a message in your message list for which you want to create a rule.
- Select Advanced Actions
- Select Create rule
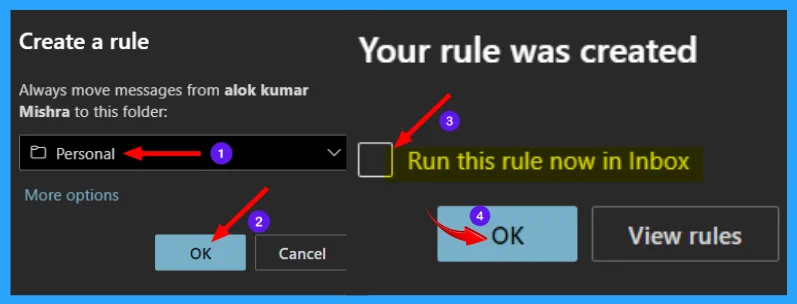
After that, you can choose the folder by clicking on ‘Search for a folder,’ where you want all messages from that sender or set of senders to be moved, and then select OK, or you can create one folder as per your choice to move the messages from that sender or set of senders.
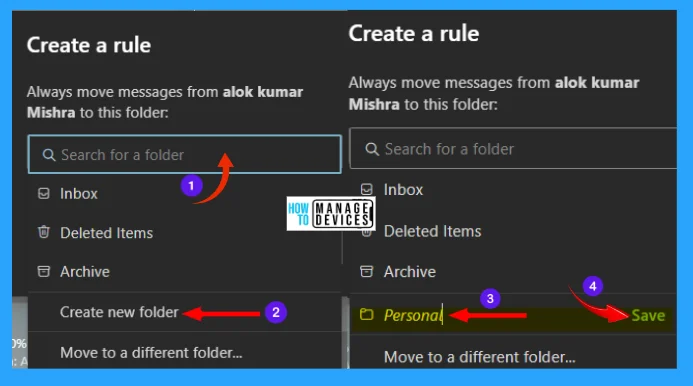
After creating the folder, select OK. The rule will be applied to all incoming messages. If you’d like to run the rule on your Inbox immediately, select the check box for Run this rule now in Inbox and select OK.
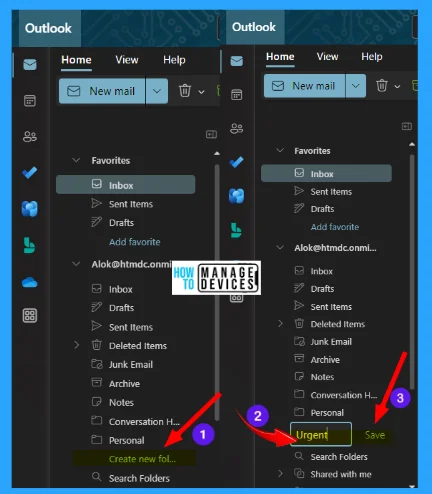
The above process describes creating a folder for the rule, but you can also create a folder directly. In the left panel, there is an option as ‘Create New Folder’; select it to create a folder and save it, and then apply the rule and choose the created folder.
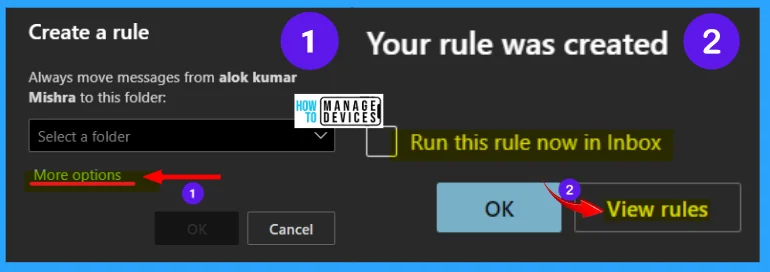
Select More options if you would like to do more than move the message from a specific sender or set of senders to a folder. The rules settings menu will open, or when you create a rule successfully, then in the options, click on View rules to move to the rules settings menu.
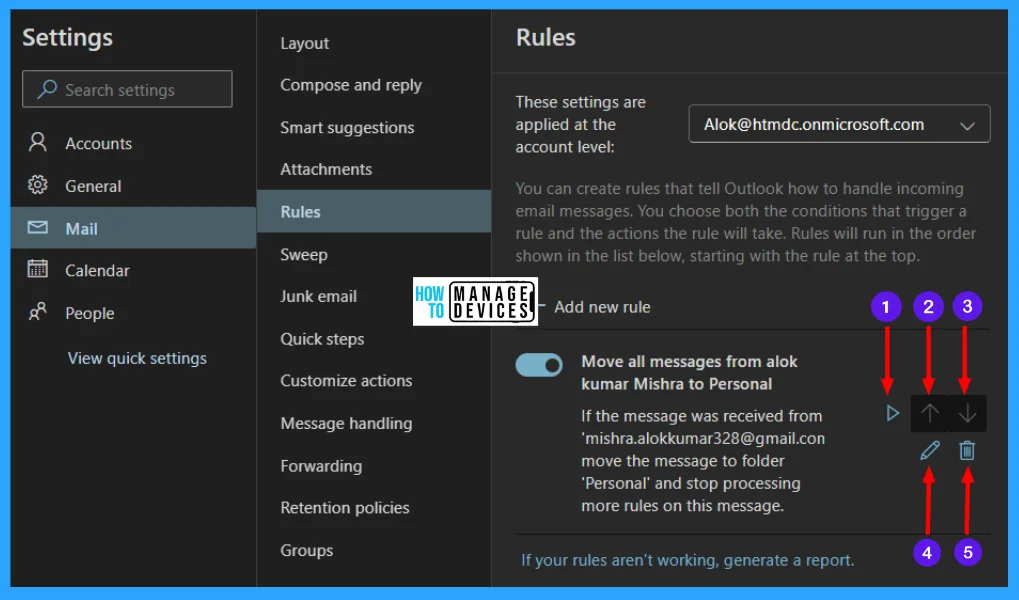
When you open the setting menu, the More options or View rules take you to the Rules settings menu. In the image table, the details are illustrated.
| Rules Settings Options | Used to |
|---|---|
| Play button | Run rule now |
| Upper arrow symbol | Move rule up |
| Lower arrow symbol | Move rule down |
| Pen/pencil symbol | Edit rule |
| Trashbin symbol | Delete rule |
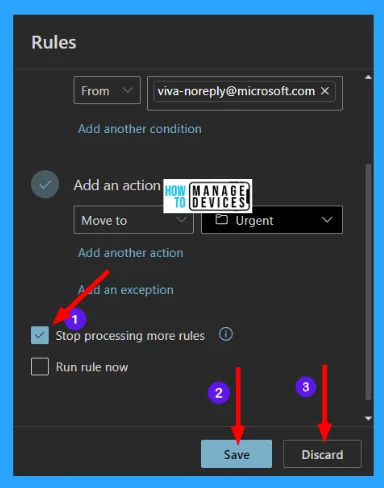
If you do not want any more rules to run after this one does, click on the edit rule and select the Stop processing more rules check box. Press Save to create your rule or Discard to cancel rule creation.
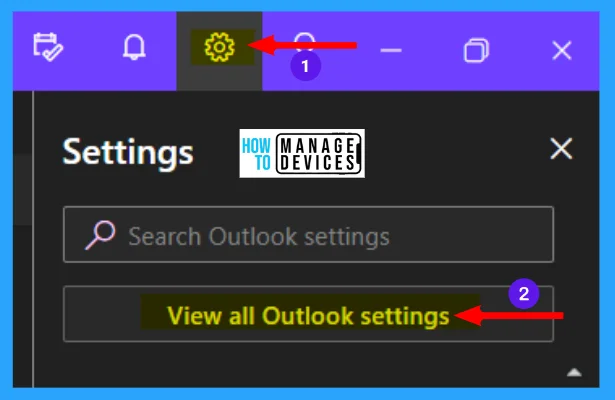
To create a completely new rule, select the settings shown as a Gear Symbol at the top of the page and click on it. After that, the settings extension opens. Now click on View all Outlook settings, as shown in the image below.
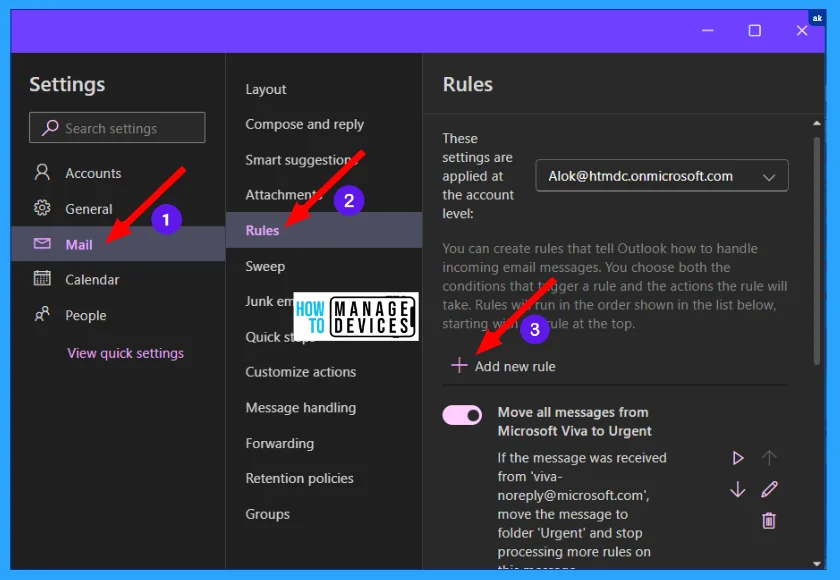
The Accounts option is opened by default when the all outlook settings window opens. Now click on the Mail option at the left panel, as shown in the figure, then click on Rules. Now the Rules window opens, where you can create, edit, delete, organize, etc. of rules.
Edit Outlook 365 Inbox Rules
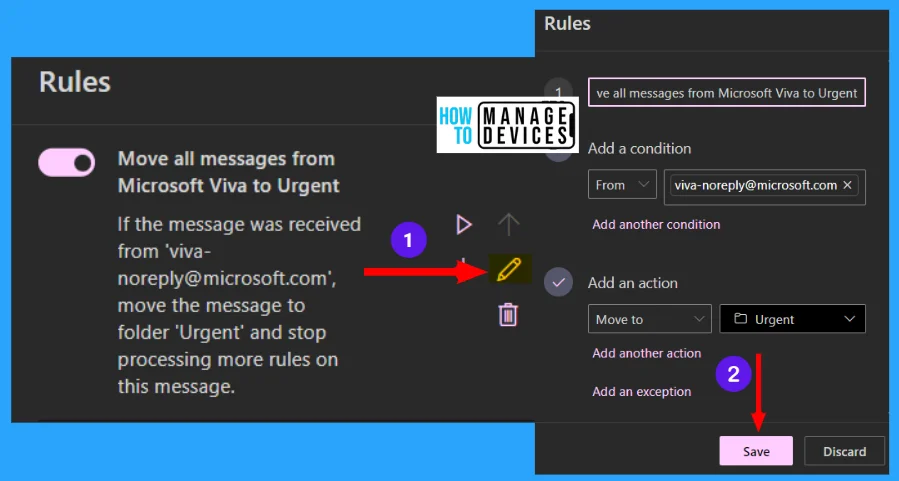
The edit option works on only the existing rule. Click on the pencil symbol to edit the rule below in the image. Then provide a name for your rule. Add a condition to your rule; you can add more than one condition if required.
Then the next step is to add an action for your rule and how it behaves to the email. You can add more than one action to the rule if needed. You can also add an exception to your rule to more accurately what you want to do by organizing the message.
Every rule needs at least three things – A name, a condition, and an action. Rules can also contain exceptions to conditions. You can add multiple conditions, actions, and exceptions at each step by choosing Add a condition, Add an action, and Add an exception, as shown in the figures below.
Delete Outlook 365 Inbox Rules
If you have many rules set in your mail and there is no need for some rules, then you can delete the rule. To delete the rule, follow the process shown in Fig. 9 & Fig.10 to open the existing rules from where you can select and delete any rule.
After reaching the rules, select the rule which you want to delete. Then click the trash symbol shown near your rule on the right side of the existing one, and click to delete. Delete rule message will appear ‘Are you sure you want to delete this rule‘ Click ok to delete the existing rules.

An additional tip for Outlook users, If you want to turn the rule off for a while, select the toggle key next to the rule, and the rule will be deactivated untill further activation.
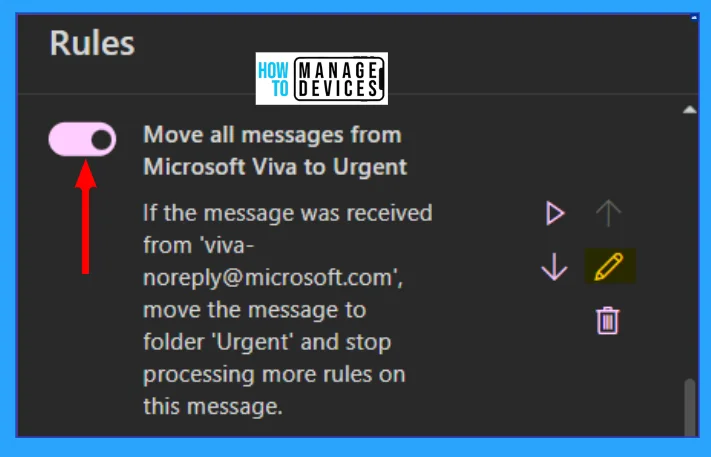
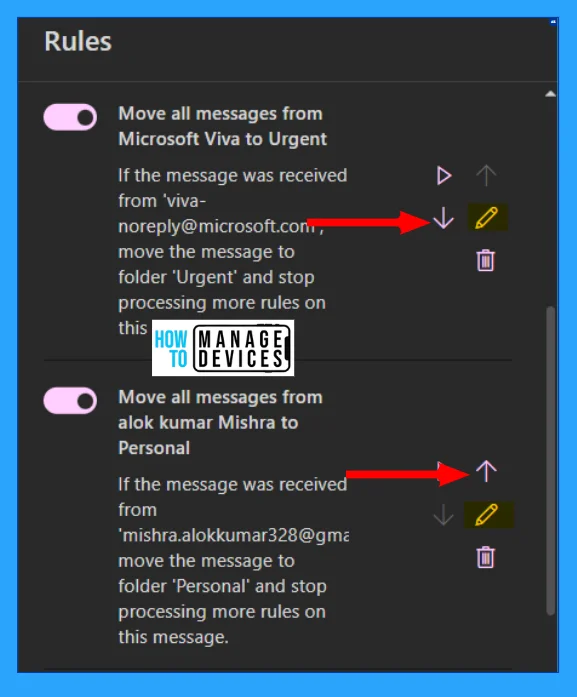
Organising Rules for Outlook 365 Inbox Rules
Outlook 365 Inbox rules are applied to incoming messages based on their order within the Inbox rules list. You can arrange the order in which the rules you create are applied to messages in your Inbox. The arrows for up & down help you to set it in order as per your choice.
Run Outlook 365 Inbox Rules
By default, an inbox rule runs on incoming messages after you have created the rule. To run a rule on existing messages. On the other hand, you can run the rule by selecting the play button, as shown in the figure below, to run the rule now.
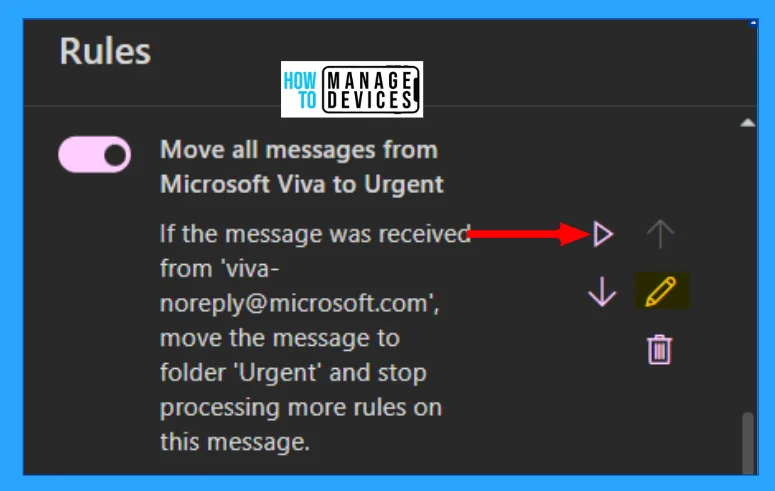
NOTE! In this situation, you can only run rules in which a message from a sender is moved to a folder. You can’t run other rules, such as those that use a message title or mark a message as unread.
I hope the How to Create Rules in Outlook 365 information is helpful. Please follow us on HTMD Community and visit our website HTMD Forum if you like our content. Suggest improvements, if any, and we love to know which topic you want us to explore next.
Author
Alok is a Master of Computer Applications (MCA) graduate. He loves writing on Windows 11 and related technologies. He likes to share his knowledge, quick tips, and tricks with Windows 11 or Windows 10 with the community.
