In this post, you will get an overview of the Quick Assist user guide. Quick Assist is the free remote support tool for Windows 10 and Windows 11. You can use Quick Assist to get remote support or remote assistance to resolve technical issues with Windows 11 devices.
Microsoft added Quick Assist application into Microsoft Store. You can install Quick Assist from Microsoft Store. There are other methods to install Quick Assist on Windows 11 PCs as well. All the Windows 10 and Windows 11 devices come with the Quick Assist application.
The system administrator (or helper) can authenticate when they sign in using a Microsoft Account (MSA) or Azure AD account. The GitHub personal account is also an option to sign in. Local AD account authentication is not supported at this time with Quick Assist.
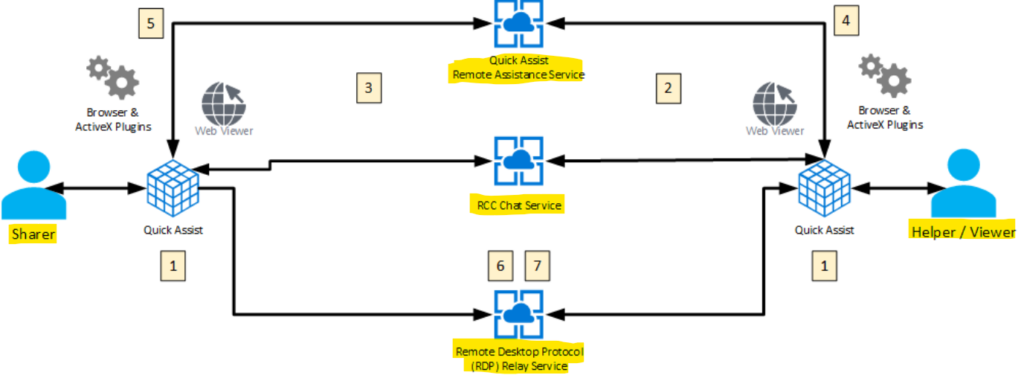
The high-level architecture diagram (connection flow) of Quick Assist client and cloud service components is illustrated in Microsoft’s schema below. The same architecture is used for Intune remote help support scenario.
How to Download & Install Quick Assist from Microsoft Store
Let’s see how to Download and Install Quick Assist from the Microsoft Store in this section of the post. You have to log in with your personal Microsoft account (hotmail.com or outlook.com) to the Microsoft store to download this application.
- Click on the Start Menu from Windows 11 PC.
- From the start menu, click on Microsoft Store.

Once the Microsoft Store is opened, you can search for the Quick Assist application using the following steps.
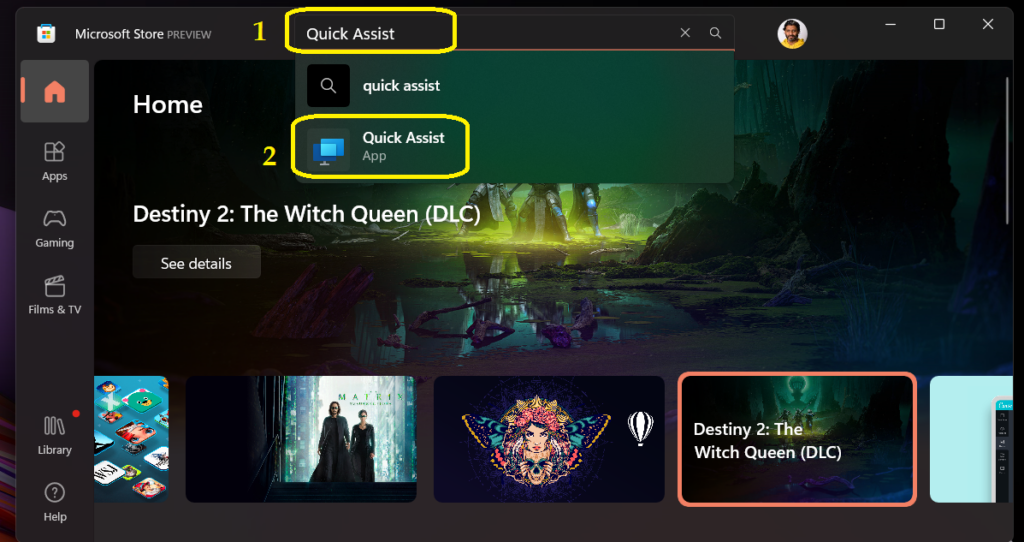
- Enter the Quick Assist into the Search box on Microsoft Store.
- From the list available applications, select Quick Assist application as shown in the below screenshot.
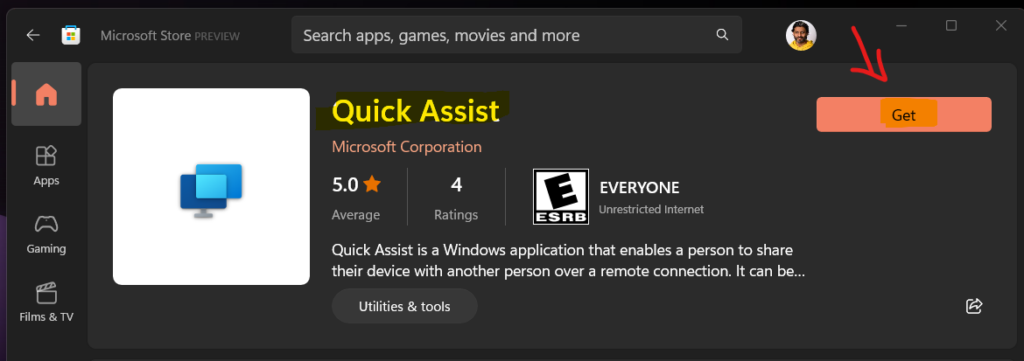
Now you got the Quick Assist application in Microsoft Store; you can install this app on Windows 11 PC. Let’s follow the steps explained below to install the Quick Assist application.
- Click on the Get button to start the installation of the Quick Assist application.
I have received an error while installing the Quick Assist application from Microsoft Store. The error was “Something Happened on Our End – Try again Later.”
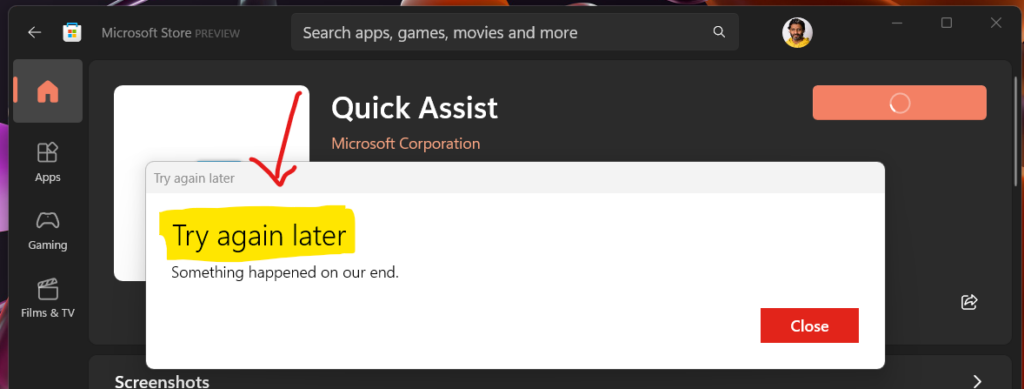
Somehow, the Get button on the Microsoft Store is changed to the Install button for the Quick Assist application. Click on the Install button to continue.

The Quick Assist application is getting Downloaded and Installed on Windows 11 PC. Let’s wait for the installation to be complete.

The Quick Assist application is ready to use. You can click on the Open button to launch the application. Otherwise, you can Start Menu – All Applications and select Quick Assist shortcut from there.
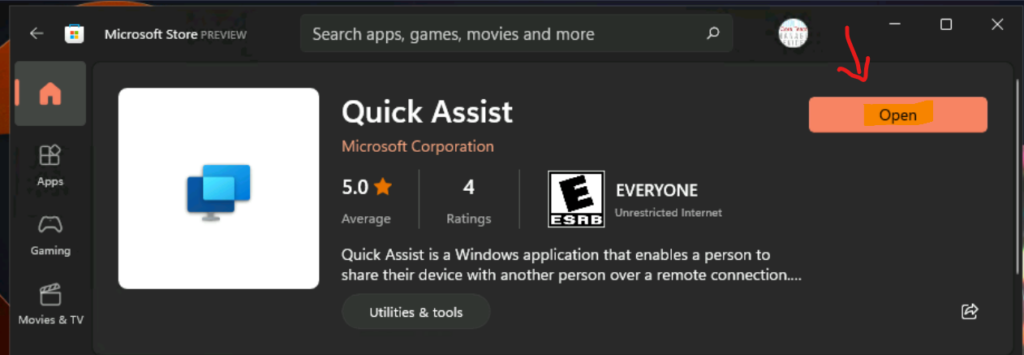
Quick Assist Application | Free Remote Support Tool for Windows
Learn how to Use Quick Assist Application free remote support tool for Windows. As mentioned above, Quick Assist helps two people to share a computer over a remote connection and resolve technical issues or problems on another person’s computer.
You will get two options when you launch Quick Assist from Start Menu. Those options are Get Assistance (end-user) and GIve Assistance (IT admin or System Administrator).
Quick Assist Get Assistance (end-user) means allowing someone you trust to assist you by taking control of your computer. You have to enter the 6-digit security code that was provided to you by the person who is taking the remote control of your Windows 11 computer.
Quick Assist Give Assistance (IT Admin or System Administrator) options give us an opportunity to help a person by taking their computer’s remote control to solve the problem.

How to Take Remote Control using Quick Assist
Let’s check how to Take Remote Control using Quick Assist Give Assistance Option. Launch the Quick Assist application using Start Menu – Search option. Launch Quick Assist as shown in the below screenshot.

Let’s start taking the remote control of another person’s computer using Quick Assist. Click on Assist Another Person button from the Give Assistance section of this app.

You need to sign in with a Microsoft account (hotmail.com or outlook.com). If you don’t have a Microsoft account, there is an option (link called Create One) below to create a new Microsoft account.
There are other options to sign in to Quick Assist using your work or school account and GitHub account. Click on the Next button to complete the sign-in process.

Now, depending on your Microsoft account setup, you might need to enter the password. If you have enabled password-less authentication like me, you will get the following screen to authenticate using the Microsoft Authenticator app.
NOTE! – Click on YES when the Stay Signed in page pops up.

Now, the Quick Assist app will connect back to the cloud service and populate the secure code for you. The person you are helping needs a security code to let you connect to their device.
Security Code: 043917
Code Expires in 10:05
NOTE! – There are other options in the below screen such as Copy to clipboard, Provide instructions, and Cancel and start over.

Quick Assist User Guide – Free Remote Support Tool for Windows
Quick Assist User Guide provides the details on launching a remote support app and sharing the screen with the system Administrator.
You need to give the security code to the person you’re helping and tell them to follow these steps. Open the Start menu go to Windows Accessories – Quick Assist, or type Quick Assist in the search bar and select the Quick Assist app to launch it.

- Accept the privacy policy, if prompted.
- Enter the Security code provided by remote support adminstrator.
- Click Share screen.
Verify that the person trying to help you (system administrator) is who you expected and accept the request.

The following screenshot shows the End-User experience while waiting for System Administrator’s instructions to take control.

The System Admin should select either of the options to continue with Quick Assist support.
- Take Full Control – Take Full Control of the Remote Computer.
- View Screen – View the remote screen without having full control.

Now, the system administrator is waiting for the end-user to share the screen.

We need your permission to continue the screen as shown below will be presented to the end-user. It normally takes a few seconds before it gets connected to System Administrator after clicking on Allow button.
- Click on Allow button to continue with screen share.
NOTE! – Anoop C N. will be able to see your files and control your computer. Please shutdown any non-essential applications and remove any private data you do not want them to see before clicking Allow.

System Administrator Experience with Quick Assist
Let’s check the System Administrator Experience with Quick Assist free remote assistance tool for Windows 11 on the following screen. All menu options are explained in detail.
NOTE! – It’s useful to see the information that the user mode as Administrator.
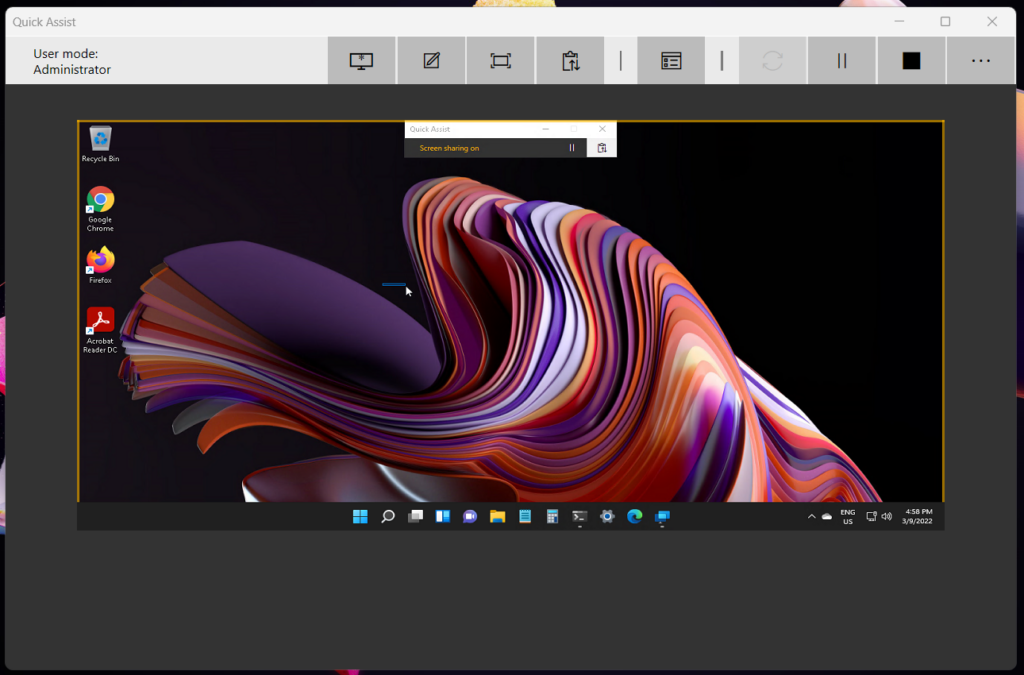
Select Different Monitors Option with Quick Assist
Let’s see how to select different monitors if the end-user has multiple monitors. The Quick Assist app has a Select Monitor ribbon menu option.

You can select any of the following options from Quick Assist to select any monitors from the list effectively.
- Monitor 0
- Monitor 1
- Monitor 2
- All Monitors.

Annotate options with Quick Assist
Annotation options on Quick Assist are illustrated in the below screenshot. The following screen is from the admin side, where the system admin is helping the remote users with screen annotations to navigate through and resolve the issues.
You can select the Annotate option from the Quick Assist menu, as shown below.

Remote System Administrator’s Quick Assist application view (Annotations).
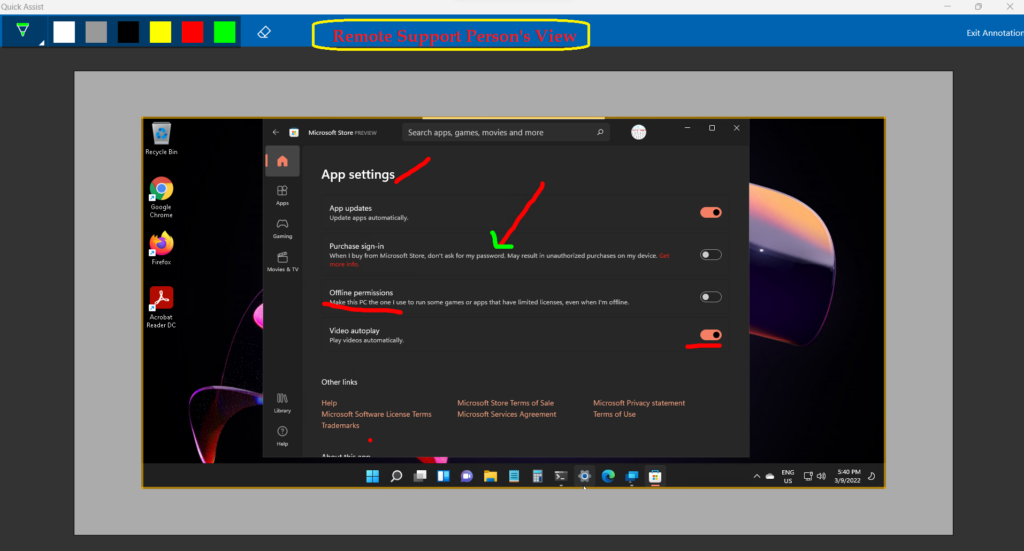
The following screenshot gives you an understanding of the end-user view when the system admin is helping them to solve the issue via Quick Assist Annotations.
- End-users view when the System Administrator is helping remotely.
Toggle Instruction to End Users using Quick Assist
Quick Assist also gives an option to Toggle Instruction to End Users. This is nothing but quick messages or some commands that System Admin wants the end-user to execute. Click on the fourth option (as shown below) from the menu item called Toggle Instruction Channel.

Enter the message or instruction you want to send to the end-user and Click on the Send button.

The end-user experience is shown below, where the person gets an option to COPY the instruction and send a reply back with the results if required.

Launch Task Manager from Quick Assist Menu
Using the Quick Assist toggle menu, you can launch the Task Manager on the remote computer (Windows 10 or Windows 11). To get the details of each menu item on Quick Assist, you need to click on 3 dots (horizontal).
Additional options are available within the same menu, as you can see below.
- Reconnect to Remote computer.
- Pause or Resume the remote control.
- Disconnect the remote control.

Anoop C N. will be able to see your files and control your computer. Please shut down any non-essential applications and remove any private data you do not want them to see before clicking Allow.
Troubleshoot Repair Reset to Fix Quick Assist Issues
Let’s understand Troubleshoot Repair Reset options to Fix Quick Assist Issues. Quick Assist is one of the Inbox applications that comes with Windows 10 and Windows 11 operating systems as an out of box experience.
You can repair or reset the Quick Assist app from the Settings menu. You can follow the steps mentioned below to complete the repair or reset.
- Click on Start Menu – Click on All Apps option.
- Scroll Down until you see Quick Assist application.
- Right-Click on the Quick Assist and Select App Settings.

From the app settings page for Quick Assist, you can perform various troubleshooting activities. I normally recommend performing troubleshooting in the following order.
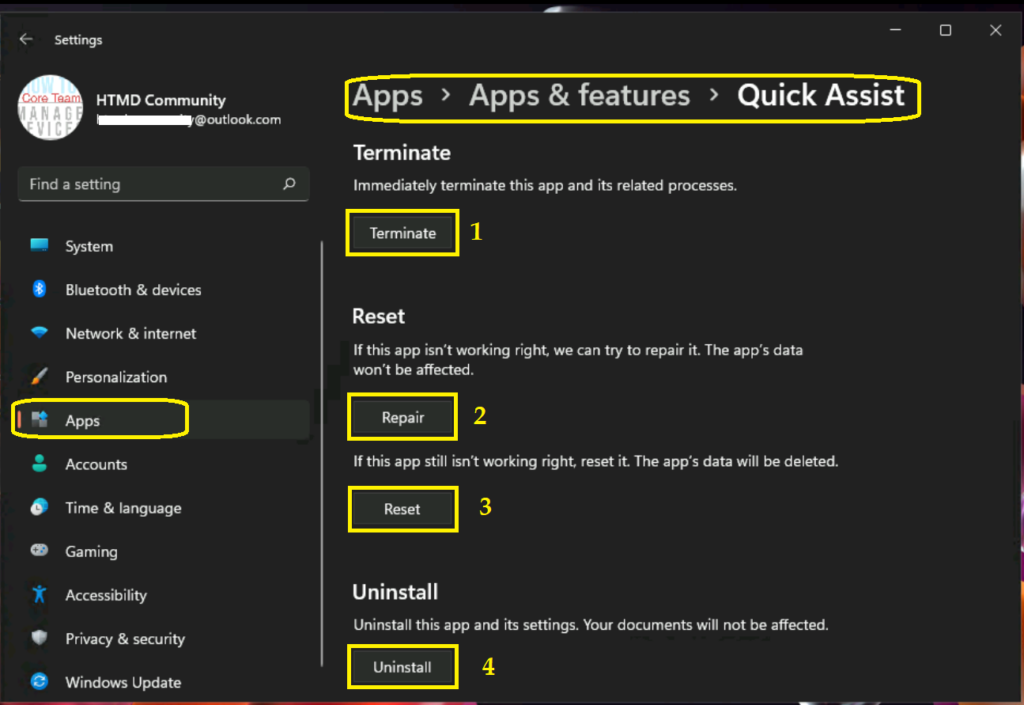
- Terminate Quick Assist App – This immediately terminates this app and it’s related processes.
- Repair Quick Assist App – If this app is not working as expected, you can try to Repair it. The Quick Assist app data won’t get removed.
- Reset Quick Assist App – If this app is still not working even after Repair, you can reset the app using this option. All the app data will be deleted.
- Uninstall Quick Assist – Uninstall or Remove the app and it’s settings. You can reinstall app from Microsoft Store.
