Let’s discuss how to Remove User Access to Scan Download and Install from Windows Update Policy using Intune. This setting helps administrators control whether users can manually check for Windows Updates. By enabling it, you effectively remove the ability for users to initiate a scan for updates, preventing them from seeing available updates or starting the update process themselves.
This can be useful in managed environments where updates are controlled centrally to ensure consistency, compliance, and minimal disruption to workflows. When this setting is enabled, the user’s access to the Windows Update scan, download, and installation functions is fully blocked.
The user cannot search for updates, download them manually, or install them outside the schedule defined by the IT administrator. All update activities are handled automatically according to your organization’s policies.
In this post, you will find complete details on how to remove user access to scan, download, and install updates from the Windows Update Policy using Intune. The guide walks you through the steps to configure the policy, ensuring that all update actions are managed centrally by administrators, preventing users from manually initiating scans or installations.
Table of Contents
How to Remove User Access to Scan Download and Install from Windows Update Policy using Intune
In this policy, the value type defines how the setting functions. A value of 0 (default) means the policy is disabled, which allows users to manually scan, download, and install updates from Windows Update. A value of 1 enables the policy, removing user access to these features so that all update activities are managed automatically according to the organisation’s configured policies, without any user involvement.
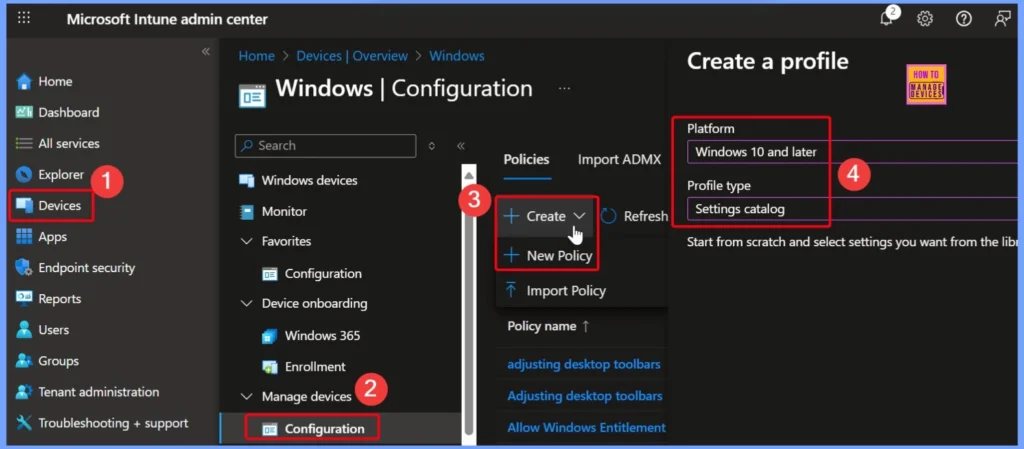
- Sign in to the Microsoft Intune Admin Center.
- Navigate to Devices.
- Under Manage devices, select Configuration.
- Go to Policies > Create > New policy.
- In the Create a profile window:
- Select Platform: Windows.
- Select Profile type: Settings Catalog.
- Click the Create button to proceed.
- How to Set Proxy Behavior for Update Detection using Intune Policy
- How to Allow or Block Disk Health Model Updates Policy using Intune
- Easy way to Create Autopatch Multi-Phase Release with Intune Feature Update Policy
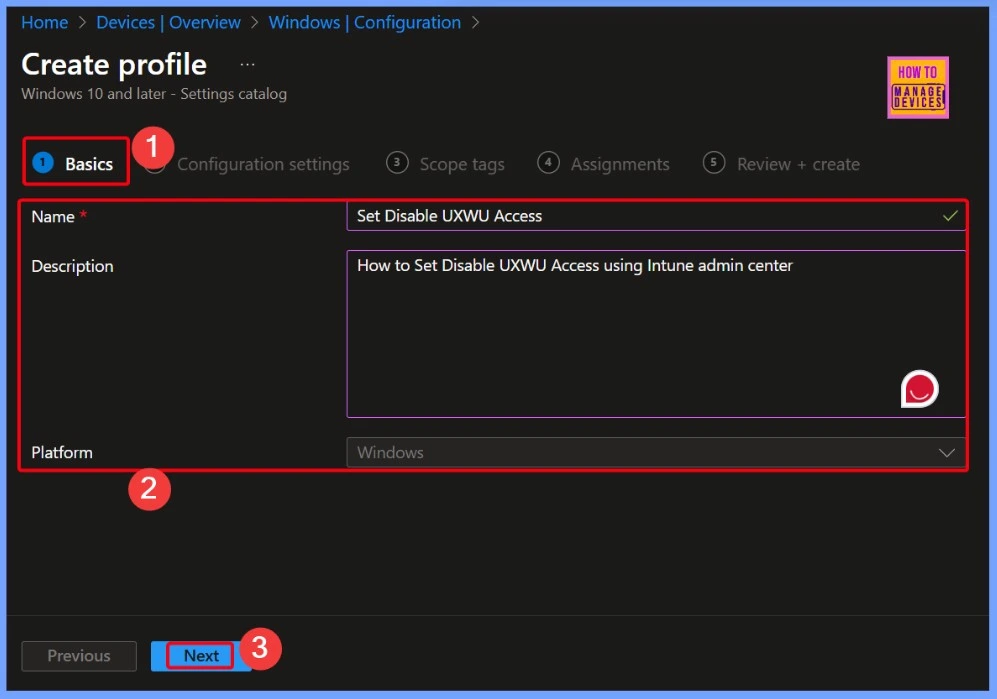
Entering Policy Details in the Basic Tab
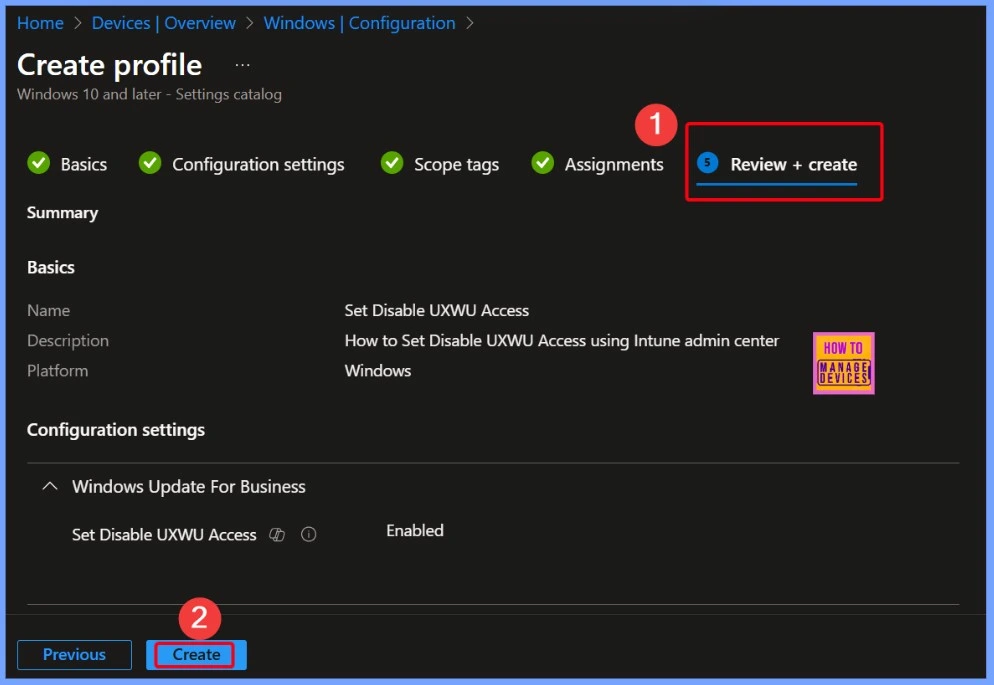
In the Basic tab, you need to enter the policy details, including the Name (Set Disable UXWU Access), the Description (How to set Disable UXWU Access using the Intune Admin Center), and the Platform (Windows). These details help identify the policy and its purpose before proceeding to the configuration steps.
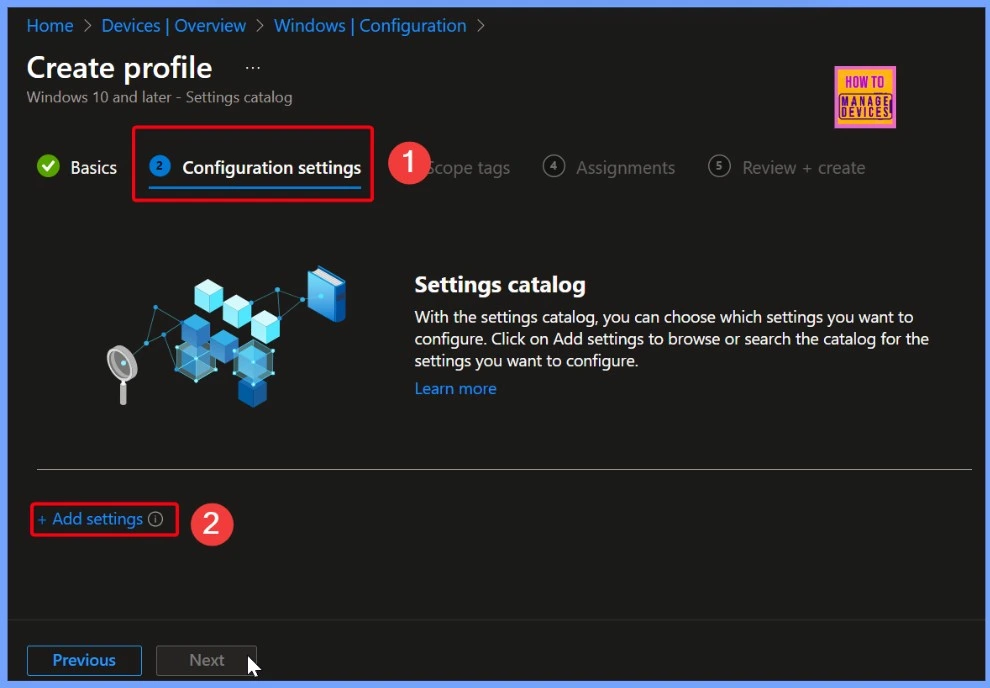
Configuration Settings and Add Settings
The CSP path for the policy Set Disable UXWU Access is ./Device/Vendor/MSFT/Policy/Config/Update/SetDisableUXWUAccess. This path represents the exact location within the Windows configuration service provider (CSP) structure where the policy settings are stored and applied. It is used by Intune and other management tools to communicate with the device and enforce the configured policy.
Windows Update for Business
In the settings picker, search for the keyword Windows Update for Business. You will see 77 results in this category. One of the available settings is Set Disable UXWU Access. To add it to your policy, simply select the checkbox next to it.
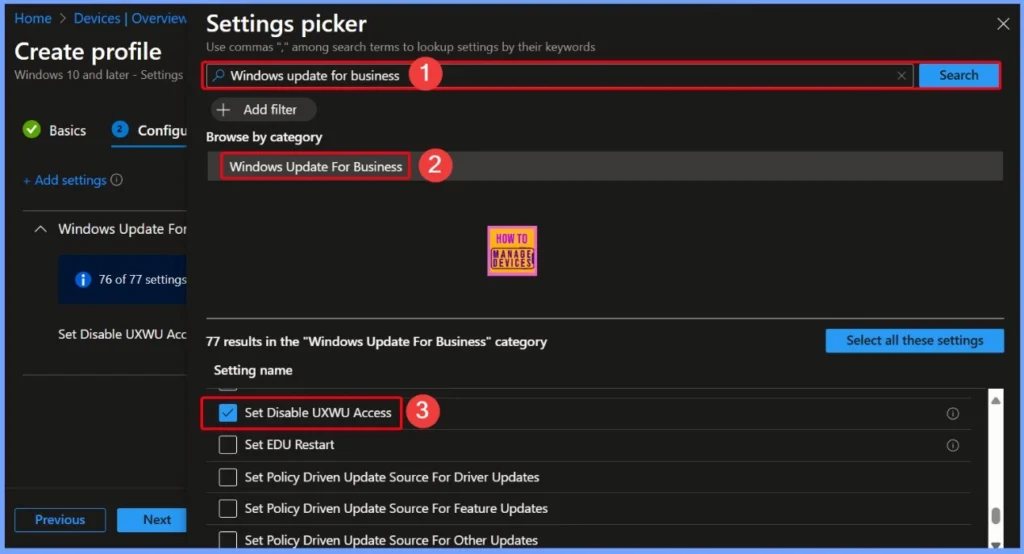
Enable Disable Set Disable UXWU Access
In the screenshot below, you can see that the Set Disable UXWU Access policy is set to Disabled. This is the default setting, which means users can scan, download, and install updates unless the policy is changed.
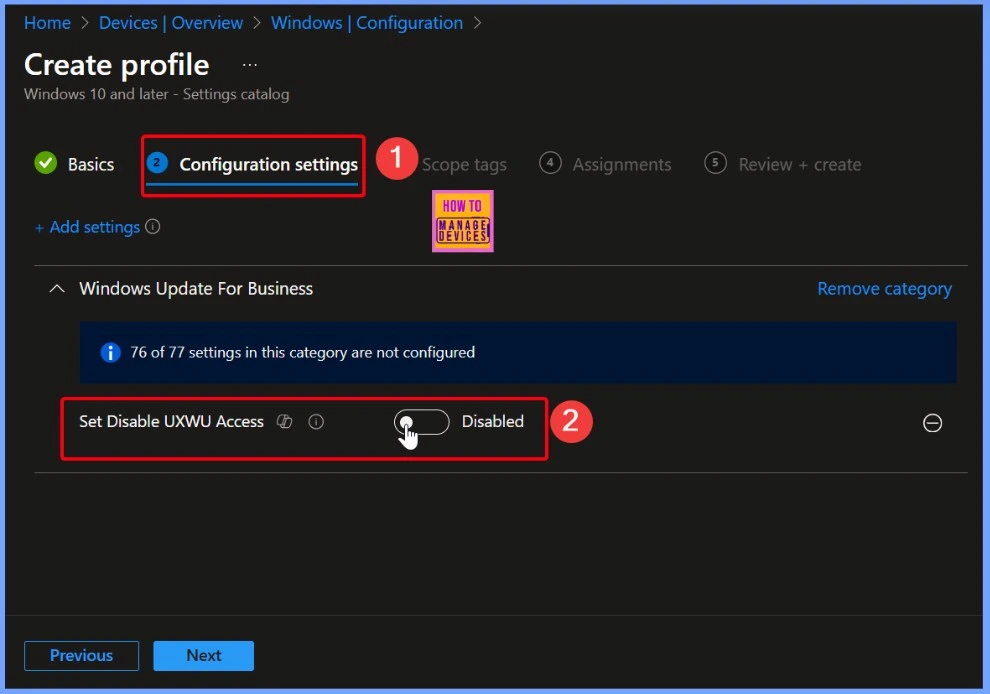
Turn on Set Disable UXWU Access Policy
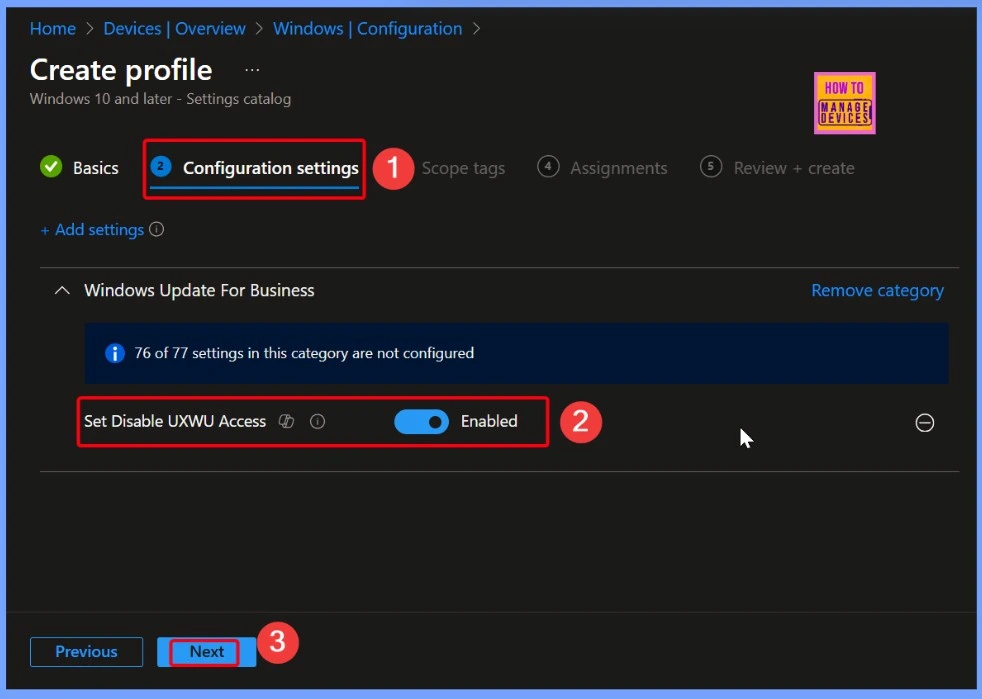
If you turn on this setting, users will not be able to scan, download, or install updates from Windows Update. The framework properties for this setting are: Format is int (integer), Access Type includes Add, Delete, Get, and Replace, and the Default Value is 0. This means it uses whole numbers, supports different actions, and is set to 0 by default.
| Policy Name | Disabled (Default) | Enabled |
|---|---|---|
| Set Disable UXWU Access Policy | Toggle the pane to the Left side | Toggle the pane to the Right side |
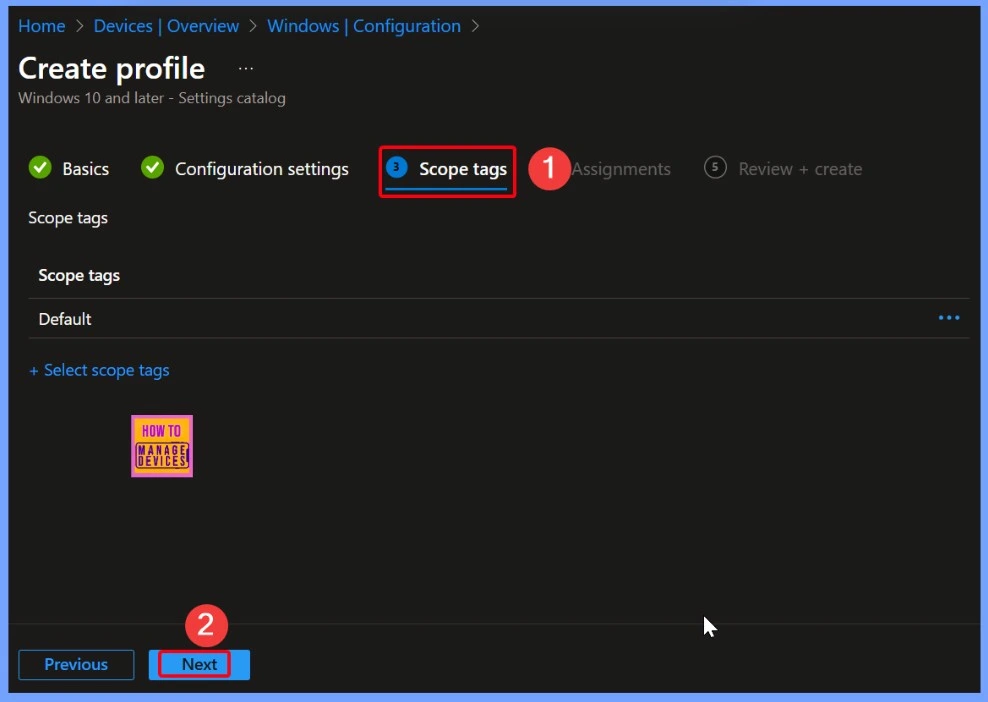
Scope Tags in Intune – Details and Usage
In Intune, Scope Tags help control which admins can see and edit a policy. Adding a scope tag is optional, so you can leave this section empty if it’s not needed. The below table helps you to show more details.
Assigning the Policy to Target Groups in Intune
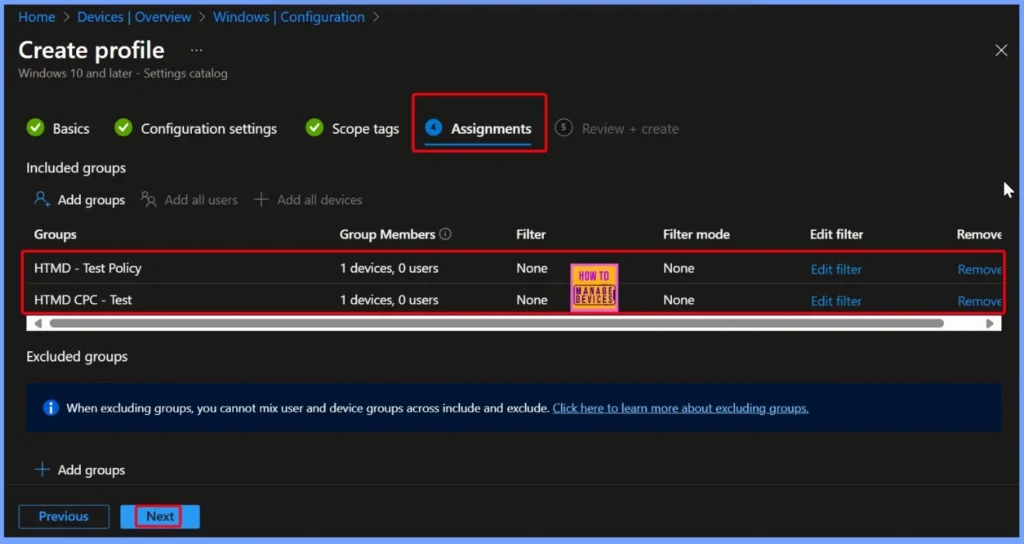
In the Assignments tab, select the users or devices that should receive the policy. Click Add Group under Include Group, choose the desired group and then click Next to proceed. Here we selected 2 groups that the HTMD Test policy and HTMD CPC Test.
Review + Create – Finalizing Your Intune Policy
In Intune, the Review + Create step is the final stage of creating a policy, profile, or configuration. Here, you can review all the settings you have configured, such as the name, description, platform, configuration settings, assignments, and scope tags, to make sure everything is correct. If you need to change anything, you can go back to the relevant section and update it.
Policy Creation Confirmation in Intune
Once you click the Create button, you will see a notification indicating that the “Set Disable UXWU Access” policy has been created successfully. On the top right side you can see the Policy creation notification.

Device and User Check-in Status of Succeeded for Two Devices
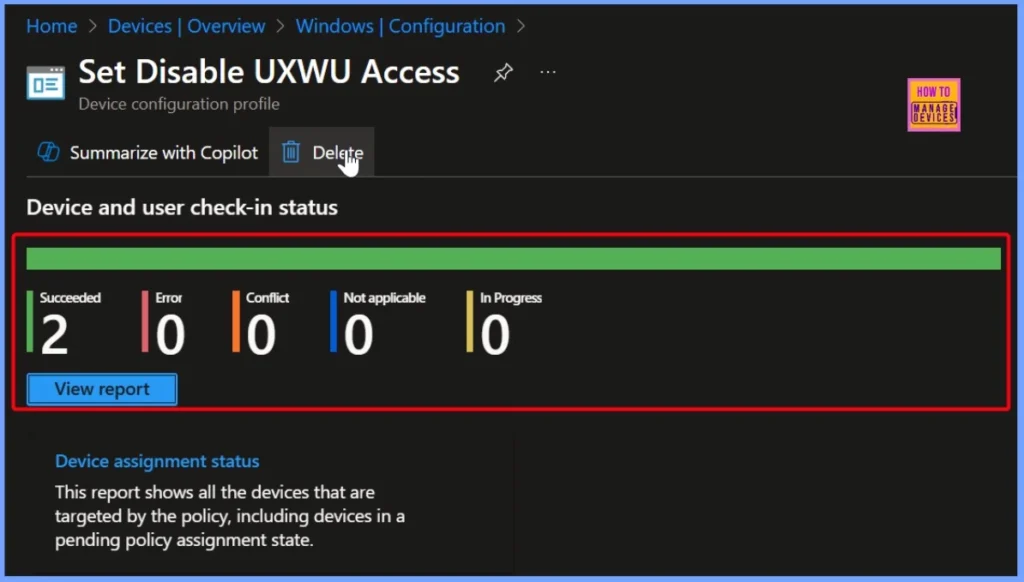
The Set Disable UXWU Access policy has a device and user check-in status of Succeeded for two devices. This indicating that the policy was applied successfully to both the devices. The below screenshot helps you to show more details.
Windows CSP Details
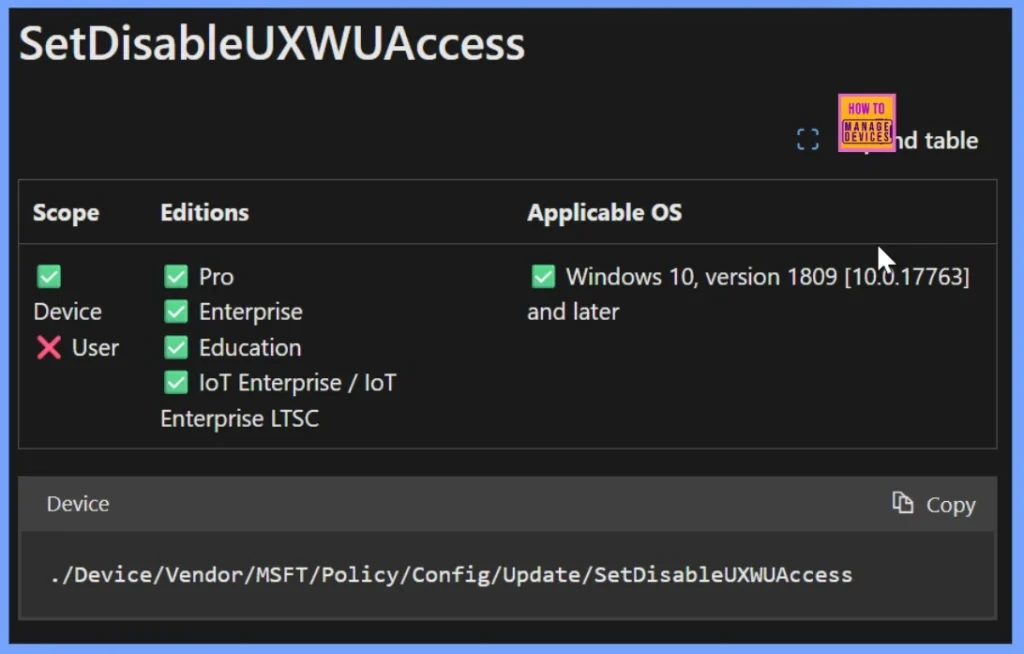
The SetDisableUXWUAccess policy applies to devices but not to users. It is supported on Windows 10 Pro, Enterprise, Education, and IoT Enterprise/IoT Enterprise LTSC editions, starting from version 1809 [10.0.17763] and later. The policy’s CSP path is ./Device/Vendor/MSFT/Policy/Config/Update/SetDisableUXWUAccess.
Client Side Verification
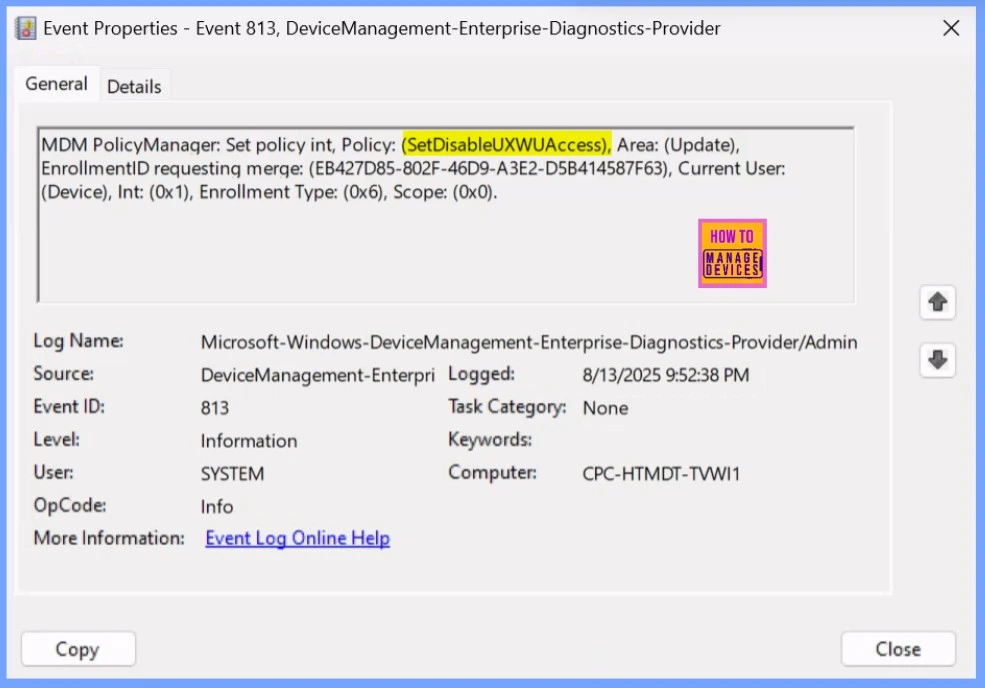
The MDM PolicyManager log shows that the SetDisableUXWUAccess policy in the Update area was set for the device. The enrollment ID is EB427D85-802F-46D9-A3E2-D5B414587F63, and the policy value was set to 1. The enrollment type is 0x6, and the scope is 0x0.
MDM PolicyManager: Set policy int, Policy: (SetDisableUXWUAccess), Area: (Update), EnrollmentID requesting merge: (EB427D85-802F-46D9-A3E2-D5B414587F63), Current User: (Device), Int: (0x1), Enrollment Type: (0x6), Scope: (0x0).
- Event Viewer > Applications and Services Logs > Microsoft > Windows > DeviceManagement-Enterprise-Diagnostics-Provider > Admin
- Search for Event ID 813 or 814 for configuration profile status updates.
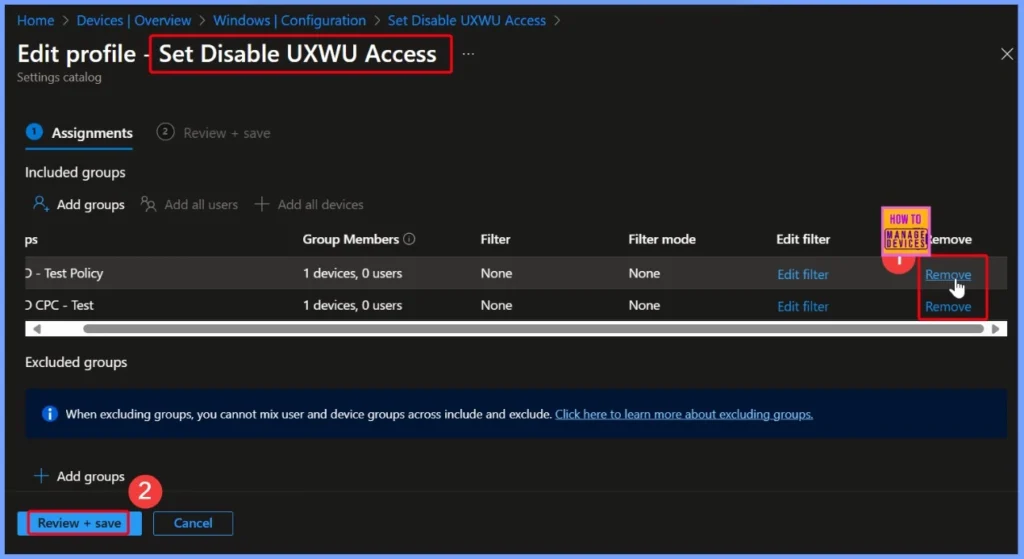
How to Remove the Assigned Group from the Set Disable UXWU Access Policy
You can easily remove a group assigned to the Set Disable UXWU Access policy. The linked post explains the steps in detail and includes a screenshot to help you follow along. Read more – How to Remove Assigned Group from Energy Saver Battery Threshold Policy in Intune Settings Catalog.
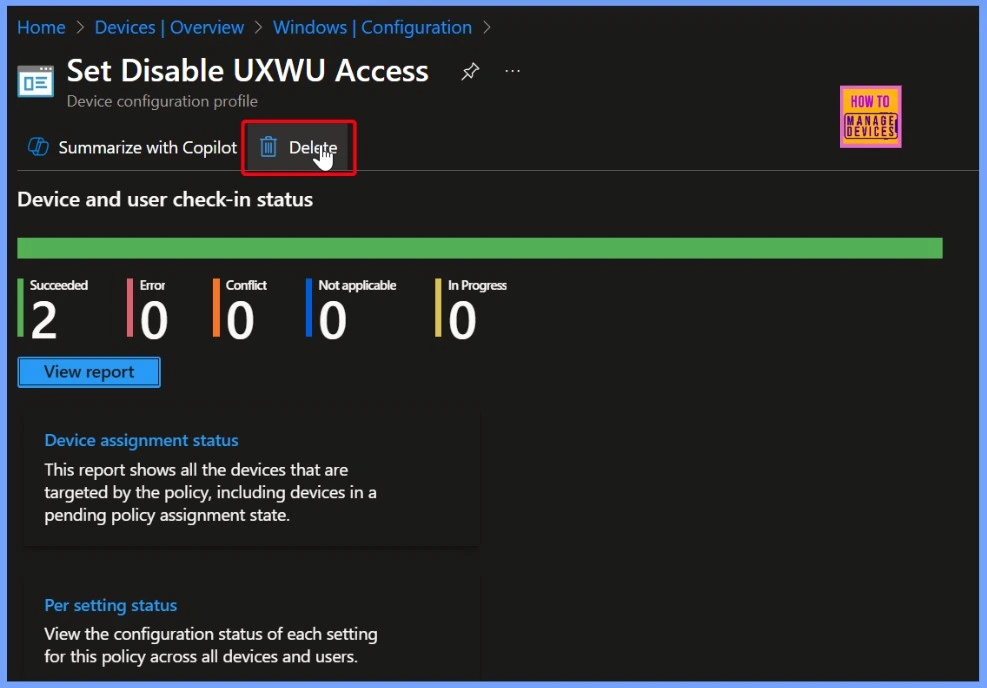
How to Delete the Set Disable UXWU Access Policy in Intune
You can easily delete the Set Disable UXWU Access policy in Intune. For the complete step-by-step guidance, refer to the detailed post. The screenshot also helps you to show more details.
Read More – How to Delete Allow Clipboard History Policy in Intune Step by Step Guide
Need Further Assistance or Have Technical Questions?
Join the LinkedIn Page and Telegram group to get the latest step-by-step guides and news updates. Join our Meetup Page to participate in User group meetings. Also, Join the WhatsApp Community to get the latest news on Microsoft Technologies. We are there on Reddit as well.
Author
Anoop C Nair has been Microsoft MVP from 2015 onwards for 10 consecutive years! He is a Workplace Solution Architect with more than 22+ years of experience in Workplace technologies. He is also a Blogger, Speaker, and Local User Group Community leader. His primary focus is on Device Management technologies like SCCM and Intune. He writes about technologies like Intune, SCCM, Windows, Cloud PC, Windows, Entra, Microsoft Security, Career, etc.

