Hello everyone, let’s discuss setting up Android Virtual Device for Intune Deployment Testing this week. In our previous posts, we discussed how to enrol Android devices to Android for Work, Fully Managed devices and Single-app and Multi-app mode Kiosk devices.
In each of our discussions, we used physical devices to test enrolment and deploy apps. What if you are from a small organization and do not want to spend money procuring devices? Or you are a student or someone who wants to learn MDM but does not want to spend money purchasing devices. Here comes the Android Virtual Device to your rescue.
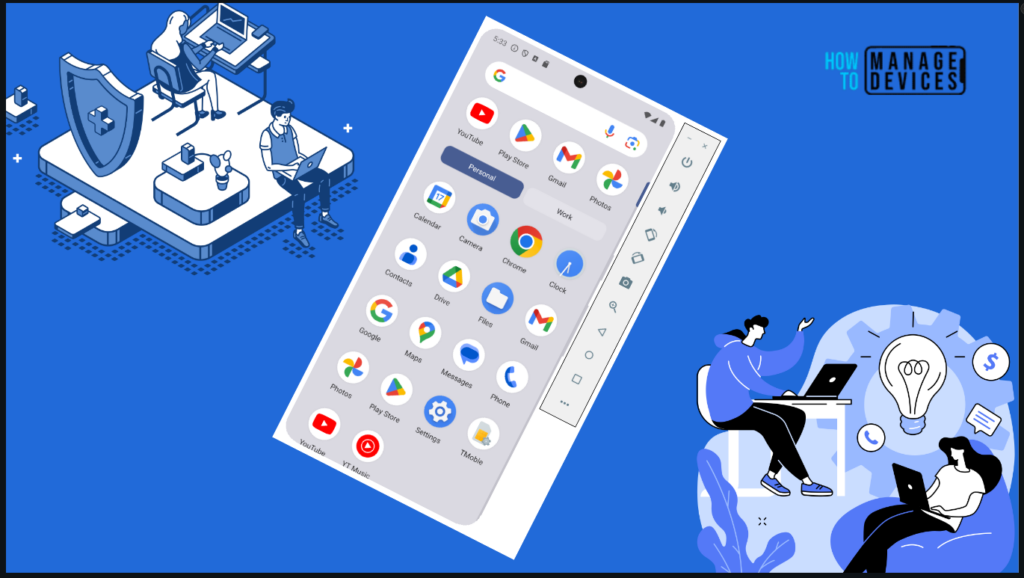
Android Virtual Device is a configuration that simulates the behaviour of a physical Android device or tablet or wear OS device using an Android Emulator. With the help of the Android device manager available in Android Studio, we can create and manage Android Virtual Devices on your laptops.
The Android emulator lets you test your apps and various device functionalities without requiring a physical device. It is very flexible and comes with different predefined configurations for testing. So, we will use one of the Android virtual devices created using the Android emulator for Intune Enrollment.
System Requirements for Installing Android Emulator
Android Emulator comes as a part of Android Studio. In this section, let’s discuss the requirements for installing Android Emulator. AVD can be installed across different OS. We need an excellent configuration to use the AVD without any issues.
- 16 GB RAM
- 64-bit Windows, macOS, Linux, or ChromeOS operating system
- 16 GB Hard disk space
We can use AVD even on a device that does not meet the above configuration standards, but it will not be very smooth. It may hang while using the AVD. So, it is always advised to have the above minimum required configuration.
Install Android Virtual Device
We can install an Android Virtual Device with a Windows or Mac device. Android Virtual Device comes as a part of Android Studio. We need to download Android Studio from Google’s official website. The current version of Android Studio is called Android Studio Giraffe. This can be downloaded from this link.
Most people will use a Windows device, so we will discuss the installation process and creating AVD on one of these. The process is similar on MAC devices. The Android Studio is more than 1 GB. Once downloaded, click on the installer to launch the installation process. This will require admin access on your Windows device.
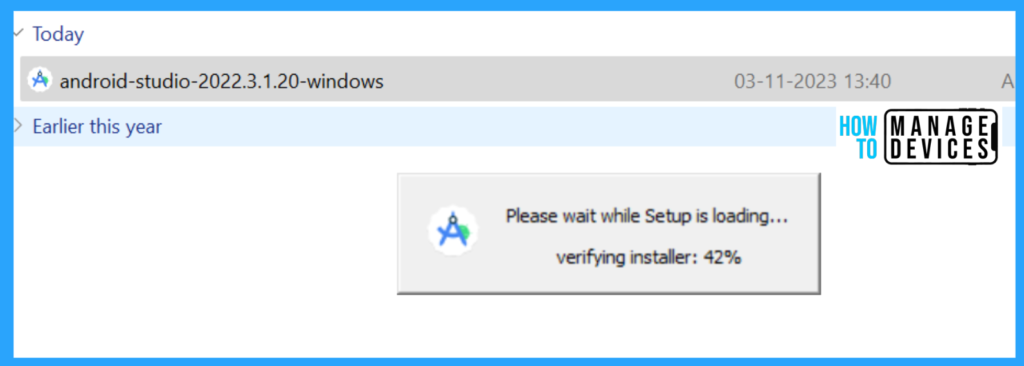
When we open the installer, it will initialize and prepare to install on the device. On the Welcome screen of Android Studio, click Next.
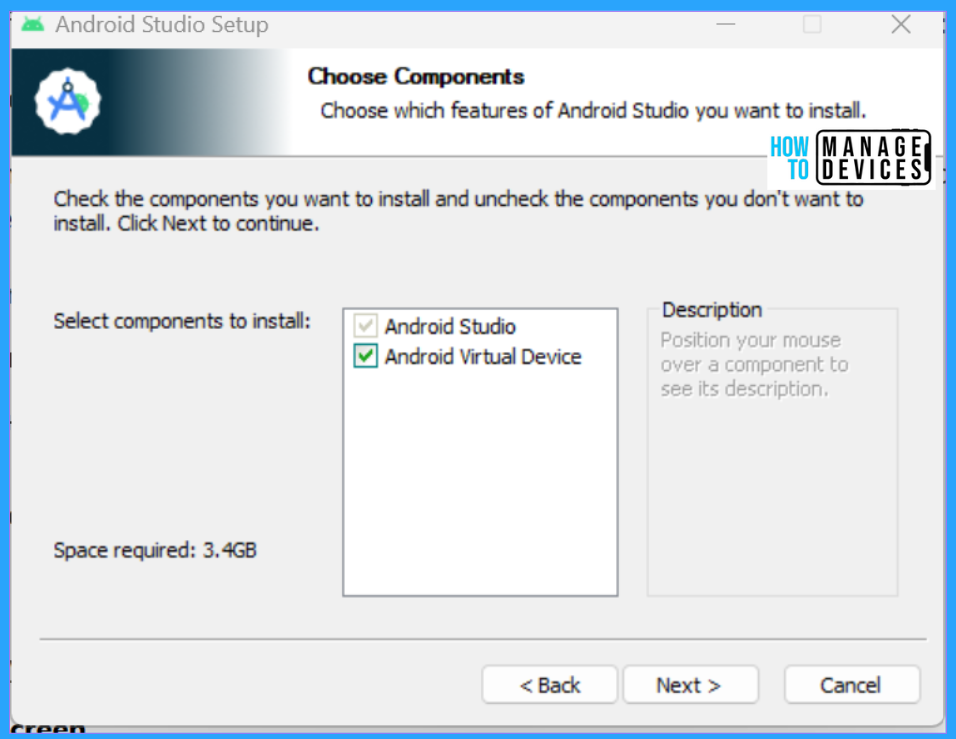
Now, we need to choose the components to be installed on our device. Although Android Studio will be selected by default, we need to choose the Android Virtual Device component. Once selected, click on Next.
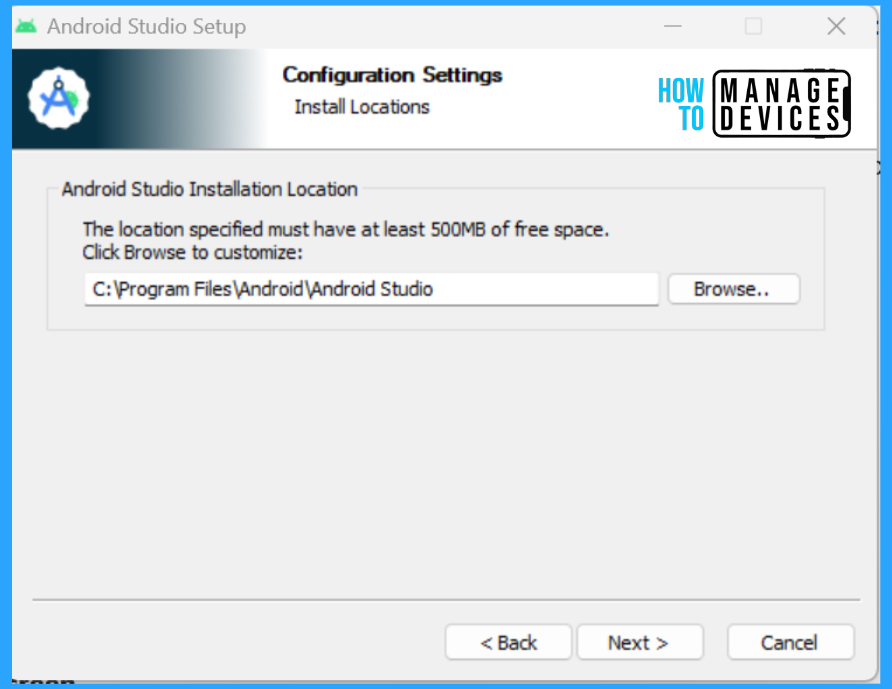
Now, choose the path where Android Studio will be installed. The path or folder you choose must have at least 500 MB of free disk space. By default, it will be installed under Program Files in Windows. After selecting, click Next and Install on the next screen.
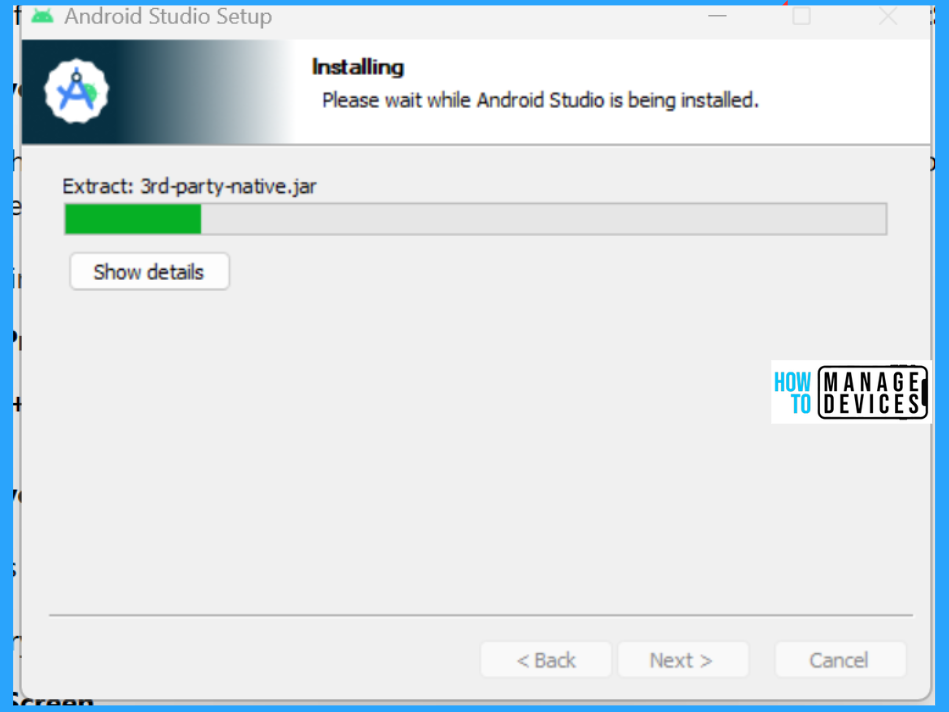
The installer starts installing the Android Studio. It will install all the .jar files and other required files in the specified Folder.
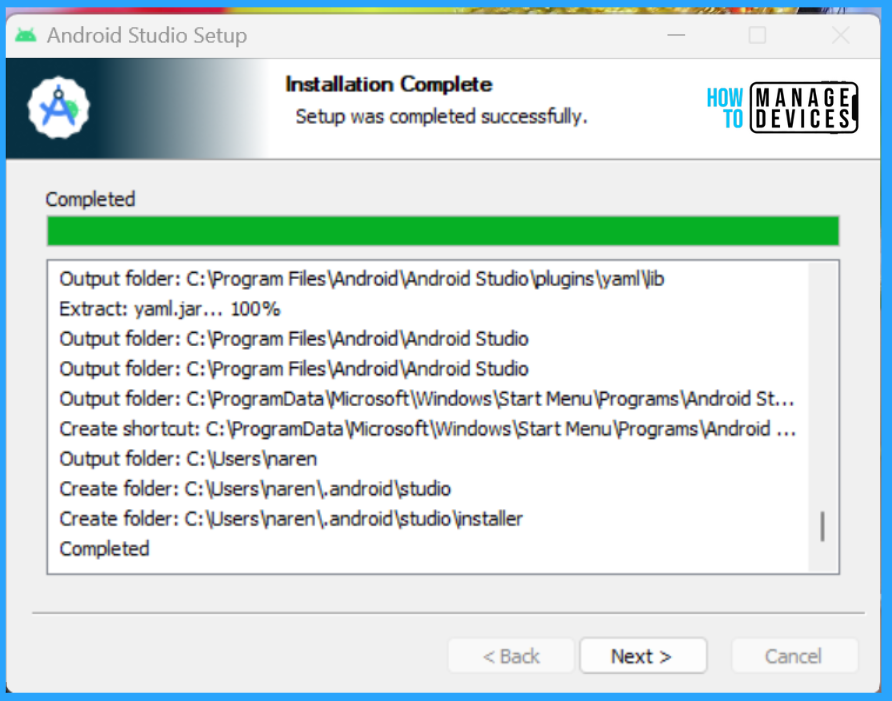
It would take a while to complete the entire installation. Once the installation is completed, click on Next. This will finish the installation, and we are ready to use the Android Studio.
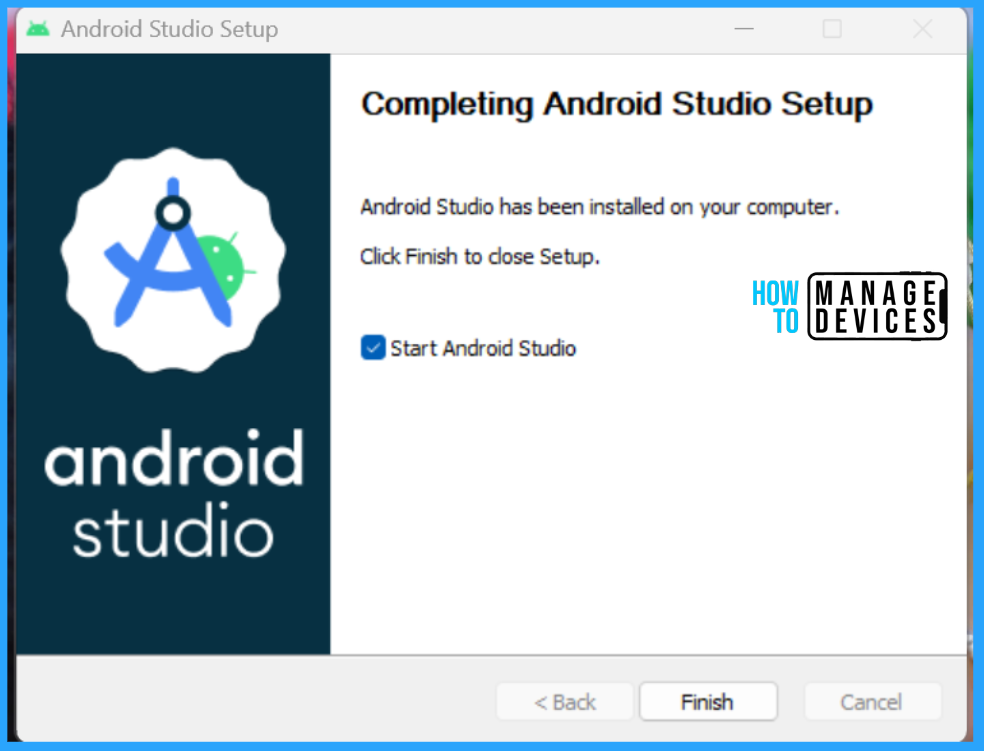
In the installation’s final step, you can start Android Studio as soon as the installer quits or launch it manually. Click on Finish. We have successfully installed Android Studio and an Android virtual device on our Windows machine. Now, let’s see how to create and launch an Android virtual device.
Create an Android Virtual Device
To create an Android Virtual Device, launch Android Studio. You will be prompted to import settings. You can choose whether to import settings or Do not import settings, as we don’t have any settings configured earlier.
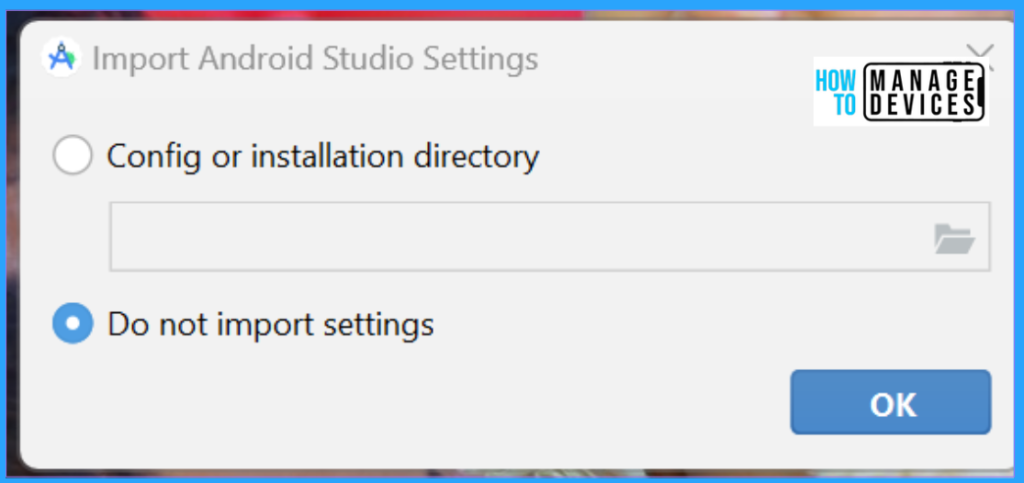
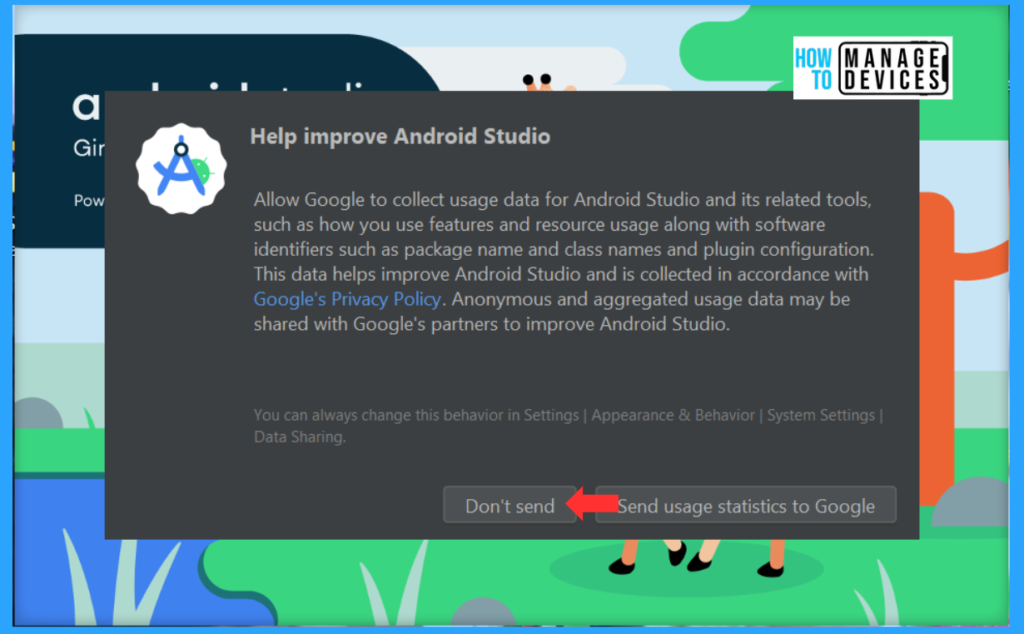
You will be prompted to send Google usage diagnostic reports to improve Android Studio. You can choose to send the report or not. I decided not to send the reports.
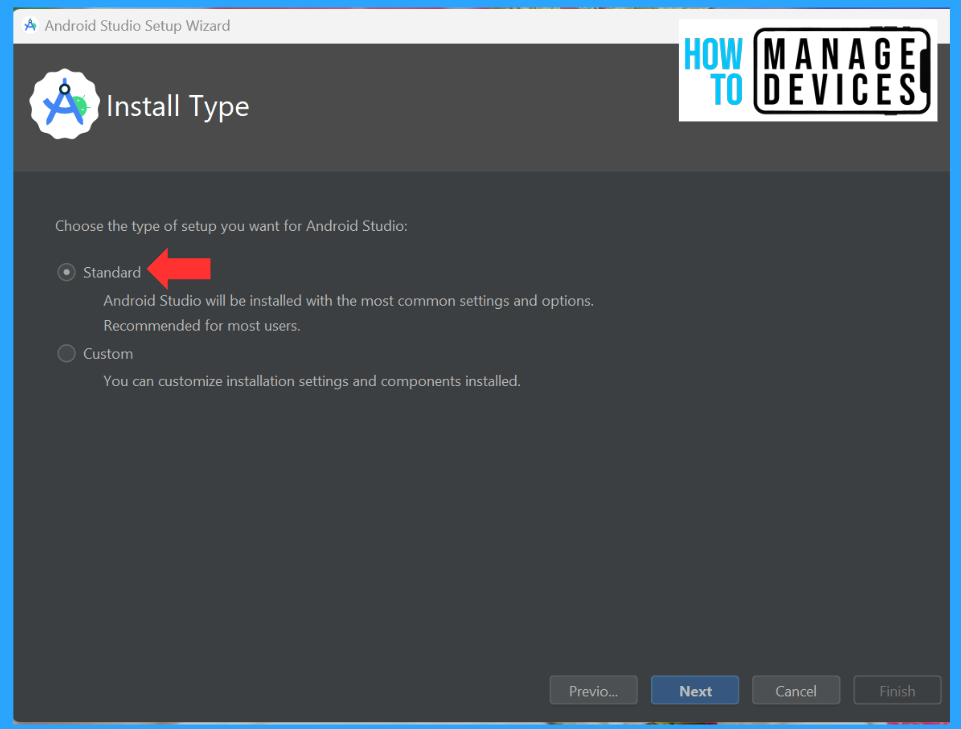
Now, you will be prompted to choose an Android install type. You can customize the install type or select the Standard install type, which will install common settings and configurations. My advice is to choose Standard.
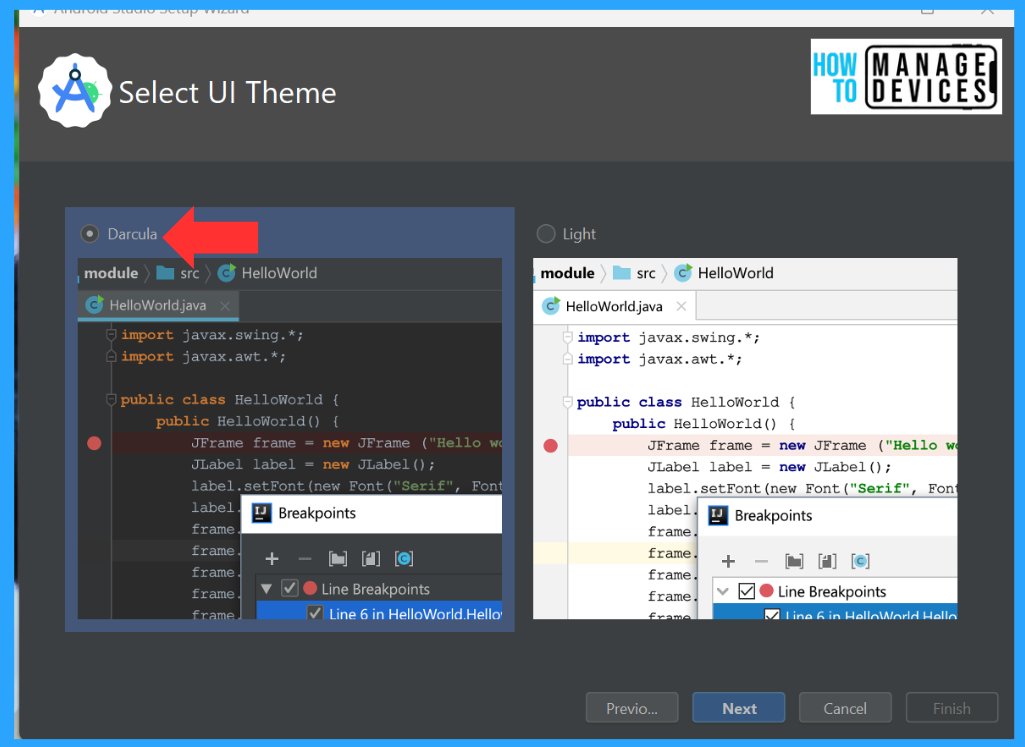
On the next screen, you will be prompted to select the theme for Android Studio, either Darcula(a dark theme) or Light mode. I have chosen Darcula because I love dark themes.
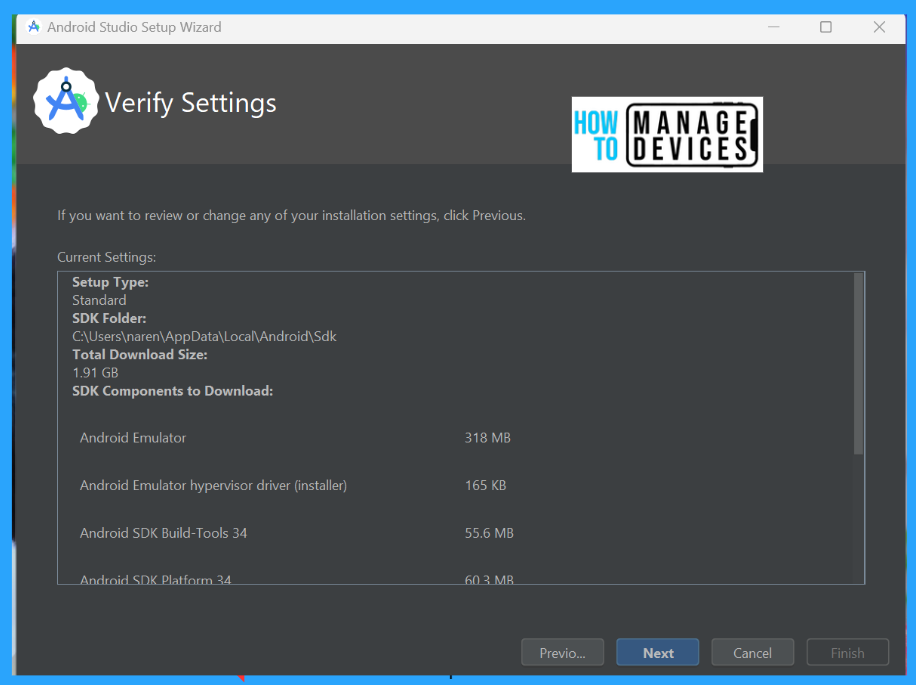
Observe the settings on the Verify Settings screen, like the installation path for SDK and SDK versions. The total size of the SDK version will be around 2 GB, but the size of the SDK may vary depending on the version. Click Next.
On the License Agreement screen, select the Android SDK license and click ” Accept ” to start downloading and installing the SDK (Software Developer Kit). This SDK contains the required libraries and tools. Android releases a new SDK for each OS.
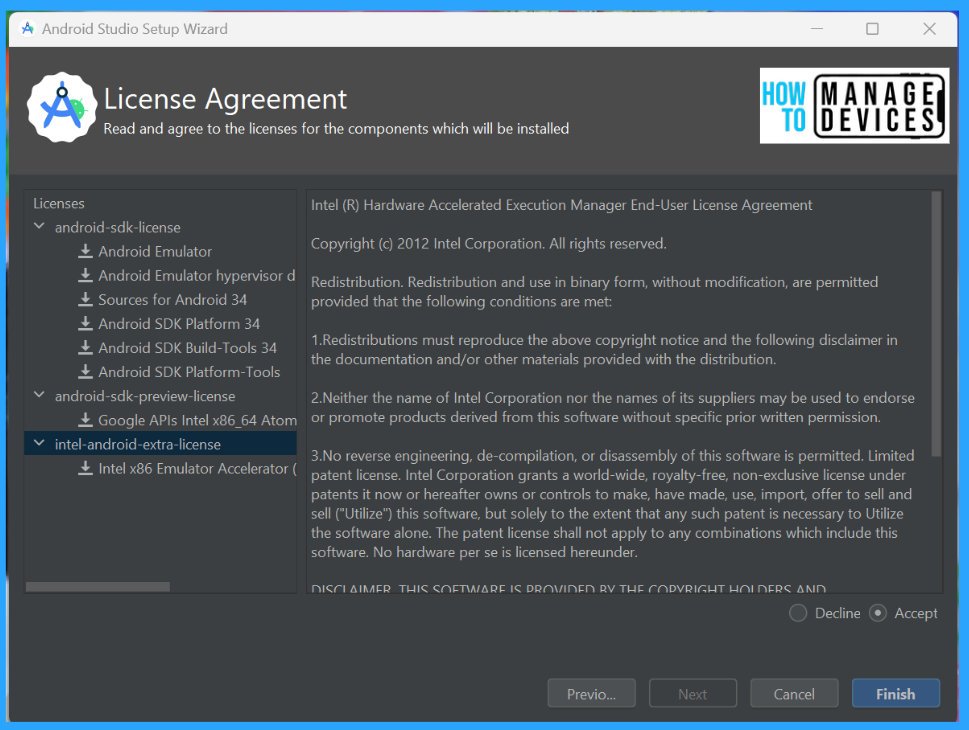
Now, the installer will start downloading the SDK and required files. The installation will take a bit longer because it has many library files. Make sure you have proper internet access for downloading the files.
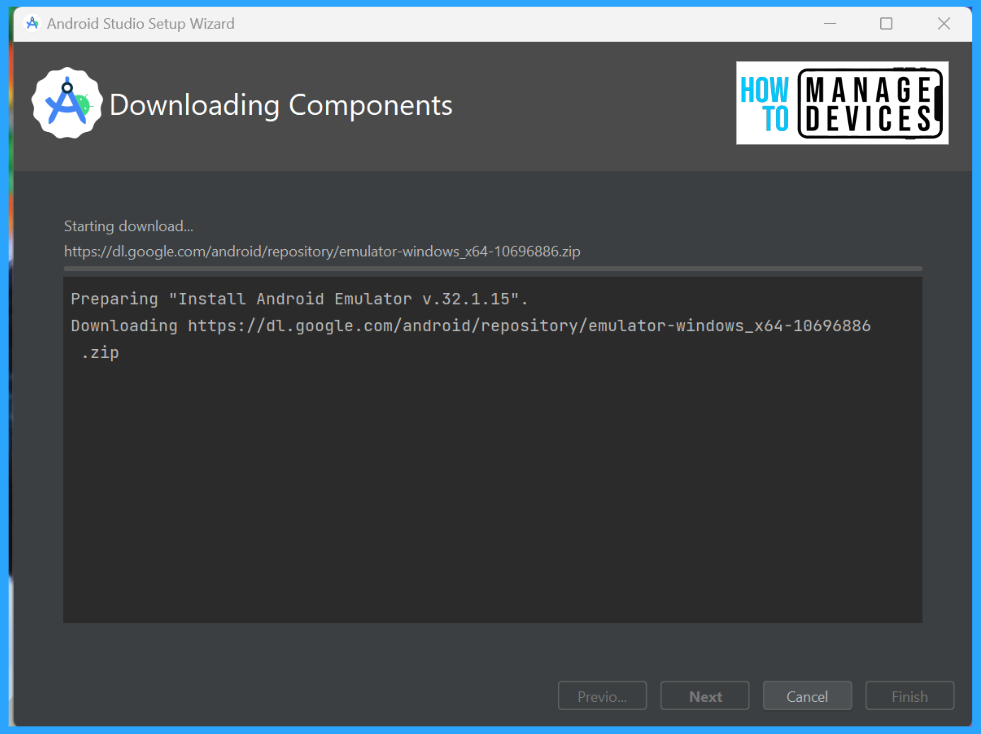
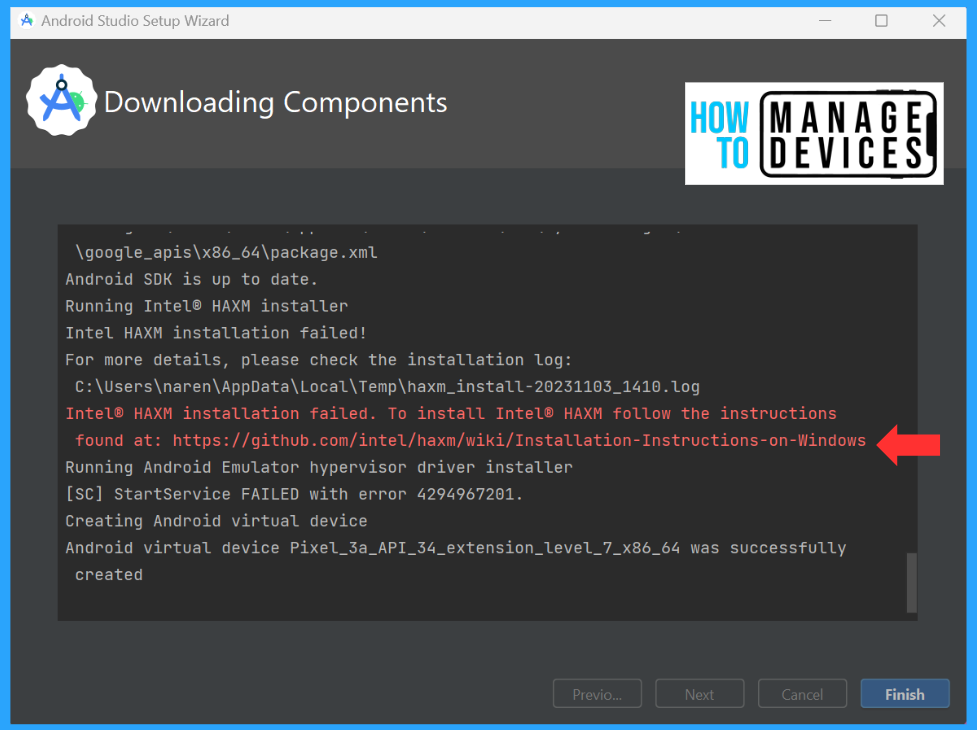
Once the download finishes, check for failure. If you require those files, you can download them from the url mentioned in the installer. I have one file that failed to install but was not required for our testing. Click on Finish.
Once the SDK installation is finished, you will be presented with the “Welcome to Android Studio” screen, this is the place where you will create projects for your Android development or import any projects if you have any, but developing apps is not moto.
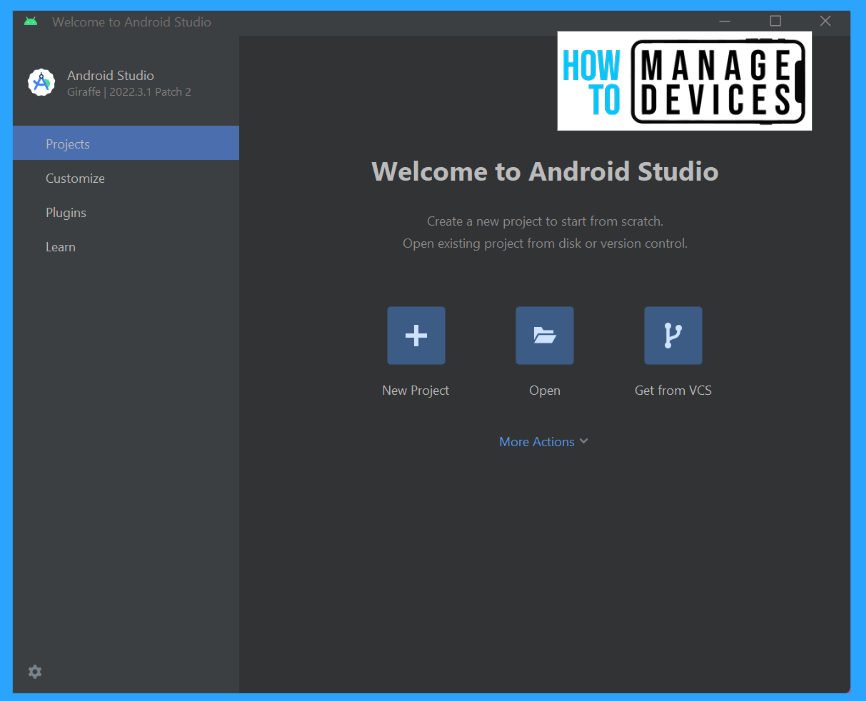
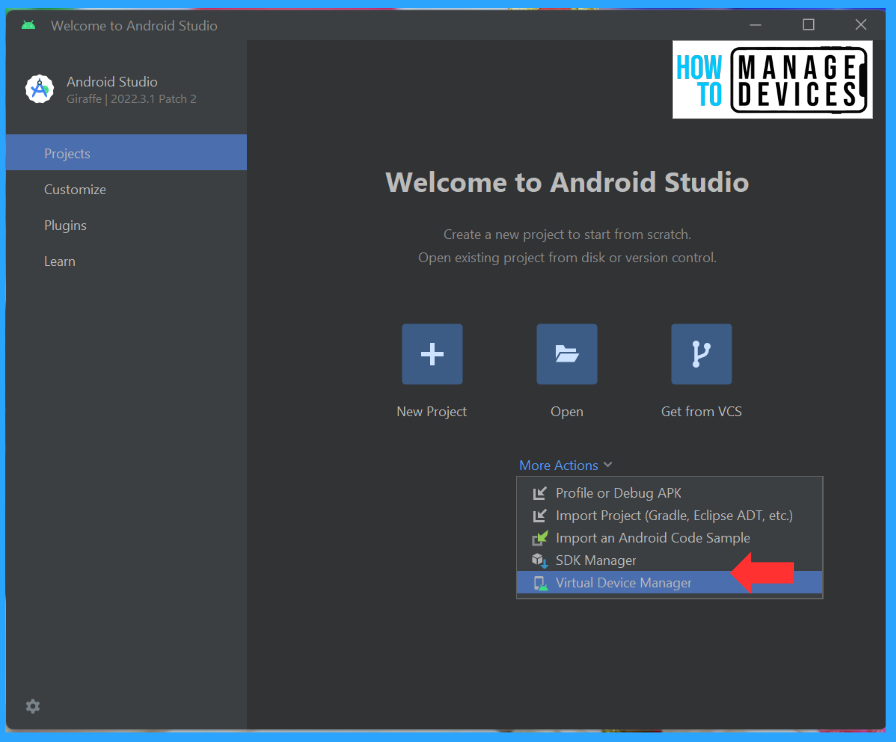
To create an Android virtual device, click on More Actions on the Welcome screen and then choose Virtual Device Manager.
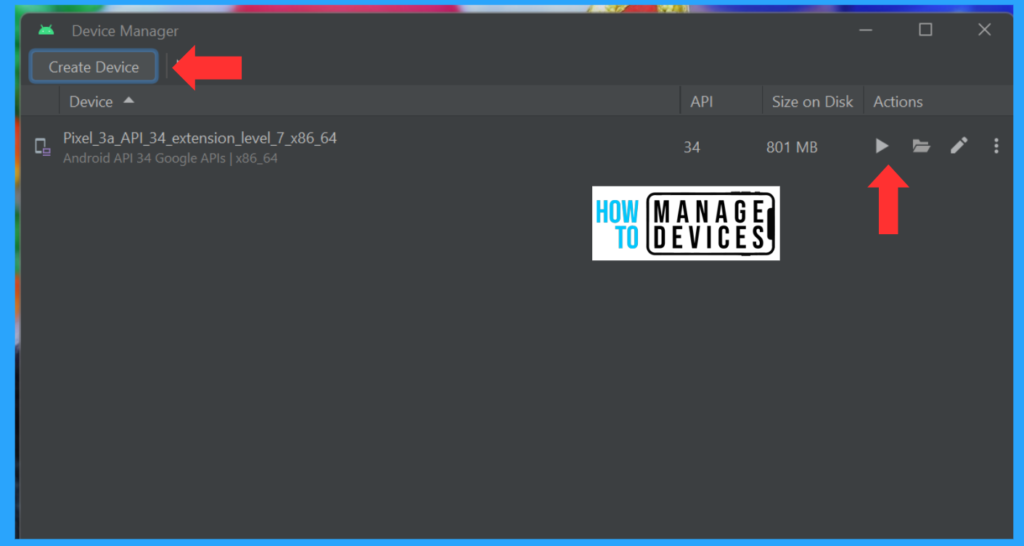
An AVD is available for testing by default. You can click the play button to launch the AVD or create a new device as requested. Click on Create Device at the top.
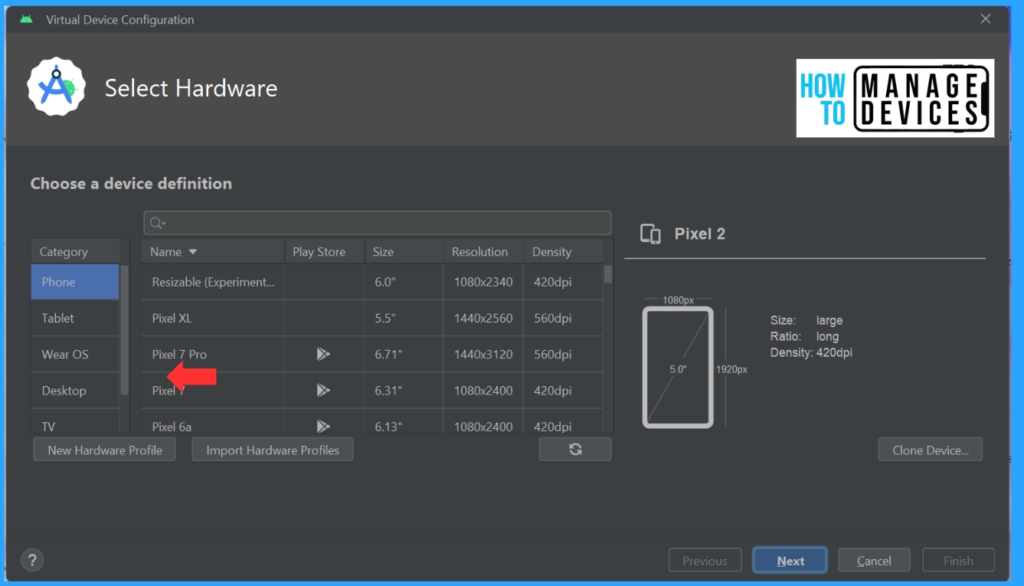
Now we must select the Hardware type like Phone, Tablet or Watch. Once the model is selected, we need to select the Phone model you wish to use. I have chosen Pixel 7 Pro for our testing. We can search for a specific model and create an AVD of that.
In the next step, we need to choose an image for the phone, which is nothing but an Android OS version for the AVD. Here, the OS versions are named after API. When you select a particular API, you can view the OS version.
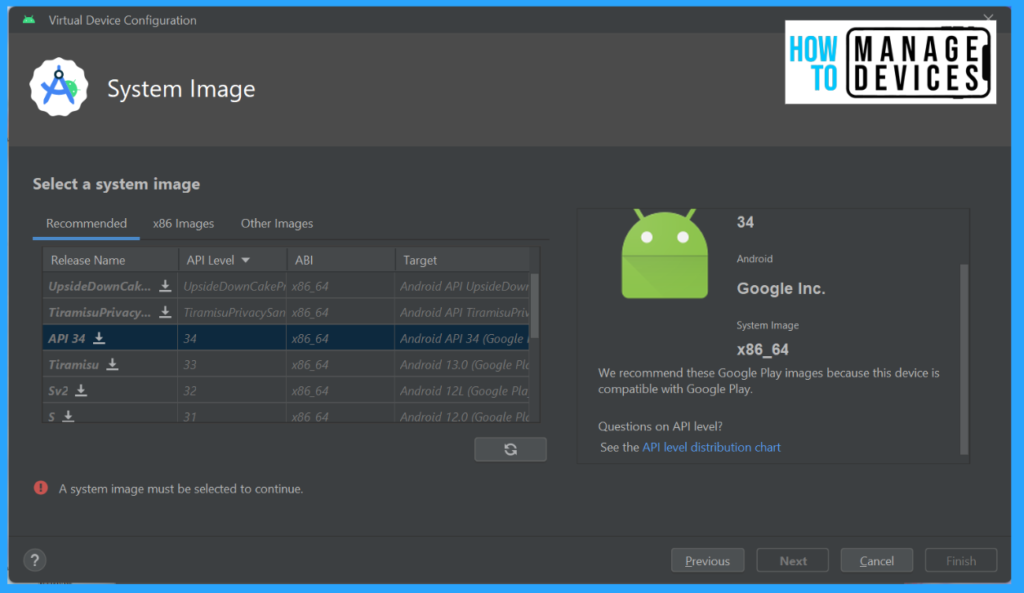
If the API version is not installed, we can install it. The latest API level is 34, which is Android 14. I have chosen that API level and clicked on install. Android Studio will then install the version. The size of the SDK component or API level will vary depending on the level. It may vary from 1 GB to 3+ GB.
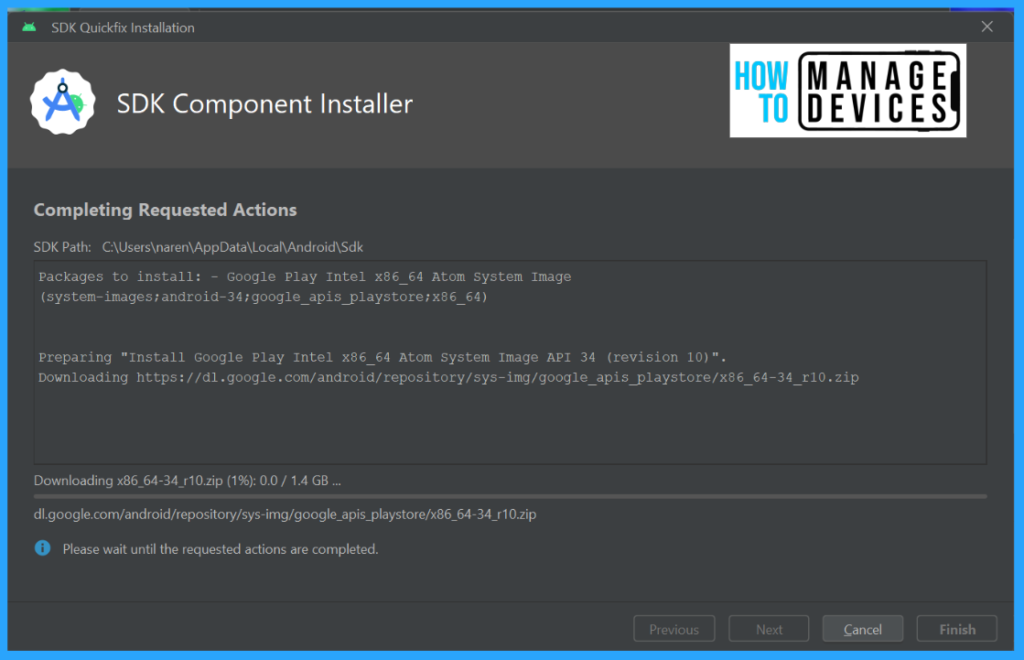
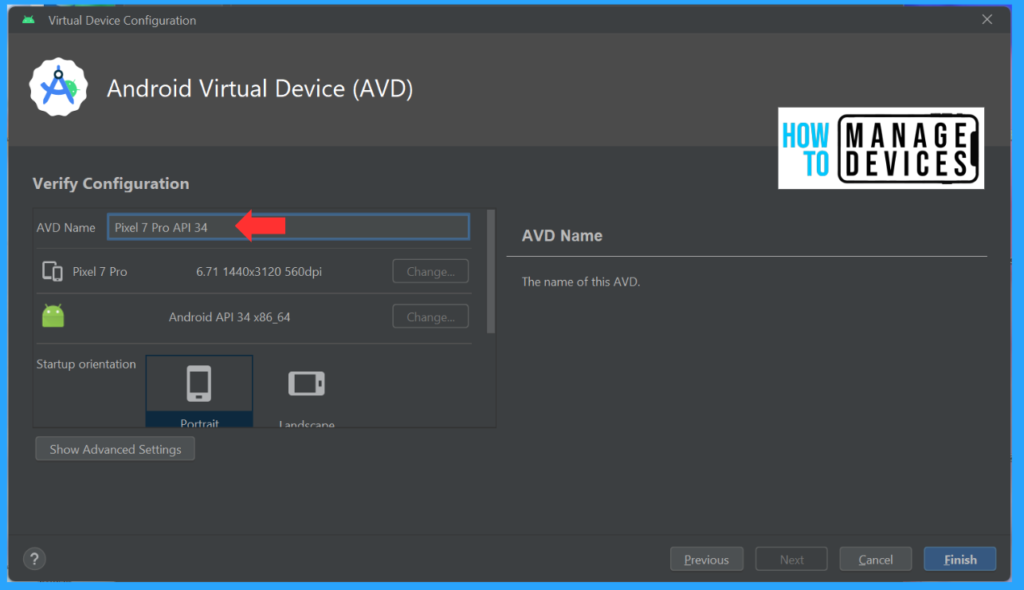
After the image has been downloaded and installed, select the required API level and click on Next. Provide a name for the AVD. I have chosen Pixel 7 Pro with API level 34(Android 14) for our testing. Click on Finish. This will create the AVD.
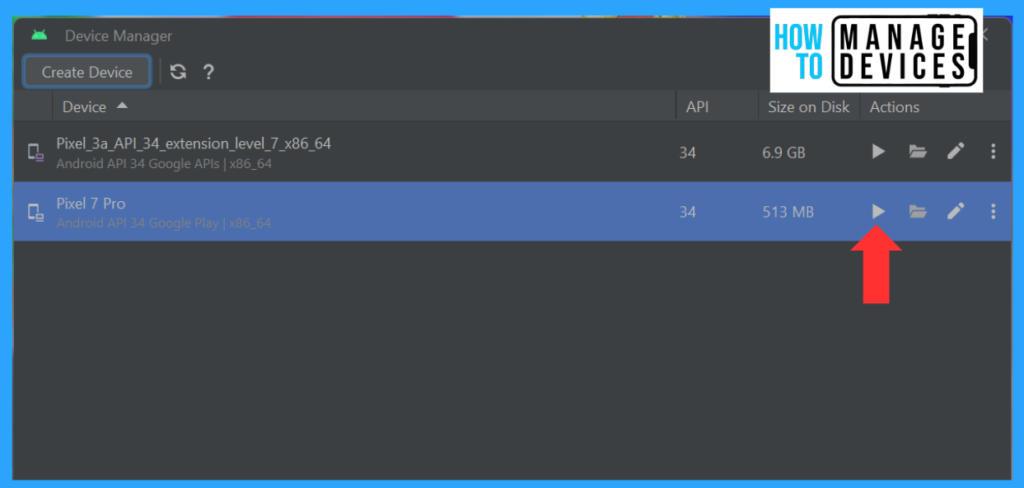
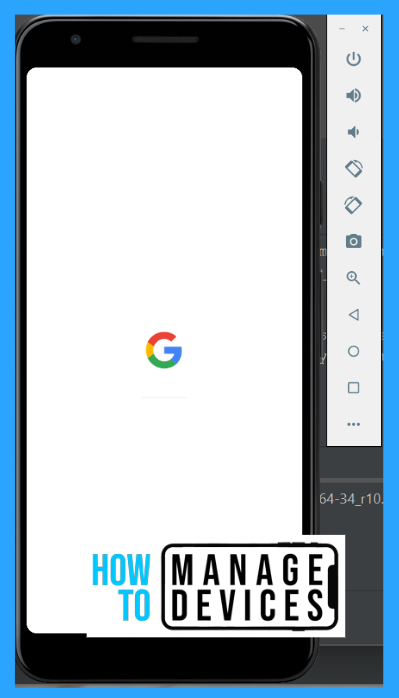
Once the AVD is created, click on the play button against the AVD, as shown in the figure below. This will launch the AVD. This might take some time to initialize and launch the AVD. You can view the Android emulator that will be launched with the API level.
We do not see the setup process that we would on a physical device. Once the AVD initializes and completes the setup, we can view the home screen like on any physical device. Our AVD is ready for Intune deployment. In the next session, we will see how to enrol a device.
Enrolling Android Virtual Device for Intune Features Test
Enrolling an Android Virtual Device in Intune is similar to a physical device. Let’s see how we can enrol it. Launch the AVD from the AVD manager. It will initialize the device. This might take a bit of time. Please be patient till the AVD boots up and shows the home screen.
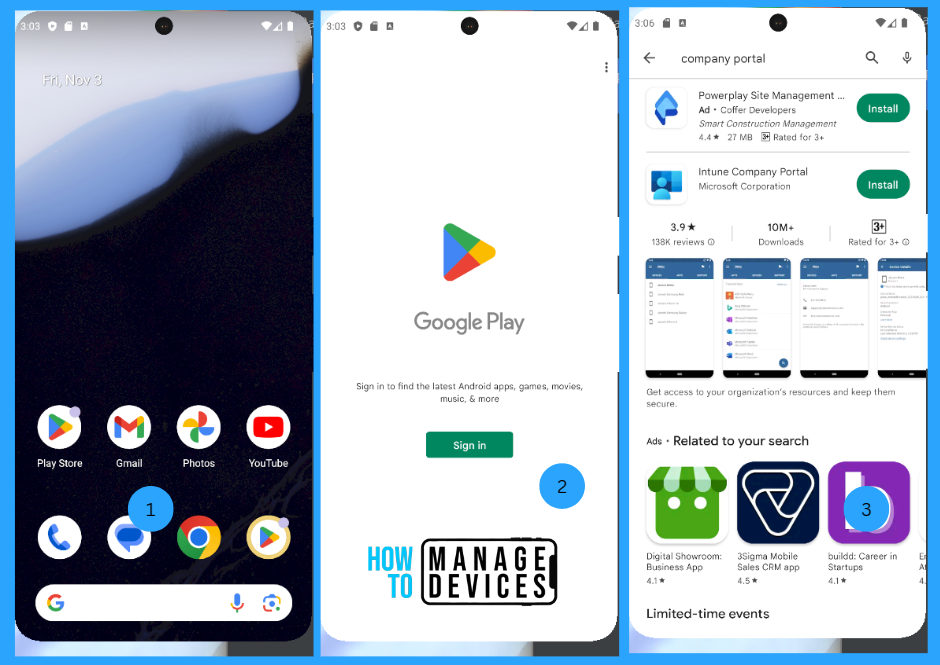
First, we must download the Company Portal app from the Play Store. Open the Play Store and sign in with a Google account. After successfully signing in, please search for the Company portal app and install it. After installing the app, open the app.
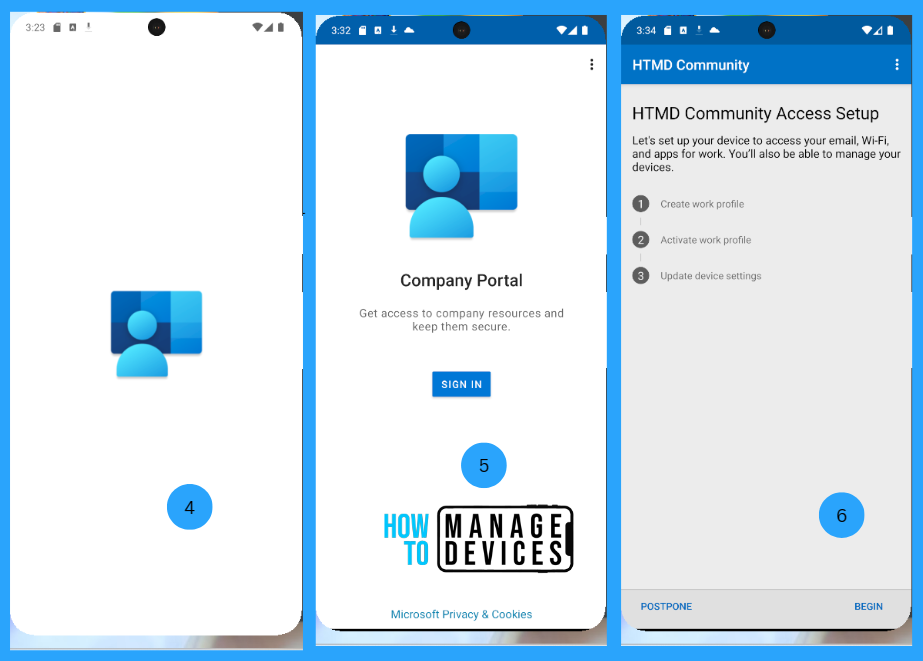
For our understanding, I’m enrolling the AVD to Android for Work. Click on Sign in and enter the credentials. After successful authentication, the user will be prompted to set up the Work profile and click on Begin.
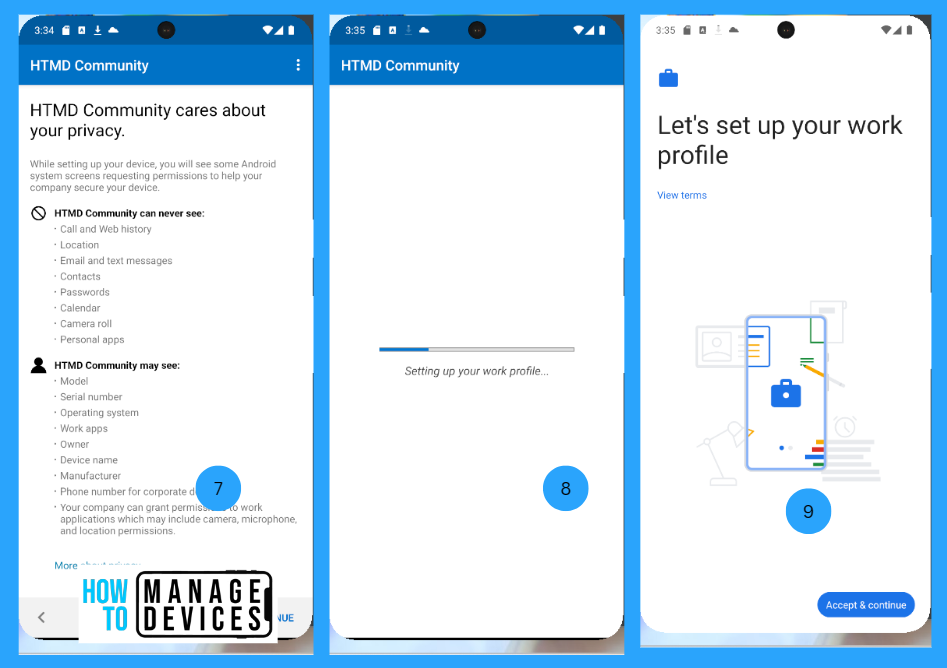
Now validate what your organization can and cannot view while using Intune. Click on Continue, and the company portal will start setting up the work profile on the device. Now agree to the terms and conditions.
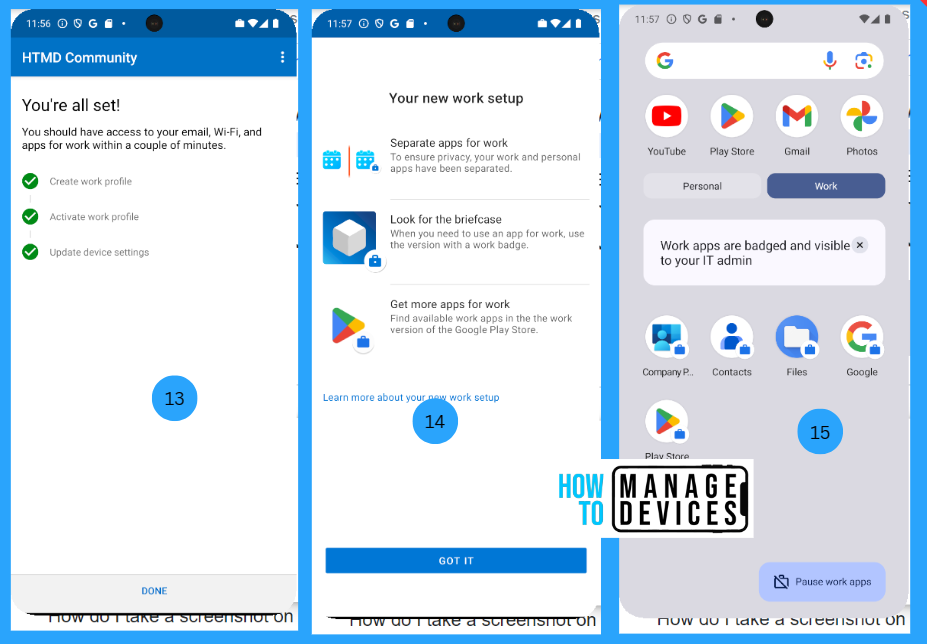
The company portal app provides tips for pausing and resuming the work profile as needed. It also gives a heads-up that the data will be visible to your IT team. Click on Next.
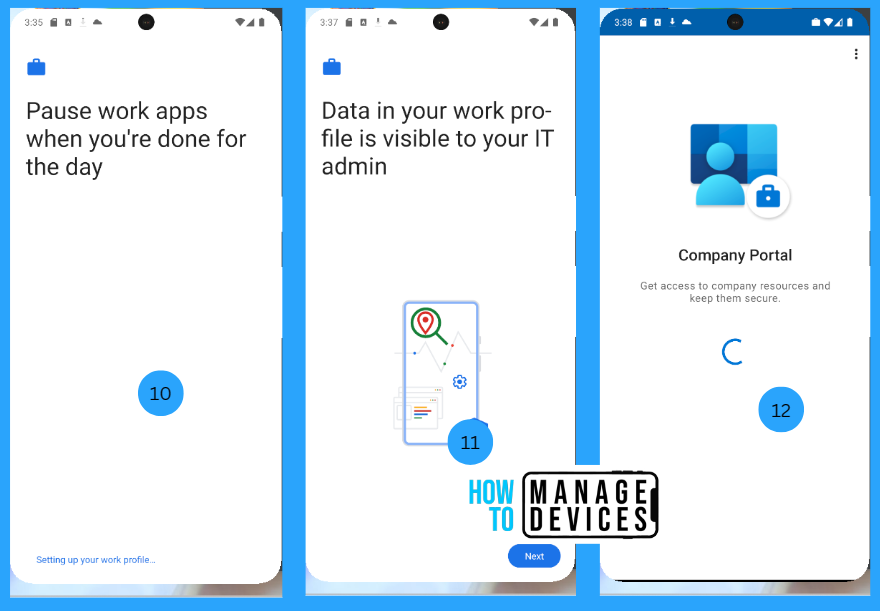
Now that the enrollment is completed, we can use the AVD for our Intune testing. We can use this AVD to test various policies, such as compliance policies, configuration policies, app configuration, and application deployment. We can also verify a separate Work profile has been created on the device.
So, we have successfully enrolled the device. Now, let’s see how the device details are captured in the Intune Admin centre. Log into the Intune Admin Centre, click on Devices > All devices, and search for the enrolled user. Select the device, and on the Overview screen, you can view all the options available for any physical device.
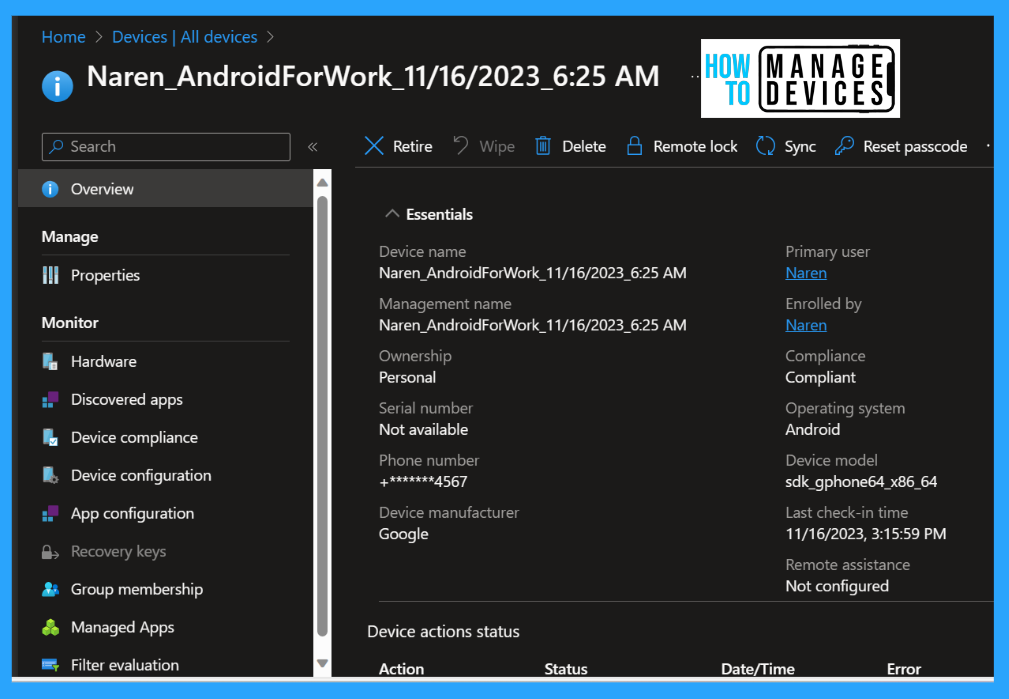
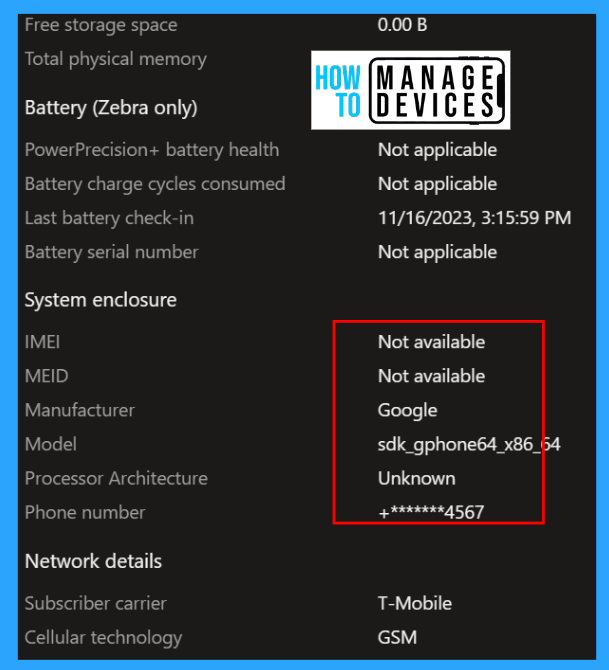
Now click on Hardware and check for serial number and IMEI number. Those options will be shown as Not Available. If observed closely, the model of the AVD is shown as “sdk_gphone64_x86_64”. For the rest, everything will be the same as a physical device.
AVD helps admins when they want to test Intune features on various types of devices. We can create a custom AVD rather than using one available in the AVD manager. So, this makes the life of Intune admins easy.
Conclusion
Android Studio and AVD are mainly used for testing or checking the behaviour of the developed Android apps before creating APK files. We can use these AVDs for our Intune deployment as well. That’s all folks for this article, see you soon in another one next week.
We are on WhatsApp. To get the latest step-by-step guides and news updates, Join our Channel. Click here – HTMD WhatsApp.
Author
About Author – Narendra Kumar Malepati (Naren) has 11+ years of experience in IT, working on different MDM tools. Over the last seven years, Naren has been working on various features of Intune, including migration from different MDMs to Intune. Naren mainly focuses on Android, iOS, and MacOS.

Hi,
Thanks for the content.
If I want to test for example a fully managed profile I want to scan the provided QR code from the Intune portal to see the setup process.
Is there any way to achieve this?