Hello everyone, let’s discuss “Enrollment Guide For Enrolling Android Devices to Corporate Owned Business Only (COBO) in Intune” this week. In one of our posts, we discussed how to enrol Android devices to Android For Work in Intune.
Android for Work helps users to enrol their personal devices to Intune to access Corporate data securely. Organizations have little control over the device, even Google deprecating many APIs that help control the device’s state. For example, We cannot reset the device passcode of Android 13 and above devices, as APIs are deprecated.
To have more control over devices and secure the devices that are procured by Organizations, Corporate Owned Business Only(COBO) is the Solution. In this method, devices are configured with an MDM solution right from setting up the device. Once the devices are enrolled, the devices are fully managed in Intune and can be used only for Corporate purposes. Users cannot use these devices for their personal use.
Enrolling Android Devices in the COBO method has only apps allowed by the organizations. Users cannot install third-party apps from the Google Play Store as the devices have Managed Google PlayStore, which hosts Corporate apps.
- Enrol Android Devices to Android for Work in Intune
- Easy Way to Create a Compliance Policy for Android Devices in Intune
Prerequisites for Enrolling Android Devices to Corporate-Owned Business Only
We have a few prerequisites before enabling the devices Enrolling Android Devices to Corporate Owned Business Only. Let’s discuss them in detail below
- Devices must run on Android 8.0 and above.
- Devices must support Google Mobile Services and be in a country supporting GMS.
- Exclude the Microsoft Intune cloud app from the Conditional Access policy that Grants Access if the device is Compliant.
- Integrate your tenant with Managed Google Playstore. Refer to the Managed Google Play Account section in this post.
Once we meet all the required prerequisites, we are ready to create an Android Enrolment Token. We can enrol the devices in multiple ways. In this post, we will discuss Token string or QR code mode.
Create an Android Enrolment Profile
We must create an Enrolment Profile to enrol the device into a Fully managed or Corporate-Owned business-only mode. This profile contains an enrolment token that can be used to enrol the devices to Intune. Let’s create our first Enrolment Profile.
- Login to Microsoft Intune Admin Center
- Click on Devices > Android > Android Enrolment
- Now click on Corporate-owned, fully managed user devices
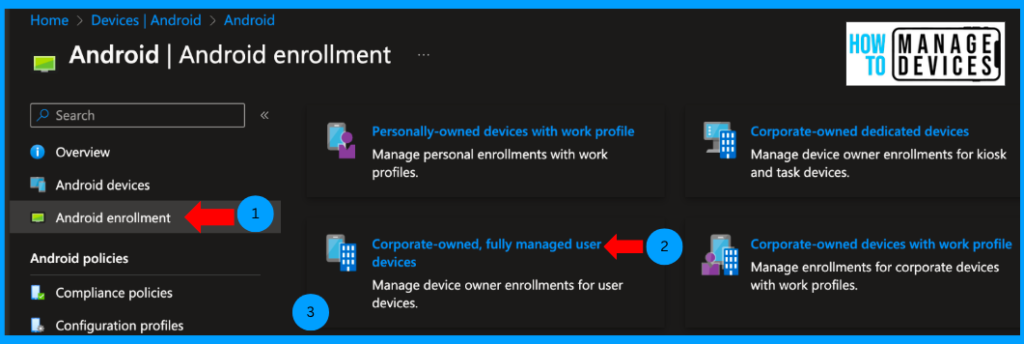
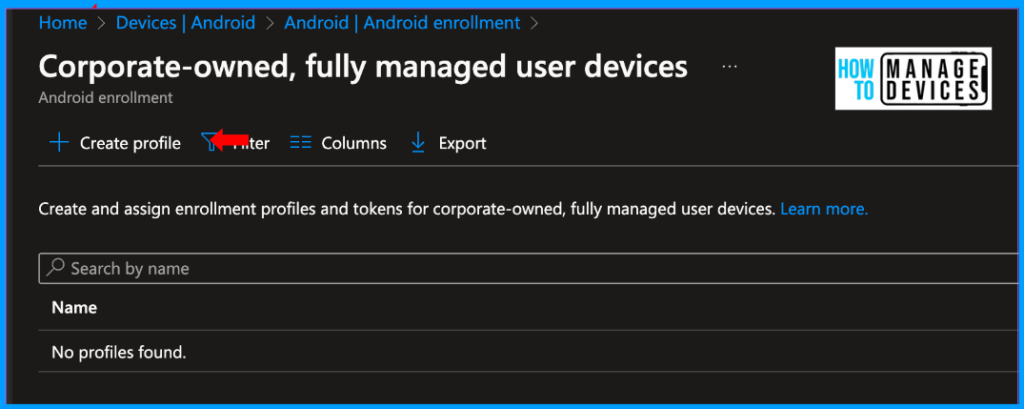
If you use an older tenant, you will be prompted to Allow users to enrol in corporate-owned user devices. Please enable it to Yes. For newer tenants, it’s enabled by default. Now Click on Create Profile
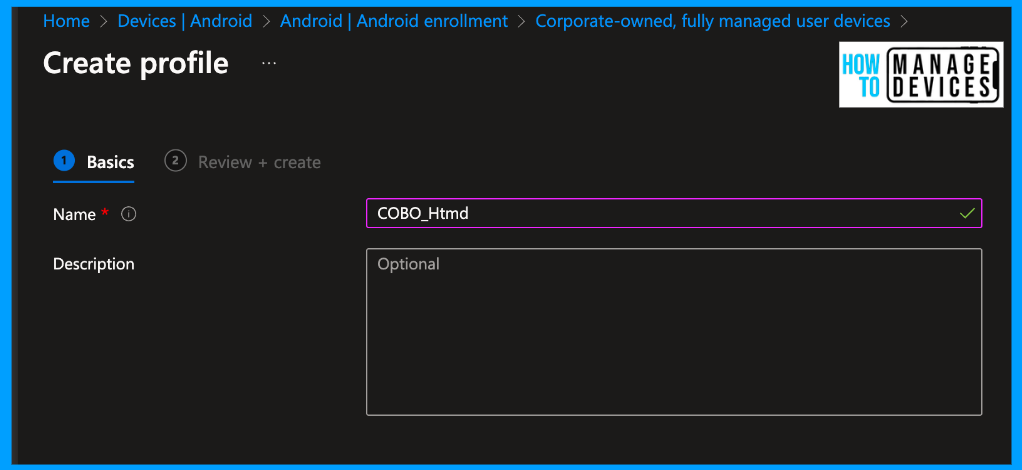
Provide the Name and Description for the Enrolment Profile on the Basics page. Now click on Next and click on Create. This will create the Enrolment Profile.
To view the Token details and QR code for enrolling the device, click on the profile and click on Token. It will display the enrollment token and QR code. If you want to add scope tags, click on properties, edit the Scope Tags and add the scope tags as per your requirement. I didn’t add any scope tags for our discussion.
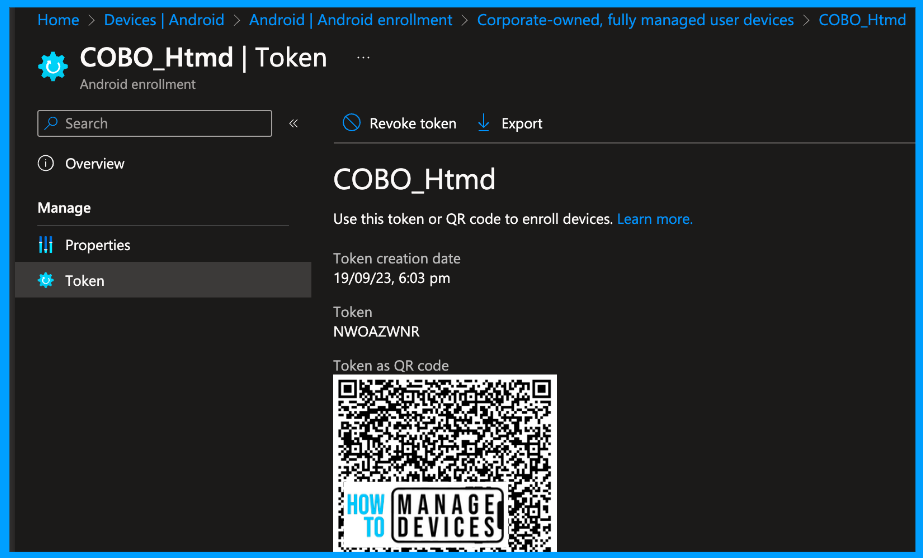
We have created the enrolment Token. Now, we need to create a Dynamic group based on the enrollment profile so that we can assign any policies and configurations to Corporate devices instead of users.
Create Azure/Entra Dynamic AD Groups
Azure/Entra Dynamic AD groups are smart groups that contain members as per our security configurations. In simple terms, we can create groups based on certain rules. If any user or device matches, the rule will be a member of that dynamic group. For example, we can create dynamic groups based on the users’ location, department or role.
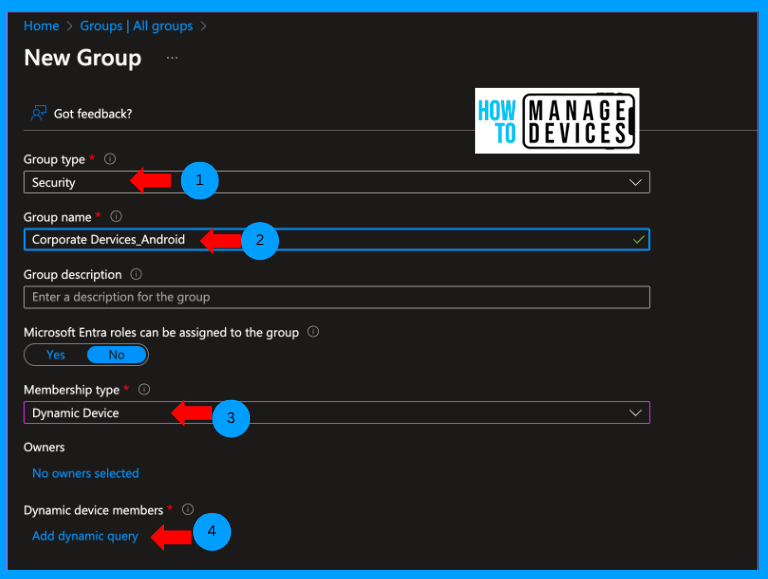
We will create an Entra Dynamic AD group based on the enrollment profile name for our discussion. Once the device enrols, using the enrollment profile, you will be a member of this group. To create a Dynamic group, please follow the below steps.
- Login to Microsoft Entra Admin Center
- Click on Groups > All Groups
- Click on New Group

Now Select the Group type as Security, and Provide the Name and Description for the group. Now, select the Membership type as Dynamic device and click on Add dynamic query to add the dynamic query.
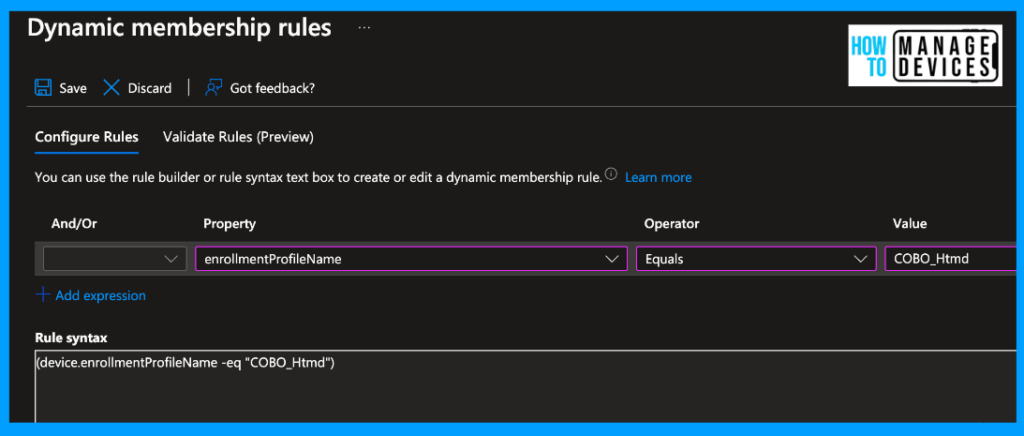
Under Property, select enrollmentProfileName, set Operator to Equals, and provide the enrollment profile name we created under Value, as shown in the screenshot below. Once done, click on Save. Now click on Create. This will create a Dynamic group.
Deploy Apps to Users
We have created an Enrollment profile and a dynamic group of the devices. Now, let’s deploy applications to the Corporate device. To deploy apps, we need to add apps from the Manage Google Play store and assign the apps to the dynamic group that we have created.
- Login to Microsoft Intune Admin Center
- Click on Apps > All Apps
- Click on Add
- Select the Managed Google Play app under App type

Now, search for an app you want to assign to the users and click Select. Once selected, click on Sync. This will be added to the app Intune apps list. The app will take a while to sync. Please wait for the Sync to complete.
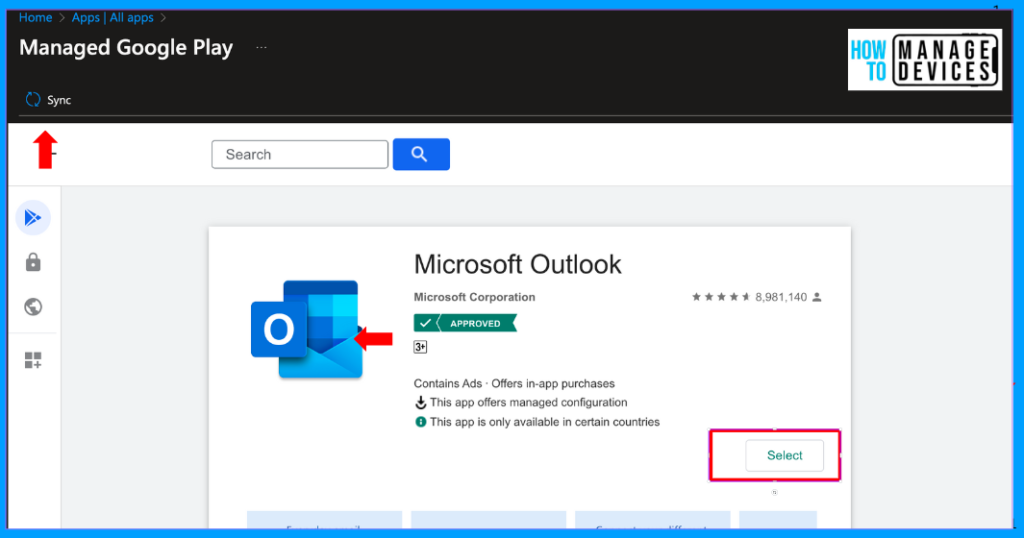
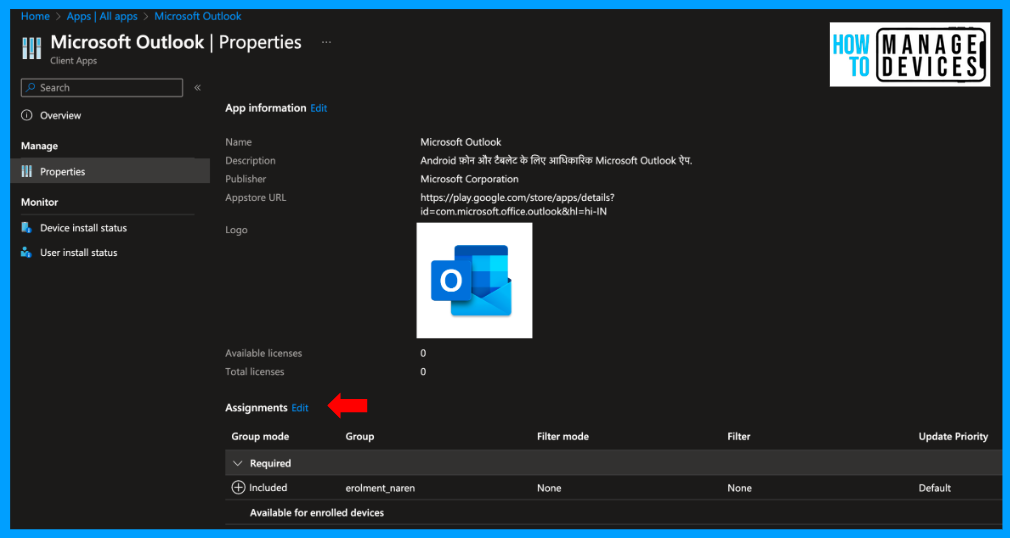
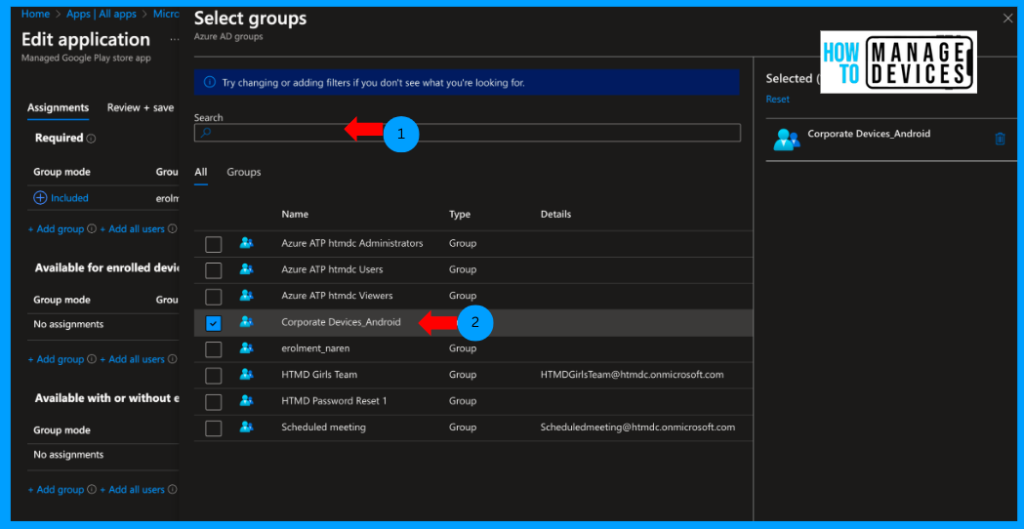
Now, search for the app added. In our case, I have selected the Outlook application. Click on the app, click on Properties, scroll to the bottom, and click Edit next to Assignments and search for the group we created and assign the group.
Search for the dynamic group that we have created based on the Enrolment Profile, select the group and click on Save. This will assign the App to the devices, not to the users, as we assigned it to the device-based group. In our case, I have chosen the Available mode, and the app will be available to install from the Managed Google Play Store on the user’s device.
Users can install the app from PlayStore. Users cannot download any other public apps. If you want to install apps during the enrollment of the device, assign the group under Required mode. This will install the apps once the device is enrolled on Intune. Once we update this post, we will see app installation behaviour and search public apps in the Managed Google Play Store.
Conclusion
In this article, we have discussed, how to create an Enrollment Profile and Dynamic Group based on the enrolment profile and assigned required apps. We will update the post very soon with the User experience and how to enrol the corporate-owned Fully Managed device to Intune and create new profiles and configurations. Till then, have a happy learning.
Author
About Author – Narendra Kumar Malepati (Naren) has 11+ years of experience in IT, working on different MDM tools. Over the last seven years, Naren has been working on various features of Intune, including migration from different MDMs to Intune. Naren mainly focuses on Android, iOS, and MacOS.
