In this post you will learn how to configure Azure AD Company Branding for Sign-in Experiences. Microsoft Azure AD portal provides many branding options for a better user experience.
Enhanced customization can be configured using the company branding blade in the Azure portal for your tenant. There, you can configure settings that automatically display customizations to your users when they land on your organization’s sign-in pages, as well as pages targeting specific browser languages.
When users authenticate into your corporate intranet or web-based applications, Azure AD provides the identity and access management service. You can add company branding that applies to all these sign-in experiences to create a consistent experience for your users.
The updated experience for adding company branding is available as an Azure AD preview feature. To opt-in and explore the new experience, go to Azure AD > Preview features and enable the Enhanced Company Branding feature.
Adding custom branding requires one of the licenses, Azure AD Premium 1, Azure AD Premium 2 or Office 365 (for Office apps).
- How To Setup Azure AD Company Branding – Device Management
- Organize Intune Managed Google Play Store Apps In Collections
Configure Azure AD Company Branding for Sign-in Experiences
Let’s see how you can set up Azure AD company branding options. You can use your organization’s logo and custom color schemes to provide a consistent look and feel on your Azure Active Directory.
- Sign in to Azure Active Directory admin center (https://aad.portal.azure.com)
- Navigate to Azure Active Directory -> Company branding.
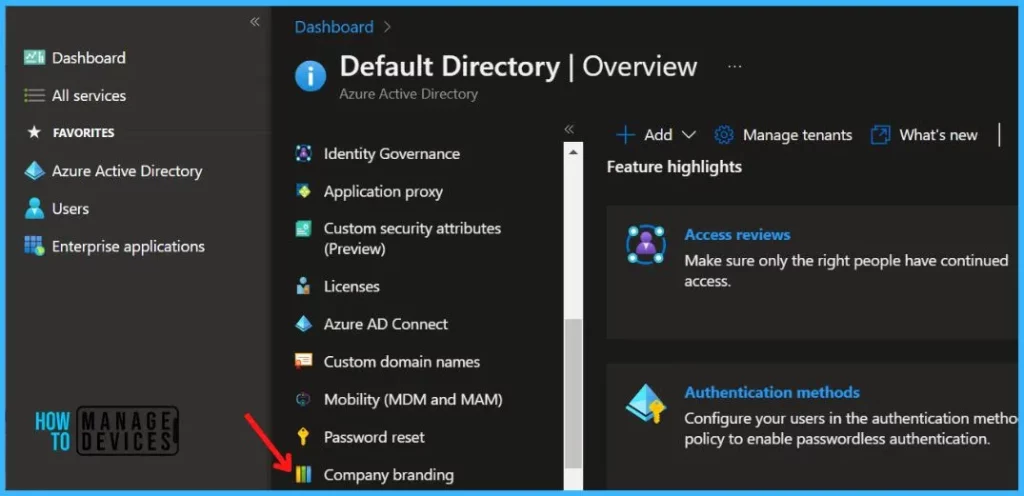
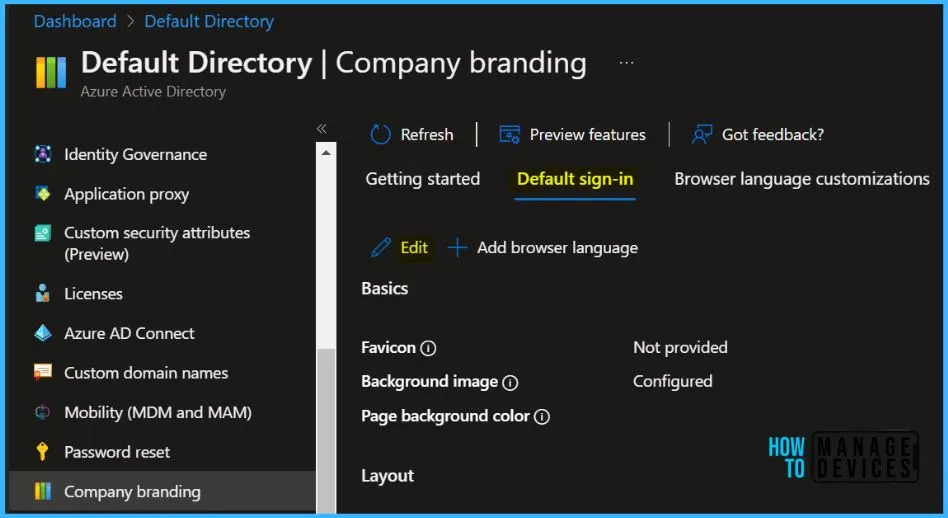
Select to Configure icon to Configure / Edit Company branding. If you already set up a customized sign-in experience, you’ll see an Edit button. Navigate to Default sign-in tab, click on Edit.
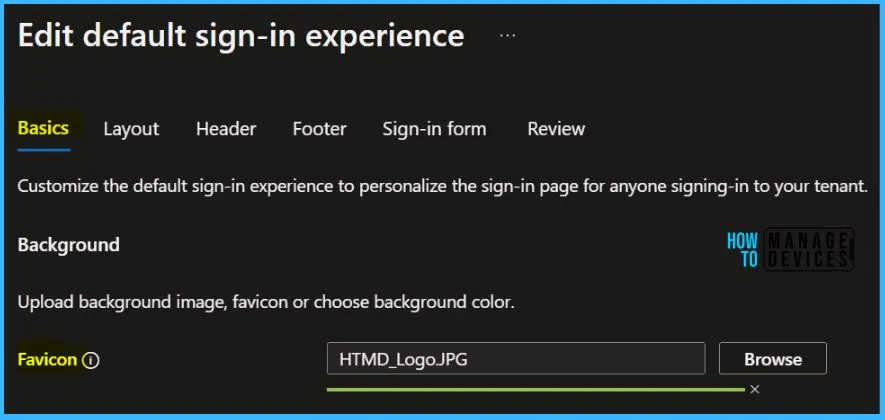
In the Basics tab, you can configure Favicon, Background image, and You’ll see an Edit button background color. Set up ‘Favicon’ tab.
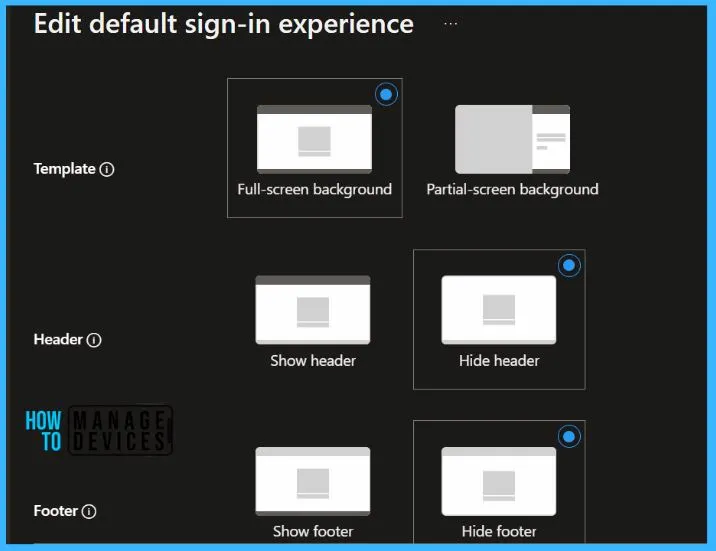
Here you can Configure layout that allows you to specify the placement of web page elements on the sign-in page. If you want to enhance sign-in experience, you need to opt for Show header, footer from this section.
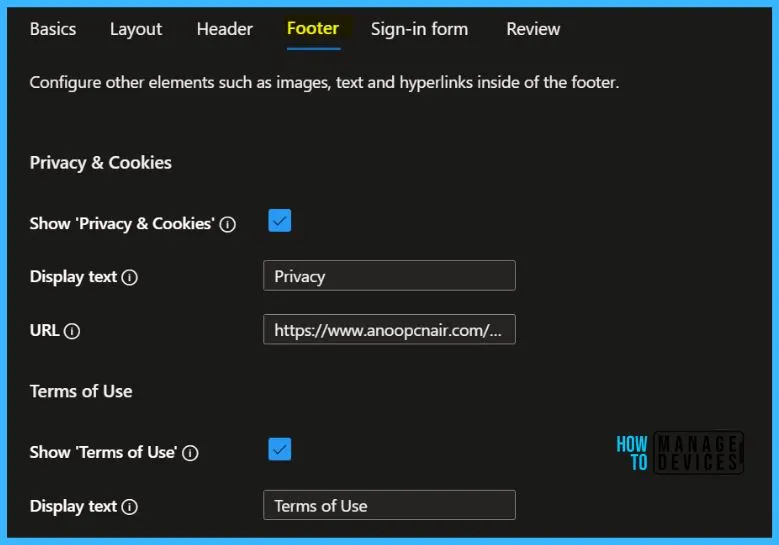
In Footer tab, you can customize footer hyperlinks by adding the URLs and link text for privacy and terms of use hyperlinks that appear in the footer of the sign-in page:
If you haven’t enabled the footer, go to the Layout section and select Show footer. Once enabled, adjust the following settings.
- Show ‘Privacy & Cookies’: This option is selected by default and displays the Microsoft ‘Privacy & Cookies’ link. Uncheck this option to hide the default Microsoft link. Optionally provide your Display text and URL. The text and links don’t have to be related to privacy and cookies.
- Show ‘Terms of Use’: This option is elected by default and displays the Microsoft ‘Terms of Use’ link. Uncheck this option to hide the default Microsoft link. Optionally provide your own Display text and URL. The text and links don’t have to be related to your terms of use.
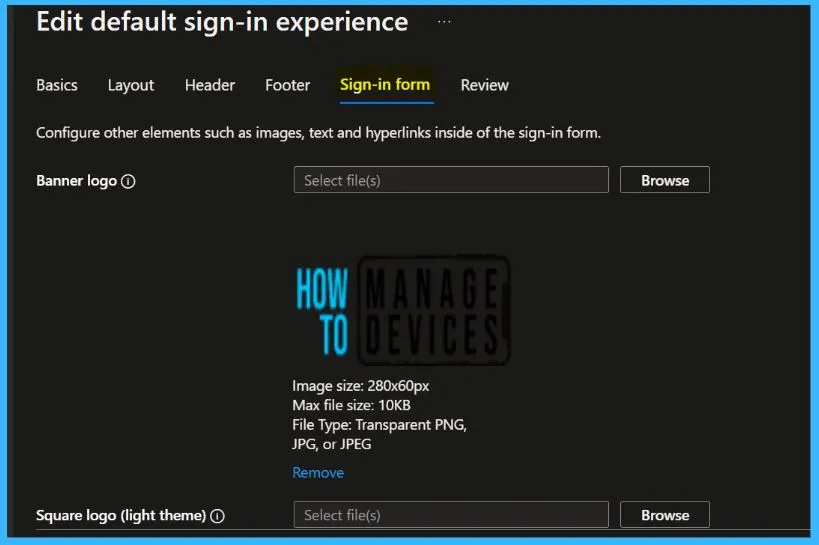
In Sign-in form section, you can adjust the banner logo to appear on the sign-in page. Additionally, you can add the following sections.
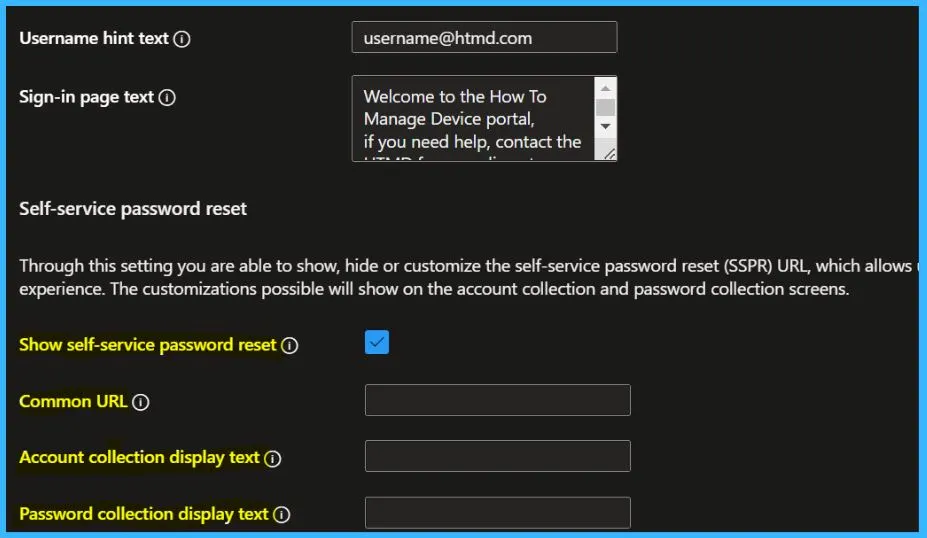
- Username hint text: Enter hint text for the username input field on the sign-in page. If guests use the same sign-in page, we don’t recommend using hint text here.
- Sign-in page text: Enter the text that appears at the bottom of the sign-in page. You can use this text to communicate additional information, such as the phone number of your help desk or a legal statement.
Here you can also set up custom self-service password reset hyperlink that allows you to show, hide, or customize the self-service password reset link on the sign-in page.
- Show self-service password reset (SSPR): Select the checkbox to turn on SSPR.
- Common URL: Enter the destination URL where your users will reset their passwords. This URL appears on the username and password collection screens.
- Username collection display text: Replace the default text with your custom username collection text.
- Password collection display text: Replace the default text with your customer password collection text.
All of the available options appear in one list so you can review everything you have customized or left at the default setting. When you are done, select the Create button.
Once your default sign-in experience is created, select the Edit button to make any changes. You can’t delete a default sign-in experience after it’s created, but you can remove all custom settings.
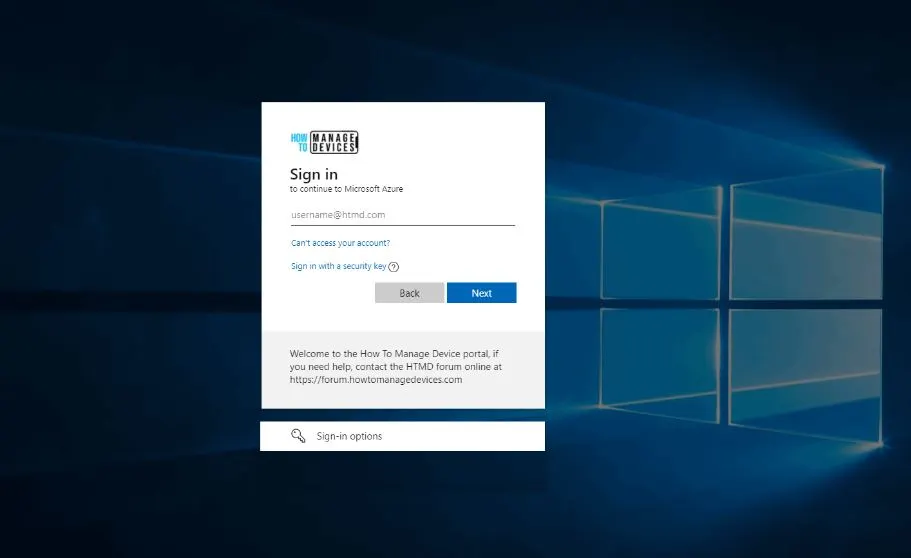
After you’ve created the Custom branding, you can access the page by https://login.microsoftonline.com/<domain name>. Here’s how you may experience based on defined customizations.
Author
About Author – Jitesh, Microsoft MVP, has over five years of working experience in the IT Industry. He writes and shares his experiences related to Microsoft device management technologies and IT Infrastructure management. His primary focus is Windows 10/11 Deployment solution with Configuration Manager, Microsoft Deployment Toolkit (MDT), and Microsoft Intune.
