In this post, you will learn how to Add iOS store apps in Intune. After adding the store apps, you can make the iOS app installed or available for iOS/iPadOS devices.
Before you can configure, assign, protect, or monitor apps, you must add them to Microsoft Intune. You must determine app requirements that are needed by the users at your company, such as the platforms and capabilities that your workforce needs.
Why do you need to manage iOS devices? This is for helping the users to become more productive at the same time protecting the enterprise resources like email, SharePoint, and OneDrive etc.
Let’s learn how to configure Intune Enrollment setup for iOS Devices, setup enrollment for iOS/iPadOS devices with Microsoft Intune. When you deploy the store apps to iOS/iPadOS devices, the apps are automatically updated.
There are various types of apps that are available for Intune. Store apps, line-of-business (LOB) apps, and web apps are added, and then synchronized into Intune so that they appear in the Client Apps list. Once they appear in the Client Apps list, you can manage the assignment of any store apps.
- How To Collect Intune Logs From IOS Device Company Portal
- Intune Delete Action No Longer Retire IOS And Android Devices
Add iOS Store Apps in Intune
Let’s follow the steps to add iOS store app directly in the Intune console. You can assign apps by using this method only if they are free of charge in the App Store. If you want to assign paid apps by using Intune, consider using the iOS/iPadOS volume-purchase program.
- Sign in to the Microsoft Intune admin center https://endpoint.microsoft.com/.
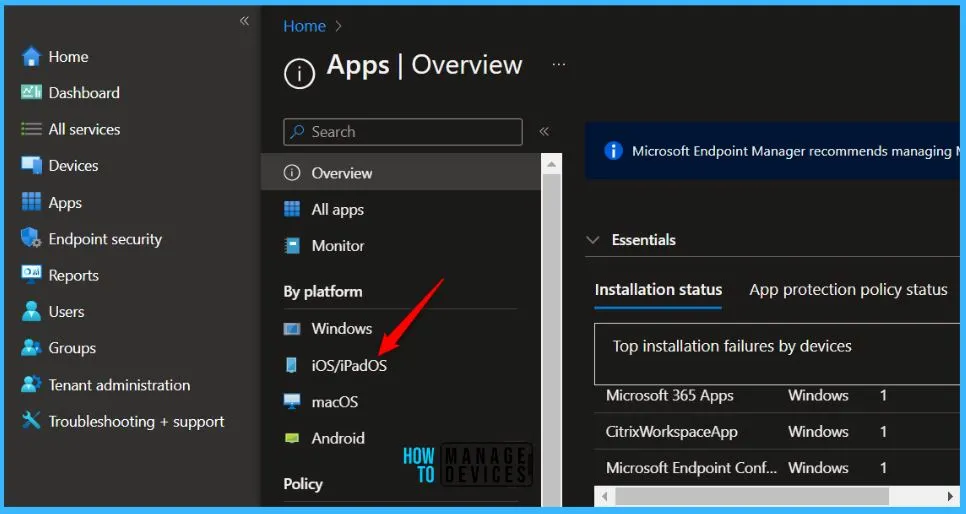
- Select Apps > All apps > Add, or you can navigate to Apps > iOS/iPadOS.
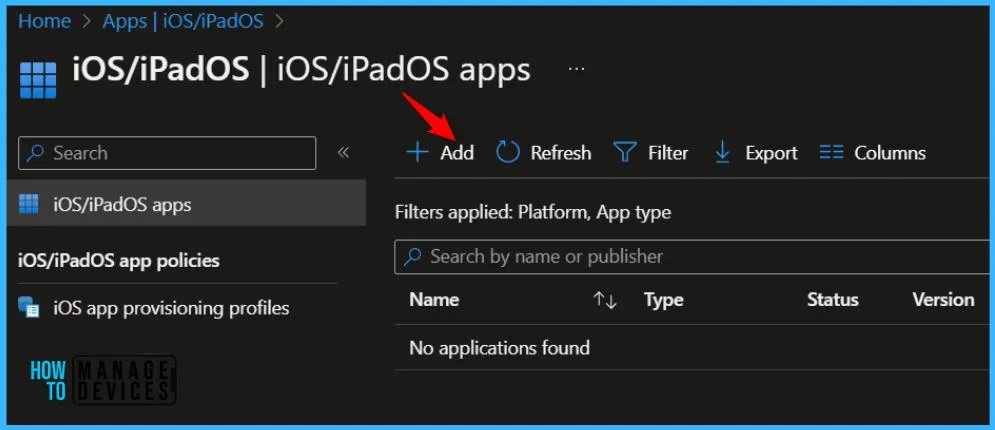
Let’s proceed to add iOS app, click the +Add button.
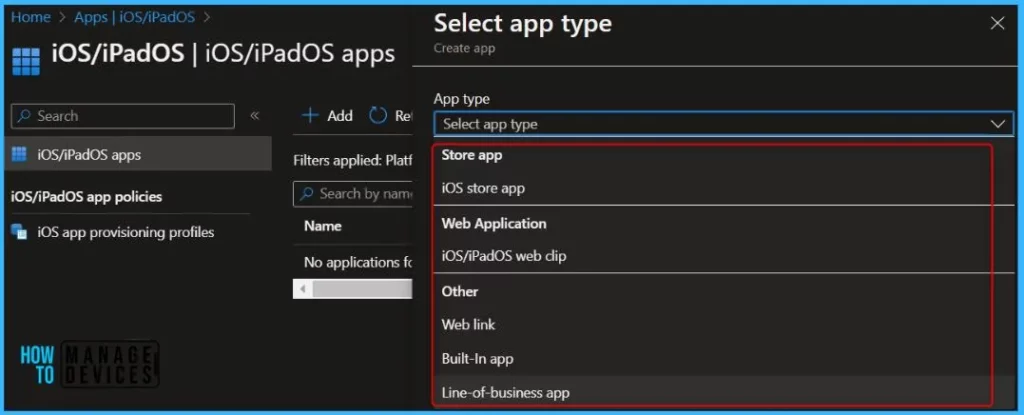
Intune supports a wide range of app types for iOS/iPadOS. The available options differ for each app type. Intune lets you add and assign the following app types to iOS/iPadOS devices.
- iOS store app
- iOS/iPadOS web clip
- Web link
- Built-In app
- Line of business app
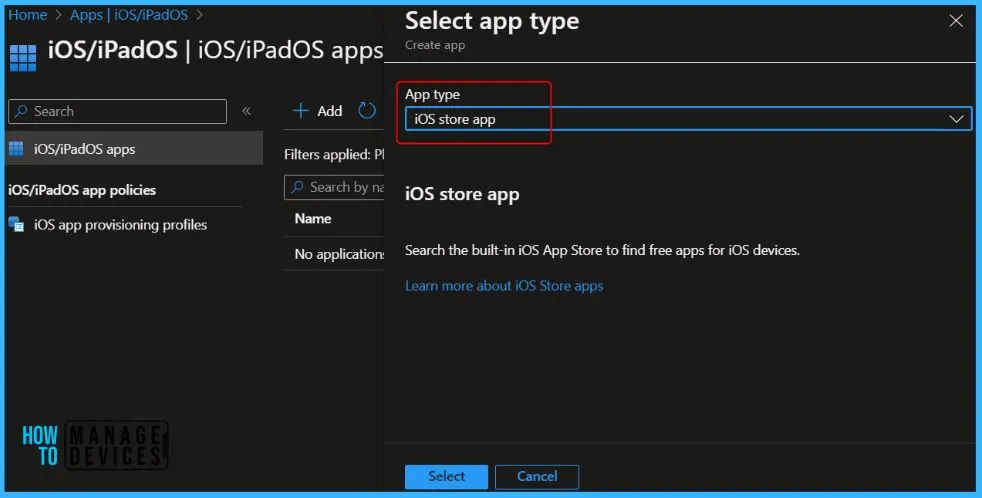
On the Select app type pane, under the store app, select iOS store app and click Select.
Select Search the App Store. In the App Store, based on your requirement type the app name in the search box and click on the search icon. For Example, I searched for Webex. select the App Store country/region locale.
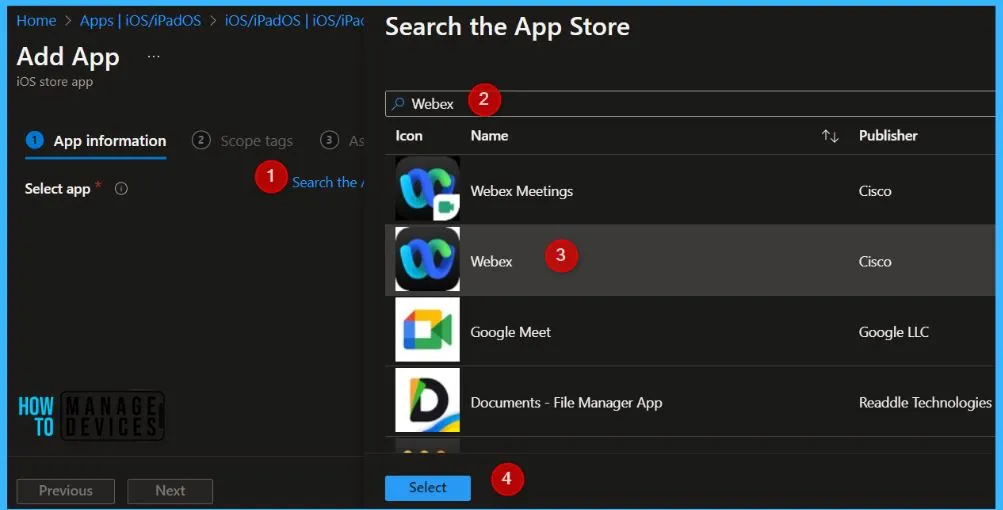
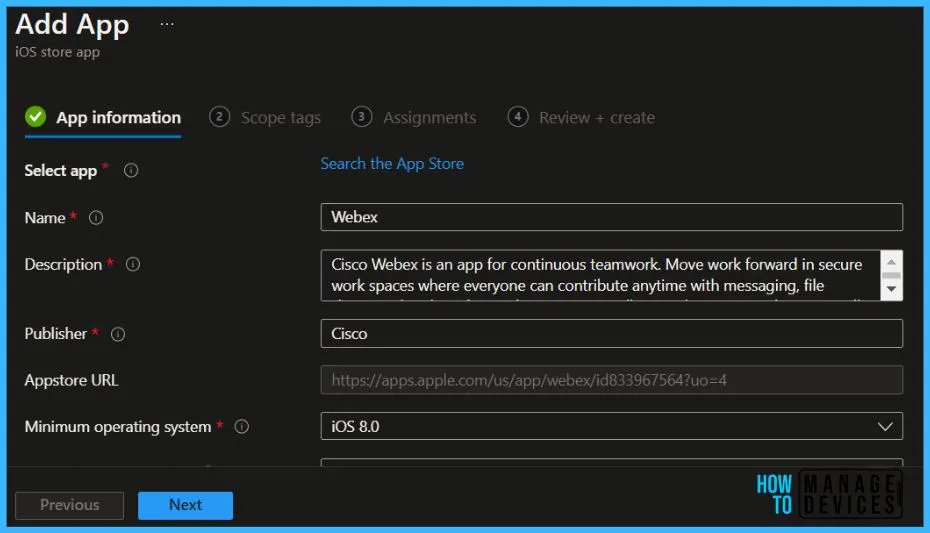
In the App information page, add the app details. Depending on the app you have chosen, some of the values in this pane might have been automatically filled in:
- Name: Enter the name of the app as it is to be displayed in the company portal. Make sure that any app name that you use is unique.
- Description: Enter a description for the app. This description is displayed to users in the company portal.
- Publisher: Enter the name of the publisher of the app.
- Appstore URL: Type the App Store URL of the app that you want to create.
- Minimum operating system: In the list, select the earliest operating system version on which the app can be installed. If you assign the app to a device with an earlier operating system, it will not be installed.
- Applicable device type: In the list, select the devices that are used by the app.
- Category: Optionally, select one or more of the built-in app categories, or a category that you created.
- Show this as a featured app in the Company Portal: Select this option to display the app suite prominently on the main page of the company portal when users browse for apps.
- Information URL: Optionally, enter the URL of a website that contains information about this app. The URL is displayed to users in the company portal.
- Privacy URL: Optionally, enter the URL of a website that contains privacy information for this app. The URL is displayed to users in the company portal.
- Developer: Optionally, enter the name of the app developer. This field is visible only to administrators and is not visible to your users.
- Owner: Optionally, enter a name for the owner of this app, for example, HR department. This field is visible only to administrators and is not visible to your users.
- Notes: Optionally, enter any notes that you want to associate with this app. This field is only visible an administrator and will not be visible to end users.
- Logo: Optionally, upload an icon that will be associated with the app. This icon is displayed with the app when users browse the company portal.
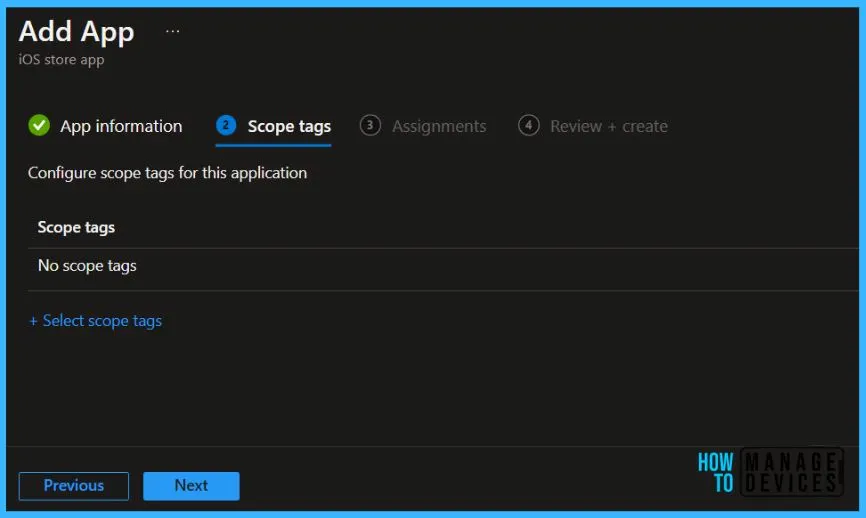
Click Select scope tags to optionally add scope tags for the app. Click Next to display the Assignments page, Select the group assignments for the app.
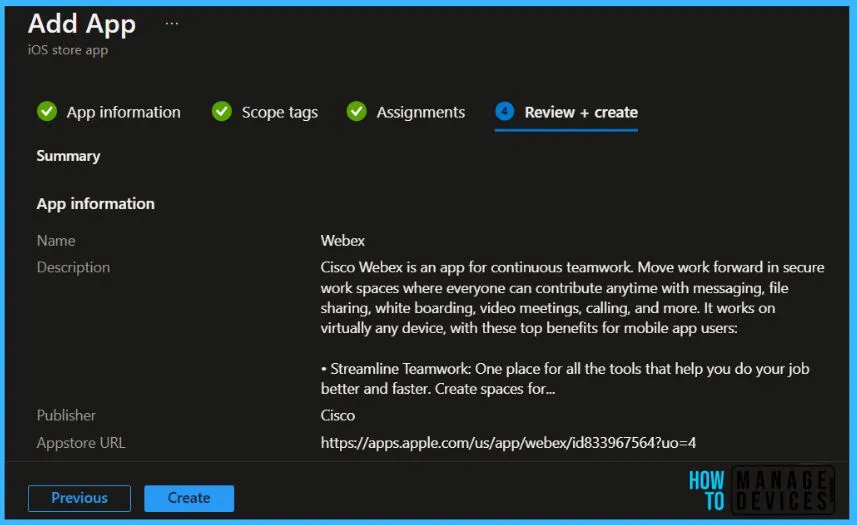
In the Review + create page. Review the values and settings you entered for the app. When you are done, click Create to add the app to Intune.
A notification will appear automatically in the top right-hand corner with a message. Here you can see, Application saved successfully. The Overview blade of the app you’ve created is displayed.
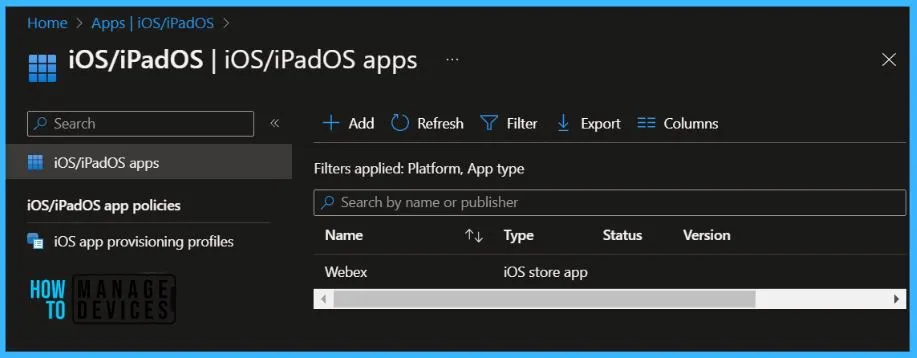
The added application will appear here in the iOS/iPadOS apps node.
On an iOS device, within a few moments, you will see Webex is available to install based on assignment. Users can proceed to install and you can monitor the progress from Intune console.
Author
About Author – Jitesh, Microsoft MVP, has over five years of working experience in the IT Industry. He writes and shares his experiences related to Microsoft device management technologies and IT Infrastructure management. His primary focus is Windows 10/11 Deployment solution with Configuration Manager, Microsoft Deployment Toolkit (MDT), and Microsoft Intune.

I am having difficulties when i am trying to see the app on my device. My iOS device is enrolled in ABM and Intune, a profile is also assigned to it. Even though i see the apps in my Company portal, i am not able to install the apps. Additionally i am seeing an error saying Sync with Microsoft Defender for Endpoint. How can i have my iOS store apps to install automatically on the group assigned under required?