Let’s discuss how to Enable Alternate Error Pages (AlternateErrorPagesEnabled) in Microsoft Edge. This is a Microsoft Edge policy that allows Edge to connect to a web service. This will help generate URLs and provide search suggestions for problems like DNS errors.
The Microsoft 365 Admin Center enables administrators to manage settings through Microsoft products, including the Edge browser. Through this platform, they can implement policies that control features such as Alternate Error Pages and security settings. This customization ensures a secure browsing experience while enhancing user productivity and protecting information.
Enabling Alternate Error Pages policy allows a web service to provide URLs and search suggestions for network errors. It helps users troubleshoot issues effectively. If disabled, no web service calls are made, and users will see a regular error page without additional resources.
A DNS error in Microsoft Edge means the browser can not connect to the internet. This can occur due to an outdated browser, network problems, or misconfigured DNS settings. Through this blog post, I will explain how this policy work in Microsoft edge with step-by-step.
Table of Contents
Enable Alternate Error Pages in Microsoft Edge Through Microsoft 365 Admin Center Policy
Enabling Alternate Error Pages will help generate URLs and provide search suggestions for problems like DNS errors. If you do not set this policy, Microsoft Edge will use the user preference found under Services at edge://settings/privacy.
There is a toggle for Suggest similar pages when a webpage can’t be found, which users can turn on or off. If you enable AlternateErrorPagesEnabled policy, this setting will automatically turn on, and users cannot change it. If you disable this policy, the settings will turn off, and users will also be unable to change them.
- Top 75 Latest Intune Interview Questions and Answers
- Top 46 Azure Virtual Desktop AVD Interview Questions
- Enable Disable Search Bar Allowed in Edge Through Microsoft 365 Admin Center Policy
Enabling AlternateErrorPages
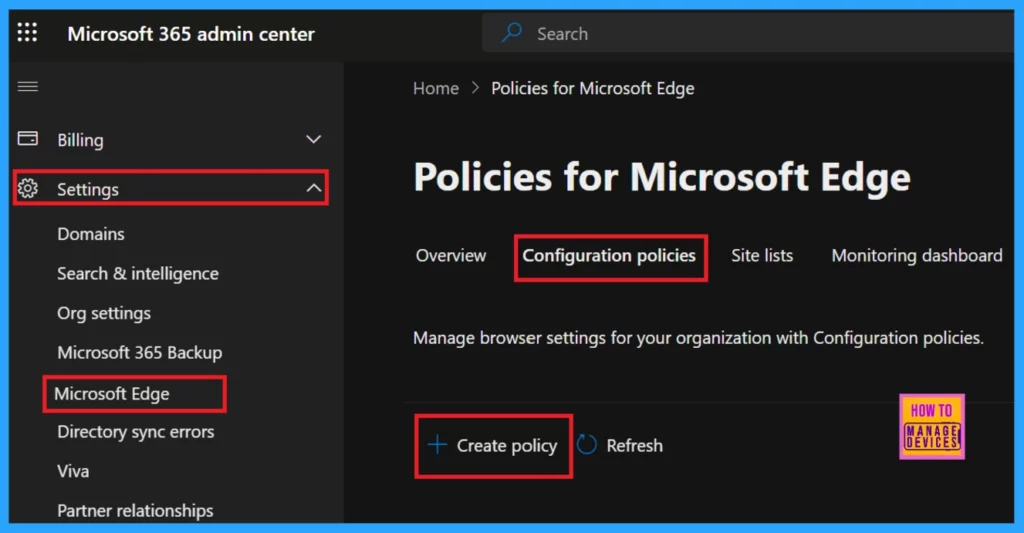
Enablling Alternate Error Pages in Microsoft Edge, first, you must sign in to the Microsoft admin center and login with your credentials. Then,
- Navigate Settings > Microsoft Edge > Configuration profile.
- Click on the Configuration profile.
- Hit on + Create Policy.
Basics
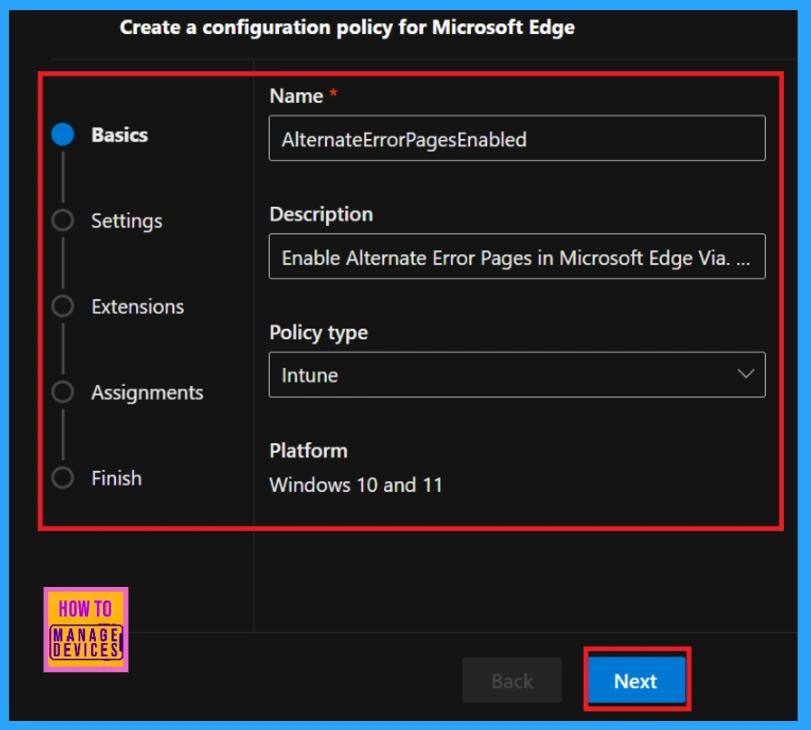
Configuration policies have 5 steps, such as Basics, Settings, Extension, Assignment and Finish. This is the Basics section. Here we must add Policy Name, Description, Policy Type and the Platform.
| Policy | Details |
|---|---|
| Name | AlternateErrorPagesEnabled |
| Description | Enable Alternate Error Pages in Microsoft Edge Via Microsoft 365 Admin Center Policy |
| Type | Intune |
| Platform | Windows 10 and 11 |
Settings
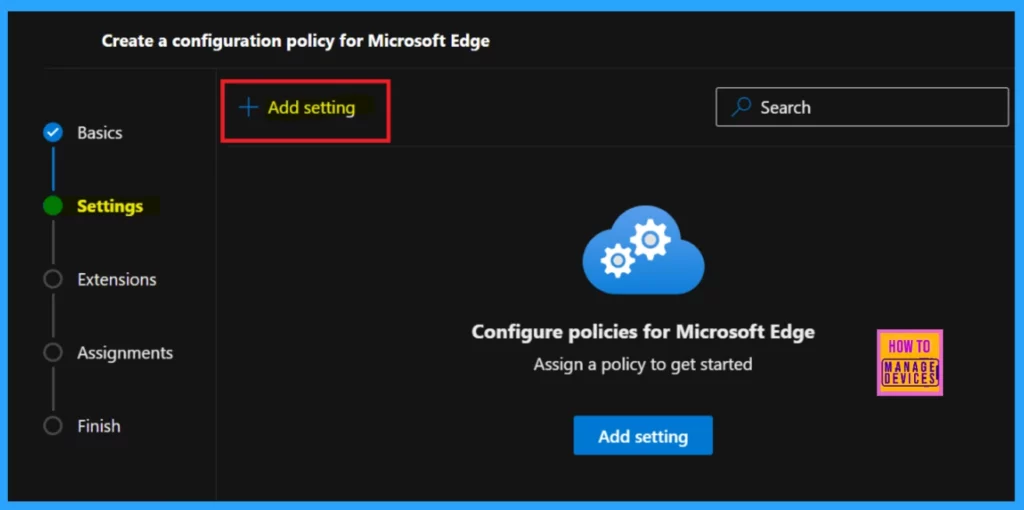
After the finishing the Basics section, we are entered into an important area of a configuration, i.e. Settings. Here we can add Value and access the policy details. To do that click on the +Add Settings option.
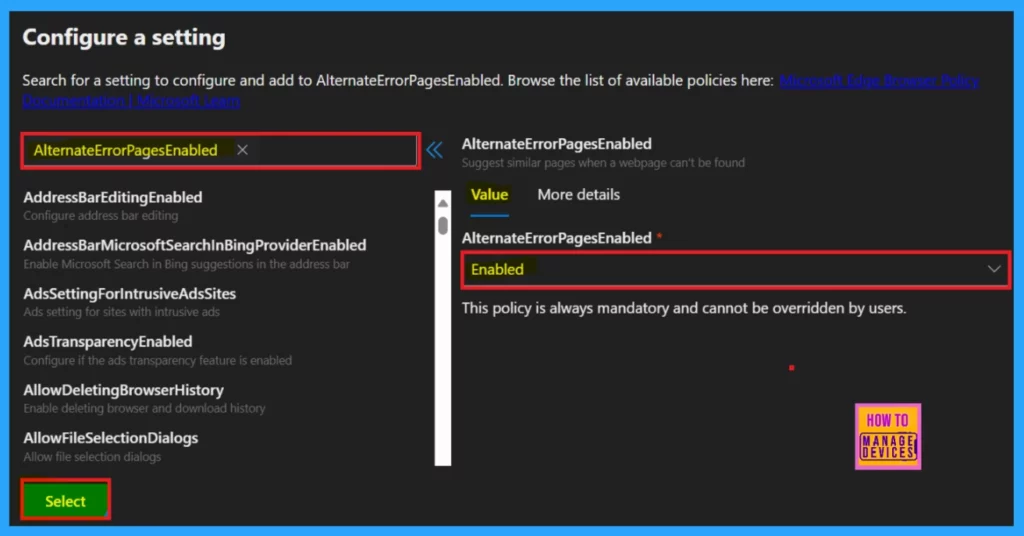
Now we entered Configure a setting page where can search the policy name under Additional settings. At the left pane you can see Value and More details options. We should add the Value which is mandatory.
Add Value
- To add Value, click the drop-down arrow and select enabled or disabled for your policy requirement.
- Here I select enabled
More Details Settings
In the More Details section, you can find a clear and detailed explanation of the policy. AlternateErrorPagesEnabled policy will generate URLs and provide search suggestions for problems like DNS errors. If you don’t configure this policy, Microsoft Edge will respect the user preference that’s set under Service at edge://settings/privacy. There is a Suggest similar pages when a webpage can’t be found toggle, which users can switch on or off.
| Feature | Description |
|---|---|
| Enable (Turn On) | The setting will automatically turn on, and users cannot change it. |
| Disable (Turn Off) | The settings will turn off, and users will also be unable to change them |
After through study click Select button. Now you will get a notification that the Policy successfully updated.
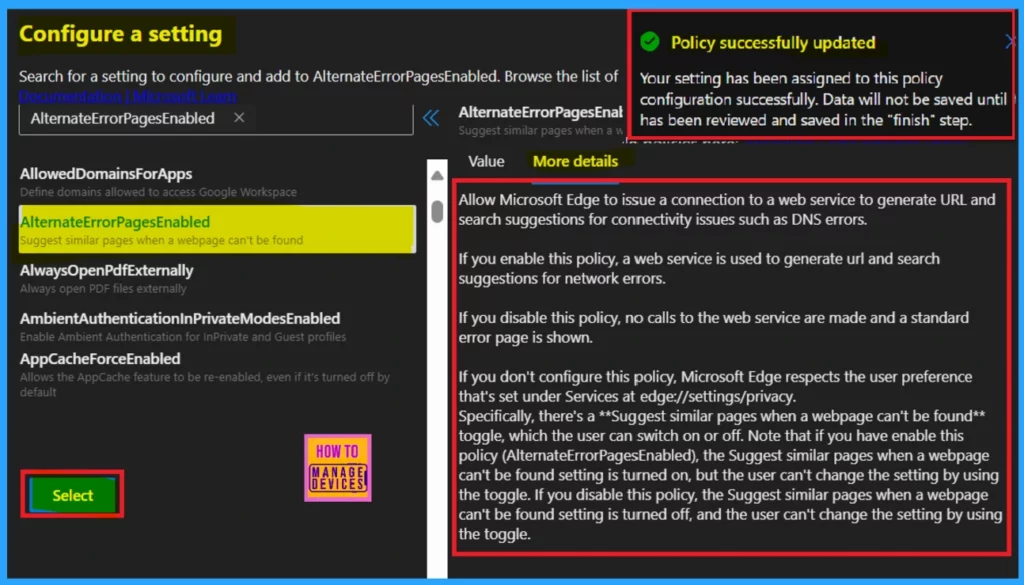
Note: Your setting has been assigned to the policy configuration successfully. Data will not be saved until has been reviewed and saved in the Finish step.
Extension
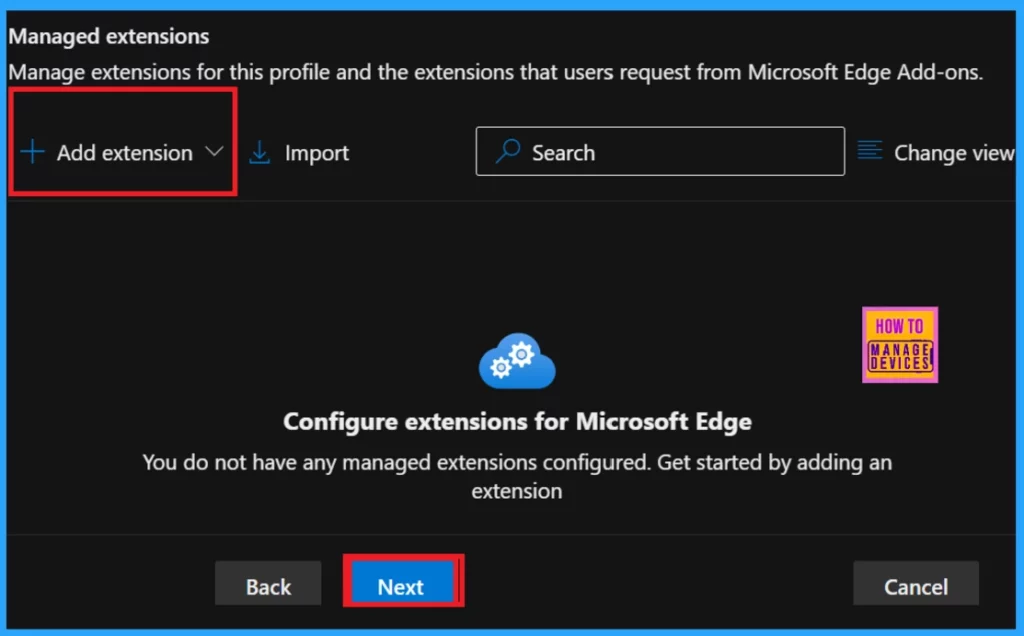
These are the default settings for all extensions in this policy. You can change these settings for managed extensions. This section is not necessary. So you can skip this page. To go to next section, click on the Next option.
Assignments
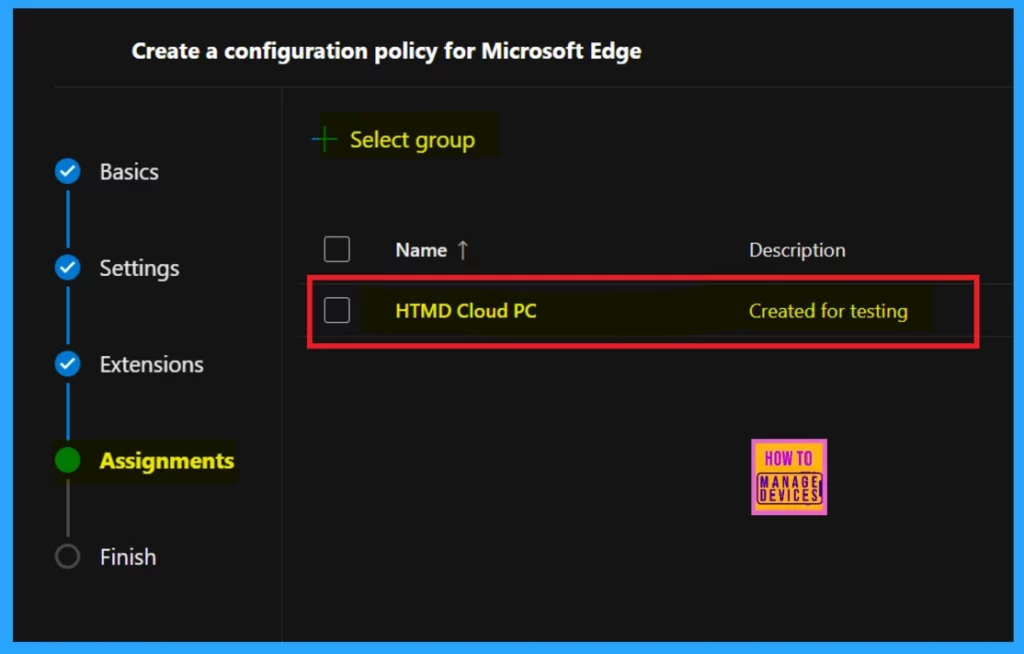
The Assignment section is essential to a configuration policy, just like the Settings option. You can assign the policy to a specific group by clicking on the +Select group option.
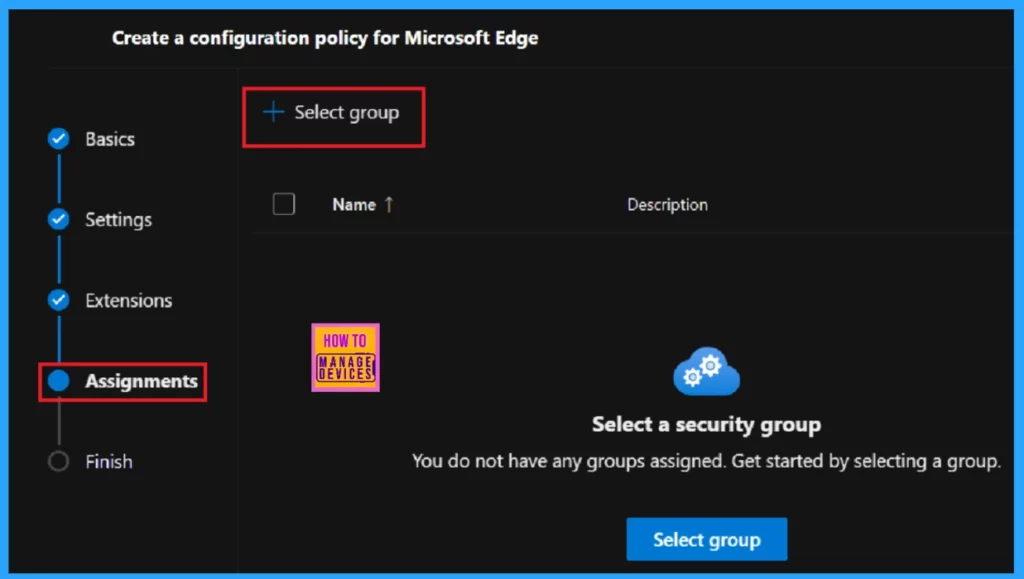
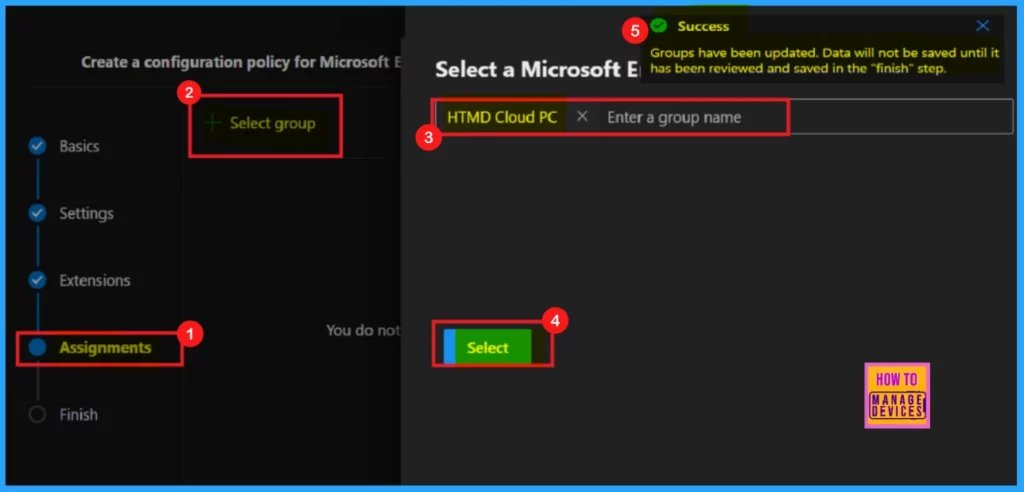
+Select Group navigates you to a pop-up window, where you can select the group. You can select it from the Microsoft Entra group, which is provided by default. Here, I selected the HTMD Cloud PC group from the list.
- Now, you will get a notification again stating that the group has been updated, but data will only be saved in the Finish stage.
The next window will show you the policy has been created for testing the selected groups. It may take some time for this policy to apply to the group. You can wait for it to apply automatically, or you can use the sync option on the company portal.
Review and Create
This is the final and very important stage because here you can review the details of the Alternate Error Pages policy that you have already been given. If needed, you can edit it at this level. Once you confirm that all the information is accurate, click on Review and Create to finalize the policy.
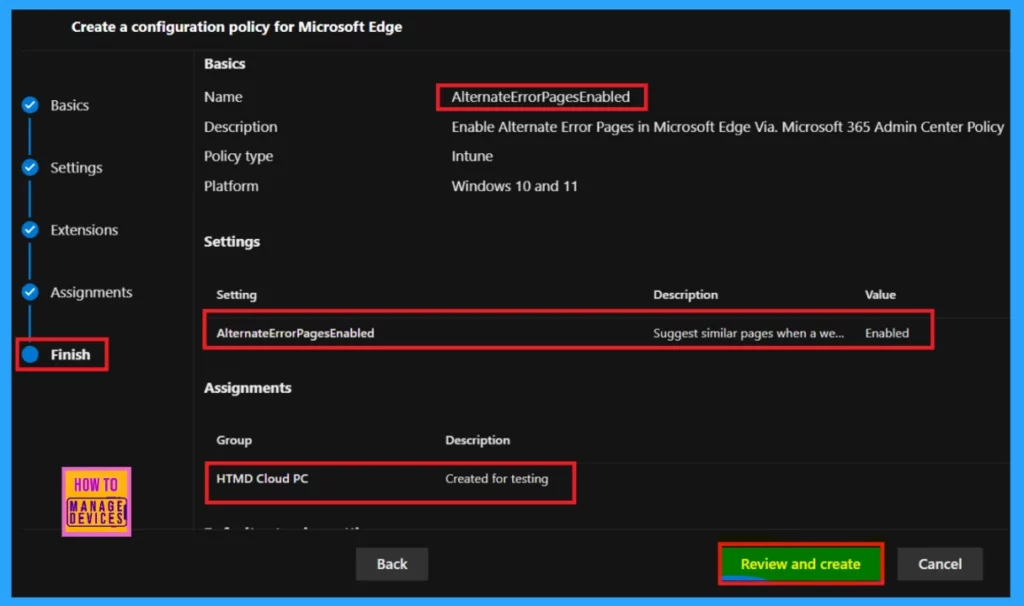
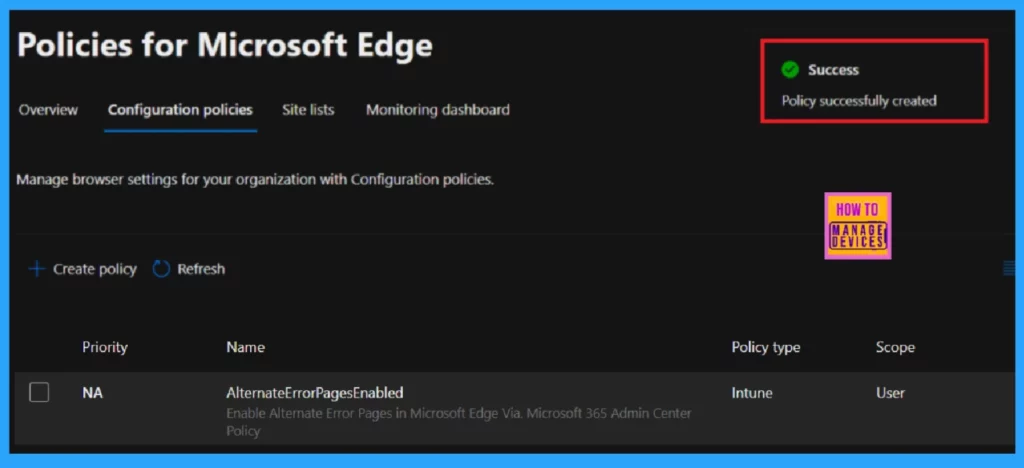
After you click Review and Create, a notification will appear confirming that the policy was created successfully. However, you will have to wait some more time to deploy the policy to the assigned group. Otherwise, you can sync the policy in the company portal.

End Result
After syncing, you can see the new policy on the Policies for Microsoft Edge page (see the image below for your reference).
End User Experience
To see the end-user result, you should open Microsoft Edge. Then go the Settings and More (… dots) in the right upper pane.
- Click on Settings
- Select Privacy, search, and services
- Scrol down to Security
There you can see the use secure DNS to specify how to lookup the network address for wbesite is enabled. By default, Microsoft Edge uses current service provider. Alternate DNS providers may cause some sites to not be reachable.

Need Further Assistance or Have Technical Questions?
Join the LinkedIn Page and Telegram group to get the latest step-by-step guides and news updates. Join our Meetup Page to participate in User group meetings. Also, Join the WhatsApp Community to get the latest news on Microsoft Technologies. We are there on Reddit as well.
Author
Anoop C Nair has been Microsoft MVP for 10 consecutive years from 2015 onwards. He is a Workplace Solution Architect with more than 22+ years of experience in Workplace technologies. He is a Blogger, Speaker, and Local User Group Community leader. His primary focus is on Device Management technologies like SCCM and Intune. He writes about technologies like Intune, SCCM, Windows, Cloud PC, Windows, Entra, Microsoft Security, Career, etc.
