Let’s discuss Enable Disable Search Bar Allowed in Edge Through Microsoft 365 Admin Center Policy. SearchbarAllowed is one of the policies provided by the Microsoft 365 admin center. This policy is related to the Microsoft Edge Search bar.
When SearchbarAllowed enabled, users can use the search bar to search the web from their desktop or an application. The search bar provides a search box, powered by Edge’s default search engine, that shows web suggestions and opens all web searches in Microsoft Edge.
This policy helps administrators manage the search functionality in Microsoft Edge, ensuring that users have a consistent and controlled browsing experience. Using the Microsoft 365 admin center, you can create a Search bar-allowed policy for your organization.
In this blog post, I will explain how to Enable the Disabled Search Bar Allowed in Edge Through the Microsoft 365 Admin Center Policy and provide step-by-step guidance for enabling this policy on Edge.
Table of Contents
What is the SearchbarAllowed Policy?
The SearchbarAllowed policy in Microsoft Edge allows administrators to control whether the search bar feature is enabled.
Enable Disable Search Bar Allowed in Edge Through Microsoft 365 Admin Center Policy
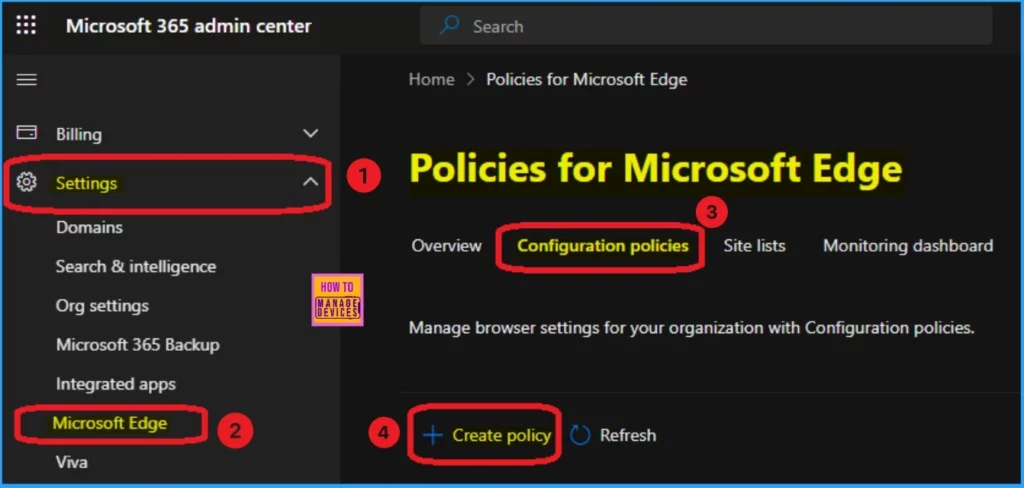
Search Bar Allowed Policy can be easily set up from the Microsoft 365 Admin center. From the portal, go to Settings > Microsoft Edge. This window shows tabs such as Overview, Configuration Policies, Site Lists, and Monitoring Dashboard.
- Select Configuration Policies
- Click on + Create Policy
- Enable Additional Search Box in Edge Browser using Microsoft 365 Admin Center Policy
- Enable AI Gen Themes in Edge Browser using Microsoft 365 Admin Center Configuration Policy
- Brand Identity Advanced Customization Options for Microsoft Edge Browser for Business
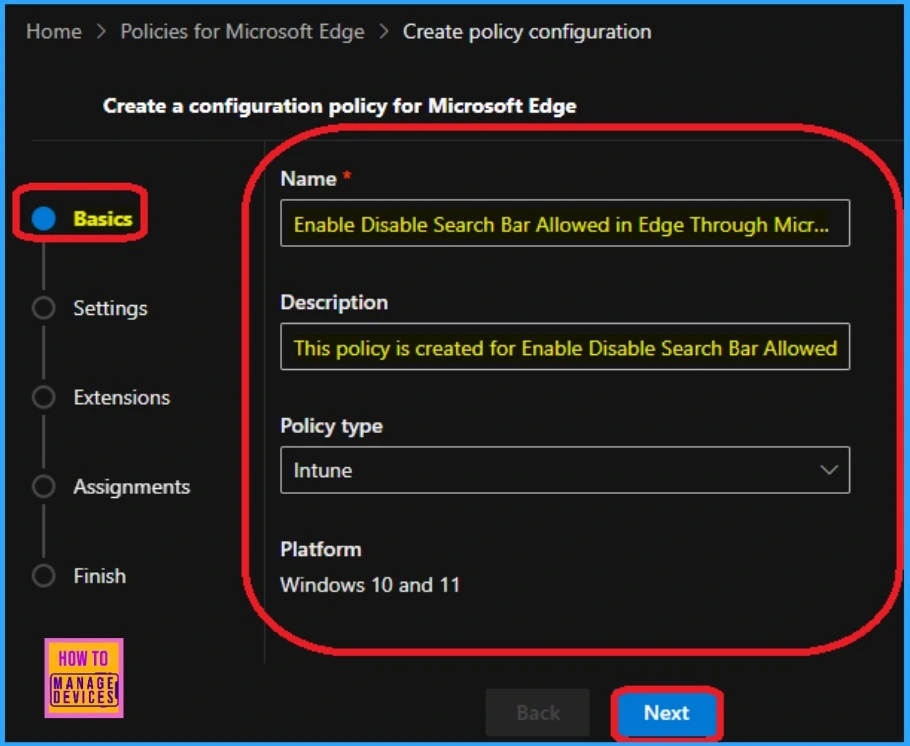
Then, you will enter the Basic Tab, where you give the Name and Description of the policy you want to create. After entering them, Click on the Next button.
Configuring a Setting
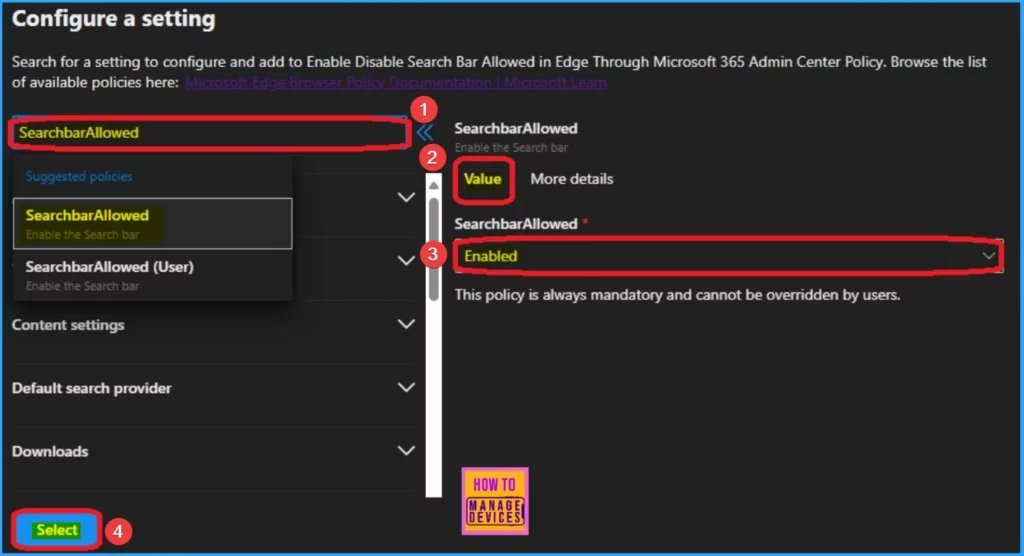
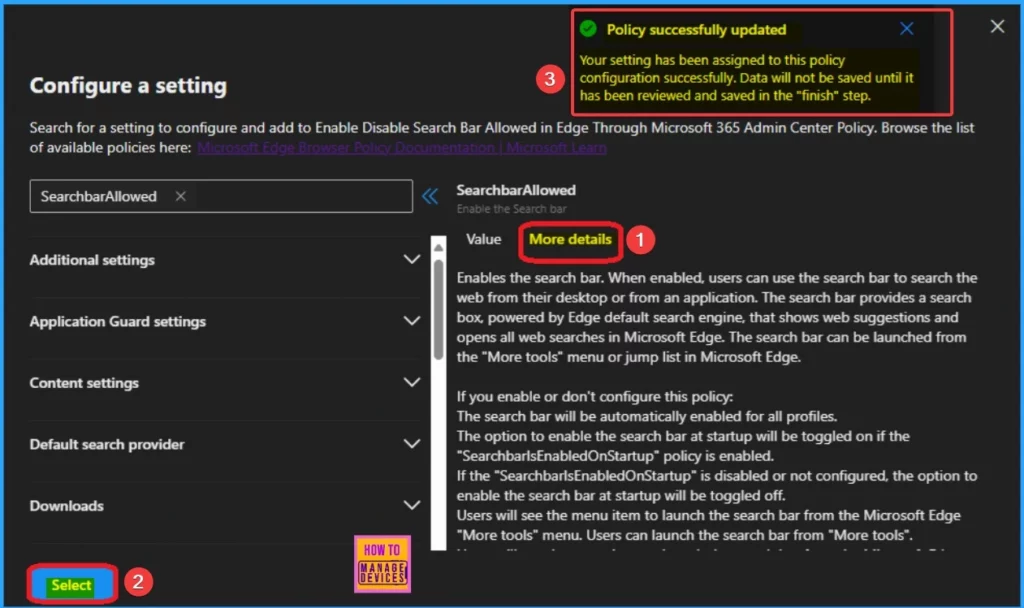
The second tab is Configure Settings. Here, you can select the policy and create it easily. When searching for the policy, enter the policy name for easy access. After choosing the policy, the right side of the window shows the policy name.
Here, you can select the Value (Enable or Disable). The More tab shows more details of the selected policy. Clicking the Select button will take you to the Next window.
| Enable | Disable |
|---|---|
| The search bar will be enabled for all profiles. | The search bar will be disabled for all profiles. |
| The option to launch the search bar from Microsoft Edge “More tools” menu will be enabled. | The option to launch the search bar from Microsoft Edge “More tools” menu will be disabled. |
| The option to launch the search bar from the Microsoft Edge jump list menu will be enabled. | The option to launch the search bar from the Microsoft Edge jump list menu will be disabled. |
If you want to know more about the selected policy, you can go to the More Details tab. You must carefully read the policy details before enabling the configuration. After that, click on the Select button. Then you will be notified on the 365 admin center as the Policy is successfully updated.
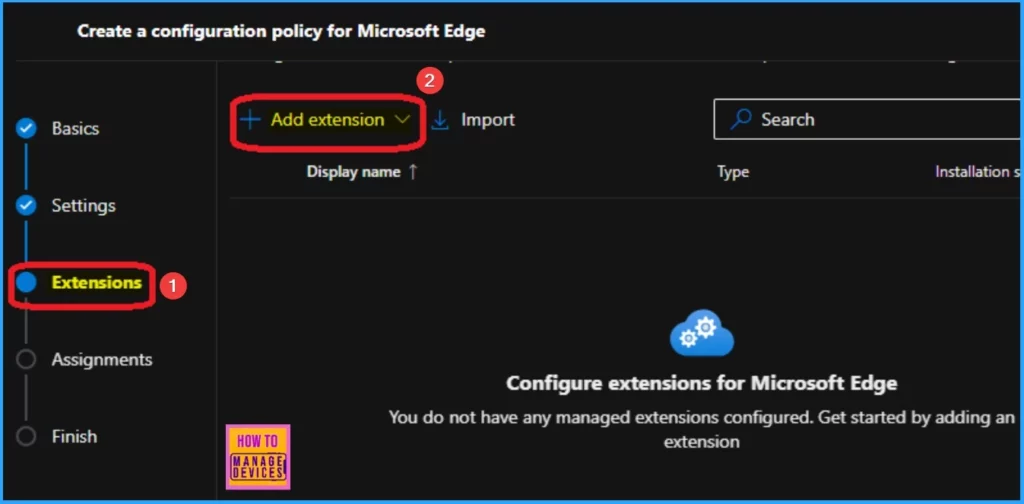
The third tab is Extensions for your policy. If you want to add an extension for the policy, you can select it from this window. You can also skip this section and go to the next window. For this, click on the Next option.
| Extensions on Edge |
|---|
| Edge add-ons |
| Search bar |
| External Extension |
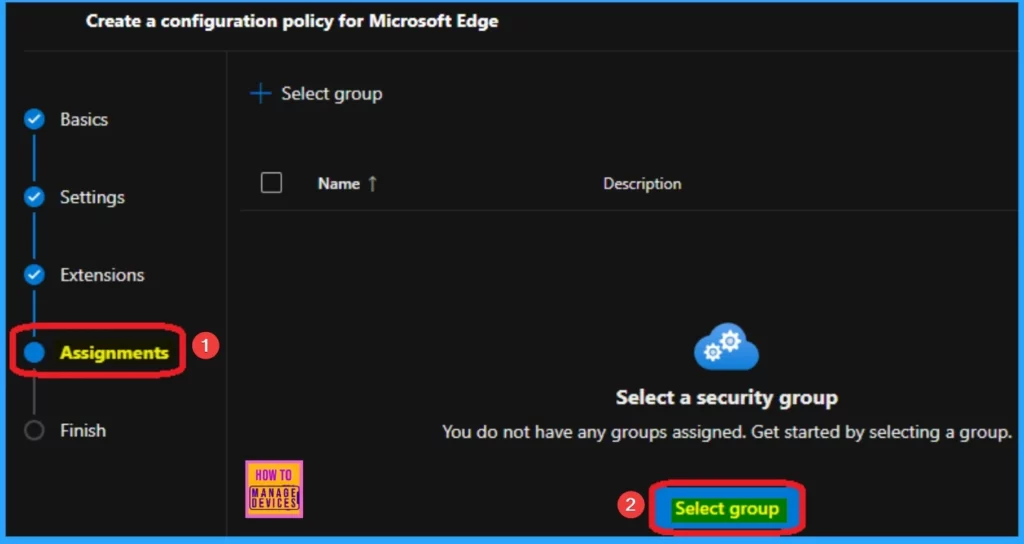
The Assignment is the second-to-last tab, which helps you add groups for assigning your policy. This tab determines which user or device is assigned the policy. Click on the Select group option.
- Enable Disable Show Downloads Insecure Warnings in Edge via the Microsoft 365 Admin Portal
- Enable Address Bar Editing in the Edge Browser using the Microsoft 365 Admin Center Policy
- Enable Disable Sleeping Tabs Timeout in Edge Browser using the Microsoft 365 Admin Center Policy
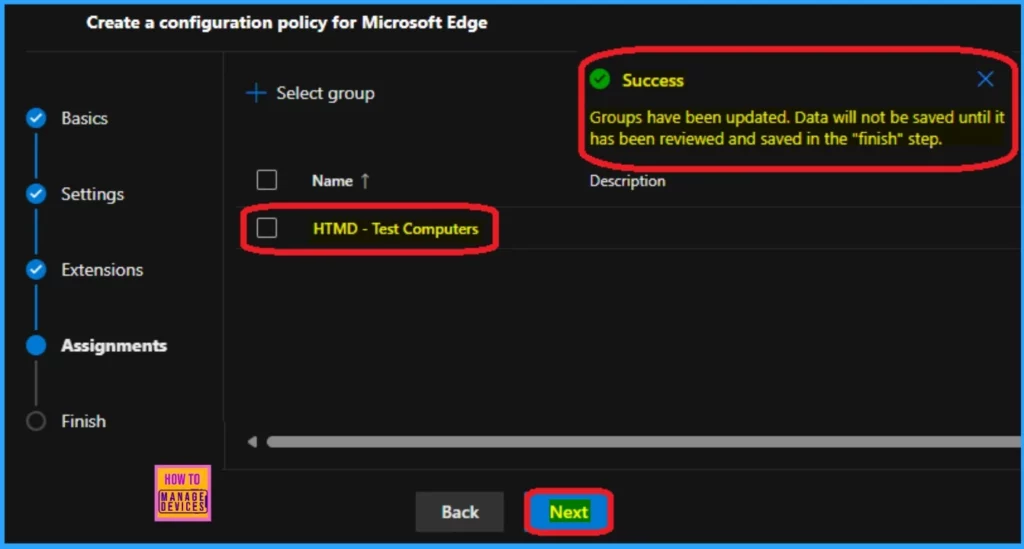
Then select the group and go to the next window. You will get a notification that the Groups have been updated. The selected group is shown in the window below. Click on the Next button to continue.
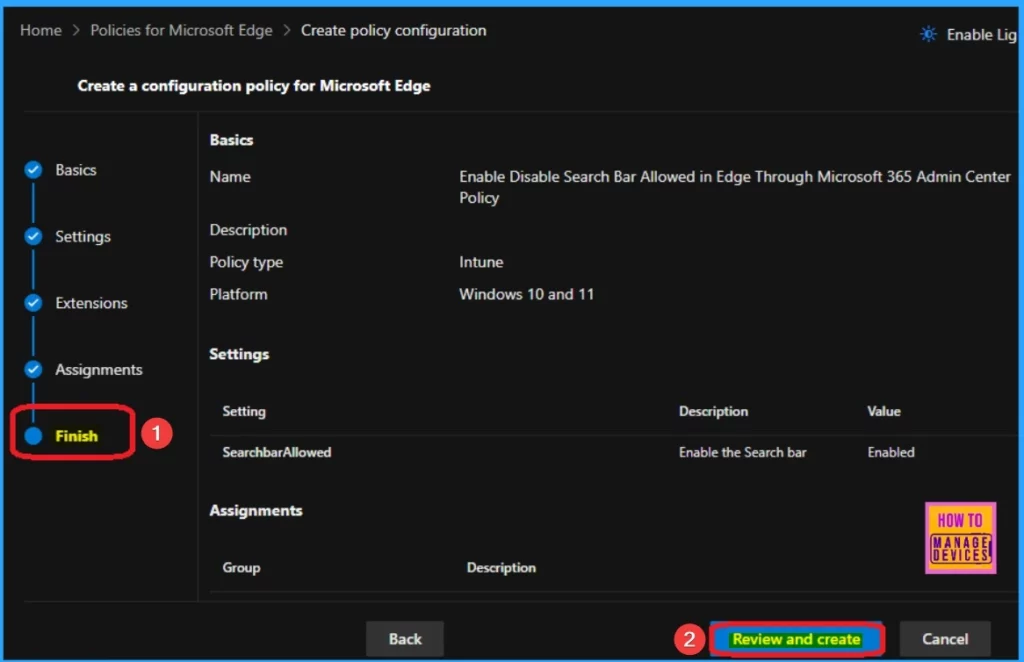
The Finish tab is the last one to complete the policy creation. Here, you can check all the details. If you want to change anything, you can go to the previous window by selecting the back button. After checking all the details, click on Review and create.
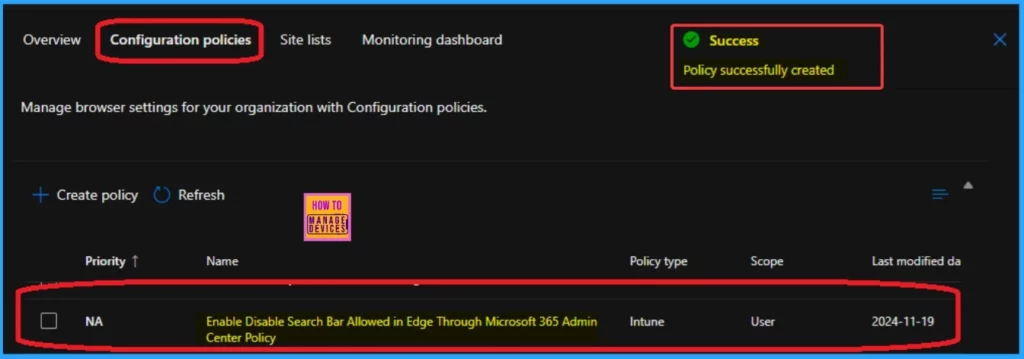
After the policy is created, you will receive a notification on the portal that the Policy has been successfully created. The screenshot below will help you.
End Result
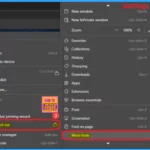
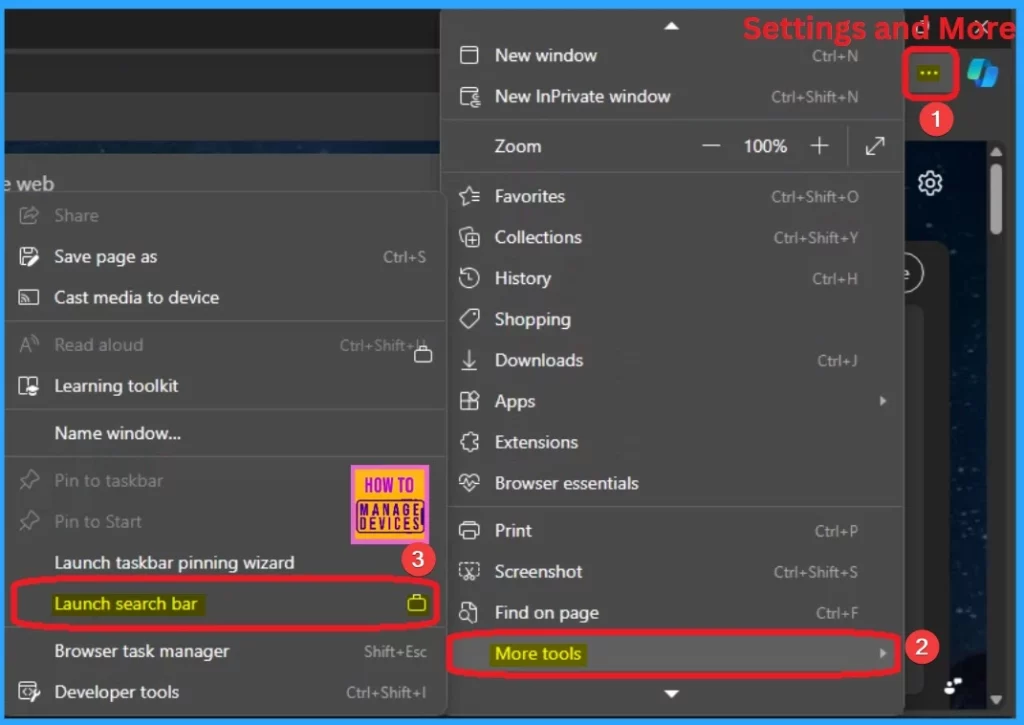
The Screenshot below shows the Edge Side, which can be accessed on the Edge. As per the SearchbarAllowed policy in the 365 admin center, if you enable this policy, the option to launch the search bar from Microsoft Edge’s “More tools” menu will be enabled. The list below shows the steps for checking the end-user experience.
- Open the Microsoft Edge on the policy-assigned device
- Click on the Settings and More (3 dot)
- Slightly Scroll down, and you’ll see the More tool. When you hover over it, you’ll see the Launch search bar option on the window.
Need Further Assistance or Have Technical Questions?
Join the LinkedIn Page and Telegram group to get the latest step-by-step guides and news updates. Join our Meetup Page to participate in User group meetings. Also, Join the WhatsApp Community to get the latest news on Microsoft Technologies. We are there on Reddit as well.
Author
Anoop C Nair has been Microsoft MVP from 2015 onwards for 10 consecutive years! He is a Workplace Solution Architect with more than 22+ years of experience in Workplace technologies. He is also a Blogger, Speaker, and Local User Group Community leader. His primary focus is on Device Management technologies like SCCM and Intune. He writes about technologies like Intune, SCCM, Windows, Cloud PC, Windows, Entra, Microsoft Security, Career, etc.
