In this post, you will learn how to enable Controlled Folder Access To Protect Data Using Intune MEM Portal. Controlled folder access in Windows Security reviews the apps that can make changes to files in protected folders and blocks unauthorized or unsafe apps from accessing or changing files in those folders.
Controlled folder access is especially useful in helping to protect your documents and information from ransomware. In a ransomware attack, your files can get encrypted and held hostage. With controlled folder access in place, a notification appears on the computer where an app attempted to make changes to a file in a protected folder.
Windows system folders are protected by default, and Controlled folder access applies to many system folders and default locations, including folders such as Documents, Pictures, and Movies. You can add other folders to be protected, but you cannot remove the default folders in the default list.
Adding other folders to Controlled folder access can be helpful for cases when you don’t store files in the default Windows libraries, or you’ve changed the default location of your libraries.
The protected folders include common system folders (including boot sectors), and you can add more folders. You can also allow apps to give them access to the protected folders. You could use audit mode to evaluate how controlled folder access would impact your organization if enabled.
- Configure Microsoft Defender SmartScreen Using Intune
- Block Potentially Unwanted Applications in Windows | Microsoft Defender
- Best Antivirus for Windows 11 Microsoft Defender | App Browser Protection | Firewall Protection
Enable Controlled Folder Access To Protect Data Using Intune
The following steps help you to enable Controlled folder access using Intune MEM Portal –
- Sign in to the Endpoint Manager Intune portal https://endpoint.microsoft.com/
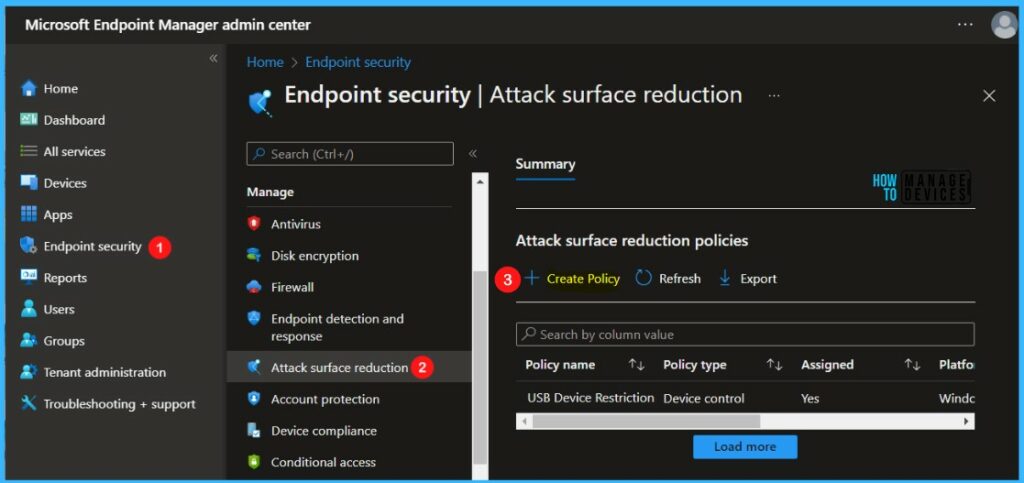
- Select Endpoint security, Navigate to Attack Surface Reduction > Create Policy.
Note – The policy settings can also be accessible by selecting Devices > Windows > Configuration profiles > Create profile.
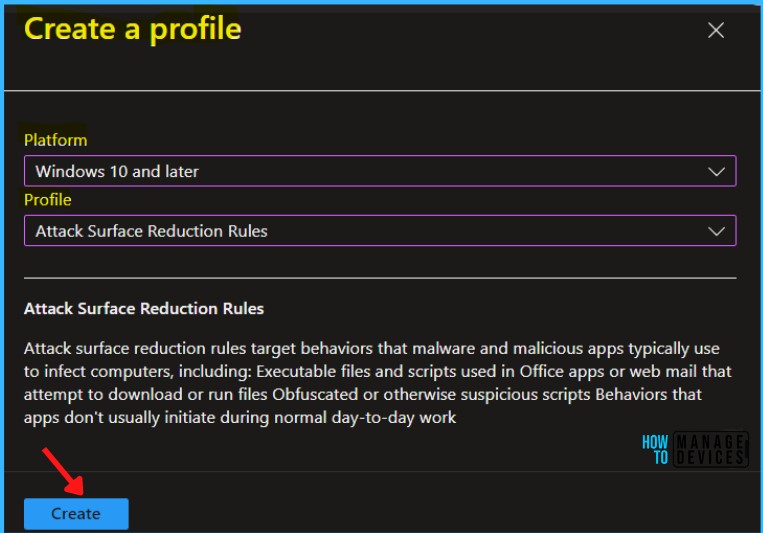
In Create Profile, Select Platform, Windows 10 and later, and Profile, Device control. Click on Create button.
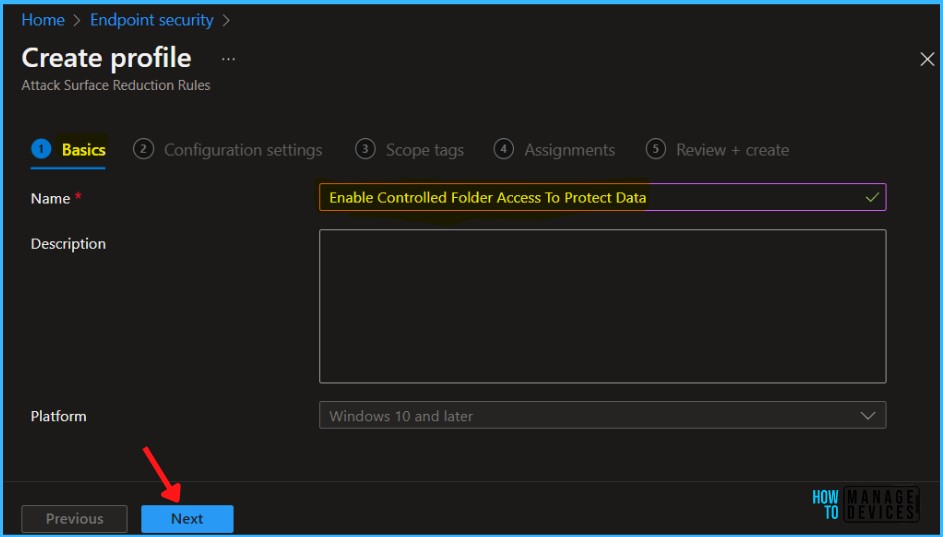
On the Basics tab, enter a descriptive name, such as Enable Controlled Folder Access to Protect Data. Optionally, enter a Description for the policy, then select Next.
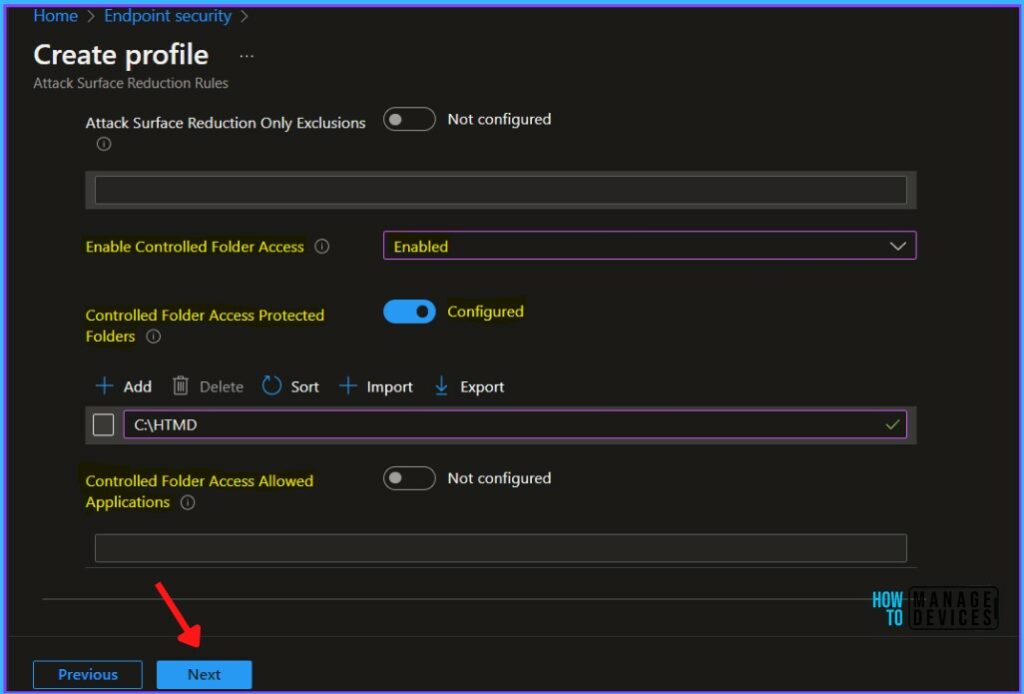
On the Configuration settings page, configure the following settings and click Next.
- Enable Controlled Folder Access: Select Enabled to enforce controlled folder access
- Controlled Folder Access Protected Folders: Select a List of additional folders that need to be protected and add the folders that need to be protected.
- Controlled Folder Access Allowed Applications: Select a List of apps that have access to protected folders and add the apps that have access to protected folders.
In Scope tags, you can assign a tag to filter the profile to specific IT groups. Add scope tags (if required) and click Next.
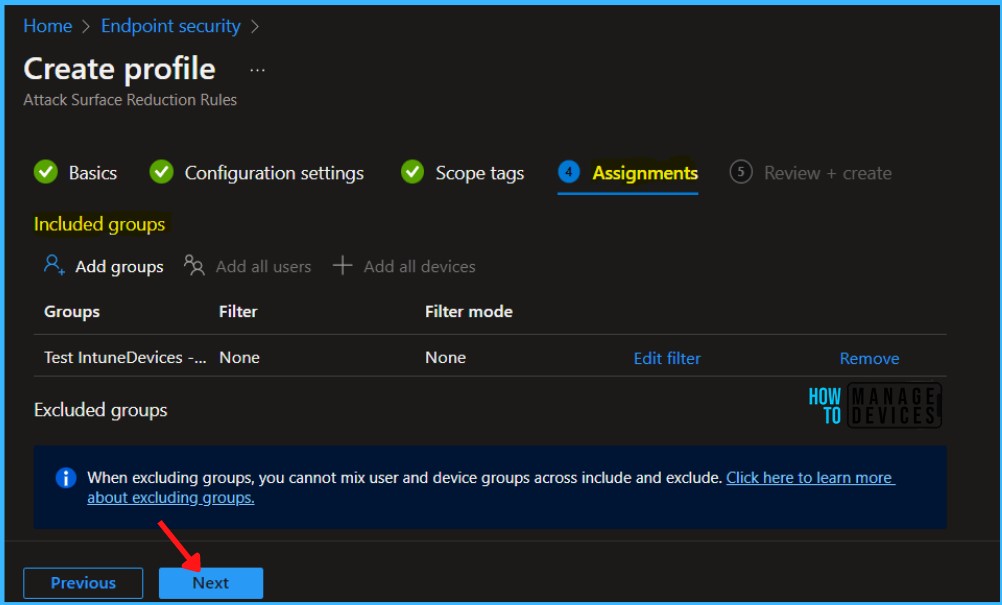
Under Assignments, In Included groups, select Add groups and select groups to include one or more groups. Select Next to continue.
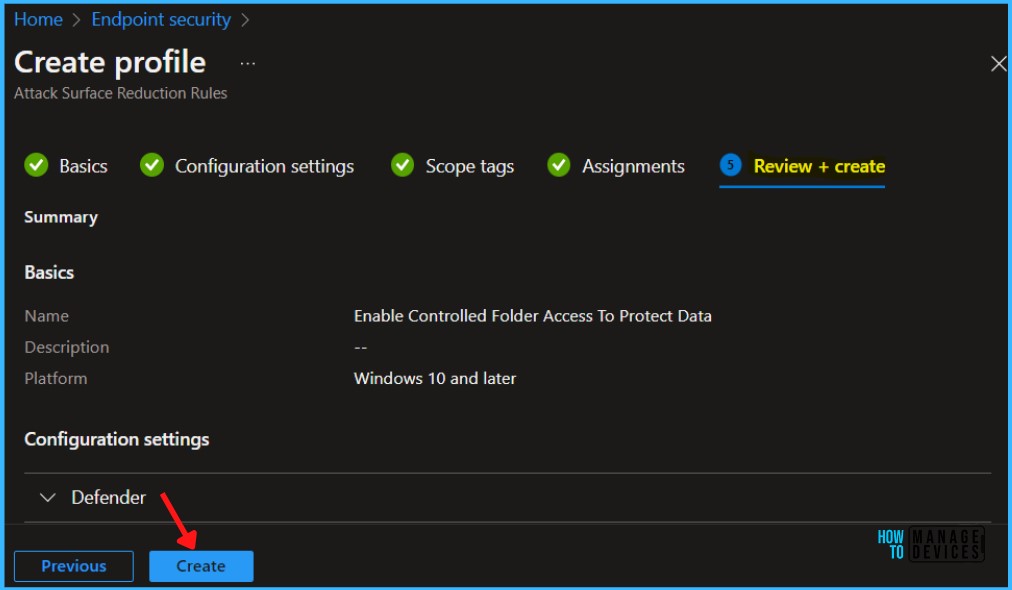
In Review + create, review your settings. When you select Create, your changes are saved, and the profile is assigned.
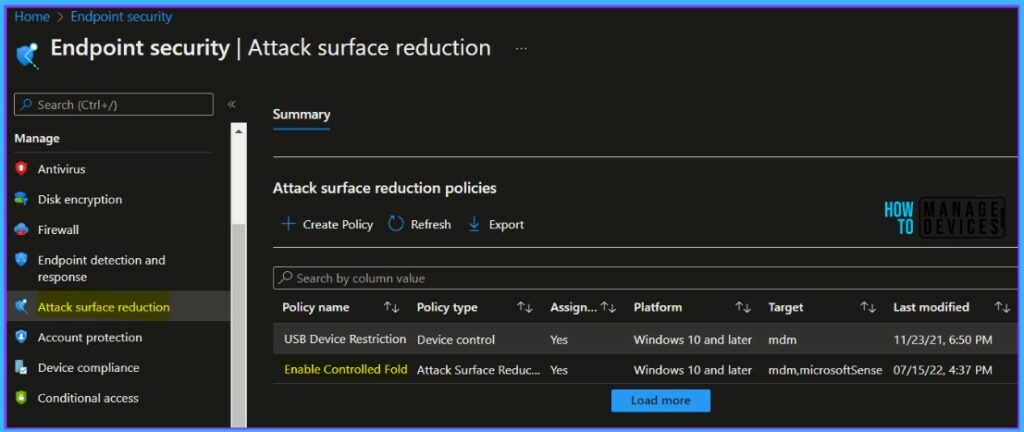
A notification will appear automatically in the top right-hand corner with a message. You can see that the Policy “Enable Controlled Folder Access To Protect Data” created successfully. The policy is shown in the Endpoint security.
Your groups will receive your profile settings when the devices check in with the Intune service the policy applies to the device.
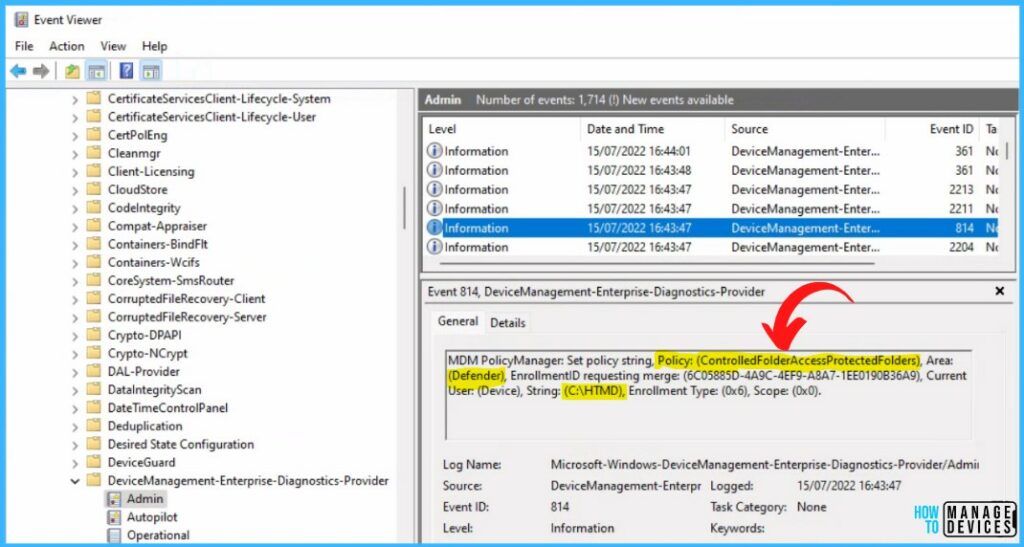
Intune MDM Event Log 814
The Intune event ID 814 indicates that a string policy is applied on Windows 11 or 10 devices. You can also see the exact value of the policy being applied to those devices.
MDM PolicyManager: Set policy string, Policy: (ControlledFolderAccessProtectedFolders), Area: (Defender), EnrollmentID requesting merge: (6C05885D-4A9C-4EF9-A8A7-1EE0190B36A9), Current User: (Device), String: (C:\HTMD), Enrollment Type: (0x6), Scope: (0x0).
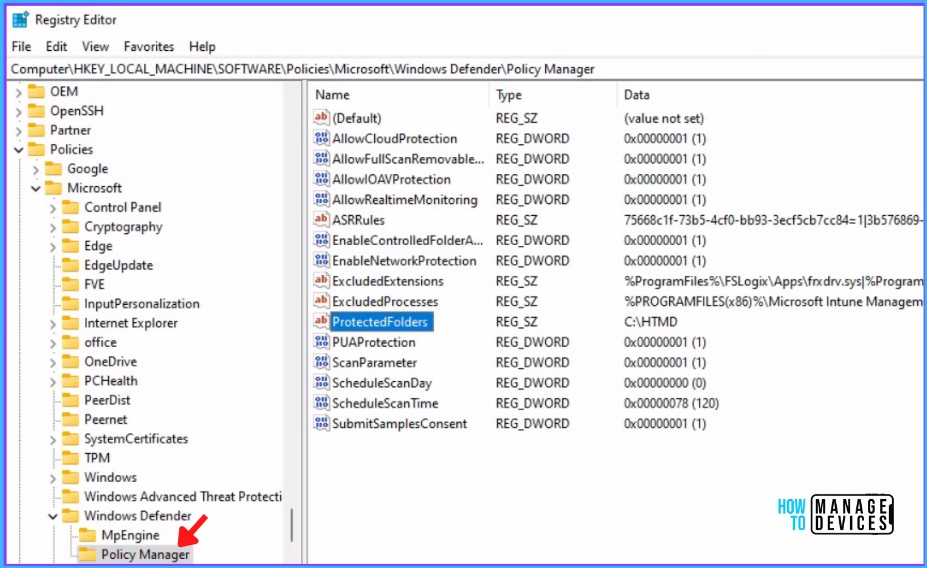
You can use REGEDIT.exe on a target computer to view the registry settings that store group policy settings. These settings are located at the registry path –
Computer\HKEY_LOCAL_MACHINE\SOFTWARE\Policies\Microsoft\Windows Defender\Policy Manager ValueName ProtectedFolders
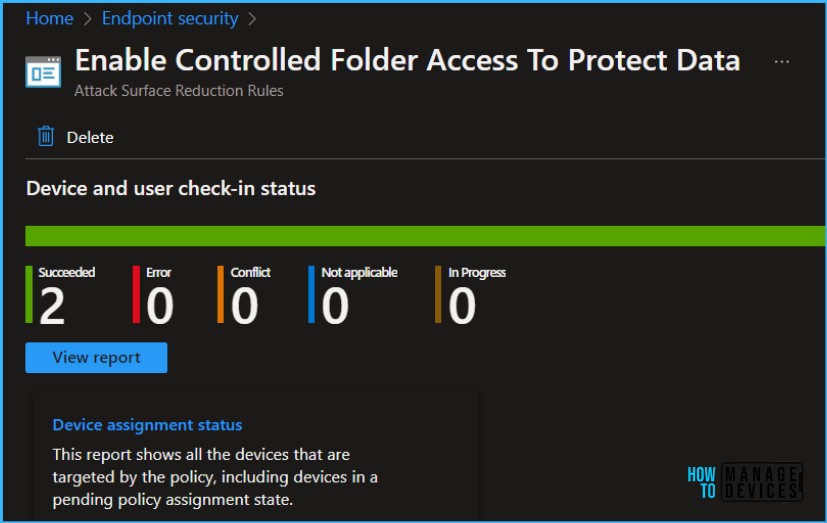
Intune Reporting – Enable Controlled Folder Access Using Intune Policy
You can check the Intune reports to confirm whether the client sends the policy deployment status back to the server or service. The policy got successfully deployed on multiple devices.
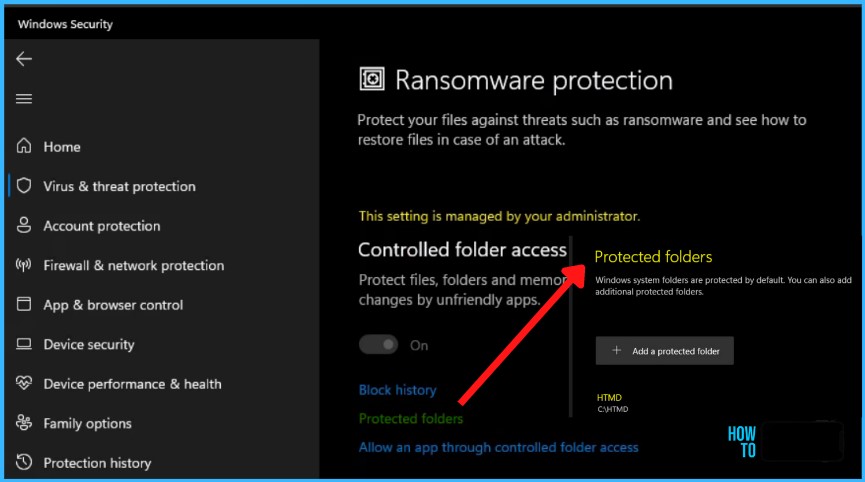
Controlled Folder Access in Windows Security
On your Windows 10 or Windows 11 Device, Click on the Start button.
Type Windows Security in the search box. Click on Virus & threat protection directly from search results.
Scroll down to the Virus & threat protection settings, and select Manage settings. Here you can see Controlled folder access is turned on, and clicking on Protected folders redirect you to look in the Windows system folders protected by default and the folder you added.
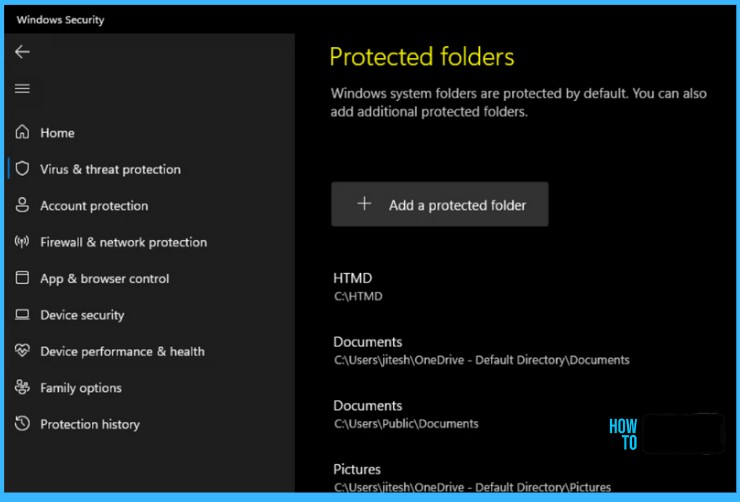
Windows system folders are protected by default, along with several other folders, The protected folders include common system folders (including boot sectors), and you can add additional folders.
You can also allow apps to give them access to the protected folders. The Windows systems folders that are protected by default are:
c:\Users\<username>\Documentsc:\Users\Public\Documentsc:\Users\<username>\Picturesc:\Users\Public\Picturesc:\Users\Public\Videosc:\Users\<username>\Videosc:\Users\<username>\Musicc:\Users\Public\Musicc:\Users\<username>\Favorites

I tried to allow an app through controlled folder access , but I got this message: “you don’t have the proper permission to view this page”. How Can I change this settings in Intune? I do have tamper protection turn on by default from Defender Admin Portal. I also tried to put my device on troubleshooting mode and can turn off tamper protection for the test device, however the “Allow an app through Controlled Folder access” still displaying same error “”you don’t have the proper permission to view this page” … advice please? thank you.