Let’s learn how to enable or disable DNR Support for Windows 11. DNR stands for Discovery of Network-designated Resolvers, an upcoming IETF standard for discovering encrypted DNS servers. Before DNR, devices getting a DNS server from their local network could not use encrypted DNS without manually finding the IP address of their desired encrypted DNS server and configuring it on the client side.
DNR enables devices to use encrypted DNS protocols like DNS over HTTPS (DoH) and DNS over TLS (DoT) on the client side without requiring manual endpoint configuration. From Windows 11 build 25982 (canary), client-side DNR is now supported in Windows 11. DNR support is not yet available on non-Insider Windows builds.
When a device with client-side DNR enabled joins a new network, it queries the local DHCP server, requesting an IP address and DNR-specific options. The server, operating server-side DNR, responds with encrypted DNS details, including server IP, supported protocols, port numbers, and authentication data, allowing the client to establish an encrypted DNS tunnel automatically using the provided info.
DNR will enable Windows Insider users to use encrypted DNS protocols like DNS over HTTPS (DoH) and DNS over TLS (DoT) on the client side without requiring manual configuration. To see DNR working when enabled on your PC, try joining a network whose DHCPv4 or DHCPv6 server supports server-side DNR.
NOTE! It would be best if you were signed in as an Administrator to enable or disable DVR support for Windows 11.

Table of Contents
Are there any Group Policy and Intune Policy Settings in Windows 11 that allow you to change Enable or Disable DNR Support?
The answer is no. We cannot find any Group Policy and Intune Policy to Enable or Disable DNR Support in Windows 11. If you have anything, let us know in the Comments.
What is DNR?
DNR is the Discovery of Network-Designated Resolvers that help Windows 11 users use encrypted DNS protocols without manual configuration.
How does client-side DNR work?
Let us look at what happens when a machine with client-side DNR enabled attempts to join a new network. First, the machine queries the local DHCP server to acquire an IP address. It also requests unique DNR-specific options (OPTION_V4_DNR for DHCPv4 or OPTION_V6_DNR for DHCPv6) during that query.
The local DHCP server, which is running server-side DNR, responds to the machine with all the required information for configuring encrypted DNS, such as the IP address of the encrypted DNS server, list of supported encrypted DNS protocols, their port numbers, and server authentication information.
Upon receiving this information, the client machine automatically sets up an encrypted DNS tunnel with the server discovered through DNR. From the user’s perspective, they join a new network as they normally would, and without effort, they reap the benefits of encrypted DNS!
- Enable Disable Secure DNS over HTTPS in Microsoft Edge
- adnroid enterprise corporate owned with work profile
How do you use DNR on Windows Insider builds?
The first step is to install the latest Windows Insider build (25982 or higher). DNR support is not yet available on non-Insider Windows builds. Once a compatible Windows Insider build is installed, a new registry key must be created to enable DNR on the device.
NOTE! You should proceed with the deployment steps below only if you have prior experience modifying the registry. This is NOT recommended for people who are unfamiliar with registry keys.
Enable or Disable DNR Support For Windows 11
You can enable or disable the DNR Support Workgroup in Windows 11. The methods for enabling or disabling the settings include the Registry Editor, Registry File and Elevated Command Prompt.
Registry Editor
Using the registry editor, there are ways to enable or disable DNR Support in Windows 11. This procedure is done using the Registry Editor. Let’s discuss the step-by-step guidelines for it.
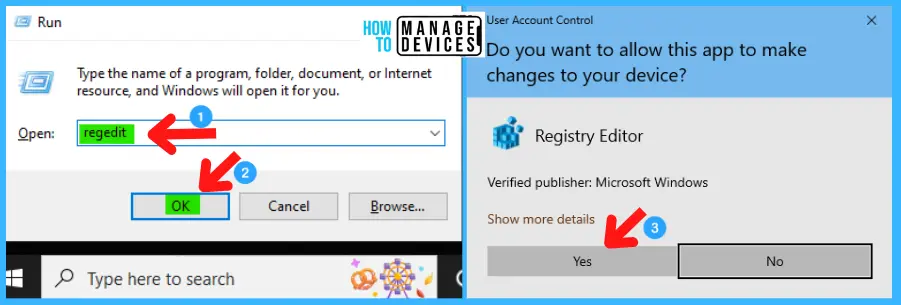
Now, open Run Window, and press Windows Key + R from the keyboard simultaneously. This is the keyboard shortcut to open the run window. Now, type regedit and press Enter.
| Registry Editor |
|---|
| Window Key + R (To open run command) |
| Type ‘regedit‘ and press OK |
| Administrator Permission press Yes |
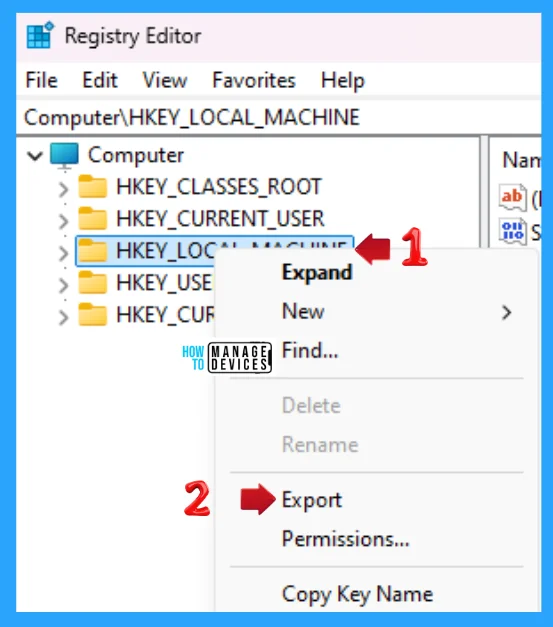
NOTE! Take Backup—If any mistake occurs in the Registry Editor, it may affect the system. It is advisable to take a backup of the Registry before proceeding. To back up, go to File in the top left corner of the Registry Editor. Click on it, then select Export and save the backup.
- Go to File.
- Right-click on HKEY_LOCAL_MACHINE.
- Click on Export.
- Please save it.
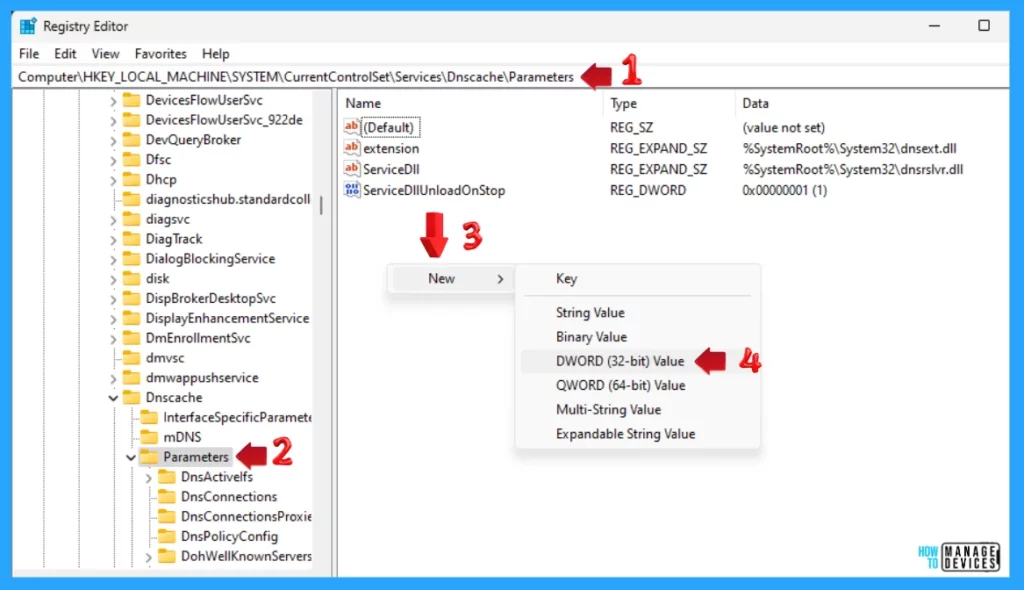
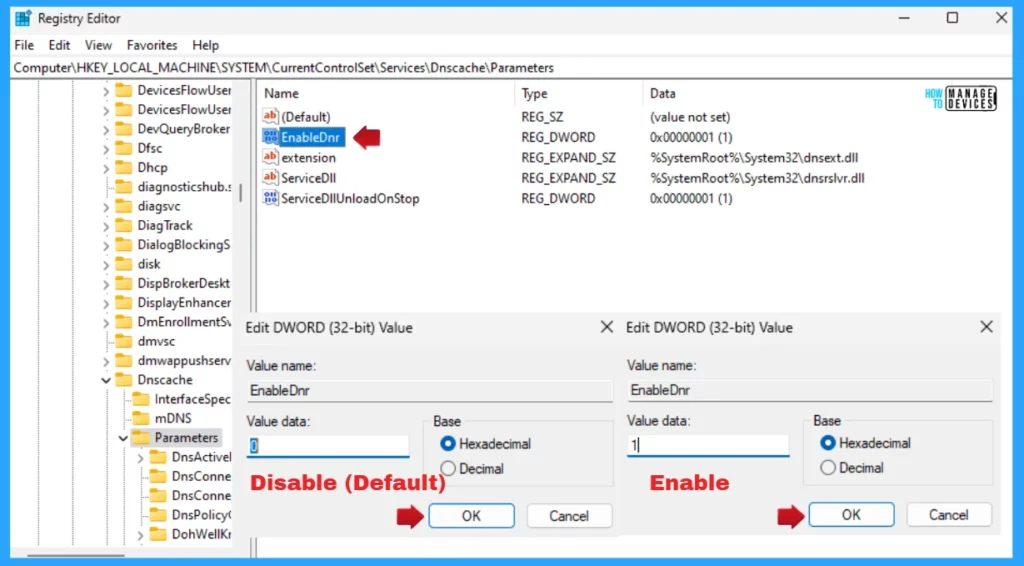
Now, the Registry Editor opens. Find the path ‘HKEY_LOCAL_MACHINE\System\CurrentControlSet\Services\Dnscache\Parameters.’ Following the trail, reach the Parameters folder for further modification.
Now right-click on the blank space, click New, select DWORD (32-bit) Value, and name it EnableDnr (Source Microsoft). It was disabled by default. You can modify it according to you.
Under the Parameters folder, the EnableDnr was created successfully. Now, double-click on it. Type 1 to Enable DNR Support in the value data or 0 to Disable DNR Support.
Registry File
Follow the process shown in Figures 2 and 3 to open the registry editor and export the file for backup. Then, use the .reg file to enable DNR Support in Windows. To create a .reg file, open NotePad, type the following code, and name EnableDNR_AllUsers. Then, save it on the desktop using the .reg extension, which enables DNR Support.
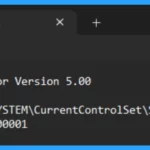
Windows Registry Editor Version 5.00

[HKEY_LOCAL_MACHINE\SYSTEM\CurrentControlSet\Services\Dnscache]
"EnableDnr"=dword:00000001
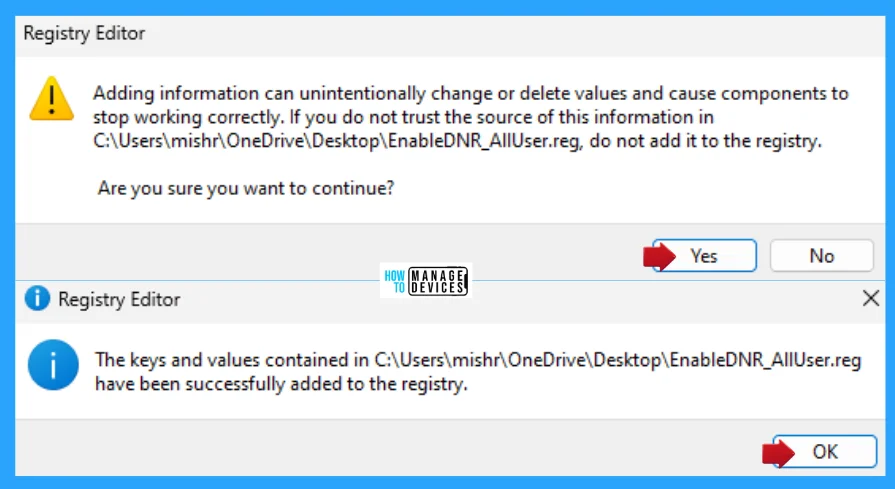
When the file is saved at your selected location, double-click on it. The User Account Control Window will open; click Yes to continue. Then, the Registry Editor Waring window will open.
Adding information can unintentionally change or delete values and cause components to stop working correctly. If you do not trust the source of this information in the path you created, do not add it to the registry; otherwise, click Yes to continue.
The following window shows that the key and value you added have been successfully added to the registry editor. Now click on OK and restart your PC to add the applicable test.
Use the .reg file to disable DNR Support in Windows. To create a .reg file, open NotePad, type the following code, and name it DisableDNR_AllUsers. Then, save it on the desktop using the .reg extension, which disables DNR Support.
Windows Registry Editor Version 5.00

[HKEY_LOCAL_MACHINE\SYSTEM\CurrentControlSet\Services\Dnscache]
"EnableDnr"=dword:00000000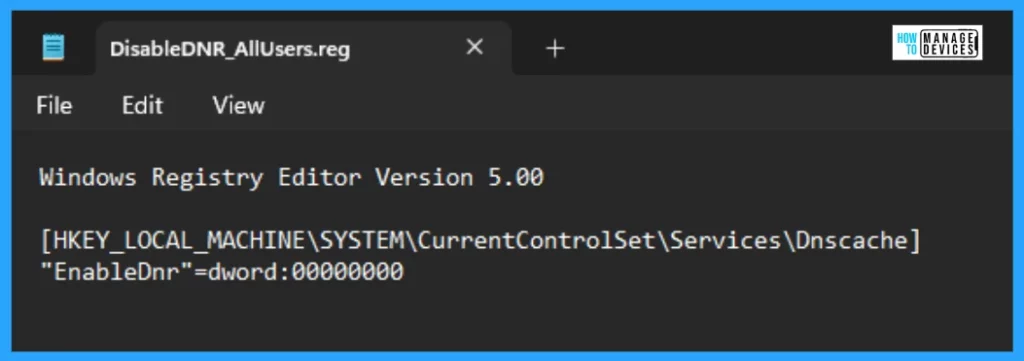
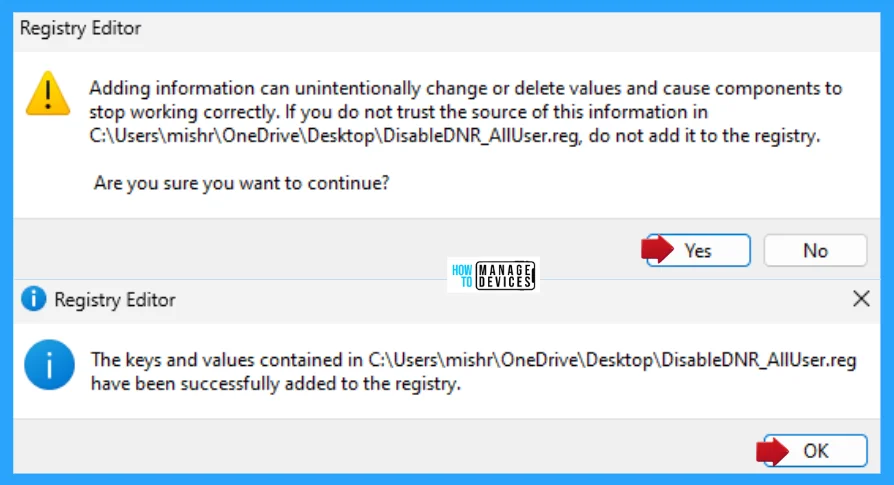
When the file is saved at your selected location, double-click on it. The User Account Control Window will open; click Yes to continue. Then, the Registry Editor Waring window will open.
Adding information can unintentionally change or delete values and cause components to stop working correctly. If you do not trust the source of this information in the path you created, do not add it to the registry; otherwise, click Yes to continue.
The following window shows that the key and value you added have been successfully added to the registry editor. Now click on OK and restart your PC to add the applicable test.
Elevated Command Prompt
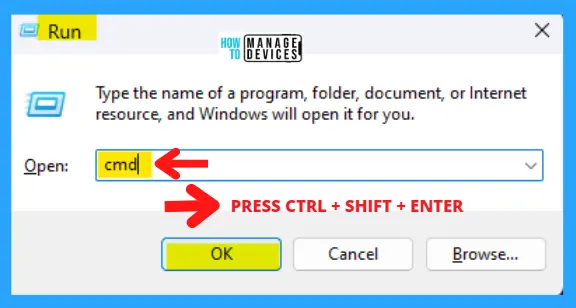
Open the Elevated Command Prompt, press Win Key + R simultaneously to open the run dialogue box, and follow the below steps. The Run window said to type the name of a program, folder, document, or internet resource, and Windows will open it for you.
- Press Win Key + R
- Type cmd for the command prompt
- Press Ctrl + Shift + Enter
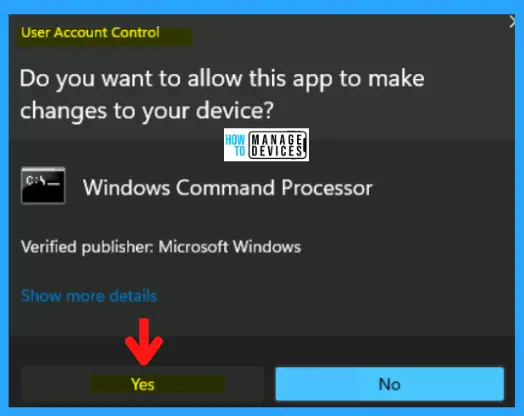
The next window appears as User Account Control, which asks, “Do you want to allow this app to make changes to your device?” For Windows Command Processor, press YES to continue. This window is an administrative approval to perform some tasks.
The Elevated Command Prompt window opens, and you can run some administrative commands. This window is represented as “Administrator: C:\WINDOWS\system32\cmd.exe“. Now type the following command (copy and paste) and press Enter to run the command successfully. This command enables the DNR Support in Windows 11.
reg add HKLM\SYSTEM\CurrentControlSet\Services\Dnscache\Parameters /v EnableDnr /t REG_DWORD /d 1
This is disabled by default; if enabled, run the following command (copy and paste) and press Enter to run it successfully. This command Disables the DNR Support in Windows 11.
reg add HKLM\SYSTEM\CurrentControlSet\Services\Dnscache\Parameters /v EnableDnr /t REG_DWORD /d 0
I hope the information on How to Enable or Disable DNR Support For Windows 11 is helpful. Please follow us on the HTMD Community and visit our website, HTMD Forum, if you like our content. Suggest improvements, if any, and we would love to know which topic you want us to explore next.
Need Further Assistance or Have Technical Questions?
Join the LinkedIn Page and Telegram group to get the latest step-by-step guides and news updates. Join our Meetup Page to participate in User group meetings. Also, Join the WhatsApp Community to get the latest news on Microsoft Technologies. We are there on Reddit as well.
Author
Alok graduated with a Master of Computer Applications (MCA) degree. He loves writing on Windows 11 and related technologies. He likes to share his knowledge, quick tips, and tricks with Windows 11 or Windows 10 with the community.
