SCCM ConfigMgr Client How to Create Windows Firewall Outbound Rules Using PowerShell. Don’t disable Windows Firewall in your SCCM labs.
Is the Windows firewall disabled on your SCCM / ConfigMgr client machine? Is this because you are too lazy to configure or create Inbound and Outbound rules for applications like SCCM?
OK, I’m also becoming lazy these days for some good reasons 🙂 We can use PowerShell commands to create and enable firewall rules, and it’s not complex.
This post will walk you through creating Outbound Windows Firewall rules for the SCCM / ConfigMgr 2012 client using PowerShell commands.
- How to Create Windows Firewall Inbound Rules for SCCM ConfigMgr Client Configuration Manager ConfigMgr
- 4 New Intune Windows Firewall Logging Configuration Policies
- Ways to Allow an App through Windows Defender Firewall
- Best Antivirus for Windows 11 Microsoft Defender | App Browser Protection | Firewall Protection
SCCM ConfigMgr Client How to Create Windows Firewall
I’ve already blogged about creating Inbound rules in Windows Firewall. More details on How to Create Windows Firewall Inbound Rules for SCCM ConfigMgr 2012 Client. Following are the topics that I’m going to cover in this post.
| SCCM ConfigMgr Client How to Create Windows Firewall |
|---|
| 1. Import the Powershell Security module for Windows Firewall |
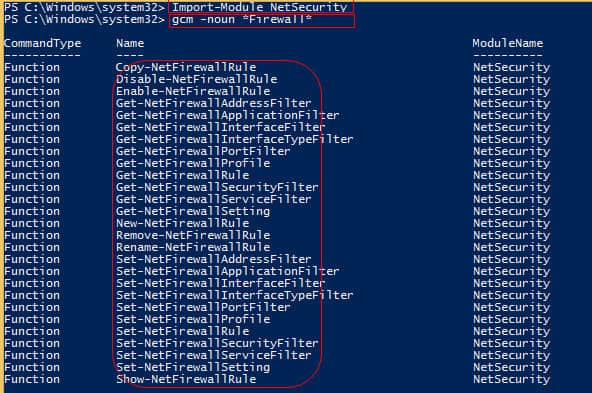
| 2. Powershell command to list all the noun commands which have the “Firewall” word |
| 3. PowerShell command to Edit/Enable the Outbound Predefined rule in Windows Firewall |
| 4. PowerShell command to create a predefined rule in Windows Firewall |
| 5. Powershell command to Create Outbound Firewall rule for TCP Port |
| 6. Powershell command to Create Outbound Firewall rule for UDP Port |
| 7. List of all the noun commands which has the “Firewall” word |
Each topic is covered with screenshots and respective PowerShell commands. I’m still learning PowerShell (taking baby steps), so there could be other/better ways to achieve this task.
These topics are selected for SCCM 2012 client outbound communication port requirements. SCCM ConfigMgr Client: How do you create Windows Firewall Outbound Rules using PowerShell?
1. Import the Powershell Security Module for Windows Firewall
We must load the Windows Firewall Module as shown in the command line. Ensure that you run all these following commands as an administrator on Windows PowerShell ISE.
PS C:\Windows\system32> Import-Module NetSecurity
2. Powershell Command for Listing All the Noun Commands which have the “Firewall” Word
The GCM command will give us a List of all the noun commands with the word “Firewall.” A more Detailed Table of available commands is at the bottom of the post.
PS C:\Windows\system32> gcm -noun *Firewall*
3. PowerShell Command to Edit/Enable the Predefined Rule in Windows Firewall
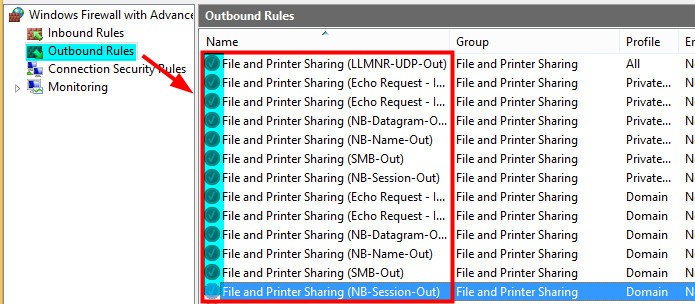
Run the PowerShell command to Edit/Enable the Predefined rule in Windows Firewall for File and Printer Sharing Group. This is a bit tricky as there are two parts to it. When we already have Windows Firewall rules for the File and Printer sharing group, we can run the following command to enable those rules.
The second part is covered in point #4. For the SCCM/ConfigMgr 2012 client, we must allow the Inbound and Outbound Firewall rules for all the predefined ones under the File and Printer Sharing group.
- All the Firewall Rules related to File and Printer Sharing are disabled
Get-NetFirewallRule -DisplayGroup "File and Printer Sharing" -Direction Outbound | Set-NetFirewallRule -Enabled True -Direction Outbound
Run the following Powershell command to LIST and enable the rules created under File and Printer Sharing. LIST Command:- (Get-NetFirewallRule -DisplayGroup “File and Printer Sharing” –Direction Outbound).DisplayName.
- To Enable:- Get-NetFirewallRule -DisplayGroup “File and Printer Sharing” -Direction Outbound | Set-NetFirewallRule –Enabled True -Direction Outbound
Rules under the File and Printer sharing group have been enabled now.
4. PowerShell Command to Create a Predefined Rule in Windows Firewall
When no Predefined firewall rules are present in the Windows Firewall console, we can’t use the SET-NetFirewallRule PowerShell command. Instead, we should use New-NetFirewallRule to create a new predefined rule in the Windows Firewall console.
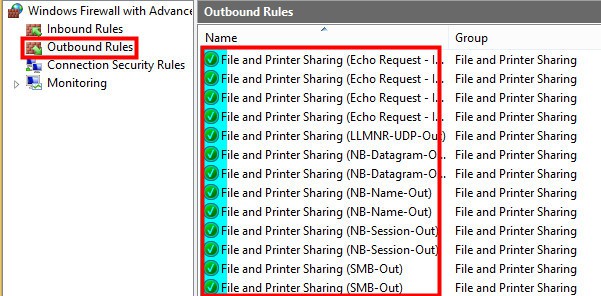
Powershell command:- New-NetFirewallRule -DisplayName “File and Printer Sharing (NB-Datagram-Out)” -group “File and Printer Sharing” –Enabled True -Protocol udp -RemotePort 138 –Direction Outbound.
A file and Printer Sharing (NB-Datagram-Out) rule has been created. The screenshot was taken after running the Powershell command mentioned above.
5. Powershell Command to Create Outbound Firewall Rule for TCP Port
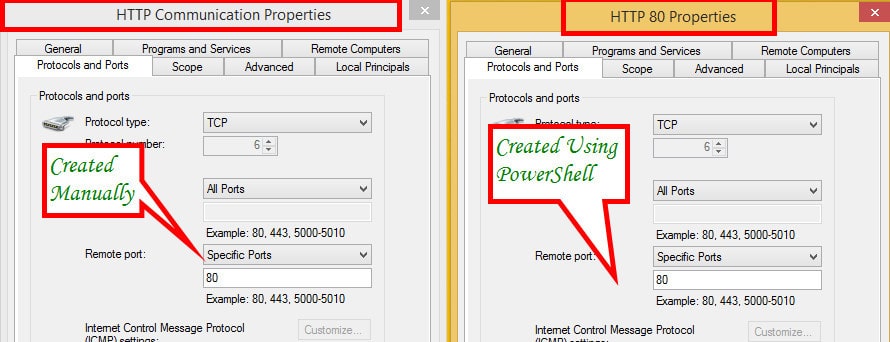
Run the Powershell command to create an Outbound Firewall rule for TCP Port 80 HTT communication. Powershell CMD: – New-NetFirewallRule -direction outbound -InterfaceType Any –Protocol TCP -RemotePort 80 -DisplayName “HTTP Communication”.
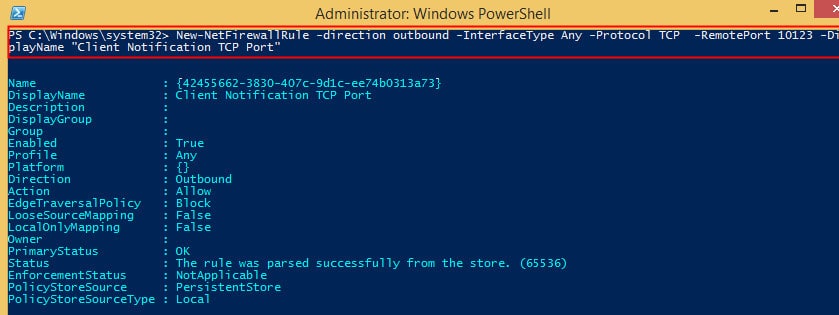
Run the Following Command to Create an Outbound Firewall Rule for Client Notification TCP Port 10123
Let’s discuss how to Run the following command to create an Outbound Firewall rule for Client Notification TCP Port 10123.
PS C:\Windows\system32> New-NetFirewallRule -direction outbound -InterfaceType Any -Protocol TCP -RemotePort 10123 -DiplayName “Client Notification TCP Port”Name : {42455662-3830-407c-9d1c-ee74b0313a73}
DisplayName : Client Notification TCP Port
Description :
DisplayGroup :
Group :
Enabled : True
Profile : Any
Platform : {}
Direction : Outbound
Action : Allow
EdgeTraversalPolicy : Block
LooseSourceMapping : False
LocalOnlyMapping : False
Owner :
PrimaryStatus: OK
Status: The rule was parsed successfully from the store. (65536)
EnforcementStatus : NotApplicable
PolicyStoreSource : PersistentStore
PolicyStoreSourceType : Local
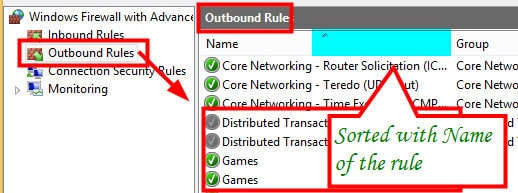
In the screenshot, the Windows Firewall with Advanced Security is open. To find the Client Notification TCP port, go to the “Outbound Rules” section and select it there.
6. Powershell Command to Create Outbound Firewall Rule for UDP Port
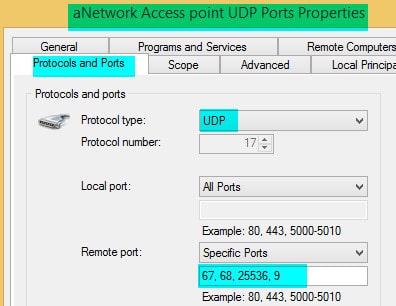
When you use Network access protection and Wake on Lan, you must open the following UDP ports.
- Outbound: UDP 67 and UDP 68 for DHCP
- Outbound: TCP 80/443 for IPsec
- Outbound: UDP Port 25536
- Outbound: UDP Port 9
PS C:\Windows\system32> New-NetFirewallRule -direction outbound -InterfaceType Any –Protocol UDP -RemotePort 67,68,25536,9 –DisplayName “a network Access point UDP Ports”.
7. List of All the Noun Commands which has the “Firewall” Word
Let’s discuss the list of all the noun commands with the Firewall word. The table below will help you to see more details.
| CommandType | Name | ModuleName |
|---|---|---|
| Function | Copy-NetFirewallRule | NetSecurity |
| Function | Disable-NetFirewallRule | NetSecurity |
| Function | Enable-NetFirewallRule | NetSecurity |
| Function | Get-NetFirewallAddressFilter | NetSecurity |
| Function | Get-NetFirewallApplicationFilter | NetSecurity |
| Function | Get-NetFirewallInterfaceFilter | NetSecurity |
| Function | Get-NetFirewallInterfaceTypeFilter | NetSecurity |
| Function | Get-NetFirewallPortFilter | NetSecurity |
| Function | Get-NetFirewallProfile | NetSecurity |
| Function | Get-NetFirewallRule | NetSecurity |
| Function | Get-NetFirewallSecurityFilter | NetSecurity |
| Function | Get-NetFirewallServiceFilter | NetSecurity |
| Function | Get-NetFirewallSetting | NetSecurity |
| Function | New-NetFirewallRule | NetSecurity |
| Function | Remove-NetFirewallRule | NetSecurity |
| Function | Rename-NetFirewallRule | NetSecurity |
| Function | Set-NetFirewallAddressFilter | NetSecurity |
| Function | Set-NetFirewallApplicationFilter | NetSecurity |
| Function | Set-NetFirewallInterfaceFilter | NetSecurity |
| Function | Set-NetFirewallInterfaceTypeFilter | NetSecurity |
| Function | Set-NetFirewallPortFilter | NetSecurity |
| Function | Set-NetFirewallProfile | NetSecurity |
| Function | Set-NetFirewallRule | NetSecurity |
| Function | Set-NetFirewallSecurityFilter | NetSecurity |
| Function | Set-NetFirewallServiceFilter | NetSecurity |
| Function | Set-NetFirewallSetting | NetSecurity |
| Function | Show-NetFirewallRule | NetSecurity |
| Function | Show-NetFirewallRule | NetSecurity |
We are on WhatsApp now. To get the latest step-by-step guides, news, and updates, Join our Channel. Click here. HTMD WhatsApp.
Author
Anoop C Nair is Microsoft MVP from 2015 onwards for consecutive 10 years! He is a Workplace Solution Architect with more than 22+ years of experience in Workplace technologies. He is a Blogger, Speaker, and Local User Group Community leader. His main focus is on Device Management technologies like SCCM and Intune. He writes about technologies like Intune, SCCM, Windows, Cloud PC, Windows, Entra, Microsoft Security, Career, etc…





Nice Post Anoop !
Glad to see more PowerShell creeping into your posts 😉
Thank you Deepak ! You’re my inspiration in powershell !