Here are the detailed steps for installing the Root CA and Sub-Ordinate CA. This guide will walk you through the Certificate Server – ROOT CA and Subordinate CA installation, specifically designed for offline installation in non-trusted domains.
This helps to install CA Servers for SCCM PKI/Internet clients, create Certificate templates, and learn How to Configure GPO for Certificate auto-enrollment.
Root Certificate Authorities (CAs) are highly secured and kept offline. Subordinate CAs, which exist between the root and end-entity certificates, are primarily responsible for defining and authorizing the types of certificates that can be requested from the root CA.
A root CA is a standalone Certification Authority that creates and signs its own certificate. In larger organizations, there may be subordinate CAs certified by the organization’s root CA. This creates a chain of certificates called the certification path, forming a hierarchical Public Key Infrastructure (PKI).
Related Post – Learn The Basic Concepts of PKI – Intune PKI Made Easy With Joy Part-1
| Index |
|---|
| Install Root CA |
| Sub Ordinate CA Installation |
| Configure Certificate Templet’s |
| Configure Group Policy for Auto Enrolment of Certificates |
| Verifying Certificate Installation on Computers |
| Resources |
Install Root CA
Install a trusted root certificate if you’re notified that the certificate authority is not trusted on any machine, which can happen when using a private or custom certificate server instead of a public one.
Perquisites
To Install Certificate Authority roles, the Server should be a member server of the ROOT domain.
Pre-Configuration
Only the Domain Admin can install the CA Server; your account must be added to the Domain Admins group before starting CA installation.
Go to the CA Server and Install role “Active Directory Certificate Services” to install ROOT CA

Select “Certificate Authority” and Click Next

If you are the member server of the domain, you can install Enterprises CA, or else you can install Standalone CA

Select the “ROOTCA” and click next to continue

Select “Create a new Private key” and Click Next

Enter the ROOTCA name as you prefer, and click Next

After installation is completed, you need to complete the post Configuration by opening the “Certificate Authority” Console.
Validation
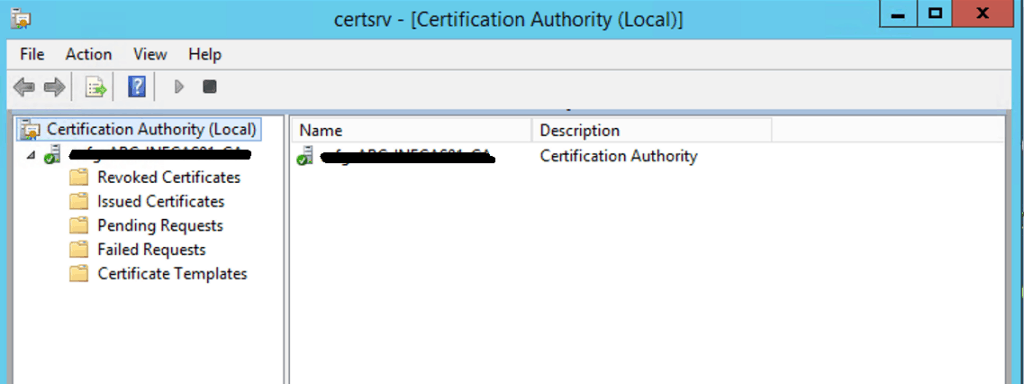
Sub Ordinate CA Installation
To install Sub Ordinate CA on a Non-Trusted domain, we have followed some manual export, Import, and Certificate generation steps to complete.
Note! – Non-Trusted Domain Sub-Ordinate CA will not get auto-enrolled for new Sub-Ordinate CA. You need to create a new Req file from Sub-Ordinate CA and generate a new certificate from ROOT CA, then Import and start services for Sub-Ordinate CA.
Perquisites
TCP/IP 80, 443 ports should allow between ROOT CA and Sub-Ordinate CA servers
Copy below given 2 files from ROOT CA to the Sub-Ordinate CA Server (Where you want to install Sub-Ordinate CA)
C:\Windows\System32\certsrv\CertEnroll
- .crt (Security Certificate file)
- .crl (Certificate Revocation file)

Pre-Configuration
Connect Sub Ordinate CA (Non-Trusted Domain Server) and open PowerShell or CMD as Administrator. Go to the certificate folder (where you copied certs from ROOT CA)
Execute the below commands to
"certutil –dspublish –f “CRTfilename.crt” RootCA"
Note! – This command places the root CA public certificate into the Configuration container of Active Directory. Doing so allows domain client computers to automatically trust the root CA certificate and there is no additional need to distribute that certificate in Group Policy.
"certutil –addstore –f root “'CRTfilename'.crt”"
"certutil –addstore –f root “'CRLfilename.crl”"
Note! – These 2 commands place the root CA certificate and CRL into the local store of the SUBCA. This provides SUBCA immediate trust in the root CA public certificate and knowledge of the root CA CRL. SUBCA could obtain the certificate from Group Policy and the CRL from the CDP location, but publishing these two items to the local store on SUBCA is helpful to speed the configuration of SUBCA as a subordinate CA.
Validation
Using the MMC command, open the “Certificate snap-in” dialog box, select “Computer account“, and then click Next. In the “Select Computer” dialog box, ensure that “Local computer: (the computer this console is running on)” is selected, and then click Finish. In the console, expand “Trusted Root Certificate Authorities“, expand “Certificate Revocation List” to verify ROOT CA, and also expand “Certificates” to validate ROOT CA
Click Add Roles and Features and select “Active Directory Certificates Services“

Select “Certificate Authority“

Select “Install” to continue the CA role installation

CA Role installation in in-progress

Once installation is complete, close the windows and open “Active Directory Certificate Services to configure CA on the server.

Select “Certificate Authority” and click Next

Select “Enterprises CA” and click Next
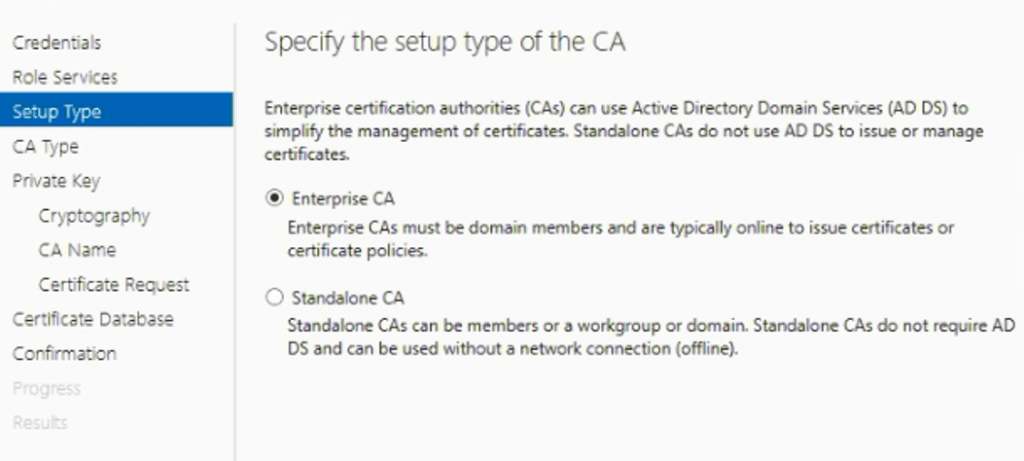
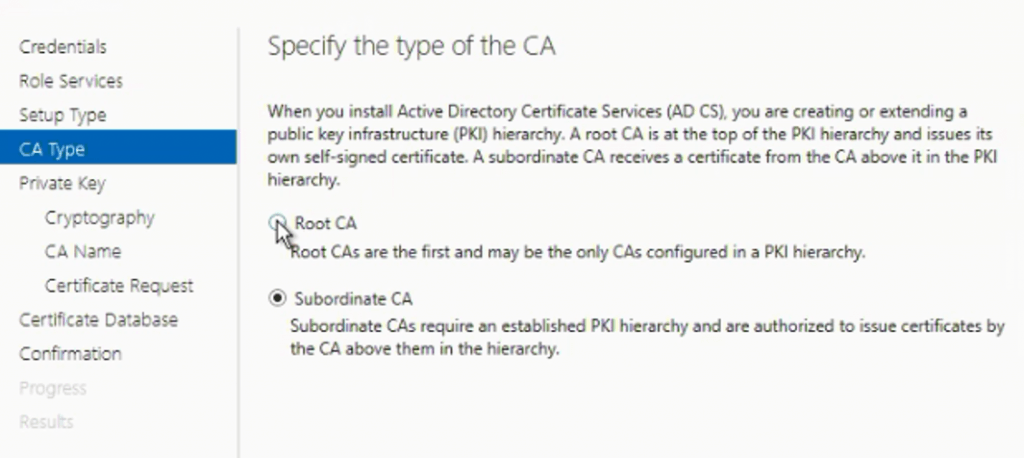
Select “Sub Ordinate CA” and Click Next
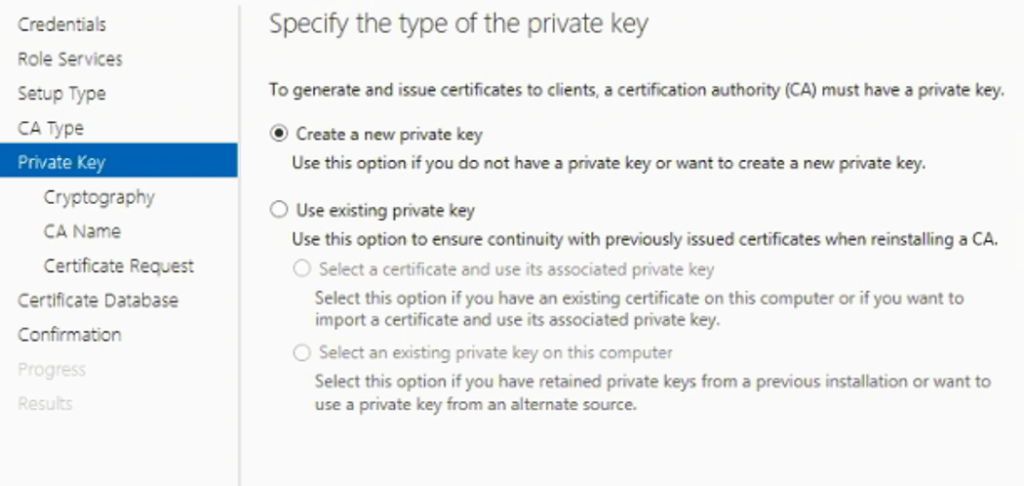
Select “Create a new private key” and click Next
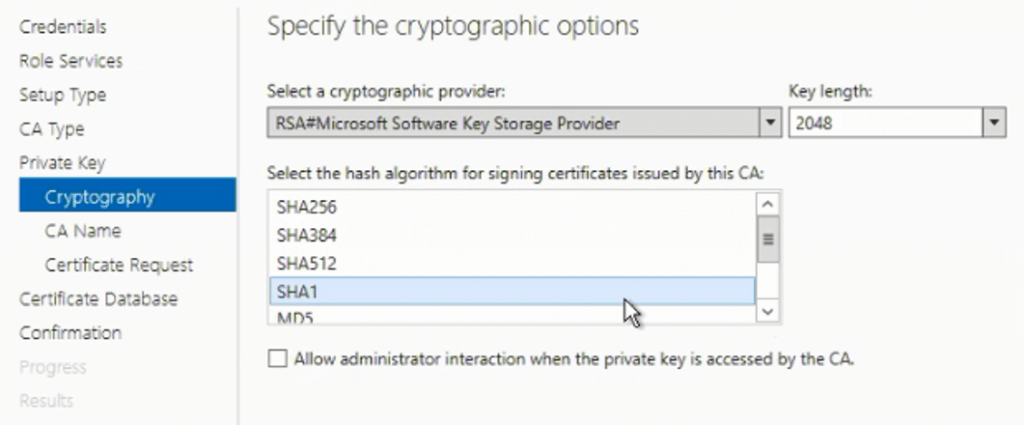
Select the required cryptographic and algorithm for signing certificate options as per your organisation’s requirements.
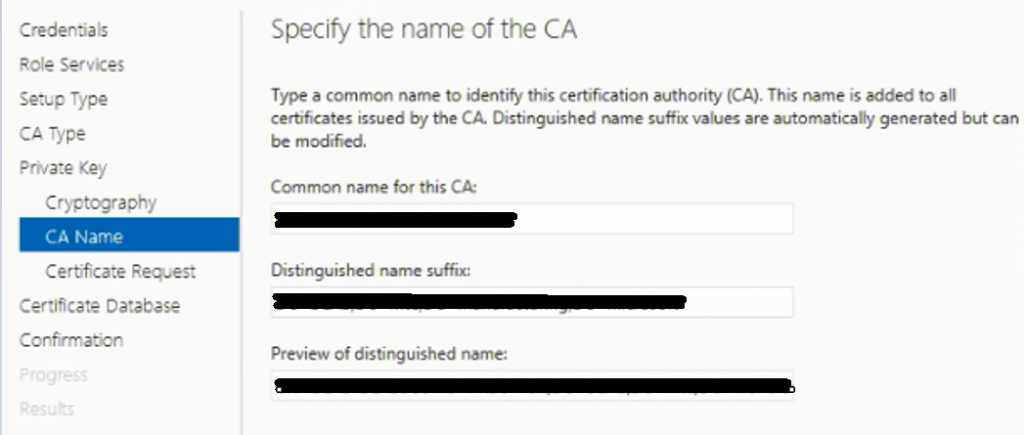
Provide your CA Name, which will update as CA certificate issuer.
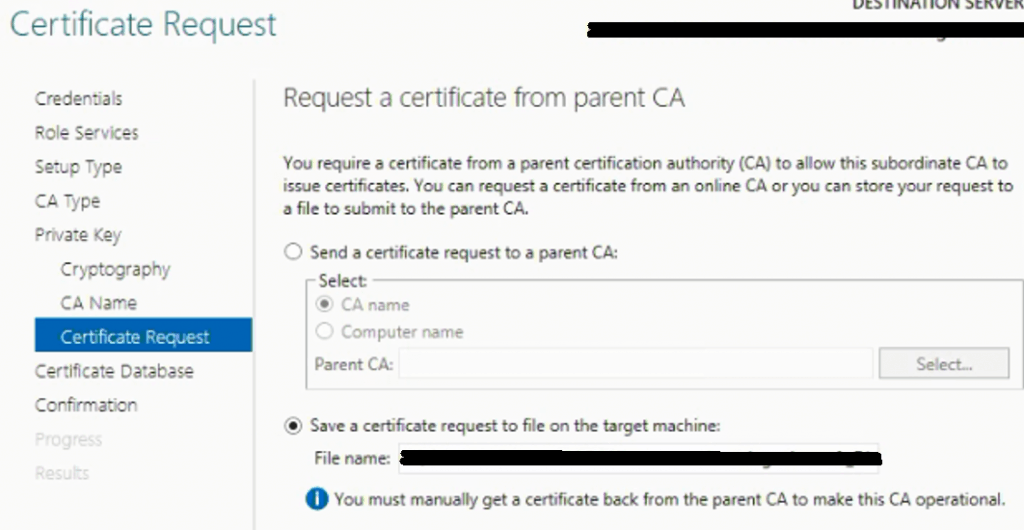
Save the file requested from Sub-Ordinate CA. Using this request file, we need to generate a new Sub-Ordinate CA certificate from the ROOT CA server.
Click “Configure” to complete the Sub-Ordinate CA Installation
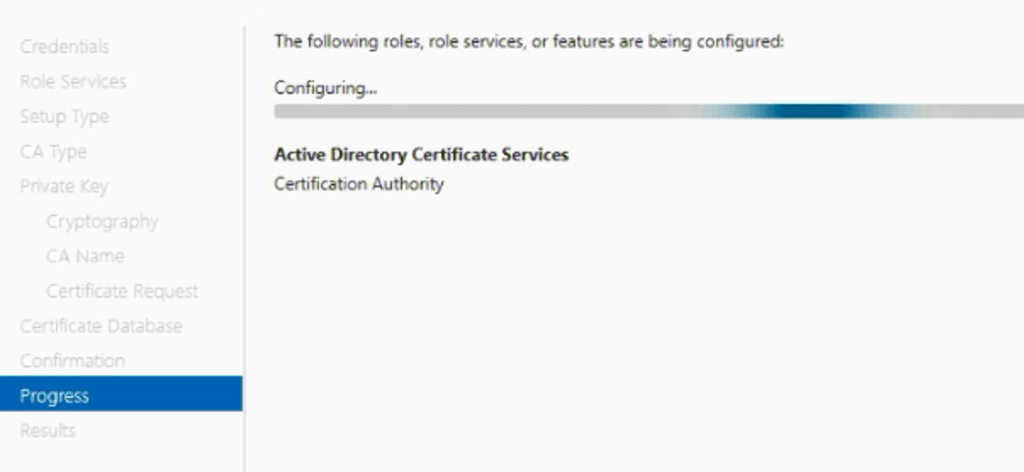
Successfully configured Certificate Server with some warring errors, due to unable to communicate ROOT CA from the non-trusted domain.
We need to executive some manual steps to generate a New Sub-Ordinate CA to start services and enrol certificates to Non-Trusted domain clients
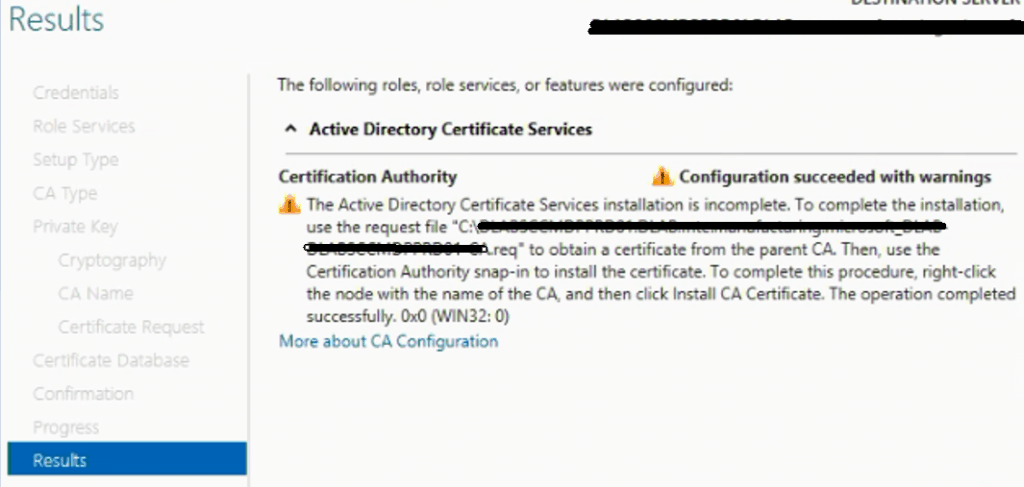
Connect “ROOTCA” and copy the file Certificate request file from SubOrdinate CA to the ROOTCA Server.
Open PowerShell with run as administrator and execute the below command to create a Sub Ordinate Certificate
"certreq -submit requestfile.req"

It will popup all your ROOT CA servers, select the correct ROOT CA and click OK to generate a certificate
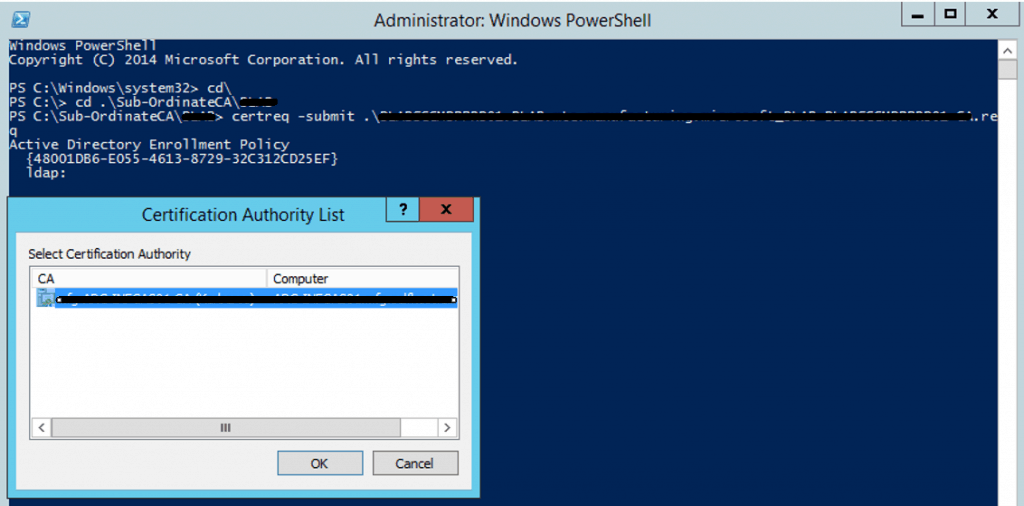
Save the Certificate file
Run the below command to create a CRT file for Sub Ordinate CA
"certreq -retrieve "RequestId" c:\filename.crt" to save CRT file

Connect Sub Ordinate CA Server, copy sub-ordinate CA crl and crt files from ROOT CA
Open the “Certificate Authority” Console on Sub Ordinate CA
Right Click on Server Name – All Tasks – Install CA Certificate

Browse and select the CRT file which is generated from ROOT CA
Once the Certificate is installed you can start the service.

Once the Service starts, you can see the GREEN symbol for CA servers, which indicates that CA services are running.

Configure Certificate Templet’s
Create “ConfigMgr Client Certificate” templet
Right-click on Certificate Templates and Click Manage to open Certificate Management Console

To create an SCCM Client Authentication Certificate – right click on “Workstation Authentication” and click Duplicate Template

Give the name of the Template “ConfigMgr Client Certificate”.

Provide allow permissions to “Read, Enroll and Autoenroll” for domain Computers.

Click OK for Save “ConfigMgr Client Certificate” Templet.
To create a Web Server Authentication Certificate – Right-click on “Web Server” Templet and Click Duplicate Template.

Give the name of the Web Server Template “ConfigMgr Web Server Certificate”.

Go to the “Request Handling” tab and select “Allow Private Key to be exported”.

Go to the “Subject Name” Tab and Select “Supply in the Request”.

Go to the “Security” Tab and allow permission to only our SCCM Server. This certificate is required for the SCCM DP Server only.

Close Certificate manage window
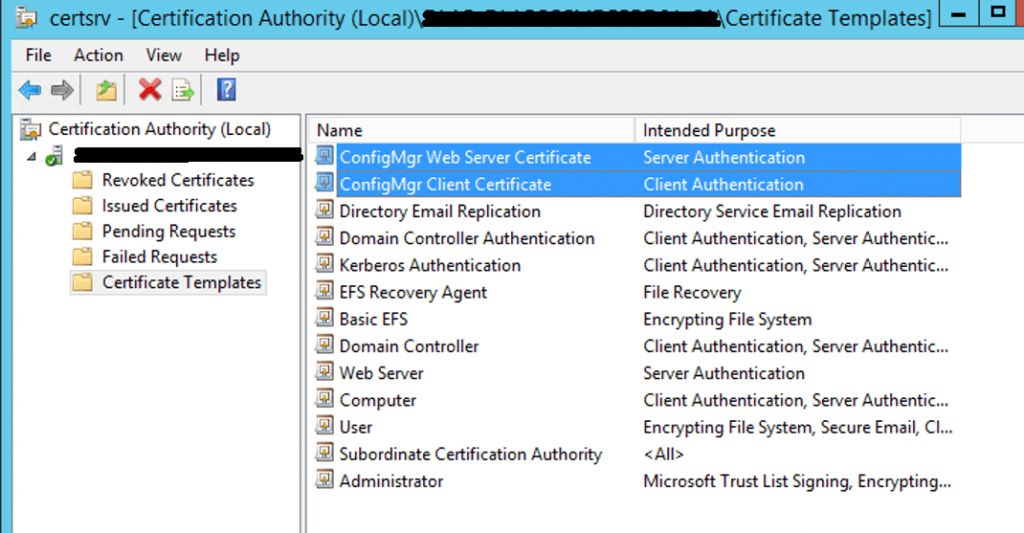
To add a newly created template to the Certificate Template’s page by running below cmd.
certutil -SetCAtemplates +ConfigMgrClientCertificate
certutil -SetCAtemplates +ConfigMgrWebServerCertificate

Once the Templates add-in Certificate Templates page is available for enrollment to client machines.
Configure Group Policy for Auto Enrolment of Certificates
On the domain controller, launch the “Group Policy Management“. Navigate to your domain, right-click it, and then select Create a GPO in this domain, and Link it here. In the “New GPO” dialog box, enter a name for the new Group Policy, such as “Autoenroll Certificates“, and click “OK“

In the results pane, on the “Linked Group Policy Objects” tab, right-click the new Group Policy, and then click Edit. In the “Group Policy Management Editor“, expand Policies under “Computer Configuration“, and then navigate to Windows Settings > Security Settings > Public Key Policies. Right-click the object type named “Certificate Services Client – Auto-enrollment“, and then click “Properties“

From the “Configuration Model” drop-down list, select “Enabled“, select “Renew expired certificates, update pending certificates, and remove revoked certificates”, select “Update certificates that use certificate templates”, and then click “OK”. Close the GPMC.

Verifying Certificate Installation on Computers
In the above steps, we have configured the workstation authentication template’s auto-enrollment using group policy. This procedure installs the client certificate on computers and verifies the installation. Restart the workstation computer and wait a few minutes before logging on.
- Using the MMC command, open the “Certificate snap-in” dialog box
- select “Computer account“, and then click Next.
- In the “Select Computer” dialog box, ensure that “Local computer: (the computer this console is running on)” is selected, and then click Finish.
- In the console, expand “Certificates (Local Computer)“, expand “Personal“, and then click “Certificates“.
- In the results pane, confirm that a certificate is displayed with “Client Authentication” in the “Intended Purpose” column and “SCCM Client Certificate” in the “Certificate Template” column.
- Close the console.

Resources
- Client Installation Health Validation PowerShell Script Including PKI Certs
- Install the Certification Authority
We are on WhatsApp. To get the latest step-by-step guides and news updates, Join our Channel. Click here –HTMD WhatsApp.
