Best Guide to Transforming iOS Devices into a Dedicated Kiosk with Intune! Hello everyone, have you ever wondered if we can transform iOS/iPadOS devices into single-app or multi-app dedicated kiosk devices? If so, you are at the right place. Intune helps organisations convert their iOS/iPadOS devices into KIOSK devices.
For organisations looking to deploy iOS devices for a specific purpose, think digital signage, self-service terminals, or point-of-sale systems – Kiosk Mode is an invaluable feature. By locking down an iPad or iPhone to a single application, you can ensure focused functionality and prevent users from accessing unintended features or apps.
Microsoft Intune helps organisations to streamline to configuration and deployment of Kiosk Mode on their supervised iOS devices. IT admins can configure the required configuration and remotely assign the profile and manage the iOS devices.
The core principle of KIOSK mode is to prevent users from accessing other device features, settings or unauthorised applications. By restricting users, organisations ensure that the device’s interaction remains strictly with the intended and controlled environment.
Table of Contents
What is KIOSK Mode
Kiosk mode is essentially locking the device to a single application, or in some scenarios, multiple applications. Users cannot interact with other features of the device. They can use the device only for allowed applications or its intended function.
Kiosk/dedicated mode is mainly used in industries where they have digital signage for advertisement, inventory management industries, Point of Sales Systems, and Educational institutes where the institutes block students to remain focused on their intended function.
- Simple Way to Add iOS to Apple Business Manager and Manage in Intune – Part 2
- Simple Way to Add iOS to Apple Business Manager and Manage in Intune Part 3
Create a Dedicated KIOSK configuration in Intune.
As we learned above, the KIOSK mode for iOS/iPad devices can be achieved only on Supervised devices. The organisations should buy their devices from an authorised reseller, and the reseller will add the devices to the ABM portal, or an IT admin can add the devices to the ABM portal using the Apple Configuratior2 tool. Now, let’s add the required configuration in Intune to configure a shared device in the following steps.
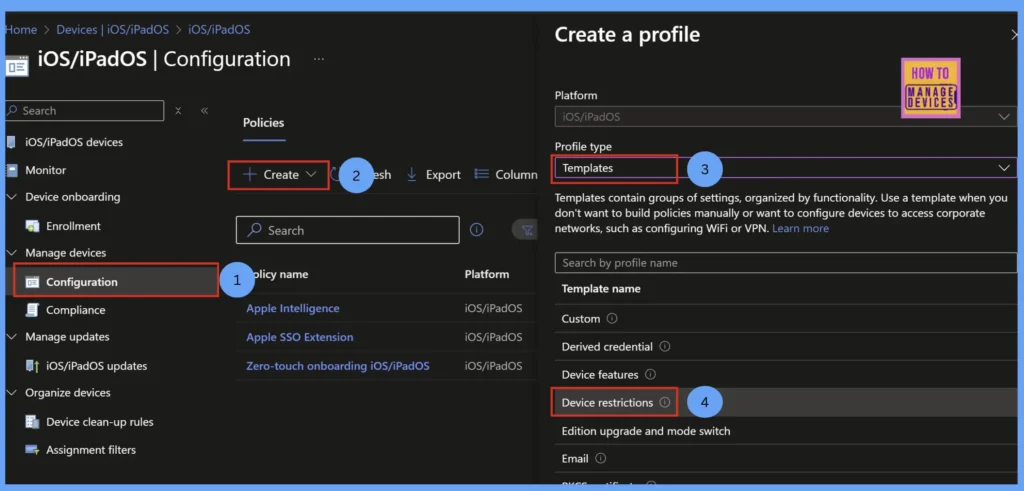
- Log in to the Microsoft Intune Admin Centre
- Click Devices > Configuration > Create > New Policy
- Click on Template > Device Restrictions
- Click On Create
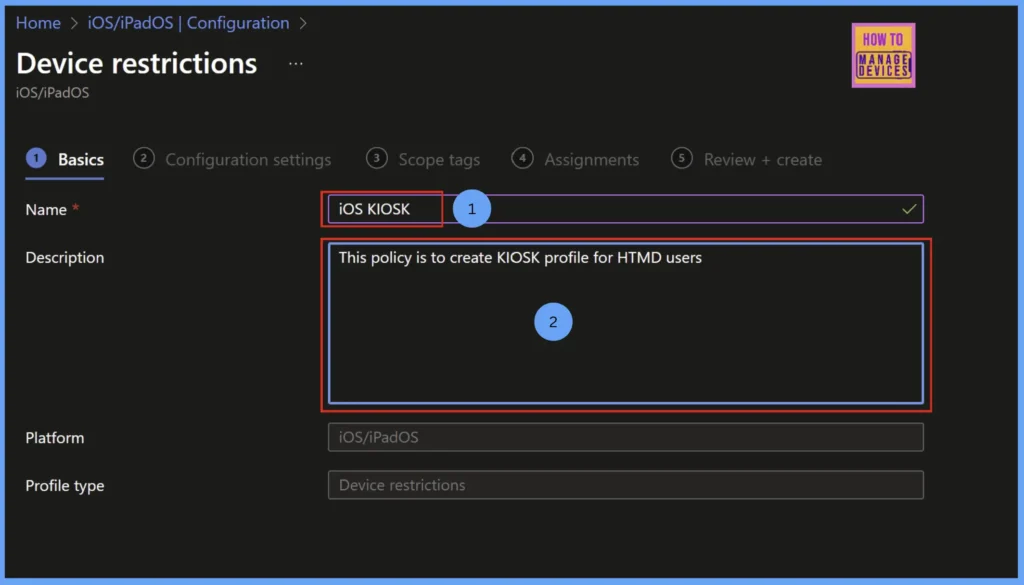
Now provide the Name and Description to the profile on the Basics page to identify the policy in future. Having a proper name and description will help admins to identify when and why the policy has been created. Click on Next to the Configuration Settings page.
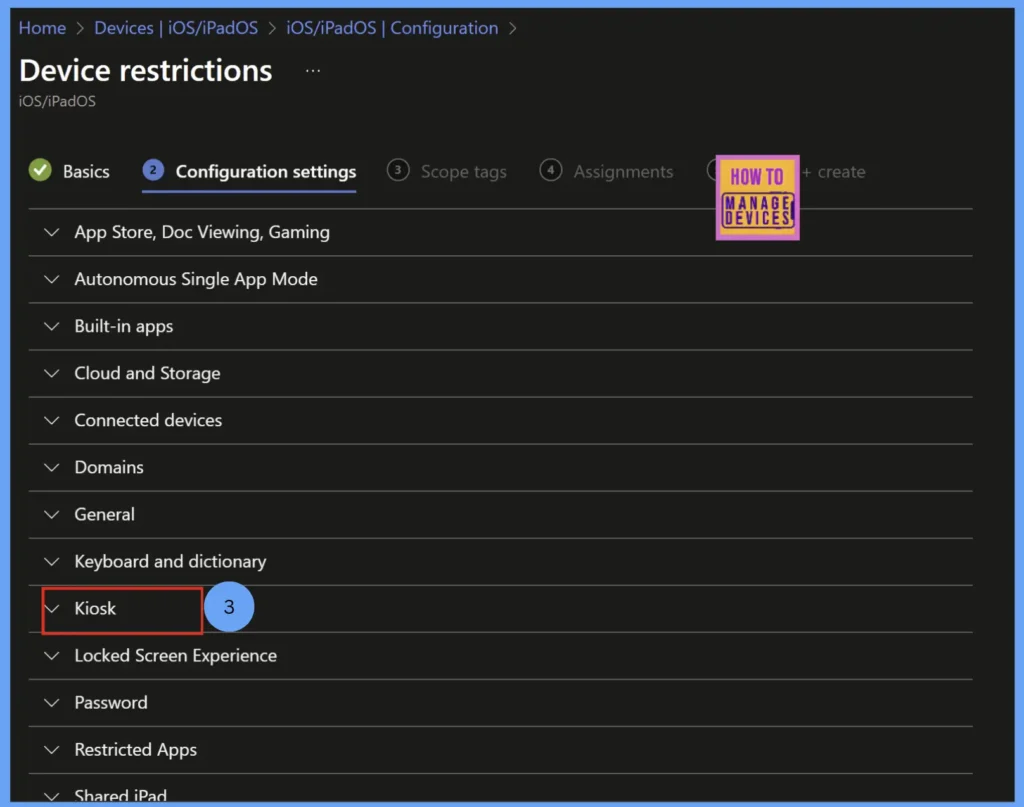
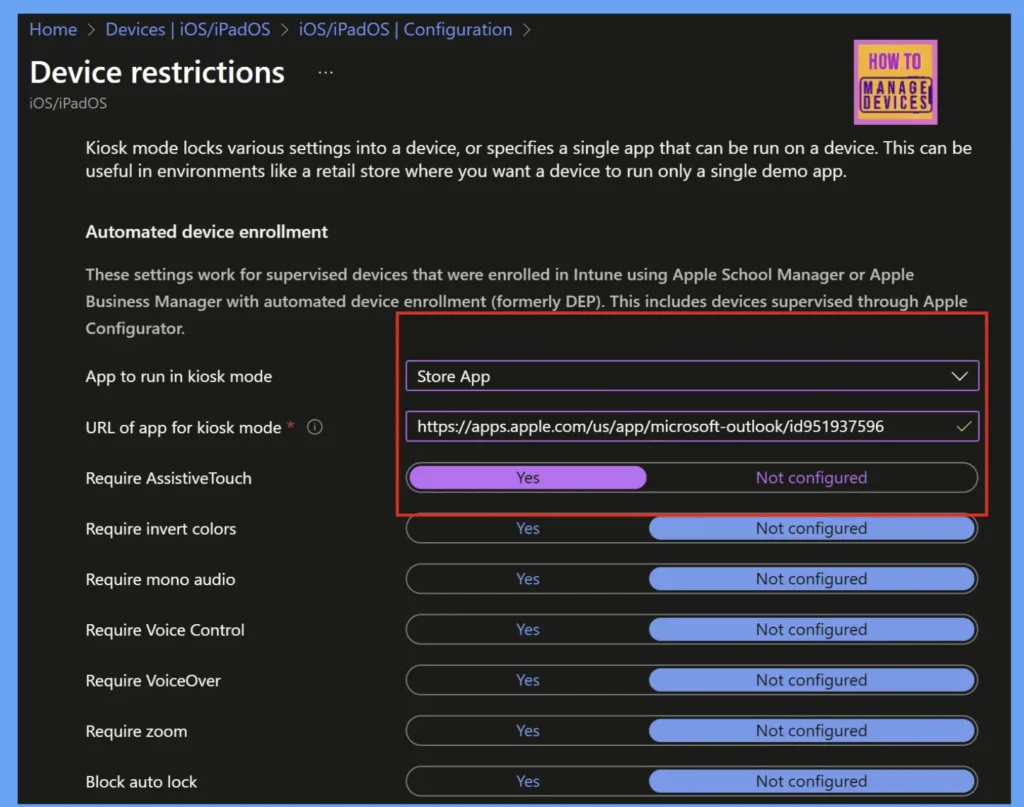
Now, in the Configuration settings page, Microsoft Intune categorises all the restrictions in various categories. We have KIOSK as a category. Click on the KIOSK category to configure the KIOSK mode on iOS devices. Intune provides various options to configure as shown below.
Select App to run in kiosk mode, we have various options like Store Apps, Managed apps and Built-In Apps. I have selected the Store Apps. When we select the store apps, you need to provide the app store URL for the application.
In case of managed aps, we can select the applications that are published in Intune. In case of Built-In Apps, you need to provide the Application ID of the application. Once you choose the App to run, you can configure various settings for the KIOSK device, like AssistiveTouch, blocking the screen sleep button or blocking touch. Configure the required restrictions as per your requirement.
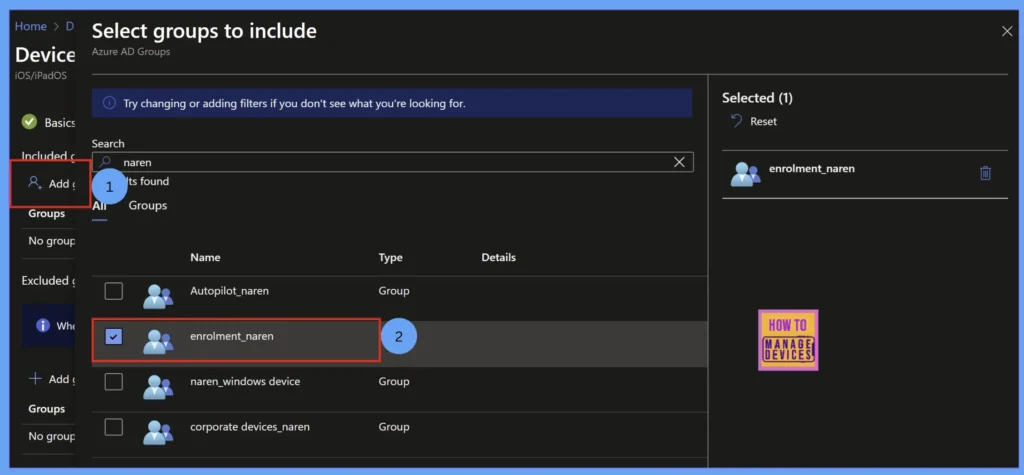
After configuring the requirement restrictions, click on Next to the Scope tags page, add scope tags if you have any, otherwise, leave it unassigned. Click Next to the Assignment page and assign the policy to the required groups. The group might be a user group or device group based on the profile type you have assigned. Let’s see few settings that might help you to configure in the below table
| Settings | Description |
|---|---|
| Touch Enabled | Allows or disables touch interaction |
| Volume Buttons | Enable/disable the Volume buttons on the KIOSK device |
| Enable AssistiveTouch | Instead of using the regular touches if we enable Assistive Touch, users will have options to use some device features |
| Auto-Lock Timeout | Sets timeout for auto-lock (or disables it) |
Click Next to Review+Create screen. In this screen, you can review all the configurations that were configured and you can edit them if you missed any restrictions to were configured. Once reviewed, click on Create to create the policy.
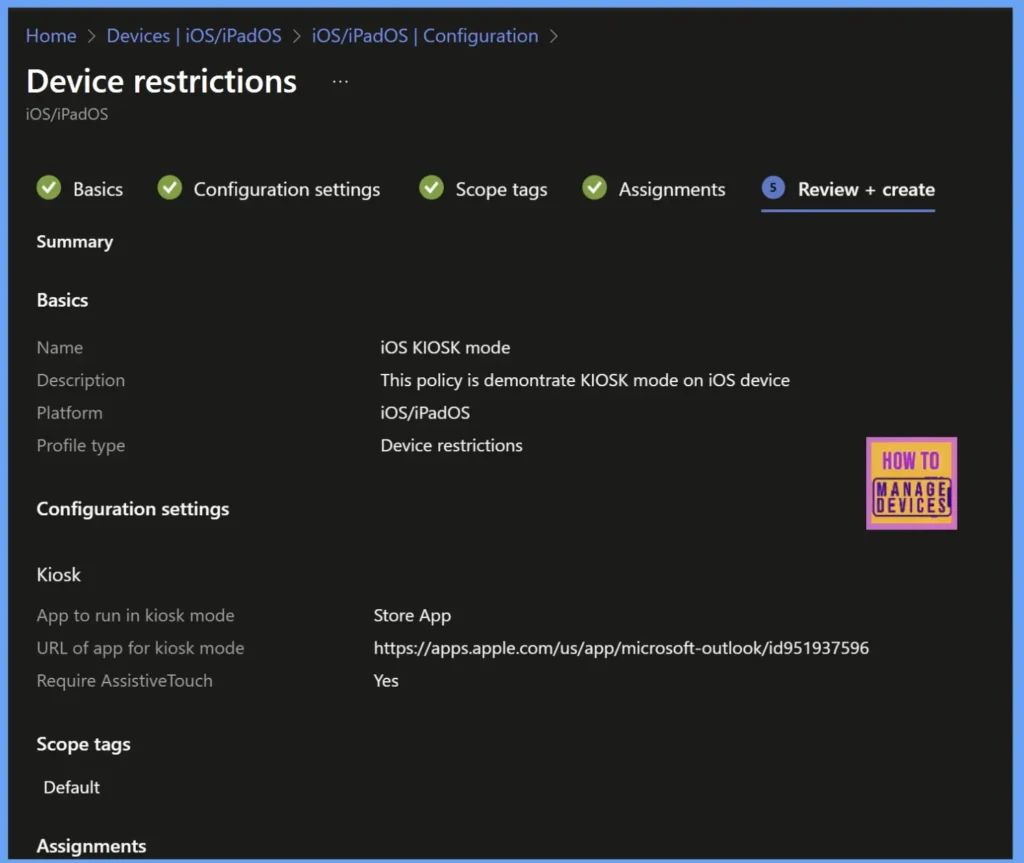
We have created the policy successfully. Now, to test it, we need to enrol the device. You can refer this article to enrol the device using ABM. Once the device is enrolled, after a couple of minutes, the Configuration will start kicking in, and KIOSK mode is enabled on the device.
User Experience
Now that we have created the required configuration, let’s see how the user experience would be. I have added one of my devices to ABM using Apple Configurator 2. Created a profile with user affinity and assigned the profile to the device. I also configured screens to be displayed to the user while setting up the device. Once the device reset and connected to Wi-Fi, the device pulled the enrollment profile and started ABM enrollment.
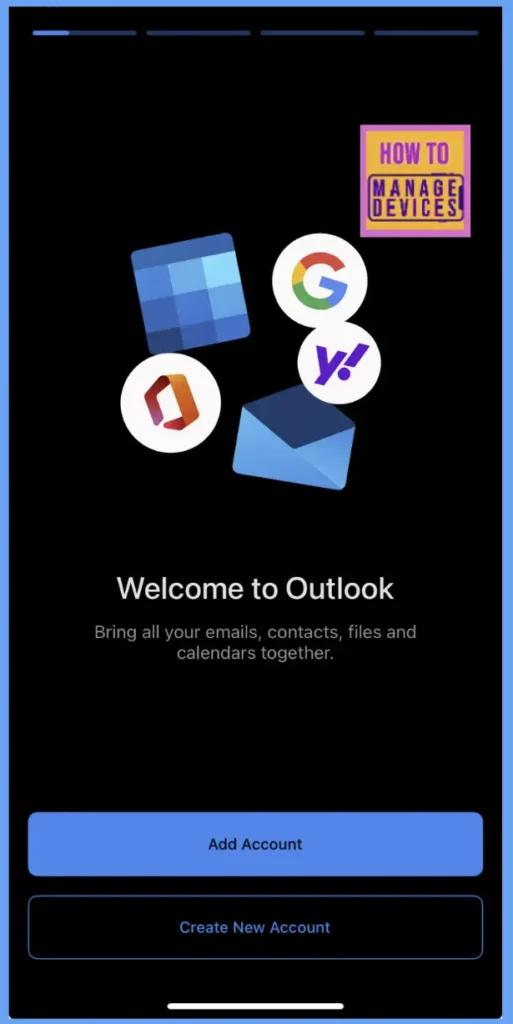
As soon as the device enrollment is completed, the assigned restriction is applied to the device and the Outlook application is opened, as we used the Outlook app for KIOSK mode. I can sign in to the application but cannot close or exit the application to use other features of the device.
Note: Make sure that if you’re using Managed applications for KIOSK mode, the application should be deployed as a required application in order to install automatically. If the KIOSK mode is not enabled on the device, this might be due to the application installed after the policy is applied. Restart the device, and this would kick the dedicated KIOSK mode on the device.
Conclusion
Intune simplifies the complex requirements and helps organisations to manage their iOS devices by locking them to a single app as per their requirement. Intune also provide granular policies to restrict the hardware button, controlling rotation of the screen and providing assistive touch.
Need Further Assistance or Have Technical Questions?
Join the LinkedIn Page and Telegram group to get the latest step-by-step guides and news updates. Join our Meetup Page to participate in User group meetings. Also, join the WhatsApp Community to get the latest news on Microsoft Technologies. We are there on Reddit as well.
Author
About Author – Narendra Kumar Malepati (Naren) has 13+ years of experience in IT, working on different MDM tools. Over the last seven years, Naren has been working on various features of Intune, including migration from different MDMs to Intune. Naren mainly focuses on Android, iOS, and macOS.

