Let’s learn how you can manage Windows Autopatch groups from Microsoft Intune. With Windows Autopatch groups, organizations can efficiently manage updates according to their business needs without incurring additional costs or unexpected disruptions.
The Windows Autopatch groups feature is currently in public preview. As it is still under active development, you can test and utilize these capabilities in your environments and share your feedback with the Microsoft Product team.
Windows Autopatch generates device-based Azure AD assigned groups according to the deployment ring composition page selections. Furthermore, the service assigns update ring policies for every deployment ring established within the Autopatch group based on the preferences set in the Windows Update settings page, which are part of the Autopatch group’s guided end-user experience.
As organizations transition to a managed-service model, wherein Microsoft handles update processes on their behalf, they face difficulty ensuring that their organizational structures and deployment schedules are adequately represented.
Windows Autopatch reporting is designed to allow visibility into update status and device health and offer insights into your estate. Check More details on Windows Autopatch Quality Updates Report In Intune MEM Portal.
- Windows Autopatch Implementation Setup Guide
- Windows Autopatch Audit Logs | How To Track Change Details
Enable Windows Autopatch Groups Public Preview
The Windows Autopatch group experience is only applicable if you have chosen to opt-in and use Windows Autopatch groups. To opt-in to use Windows Autopatch groups.
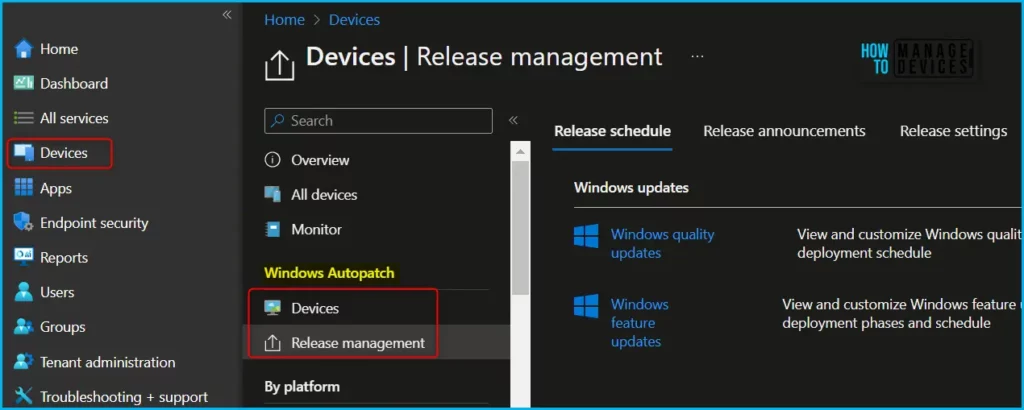
In the Microsoft Intune admin center and select Devices. Under Windows Autopatch, select Release Management, then select Autopatch groups (preview).
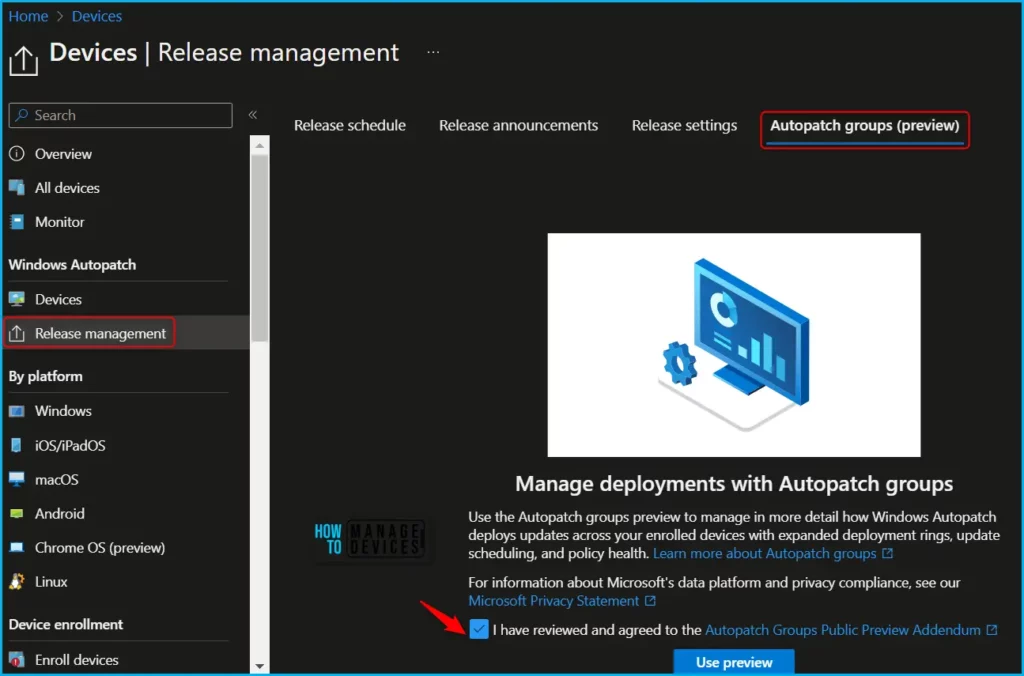
Review the Microsoft Privacy Statement and the Autopatch groups Public Preview Addendum. If you agree, select the I have reviewed and agree to the Autopatch groups Public Preview Addendum checkbox.
Next, select Use preview to test Windows Autopatch groups and its bundled feature set. If the Use Preview option is greyed out, ensure you meet all the Autopatch group prerequisites.
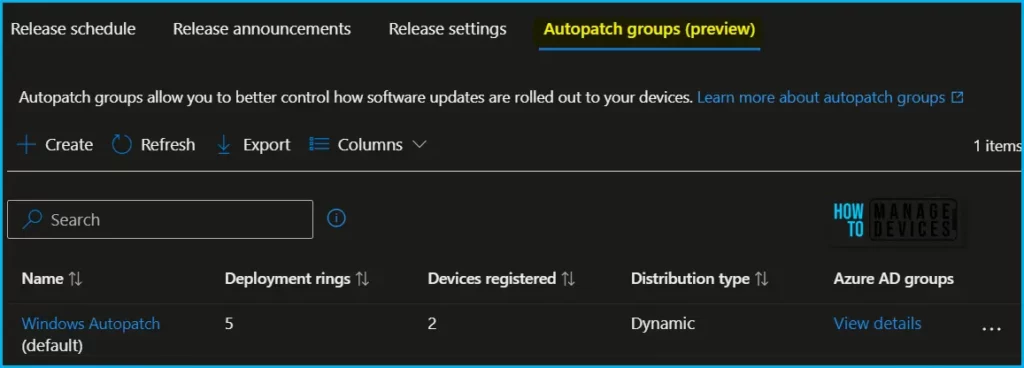
After enabling the Public Preview for Windows Autopatch Group, you can create an Autopatch group. When creating or editing an Autopatch group, software update policy assignments will be based on your choices and can be managed through Azure AD, Intune, and Windows Update for Business (WUfB). Specifically, Intune is responsible for assigning software update policies.
Windows Update for Business (WUfB) is accountable for several tasks, including delivering update policies, receiving update deployment statuses from devices, transmitting this status information to Microsoft Intune, and ultimately to the Windows Autopatch service.
Create Custom Autopatch Group
The next step is to Create an Autopatch group. The Default Autopatch group is recommended for organizations that can meet their business needs using the pre-configured five deployment ring composition.
Before beginning to manage Autopatch groups, please ensure that you have fulfilled the following prerequisites, Autopatch groups prerequisites.
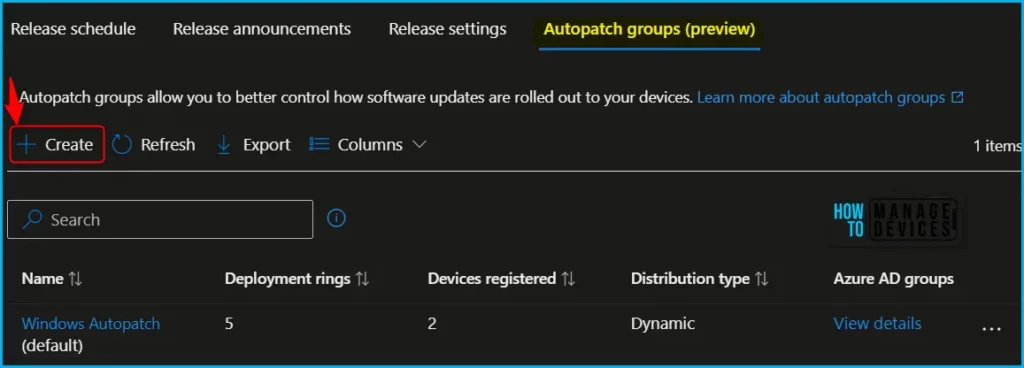
Under Windows Autopatch, select Release Management, then select Autopatch groups (preview). In the Autopatch groups blade, select Create.
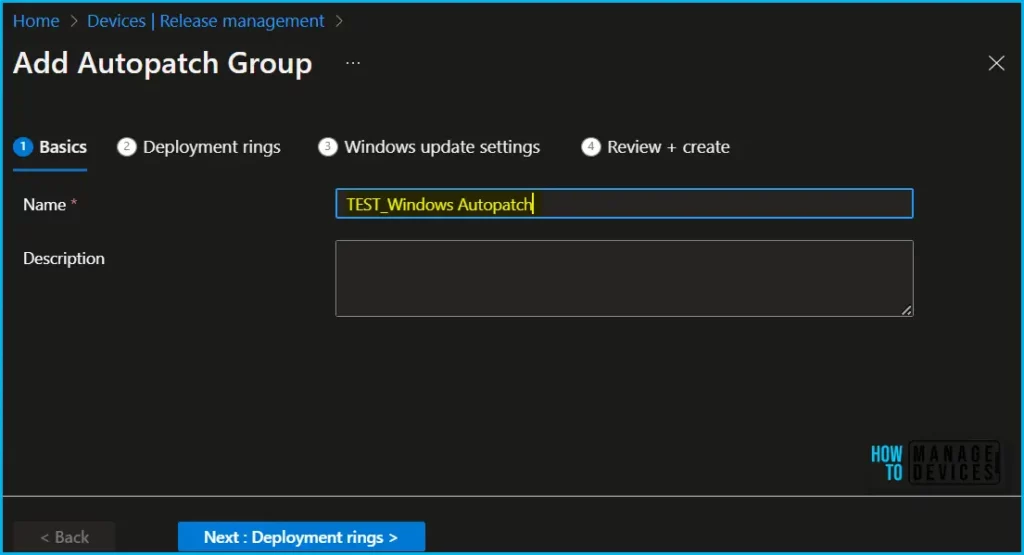
On the Basics, enter a name and a description. Enter up to 64 characters for the Autopatch group name and 150 characters maximum for the description, then select Next: Deployment rings. The Autopatch group name is appended to both the update rings and the DSS policy names created once the Custom Autopatch group is created.
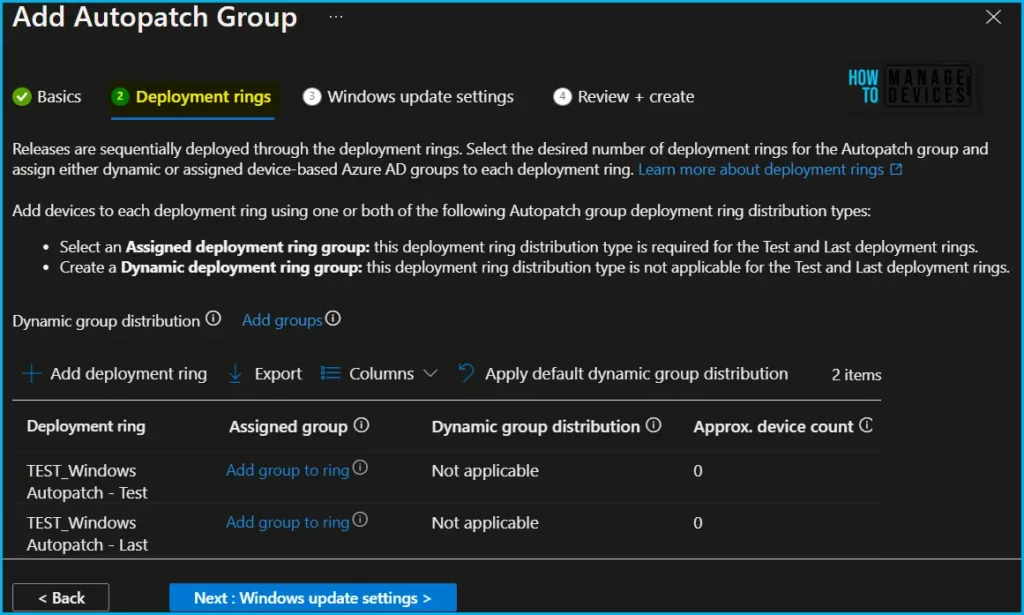
On the Deployment rings, select Add deployment ring to add the number of deployment rings to the Custom Autopatch group.
Each new deployment ring added must have either an Azure AD device group assigned to it, or an Azure AD group that is dynamically distributed across your deployments rings using defined percentages.
- In the Dynamic groups area, select Add groups to select one or more existing device-based Azure AD groups for Dynamic group distribution.
- In the Dynamic group distribution column, select the desired deployment ring checkbox. Then, either enter the percentage of devices that should be added from the Azure AD groups selected or select Apply default dynamic group distribution to use the default values.
In the Assigned group column, select Add group to ring to add an existing Azure AD group to any of the defined deployment rings. The Test and Last deployment rings only support Assigned group distribution. These deployment rings don’t support Dynamic distribution.
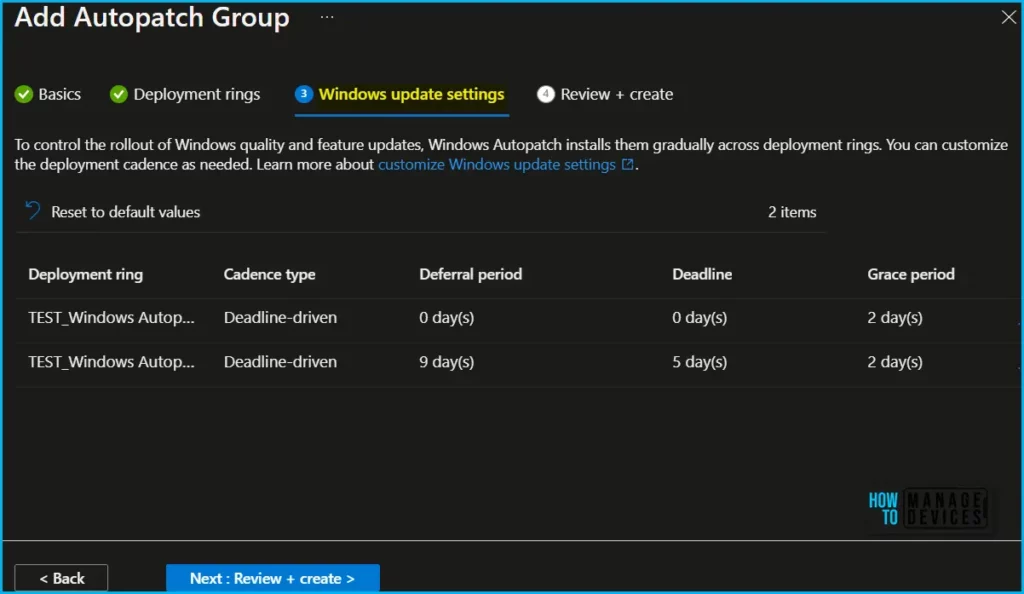
Select Next: Windows Update settings. Select the horizontal ellipses (…) > Manage deployment cadence to customize your gradual rollout of Windows quality and feature updates. Select Save.
Select the horizontal ellipses (…) > Manage notifications to customize the end-user experience when receiving Windows updates. Select Save.
Select Review + create to review all changes made. Once the review is done, select Create to save your custom Autopatch group.
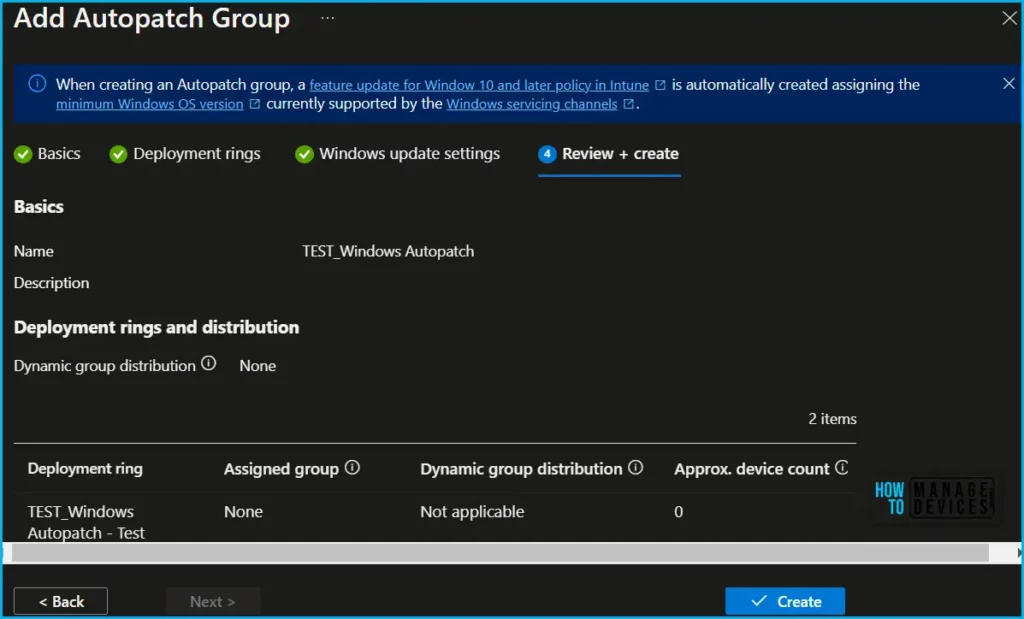
Once all settings, and deployment rings are completed, A notification will appear automatically in the top right-hand corner with a message. You can see “Autopatch group created”.
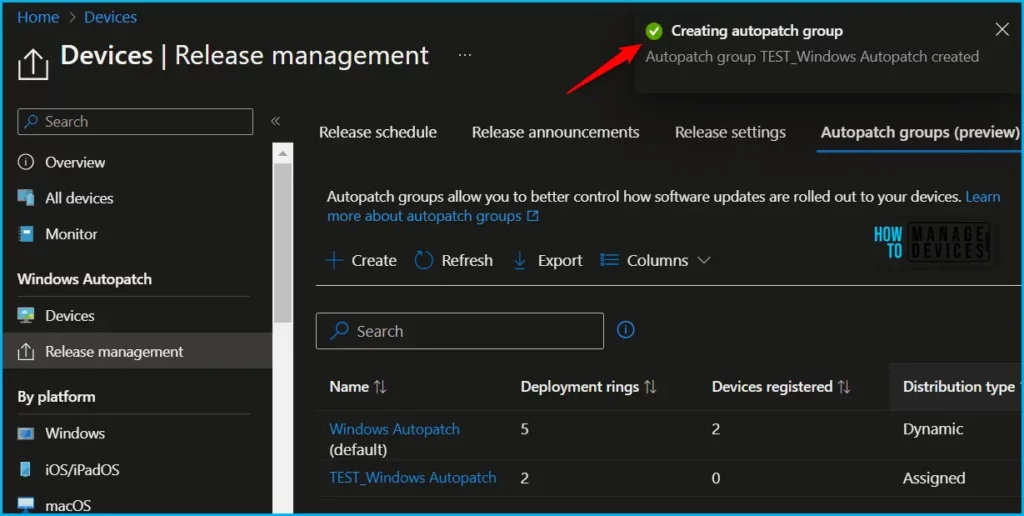
Autopatch groups initiate device registration with the Windows Autopatch service when you create or modify a Custom Autopatch group. This registration can also occur when you modify the Default Autopatch group to use your pre-existing Azure AD groups instead of the default Windows Autopatch Device Registration group supplied by the service.
Author
About Author – Jitesh, Microsoft MVP, has over six years of working experience in the IT Industry. He writes and shares his experiences related to Microsoft device management technologies and IT Infrastructure management. His primary focus is Windows 10/11 Deployment solution with Configuration Manager, Microsoft Deployment Toolkit (MDT), and Microsoft Intune.
