
Key Takeaways
- Enforces Onlooker Detection behavior through MDM policy
- Prevents users from changing the setting (UI toggle is disabled)
- Helps protect sensitive information from unauthorized viewers
- Ensures consistent security configuration across all managed devices
- Ideal for organizations with strict data privacy and compliance requirements
In this post, we discuss Secure Sensitive Screens Through Onlooker Detection Controls using an Intune Policy. With Microsoft Intune’s Settings Catalog, administrators now have more granular control over advanced features like Human Presence detection. One such setting, Force Onlooker Detection Action, ensures that sensitive screen content is protected from unintended viewers. This policy determines whether the Onlooker Detection action is enforced by the organization.
Table of Contents
Table of Contents
Force Onlooker Detection Settings with Intune to Improve Privacy and Prevent User Changes
By forcing this setting, IT teams can reduce the risk of data exposure in environments where shoulder surfing or unauthorised viewing is a concern. It’s particularly useful in workplaces handling confidential data, helping maintain privacy without user intervention.
- Configure Pinning Programs to the Taskbar using Intune Policy
- Add or Remove All Program Lists from the Start Menu in Windows 11
- How to Control Multi Monitor Taskbar Settings using Intune Policy
Create Profile in Intune
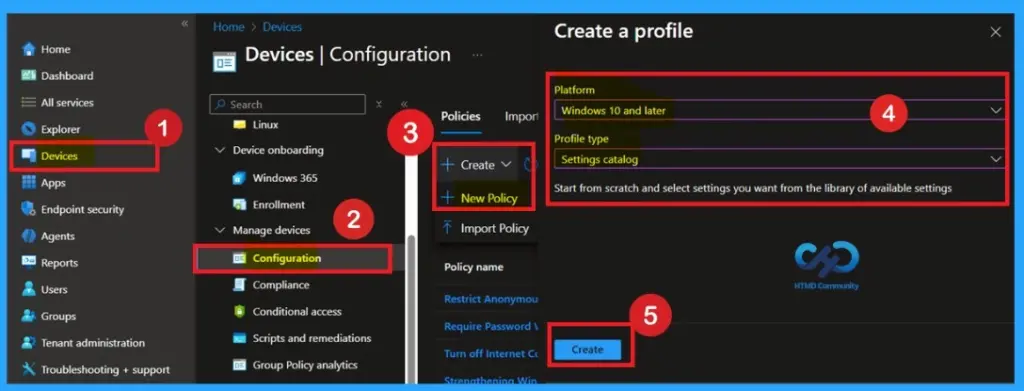
Sign in to the Microsoft Intune Admin Center using your admin account. From the left menu, go to Devices and then select Configuration profiles. Click on Create profile to start a new policy. Choose Windows 10 and later as the platform. Select Settings catalog as the profile type. Finally, click the Create option to continue.
Basic Tab
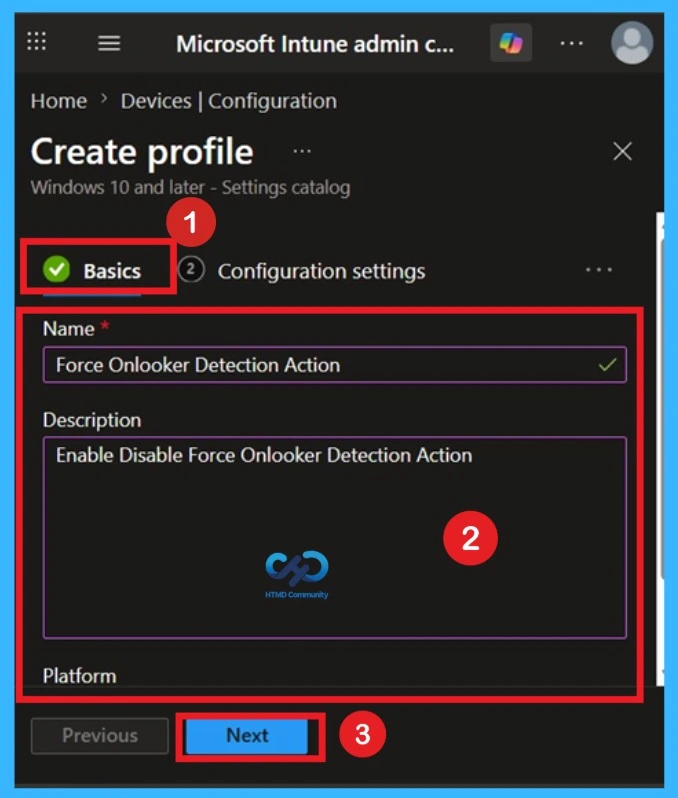
The Basics tab is the quickest step. Here, you need to enter the basic details such as the Name, Description, and Platform information. Since the platform is already set to Windows, you only need to provide a specific name and description for the policy, then click Next.

Configuration Tab
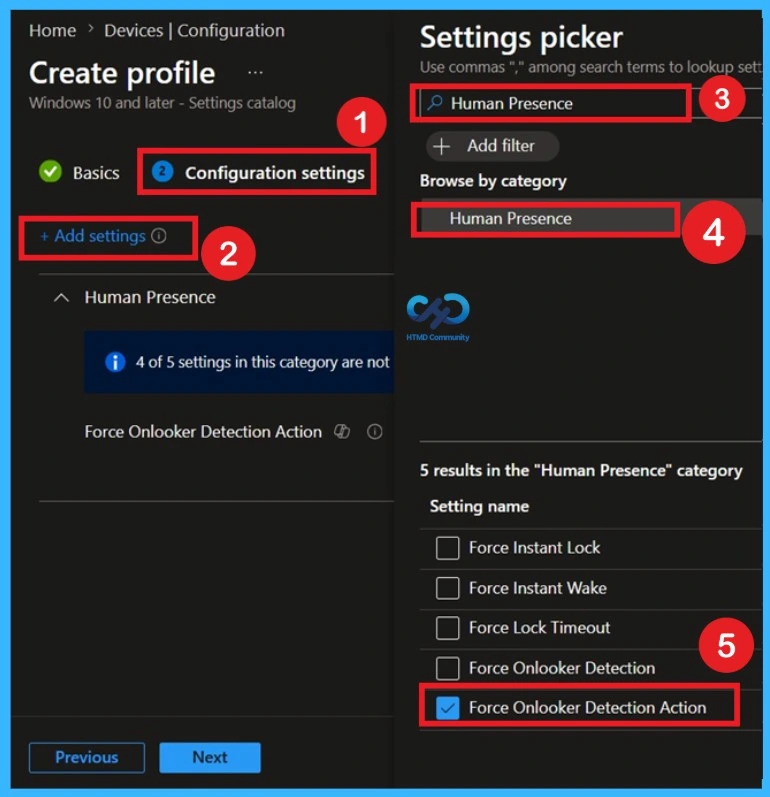
The next step is Configuration settings; there, you can look for the + Add Settings. When you click on the + Add settings, you will get the settings picker window. There, you can search for the Human Presence, then in the category select the policy name Force Onlooker Detection Action.
Defaulted State of Policy
The Default state of the policy is Default to User Choice. That means if the policy isn’t explicitly set by the admin, Windows will defer to the user’s own privacy or screen protection preference rather than enforcing a specific action like Forced Notify or Forced Dim and Notify
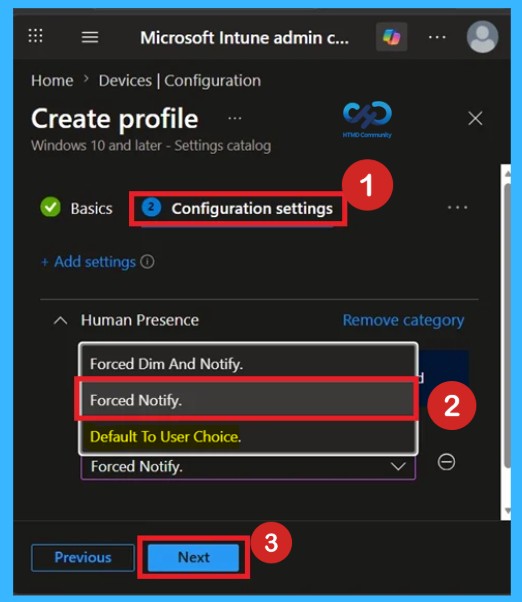
Forced Notify
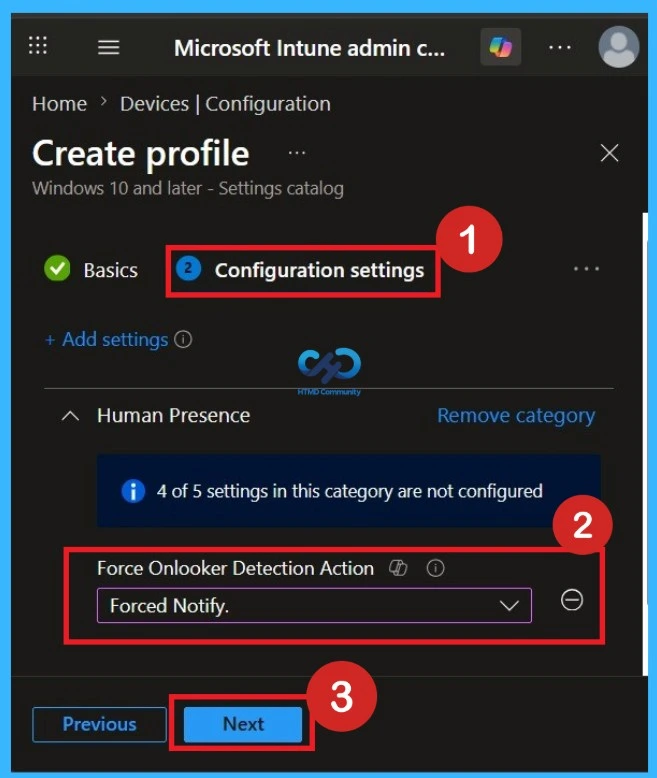
When the Force Onlooker Detection Action policy is set to Forced Notify, Windows will only alert the user when an onlooker is detected, and it does not dim or obscure the screen. If it set to the Forced Notify the screen itself stays normal (no dimming or blurring). Select the mode and click on the Next.
Scope Tags
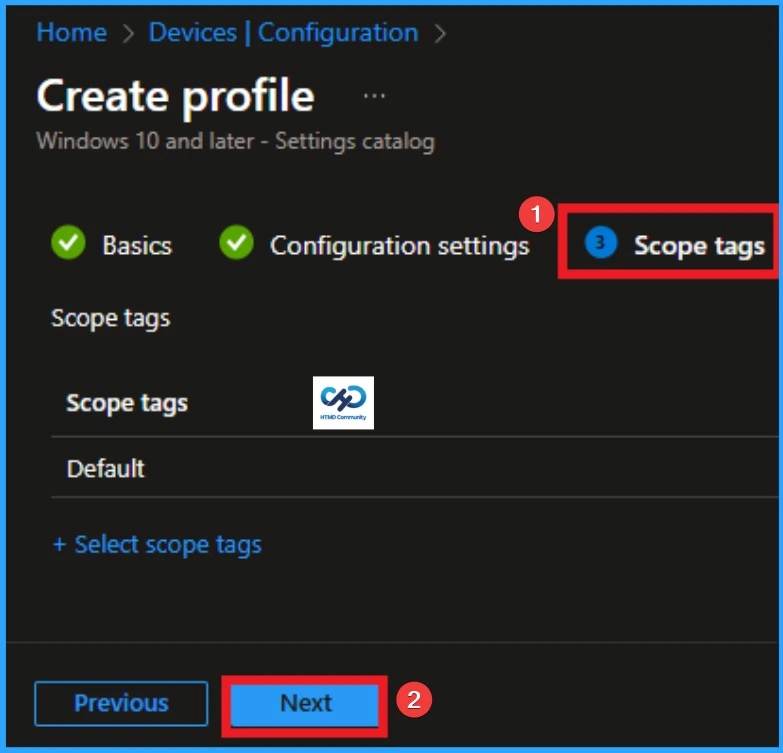
The Scope tags page helps control who can see or manage this policy in Intune. If your organization uses scope tags, select the appropriate tag based on your admin role or department. Scope tags are useful in large environments with multiple IT teams. If your organization does not use scope tags, you can leave this section.
- Here I Skip this Section
Assignment Tab
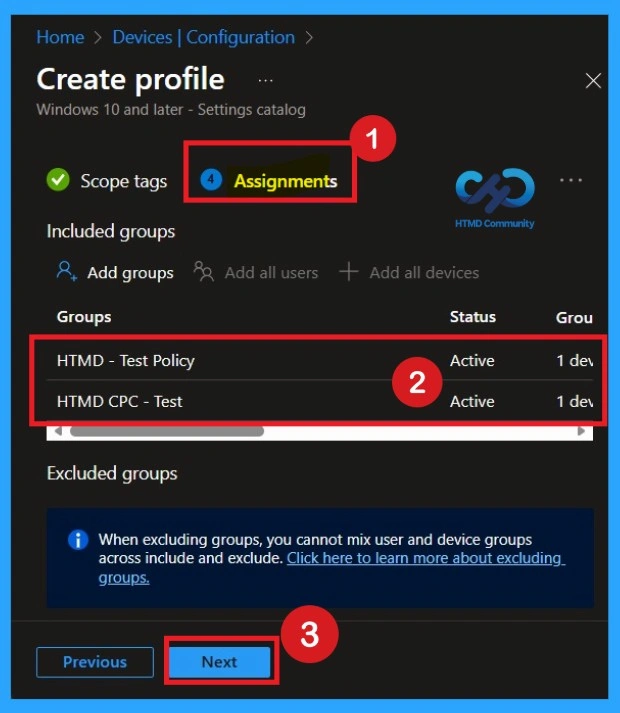
On the Assignments page, decide which devices or users should receive this policy. Under Included groups, select the required device groups or user groups. Assigning the policy ensures it applies only to the systems. Avoid assigning it to test or excluded devices unless required. Once assignments are completed, click Next to proceed.
Review + Create
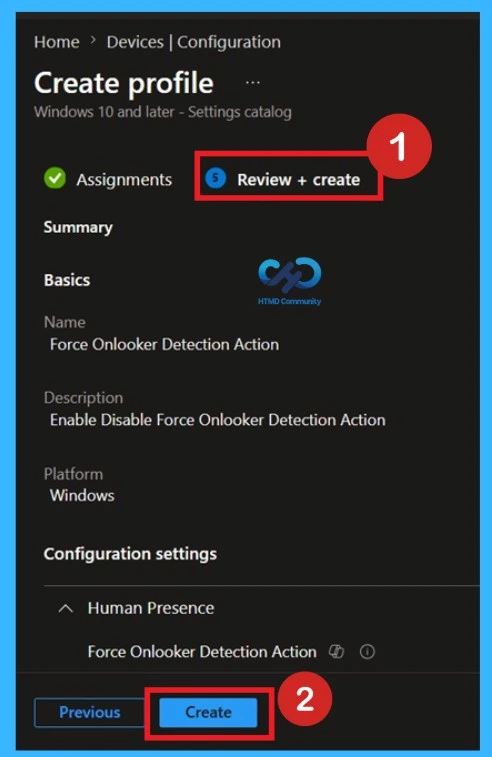
To complete the policy creation, you can review all the policy details on the Review + create tab. It helps to avoid mistakes and successfully configure the policy. After verifying all the details click on the Create Button. After creating the policy, you will get success message.
Monitoring Status
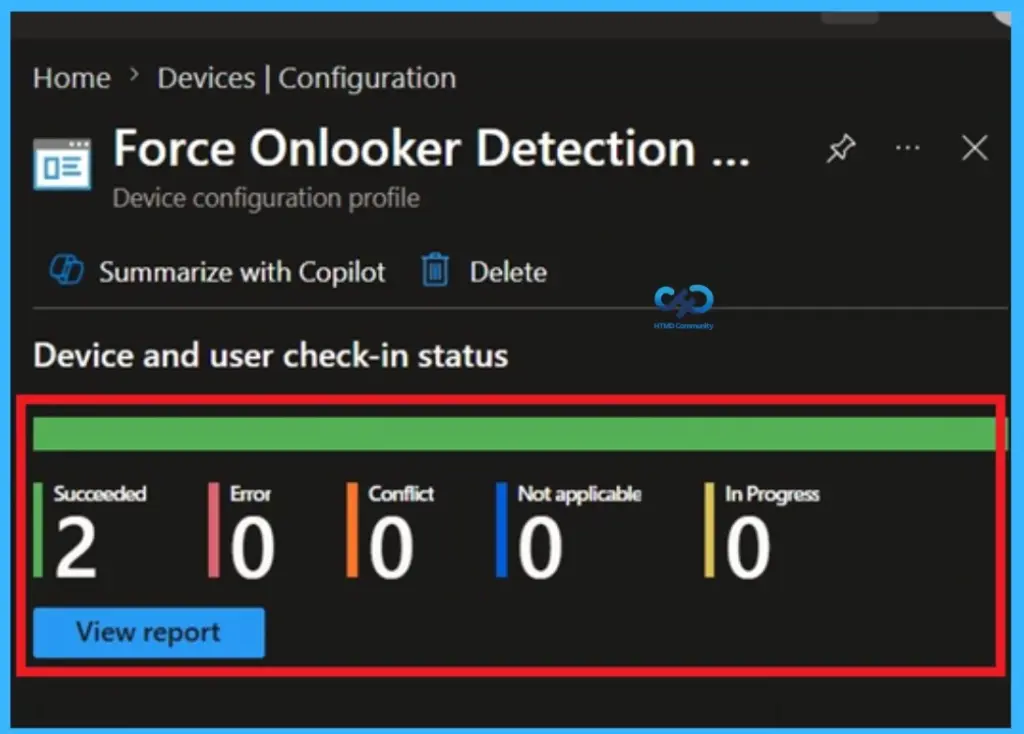
To quickly configure the policy and take advantage of the policy sync the assigned device on Company Portal. Open the Intune Portal. Go to Devices > Configuration > Search for the Policy. Here the policy shows as succeeded.
Client Side Verification
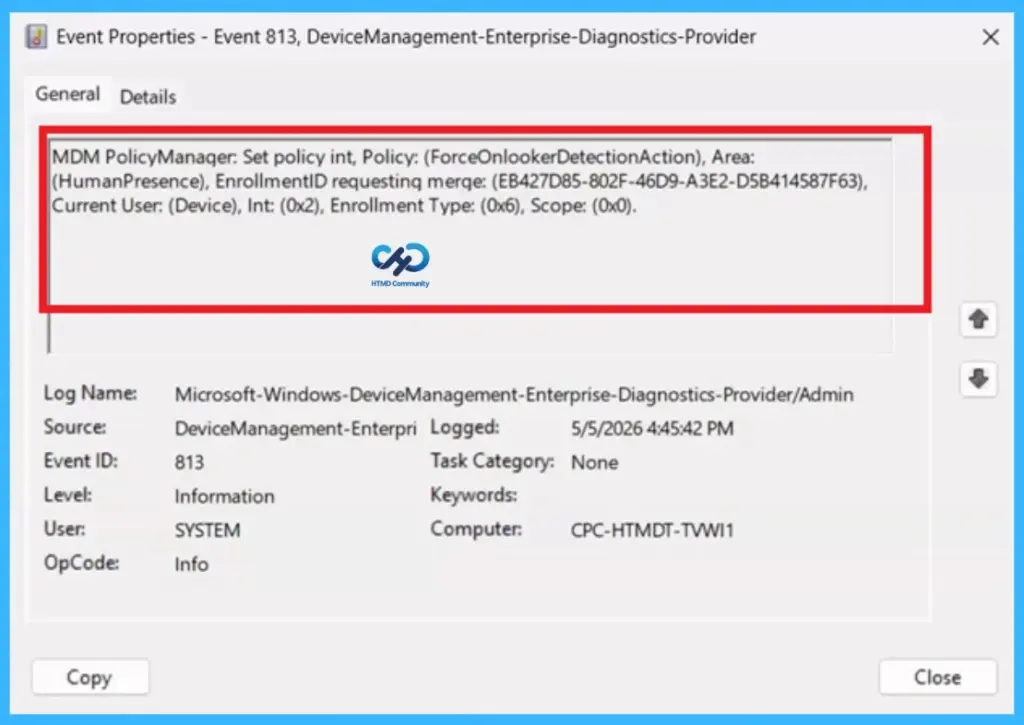
Always Remember, receiving a success message during policy deployment doesn’t necessarily confirm that the policy is actively applied or functioning as intended on the client device. To ensure the policy has been successfully configured, it’s important to verify through the Event Viewer. You can do this by filtering for Event ID 813 or 814, which will help you quickly locate logs.
| Policy Info |
|---|
| MDM PolicyManaqer: Set policy int, Policy: (ForceOnlookerDetectionAction), Area: (HumanPresence), EnrollmentID requestinq merqe: (EB427D85-802F-46D9-A3E2-D5B414587F63), Current User: (Device), Int: (0x2), Enrollment Type: (0x6), Scope: (0x0). |
Remove Assigned Group from Intune
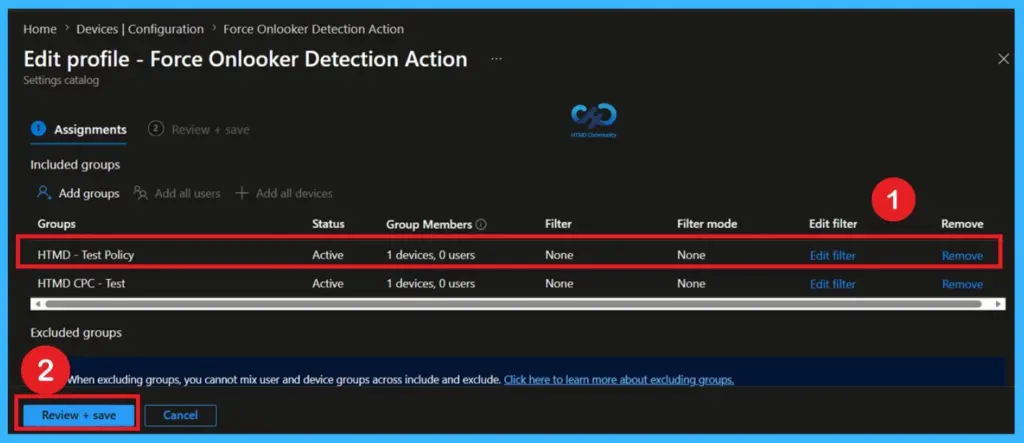
To remove a group from a policy, first open the Microsoft Intune Admin Center and sign in. From the left menu, go to Devices and then open Configuration profiles. Find the policy you want to change and click on it. Open the Assignments section and choose Edit. Remove the group that should no longer receive this policy and save the changes. After this, the policy will stop applying to devices.
- Removing a group only stops the policy for that group, but the policy still exists.
To get more detailed information, you can refer to our previous post – Learn How to Delete or Remove App Assignment from Intune using by Step-by-Step Guide.
Delete Policy Permenantly
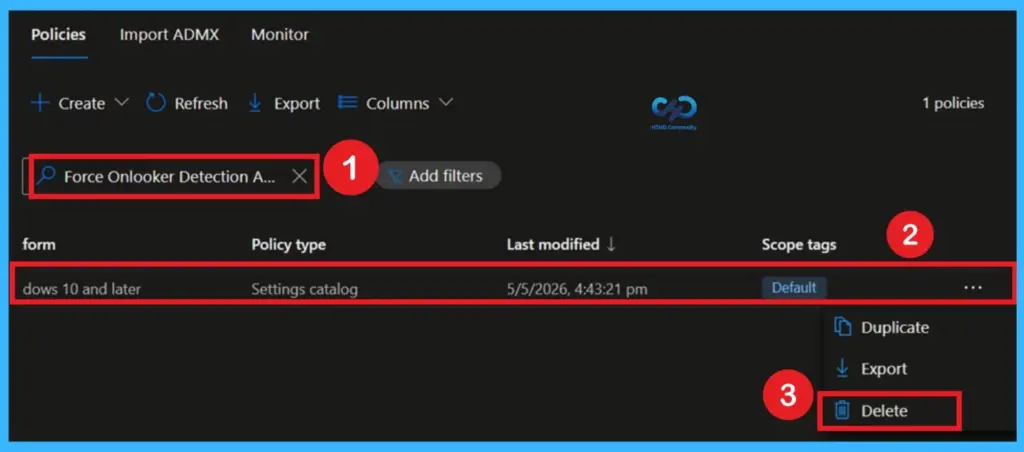
If the policy is no longer needed, you can delete it fully from Intune. Sign in to the Microsoft Intune Admin Center and go to Devices > Configuration profiles. Locate the policy you want to remove and open it. Click the three-dot menu in the top corner and select Delete. The policy is now permanently removed and will not affect any devices.
For detailed information, you can refer to our previous post – How to Delete Allow Clipboard History Policy in Intune Step by Step Guide.
Need Further Assistance or Have Technical Questions?
Join the LinkedIn Page and Telegram group to get the latest step-by-step guides and news updates. Join our Meetup Page to participate in User group meetings. Also, join the WhatsApp Community and the WhatsApp channel to get the latest news on Microsoft Technologies. We are there on Reddit as well.
Author
Anoop C Nair is a Workplace Technology solution architect with 25+ years of experience. Microsoft Certified Trainer. Microsoft MVP from 2015 onwards for consecutive 11+ years! He is a blogger, Speaker, and Founder of HTMD Community and HTMD Conference. His main focus is on Device Management technologies like Intune, Windows, and Cloud PC. He writes about technologies like Intune, SCCM, Windows, Cloud PC, Entra, and Microsoft Security.