Hi, Let’s discuss How to Make Application Packagers’ Life Easier – Part 2. In this series of posts, I will explain and share tips for making application packagers’ lives easier.
In part 1 of this series (How to Make Application Packagers Life Easier – Part 1), you can learn about the future of packaging and the modern packaging community.
This post will show you how to set up a smart package studio. When installing and learning the trial version, you will learn more about the automation techniques used in the smart package studio.
Most organizations are moving from traditional to modern device management technologies. Packaging technologies are also evolving to keep up with the contemporary world of AI and machine learning.
Related Post – How to Make Application Packagers Life Easier – Part 1 and How to Make Packagers Life Easier – Part 3
What are the Key Features of Smart Package Studio?
Smart Package Studio simplifies the process and minimizes manual tasks, enabling you to work more efficiently and intelligently. Here are some of the main features that Smart Package Studio offers:
1. Intelligent Capture
2. Smart Investigation
3. Smart Editor
4. Smart Tester
5. MSIX and IntuneWin support
6. Skilled package ideas
Get Ready to set up Smart Package Studio
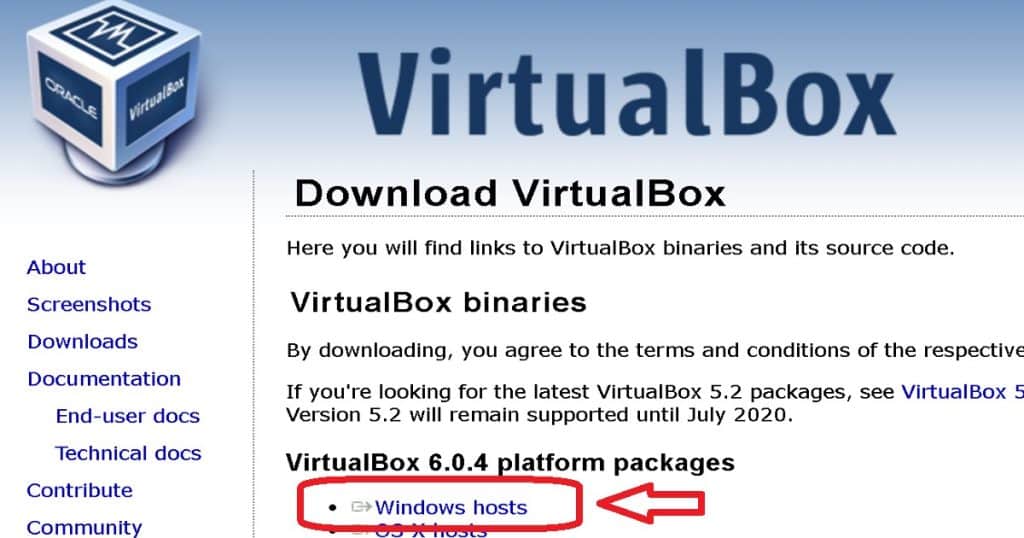
Download the following applications to complete the packaging environment setup. With virtualisation-supported hardware, I installed the smart package studio on my Windows 10 device.
NOTE! The VirtualBox platform is required to build a smart package studio environment, and you need to support hardware to use Oracle VirtualBox. VirtualBox supports most modern laptops and desktops!
- Download Oracle VirtualBox platform packages (Free latest version)
- Download VirtualBox Oracle VM VirtualBox Extension Pack (Free – same version as virtual box platform)
- Download Smart Package Studio (trial version)
- Windows 10/7 ISO to build Virtual Machines
Video Tutorial – Setup Smart Packaging Environment
Install Smart Package Studio
Installing the smart package studio is a straightforward process. I would recommend going with the default setup configurations.
Setup Smart package studio and packaging lab are not yet completed with this installation, and this is just the first and easiest step of the installation process.
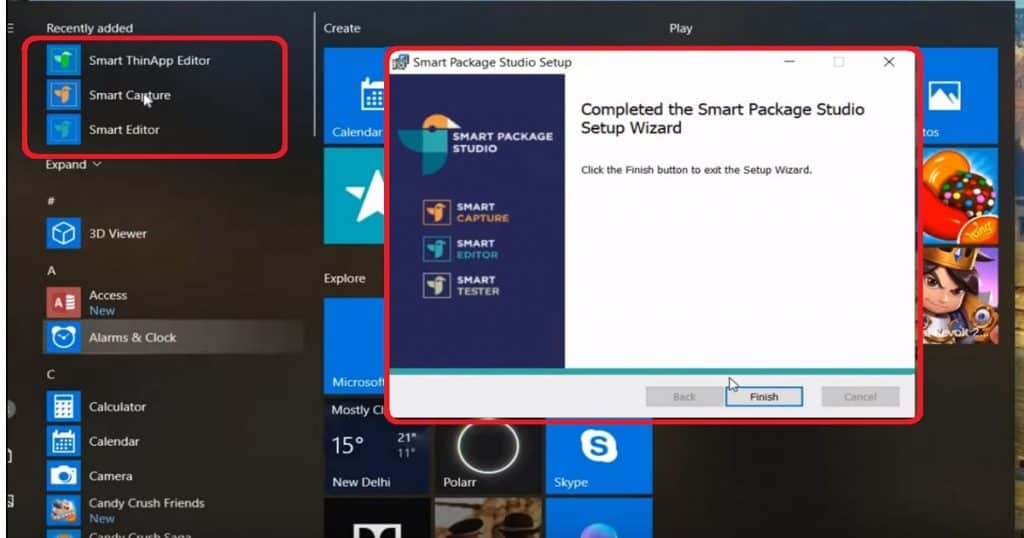
I have installed Smart Package Studio, as you can see in the video tutorial.
The smart package studio installer created five(5) shortcuts of different tools used in this series of posts to create MSI application packages, capture the snapshot, and create smart transform files for MSI application packages.
- Smart ThinApp Editor
- Smart Tester
- Smart Capture
- Smart Searcher
- Smart Editor
Let’s install Oracle VirtualBox and extension before launching any of the above-mentioned smart package studio tools.
Install Oracle VirtualBox and Extension
To complete the setup of Smart package studio, you need to download and install the latest version (6.0.4) of Oracle VirtualBox, and it’s an extension.
VirtualBox installation is also straightforward. I recommend completing the setup by going through the default configurations.
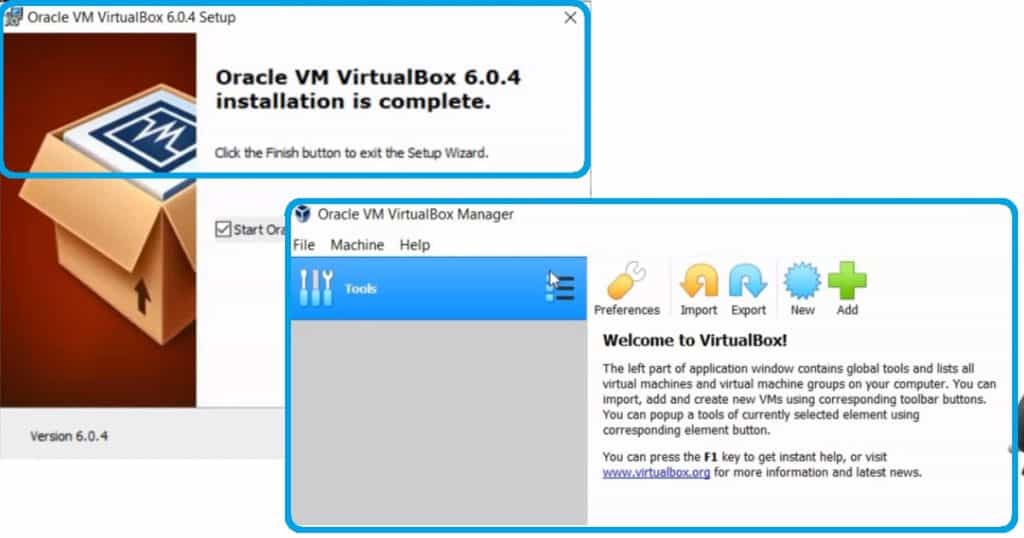
A new shortcut called Oracle VM VirtualBox is created after the successful installation of VirtualBox.
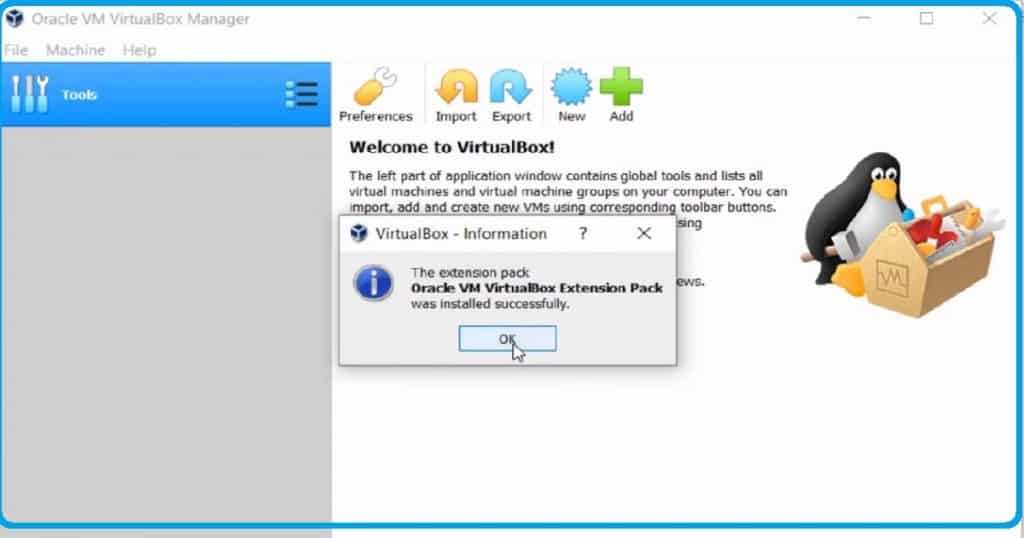
Now it’s time to install the VM VirtualBox extension pack as mentioned in the above section of the post. This extension installation took less than a minute on my laptop.
Create a Windows 10 Virtual Machine
The next step is to create a Windows 10 virtual machine with the Oracle VirtualBox tool. You should be ready with Windows 10 ISO to create the VM.
Follow the steps below to create a Windows 10 64-bit Virtual Machine from VirtualBox.
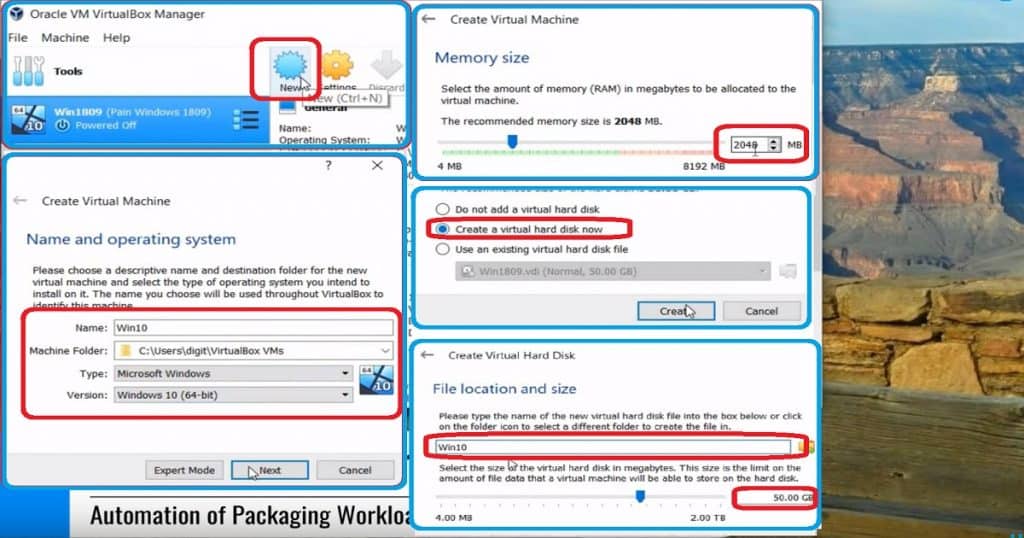
- Launch the New Virtual Machine Wizard by selecting
- Name of the VM = Win10
- Machine Folder = C:\Users\digit\virtualBox VMs
- Type of Operating System (Windows/Linux/MacOS) = Microsoft Windows
- Version = Windows 10 (64-bit)
- Click on Next to configure the memory (RAM) size for that Windows 10 machine = 2048 MB (default value)
- Click on the Next button to continue and configure the Hard disk
- Do not add a virtual hard disk
- Create a virtual hard disk now (select this one)
- Use an existing virtual hard disk file
- Click on the Next button to configure the Hard Disk File Type
- VDI (VirtualBox Disk Image)
- VHD (Virtual Hard Disk) – Opted for this option
- VMDK (Virtual Machine Disk)
- Click on the Next button to configure Storage on the physical hard disk
- Dynamic allocated
- Fixed-size – Faster performance
- Click on the Next button to configure File Location and Size
- Win10 (File location folder name for this VM)
- 50.00 GB (size of the Hard Disk)
- Click on the Create button to start the creation of the VirtualBox VM
- Right-click on the newly created VM, click on start, and then select normal start
- From the Windows 10 VM, Click on Devices -> Optical Drives. Attach the Windows 10 ISO (which has already been downloaded) to the VM, boot the VM from the Windows 10 ISO, and complete the Windows 10 setup process!
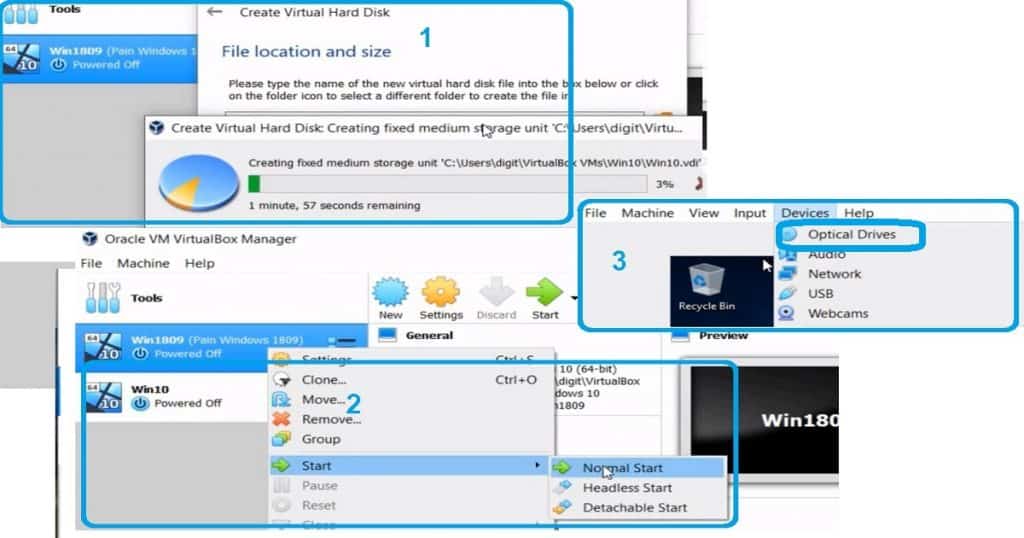
- The above-created VM is a Windows 10 test machine that performs all packaging-related testing with Smart Package Studio.
- To complete the following steps, you need to log in to the Windows 10 VM with a built-in administrator account. Alternatively, you can disable UAC on the VM and log in with an admin account.
Install VirtualBox Guest Additions on Windows 10
Follow the below steps to install VirtualBox guest additions on Windows 10 virtual machine. This installation will help integrate and authorize a smart package studio to manage this VM remotely.
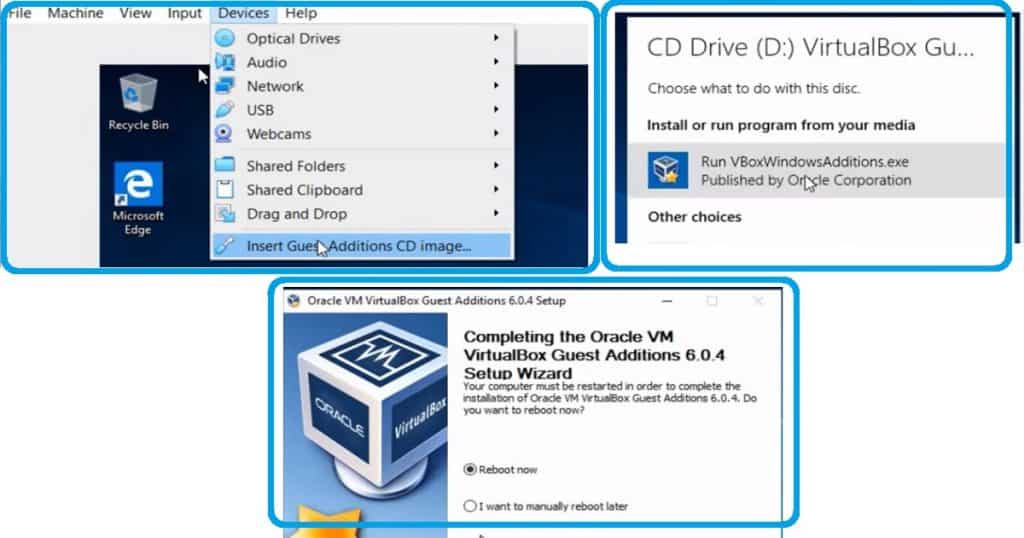
- Make sure you remove the already mounted Windows 10 ISO file from the VM
- Click on Devices and select Insert Guest Additions CD Image from VM
- Click on Run VboxWindowsAdditions.exe to Install VirtualBox Guest Additions on Windows 10 (Oracle VM VirtualBox Guest Additions 6.0.4 Setup)
- Please go through the default settings of VirtualBox guest additions tool to install it
- Reboot the Windows 10 VM to complete the Setup
Best Practices & Take Snapshot of VM
In this section, you will see the best practices to set up a VM to set up a smart package studio environment. The following are the recommended settings.
- Go to Services. msc and Disable Windows update.
- Create a new user, “test user,” using compmgmt. msc. This user is normal and will be used to test the application packages using the smart tester tool.
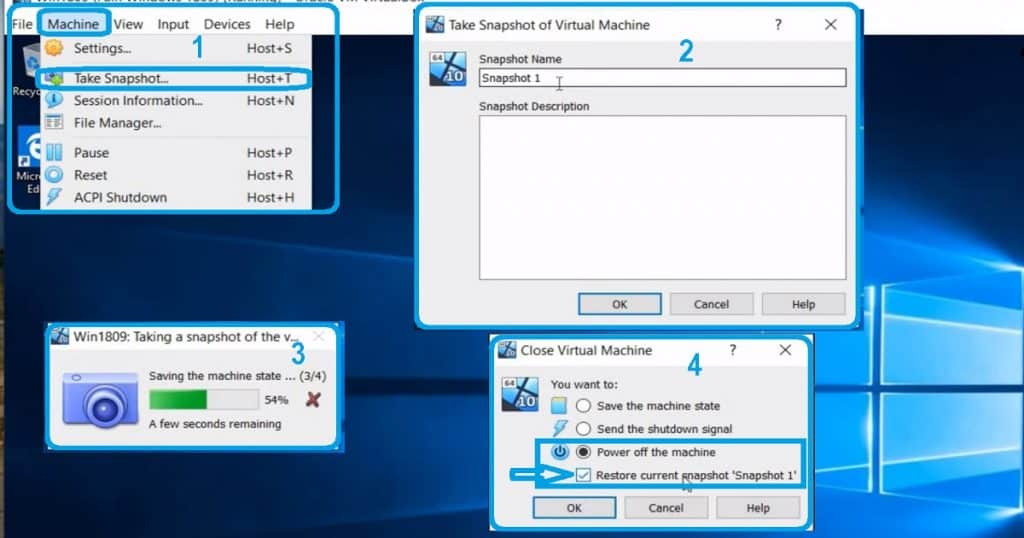
- Go to the VM toolbar and click on Machine -> Take Snapshot to start the snapshot of the Windows 10 VM.
- You need to provide the name of the snapshot – “Snapshot 1.”
- The snapshot will get saved and show you the progress bar while Saving the machine state.
- Now you can close the Virtual machine by selecting the following options
- Select – Power off the machine
- Select – Restore current ‘snapshot 1‘
- Click OK button to complete this process
Continued …..
The next post will provide an overview of all the exciting functionalities and automation of the Smart Package studio.
Related Post – How to Make Application Packagers Life Easier – Part 1 and How Make Packagers Life Easier – Part 3
Resources
We are on WhatsApp. To get the latest step-by-step guides and news updates, Join our Channel. Click here –HTMD WhatsApp.
Author
Anoop C Nair is Microsoft MVP! He is a Device Management Admin with more than 20 years of experience (calculation done in 2021) in IT. He is a Blogger, Speaker, and Local User Group HTMD Community leader. His main focus is on Device Management technologies like SCCM 2012, Current Branch, and Intune. He writes about ConfigMgr, Windows 11, Windows 10, Azure AD, Microsoft Intune, Windows 365, AVD, etc.
