Let’s discuss how to Track Time Zone Information from Windows Devices using Intune Inventory. You can use Intune Inventory to track time information from Windows devices. This helps you collect basic time related details. It is useful for managing devices across different regions and making sure the time settings are correct.
Many IT processes such as software updates or scheduled scans depend on accurate timing, and any mismatch in time zones can lead to delays, missed actions, or confusion in managing tasks. For organizations with devices spread across multiple regions, knowing the time zone also helps IT admins plan activities during appropriate working hours and reduce user disruptions.
It supports global device management, improves security monitoring, and ensures that all time sensitive operations run smoothly. Tracking time zone settings allows IT admins to ensure that all systems are properly configured.
In this post, you will get all the details about how to track time information from Windows devices using Intune Inventory. This information is useful for managing devices across different locations and ensuring accurate time configuration for logs, updates, and security features.
Table of Contents
How to Track Time Information from Windows Devices using Intune Inventory
The TimeZone property is a text value that shows the time zone set on a Windows device. It helps you understand which region’s time the device is using. This is useful when managing devices in different locations.
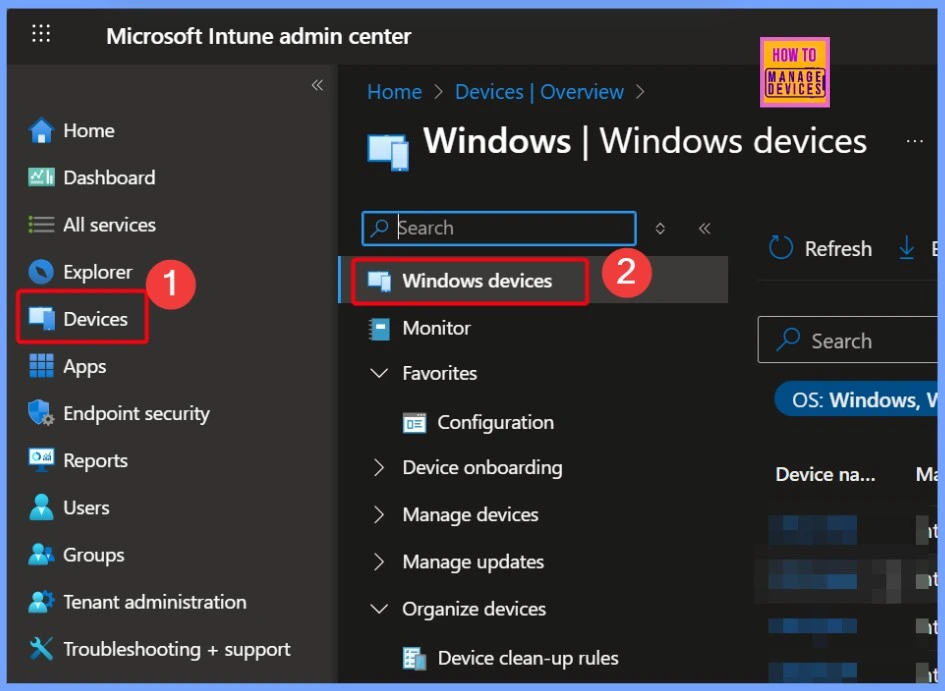
To get started, first sign in to the Microsoft Intune admin center using your admin credentials. Once you are in, look at the menu on the left-hand side and click on Devices. This section lets you view and manage all the devices that are enrolled in Intune.
- How to Track Device Battery Information using Intune Property Catalog
- How to Collect Physical and Virtual Memory Information using Intune Properties Catalog
- Intune Managing OneDrive File Downloads for Low Disk Space
Manage Devices and Configurations
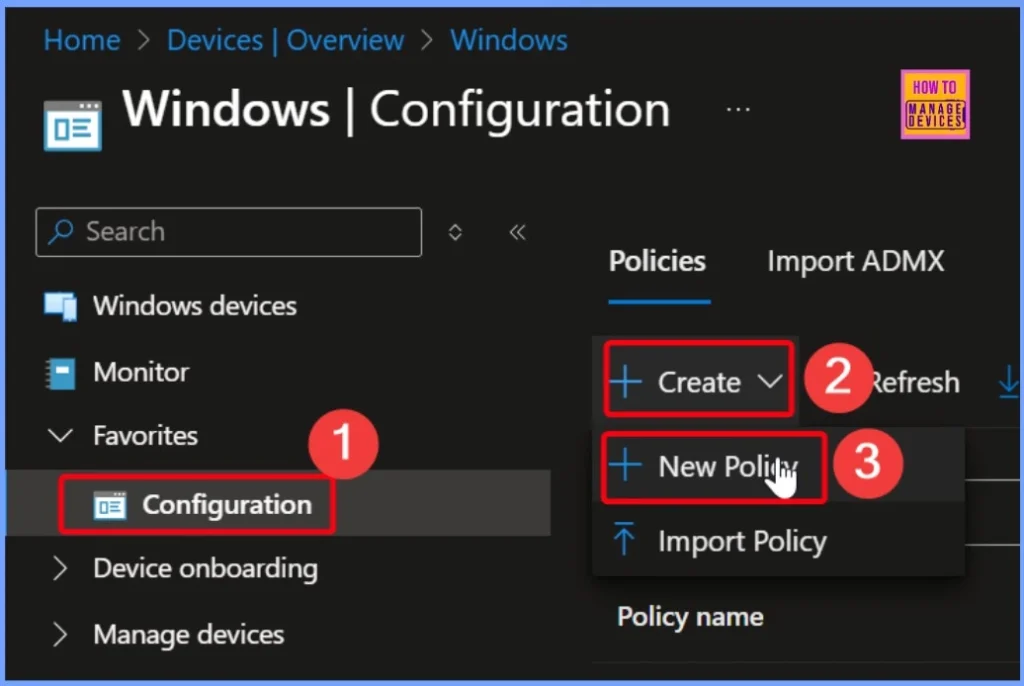
Next, go to Manage devices and click on Configuration. Then, select the Create option and choose New Policy. This will help you start creating a new configuration profile for your Windows devices.
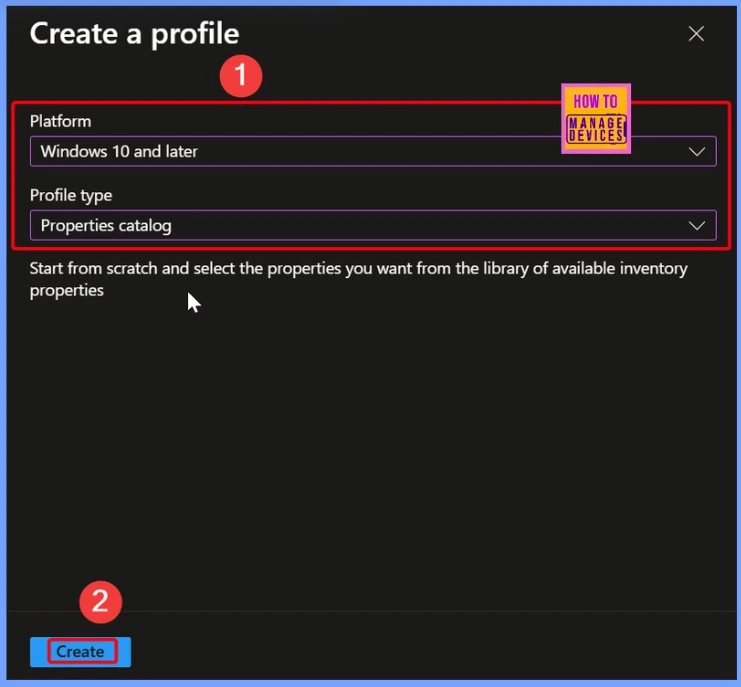
Platform and Profile Type
In the next step, choose the Platform as Windows 10 and later. Then, for the Profile type, select Properties catalog. This allows you to customize and apply specific settings to your Windows devices through Intune.
Basics Page
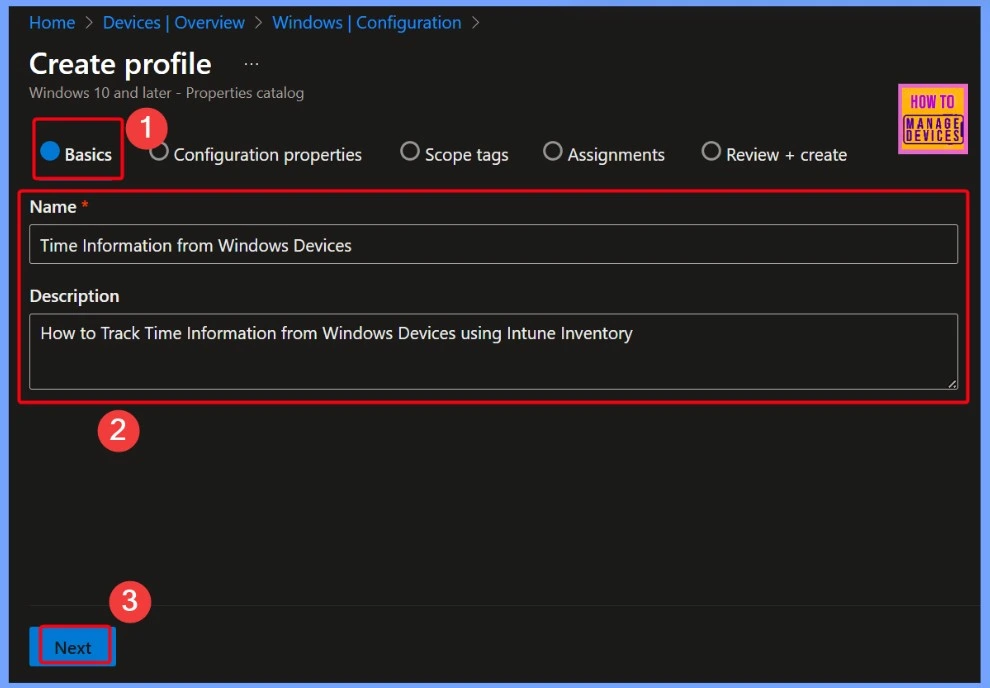
On the Basics page, you need to fill in some basic details for your policy. In the Name field, enter Time Information from Windows Devices. In the Description field, you can write How to Track Time Information from Windows Devices using Intune Inventory. This helps you and others understand what the policy is for when managing it later.
Configuration Properties Tab
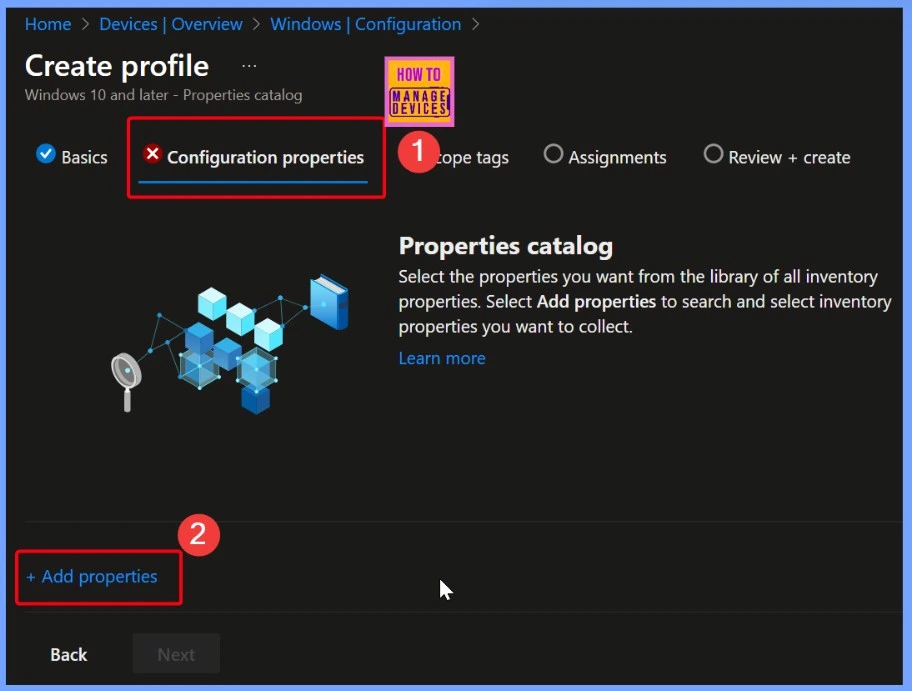
In the Configuration Properties tab, you will find a brief introduction about the Properties Catalog and how it is used. This section explains that you can collect different hardware details from your devices.
Available Settings is Time
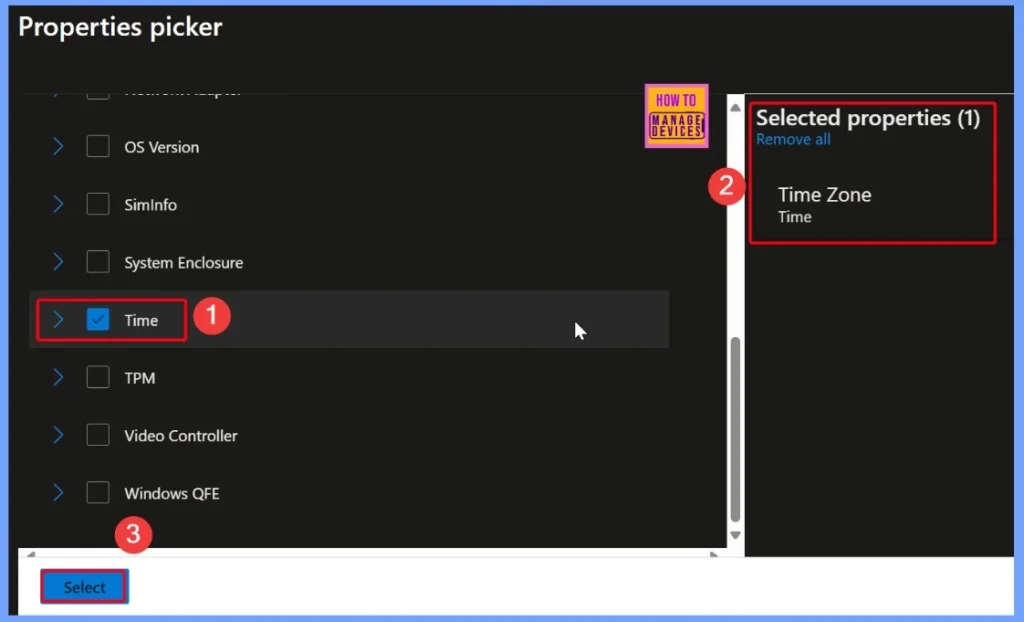
In the properties picker, you will see a list of different settings like OS Version, Siminfo, and System. One of the available settings is Time. Here, you can select the Time option to collect time-related information. After selecting it, you will see that the chosen property is Time Zone, which shows the time zone set on the device.
Configuration Propertie
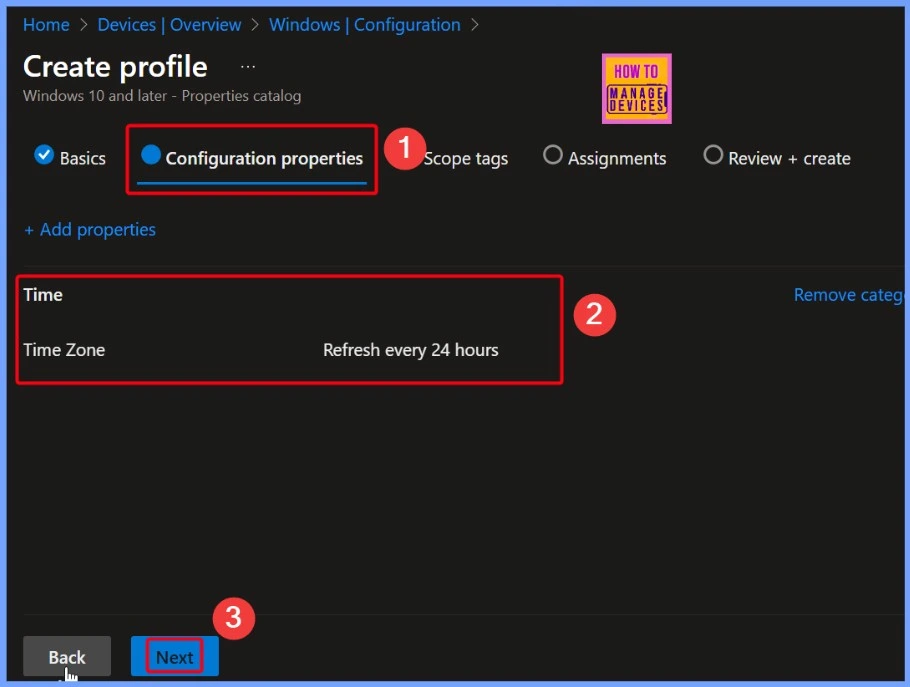
Under the Configuration properties, you will see the setting for Time. Inside this, the property Time Zone is listed. This means Intune will collect information about the device’s time zone. The data will automatically refresh every 24 hours, so you always have up-to-date information.
Scope Tags to Control Access
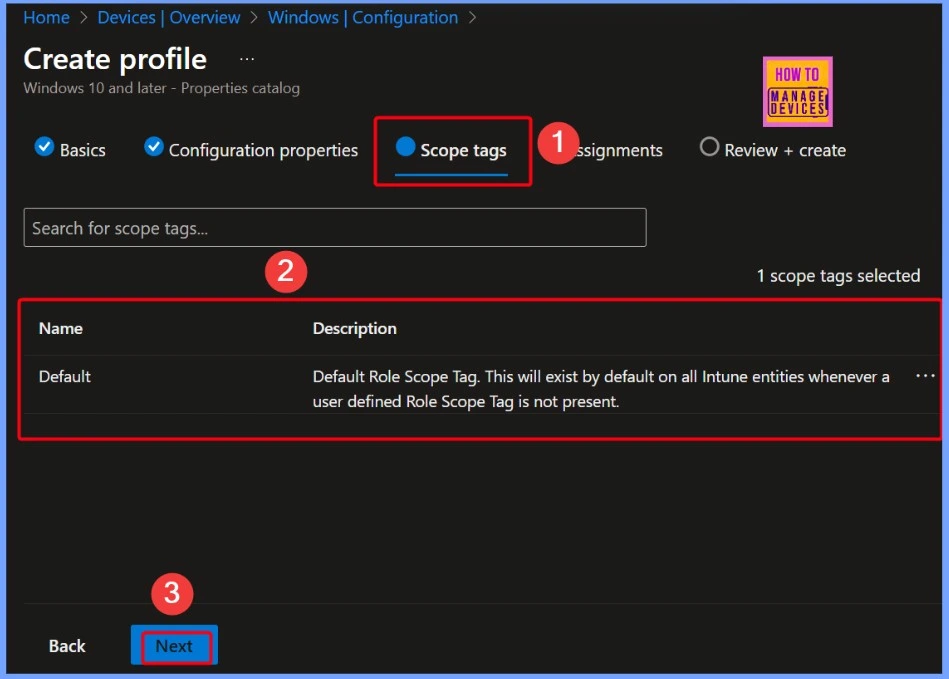
You can use scope tags to control access. Scope tags let you assign visibility so that each admin only sees and manages the devices and policies related to their group. This keeps the environment well-organized, improves security, and ensures admins work only with what they need.
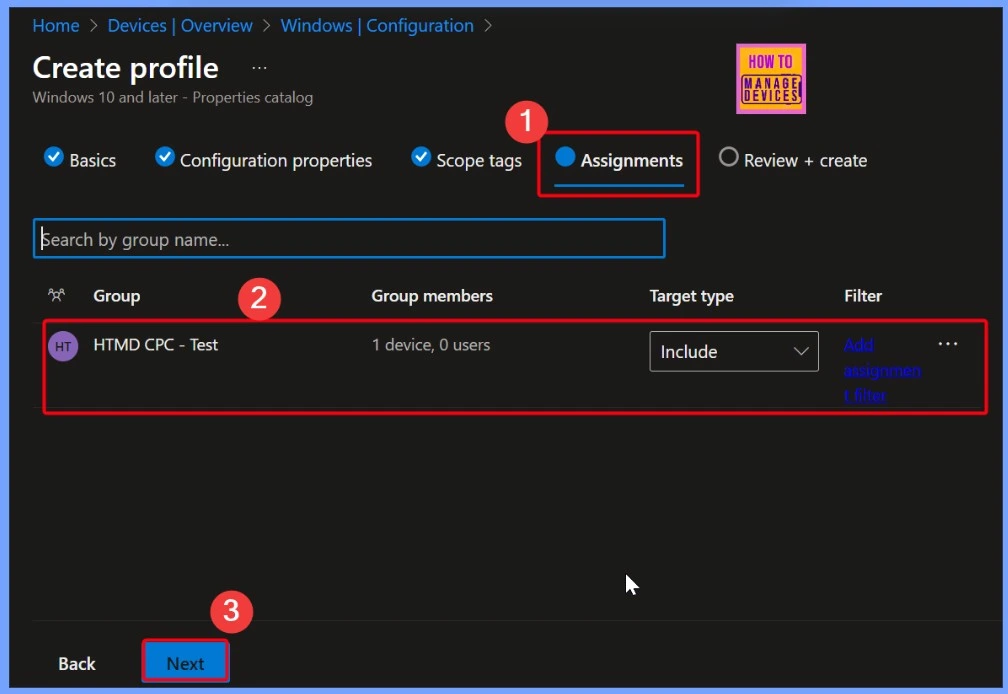
Assignments in Intune
Assignments in Intune define who will receive the policy. After setting up a policy, the next step is to assign it to specific users, devices, or groups within your organization. In the below screenshot helps you to show more details.
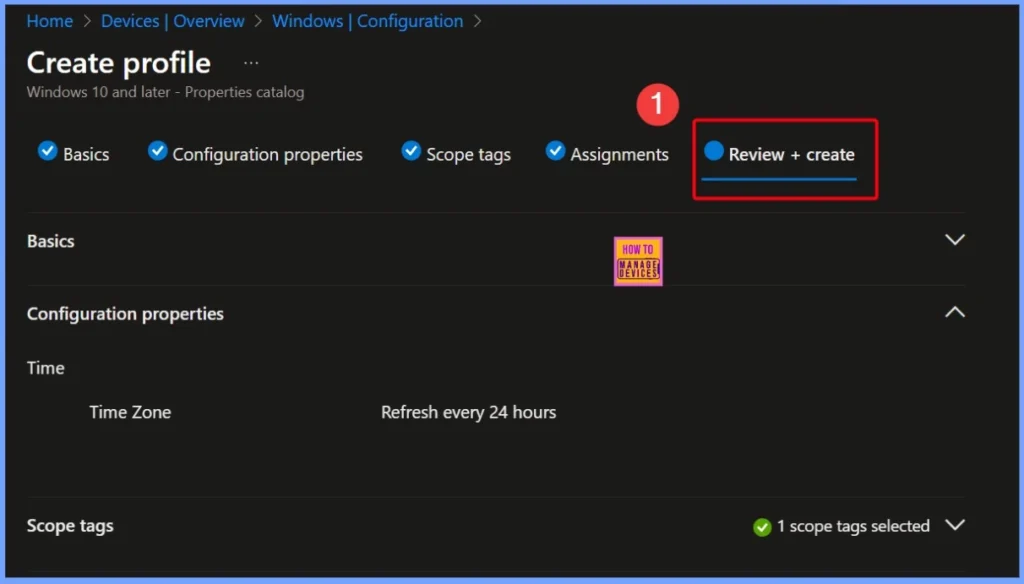
Complete Summary of all the Settings
The final step in most Intune configuration processes is Review + Create. At this stage, you will see a complete summary of all the settings you have selected. It’s your chance to review everything one last time and make sure all the details are correct before the policy is created and applied to devices.
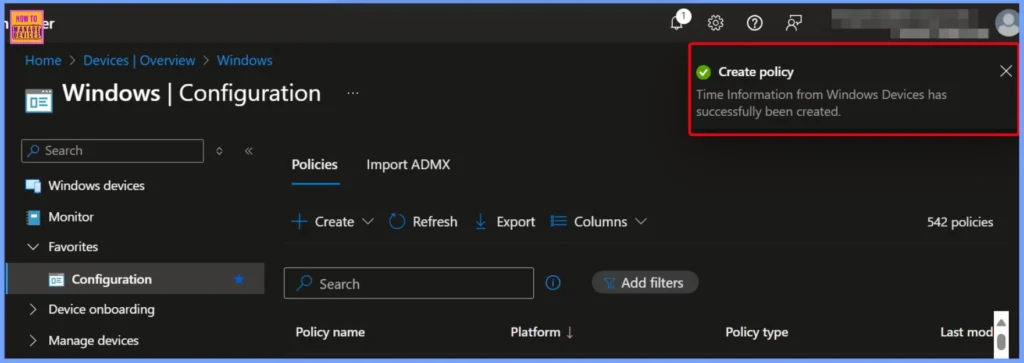
Create Policy Notification
In the screenshot below, you can see that the policy named Time Information from Windows Devices has been successfully created. This window also shows more details about the policy, helping you review and confirm the settings you have applied.
End Result
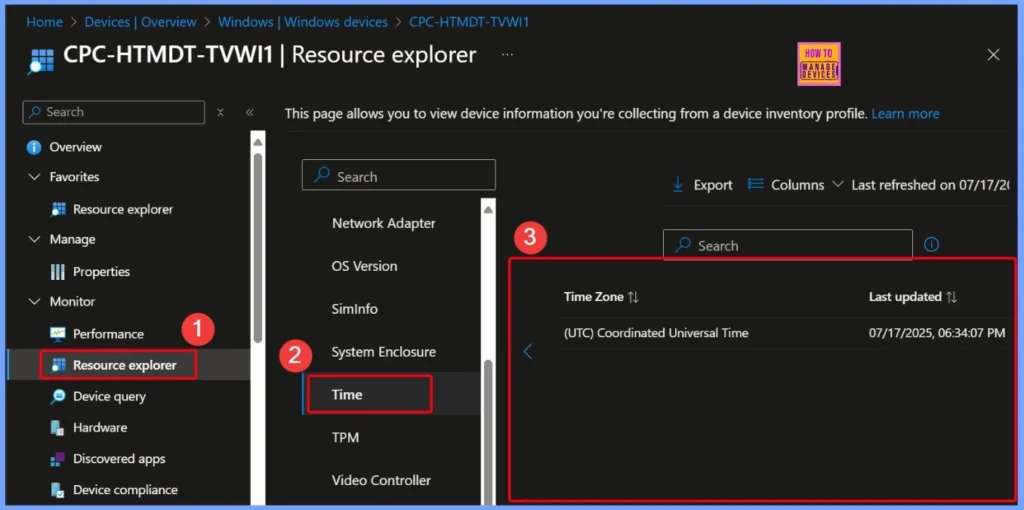
You can easily check the collected Time information, navigate to Devices > Windows Devices in the Intune admin center and pick the device you want to review. Next, go to the Monitor section and click on Resource Explorer.
| Time Zone | Last Updated |
|---|---|
| (UTC) Coordinated Universal Time | 07/17/2025, 06:34:07 PM |
Need Further Assistance or Have Technical Questions?
Join the LinkedIn Page and Telegram group to get the step-by-step guides and news updates. Join our Meetup Page to participate in User group meetings. Also, Join the WhatsApp Community to get the latest news on Microsoft Technologies. We are there on Reddit as well.
Author
Anoop C Nair has been Microsoft MVP for 10 consecutive years from 2015 onwards. He is a Workplace Solution Architect with more than 22+ years of experience in Workplace technologies. He is a Blogger, Speaker, and Local User Group Community leader. His primary focus is on Device Management technologies like SCCM and Intune. He writes about technologies like Intune, SCCM, Windows, Cloud PC, Windows, Entra, Microsoft Security, Career, etc.

