In this post, we will learn how to start AVD Management Using Visual Studio Code instead of PowerShell ISE. Azure Virtual Desktop (AVD) supports only PowerShell core 7.0 or later. I have been extensively using PowerShell ISE (yes!).. but I still love GUI, and I don’t like coding.
Note! – This post mainly applies to the Windows Virtual Desktop spring 2020 release (a.k.a AVD). This Spring 2020 update uses the Azure Resource Manager (ARM) Windows Virtual Desktop objects.
Windows Virtual Desktop cmdlets (Az.DesktopVirtualization) currently only work with PowerShell Core. So, there is PowerShell ISE support! We need to find a way to get PowerShell ISE experience.
PowerShell commands are necessary with AVD’s new portal Experience, such as for personal desktop assignments in AVD v2, which can only be done using PowerShell Core.
| Index |
|---|
| Install Visual Studio Code for AVD Management |
| Configure PowerShell in Visual Studio Code for AVD |
| Results – AVD Management Using Visual Studio Code Instead of PowerShell ISE |
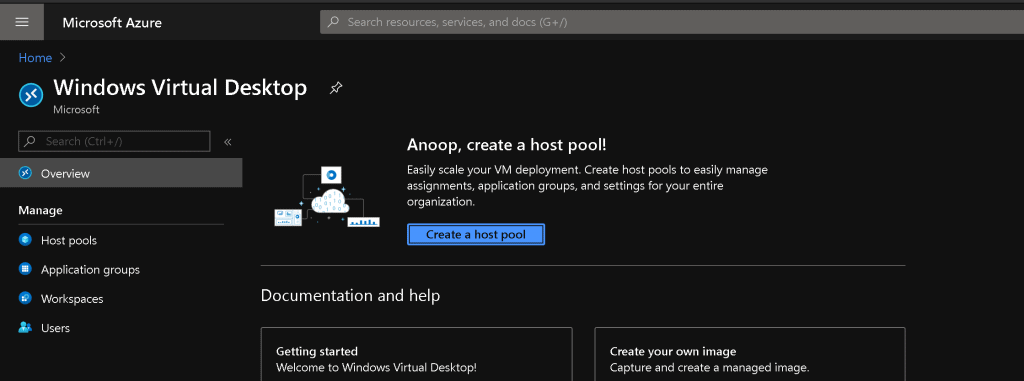
If you don’t want to install Visual Studio code to manage AVD, use the latest version of PowerShell Core.

Install Visual Studio Code for AVD Management
Now, you will need to install Visual Studio Code for AVD management.
- Download the Visual Studio Code for Windows 10 from Microsoft (Direct download).
- Alternate – https://code.visualstudio.com/download
- Double-click on the VSCodeUserSetup-x64-1.46.0.exe to start the installation.
- Accept the license terms and click on the Next button.

Select the installation folder
C:\Users\Anoop C Nair\AppData\Local\Programs\Microsoft VS Code
Click on the Next button to continue

Setup will create a shortcut Visual Studio Code folder in the start menu folder.
You can opt out of creating a start menu folder.
Click on Next to continue.

Select the additional options in this window. I have added the following options.
Add the “Open with Code” action to the Windows Explorer file context menu
Add the “Open with Code” action to the Windows Explorer directory context menu
- Register Code as an editor for supported file types
- Add to PATH (requires shell restart)
- Click on Next to continue

Installing the Microsoft Visual Studio Code (User).

Installation of Microsoft Visual Studio code completed.
- Click on FINISH to launch the Visual Studio code app.

Configure PowerShell in Visual Studio Code for AVD
You will need to configure PowerShell in Visual Studio Code for AVD.
- Press Ctrl+P (Quick-Open) to launch the search option
- In Quick-Open, type
ext install powershell, Press Enter. - Select the Powershell Extension for Visual Studio Code (PowerShell Scripts in Visual Studio code).
- Click on the Install button to continue.
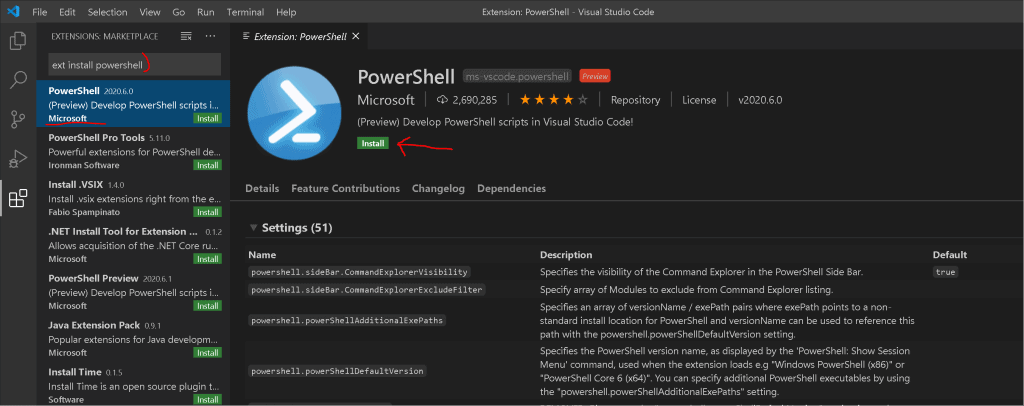
- Run the Following Commands from the Terminal.
Install-Module -Name Microsoft.RDInfra.RDPowerShell

Install-Module -Name Az.DesktopVirtualization -RequiredVersion 2.1.0

Import-Module -Name Microsoft.RDInfra.RDPowerShell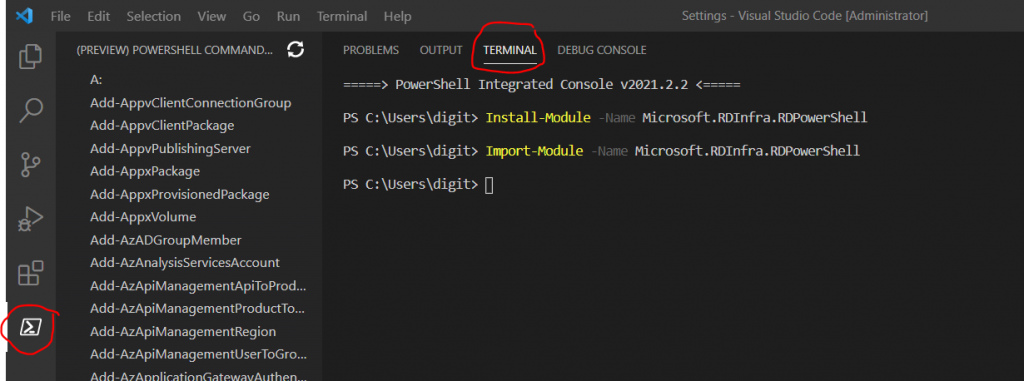
Run the following commands to select the appropriate subscription.
Connect-AzAccount

Get-AzSubscription | Out-GridView -PassThru | Select-AzSubscription

Update-AzWvdHostPool -ResourceGroupName WVD-Resource-Group -Name HostPool -StartVMOnConnect:$True 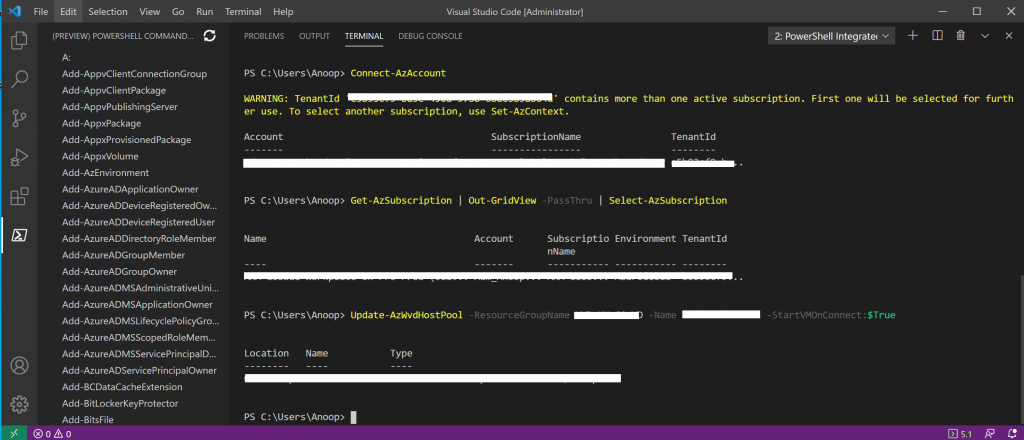
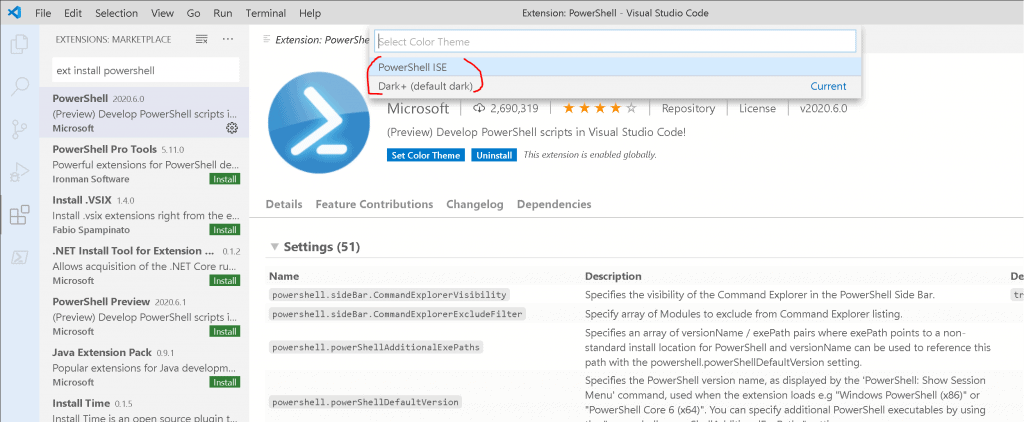
Select PowerShell ISE, as shown in the screenshot below. (I can’t get this option from the latest version of VS Code?).
| Function | ISE Binding | VS Code Binding |
|---|---|---|
| Interrupt and break debugger | Ctrl+B | F6 |
| Execute current line/highlighted text | F8 | F8 |
| List available snippets | Ctrl+J | Ctrl+Alt+J |
Results – AVD Management Using Visual Studio Code Instead of PowerShell ISE
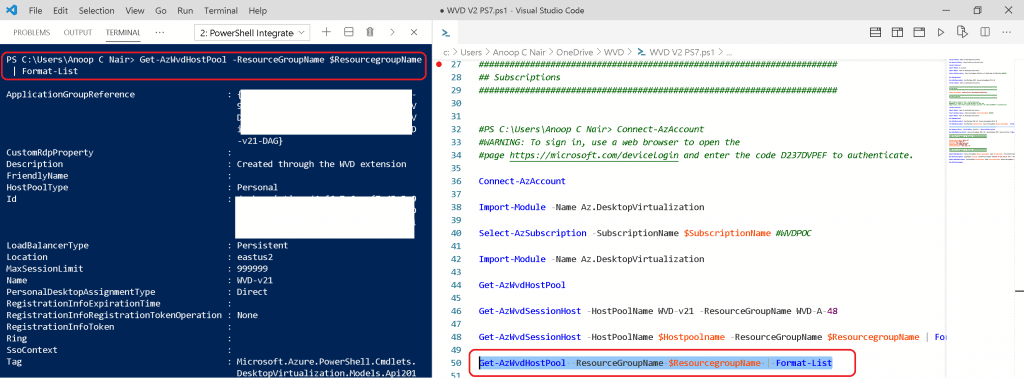
I can get a very similar experience as PowerShell ISE using VS code (Visual Studio Code). More details are below:
- If you already imported the PowerShell modules on your Windows 10 device, you don’t have to import them again.
- You can have the Terminal window on the left side.
- You can now use the existing PS1 files using Visual Studio code.

- The following are the sample PowerShell core commands you can try in VS code to manage AVD V2.
>Get-AzWvdSessionHost -HostPoolName $Hostpoolname -ResourceGroupName $ResourcegroupName | Format-List
>Get-AzWvdHostPool -ResourceGroupName $ResourcegroupName | Format-List
Resources
- Using Visual Studio Code as Your Default PowerShell Editor
- AVD Architecture Changes for v2| New Portal Admin Experience
We are on WhatsApp. To get the latest step-by-step guides and news updates, Join our Channel. Click here –HTMD WhatsApp.
Author
Anoop C Nair is Microsoft MVP! He is a Device Management Admin with more than 20 years of experience (calculation done in 2021) in IT. He is a Blogger, Speaker, and Local User Group HTMD Community leader. His primary focus is Device Management technologies like SCCM 2012, Current Branch, and Intune. He writes about ConfigMgr, Windows 11, Windows 10, Azure AD, Microsoft Intune, Windows 365, AVD, etc.

Hi, thanks for your article. Is it possible to use Visual Studio in WVD? Do I use the normal installation package or is there a special one?
What you meant by in WVD? I used the default application available as mentioned in the article.
I mean, it is possible to use an installation of Visual Studio by downloading the default one by e.g. https://visualstudio.microsoft.com/de/ in windows virtual desktop or must i use a special package?
I used https://aka.ms/win32-x64-user-stable as I mentioned in the post. I don’t think there is a need for special packages.