Let’s discuss Enable Additional Search Box in MS Edge for Better Search Experience using Intune. An Additional Search Box in Microsoft Edge browser allows users to perform web searches directly from the browser interface. With the Microsoft Intune policy you can easily configure this policy.
This policy is benenefical for different scenarios like, It firms, students and educators, Finance Professionals in Regulated Industries etc. As an Admin you enable this policy to users get access to search without disrupting the current page.
Organizations want to enable this policy to enahnce the productivity and clarity. By adding additional search box users can quickly do the frequent web searches. With additional search box, A separate search box makes it visually distinct from the address bar, reducing potential confusion about where to type a url and other searches.
The Additional Search Box is a completely customizable feature on Microsoft Edge browser. By enabling this feature, admins can control the overall browsing experience of users. Organization have granular control over the browser’s user interface.
Table of Contents
Enable Additional Search Box in MS Edge for Better Search Experience using Intune
If you are concerned with your organizations privacy, you can implement this policy. An additional search box can enhance your privacy by separating your navigation and search activities. When you use the address bar for both, your browsing history, which includes full URLs, and your search queries are often stored together.
- How to Configure New Tab Page Search Box Policy in MS Edge Browser using M365 Admin Center
- Turn ON or OFF Edge Browser Additional Flexible Search Box on Your Windows Desktop Device
- Enable Additional Search Box in Edge Browser using Microsoft 365 Admin Center Policy
Starting Step of Policy Creation
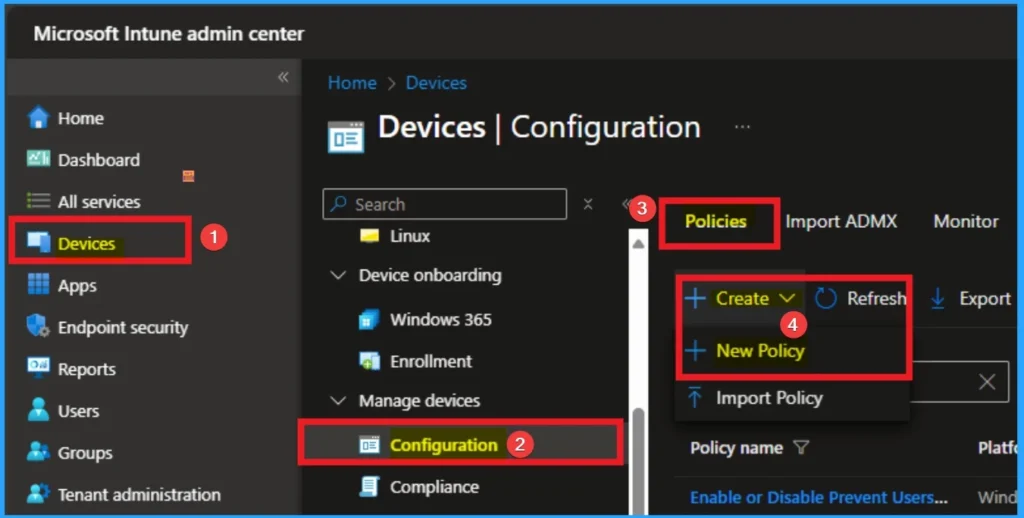
With Microsoft Intune Admin center you can easily configure the Address Bar Search Suggestion policy with Settings Catalog. Sign in to the Microsoft Intune Portal. Then go to Devices > Configurations > Create > New Policy.
Profile Creation for Policy
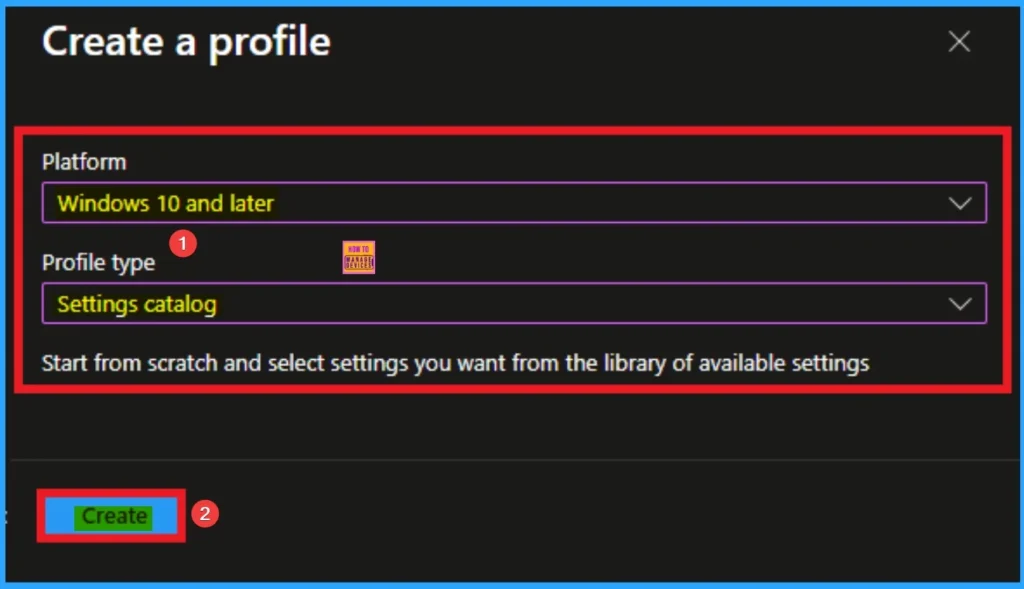
Choosing a platform and profile is the Next step to take before creating policy. This necessary step, and you cannot skip this. Here, I selected Windows 10 and later as the Platform and Settings catalog as the profile type. Then click on the Create button.
Basic Tab for Naming Policy
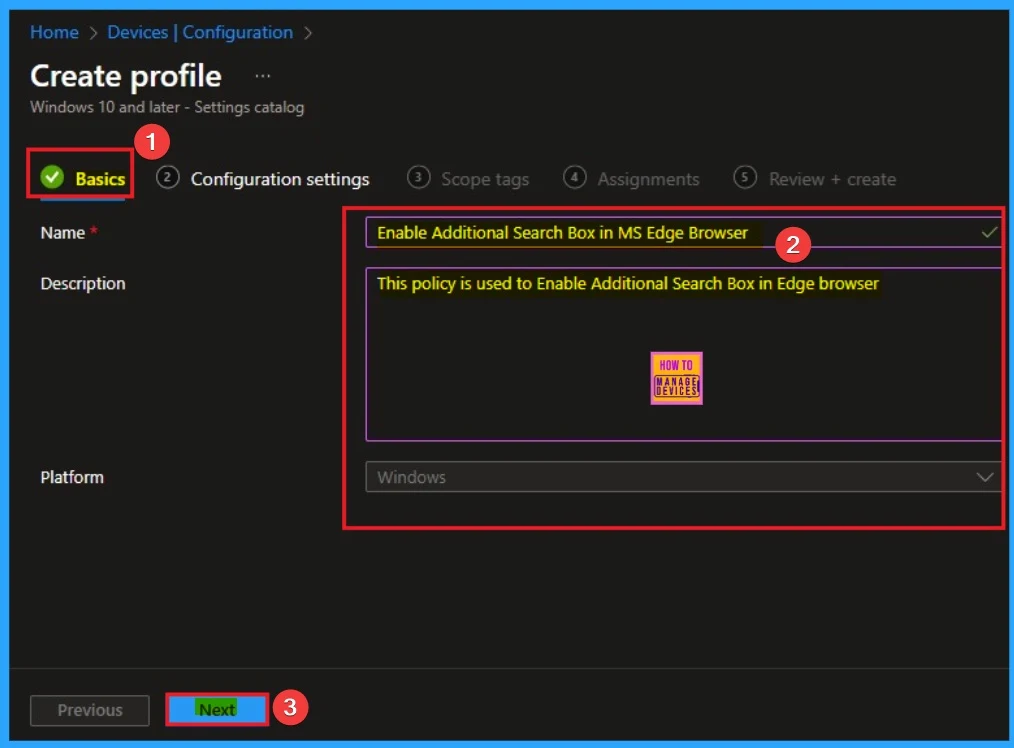
Basic Tab is an important step that helps admins to know the purpose of the policy before going to the configuration tab. You can add description field to know more about the policy details. You must add relevent name and description to avoid confusion. After adding this, click on the Next button.
Configure Additional Search Box Settings
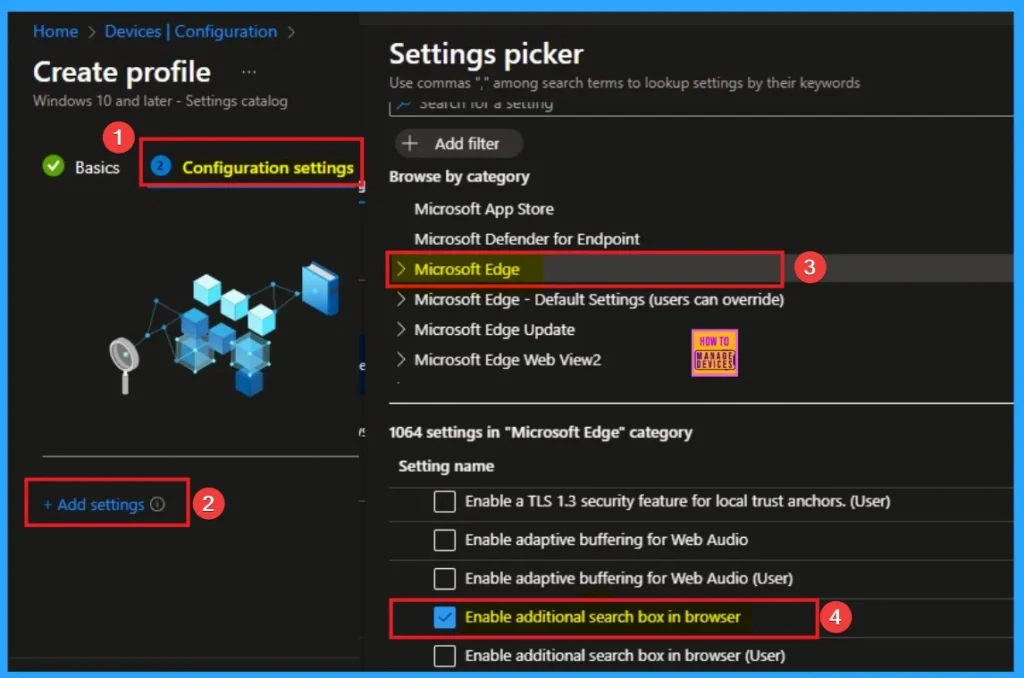
The configuration settings tab helps to define the settings. By clicking on the +Add settings hyperlink, you can easily find the specific settings. From the Settings Picker, I choose, Microsoft Edge category and select Enable Additional Search Box in browser settings.
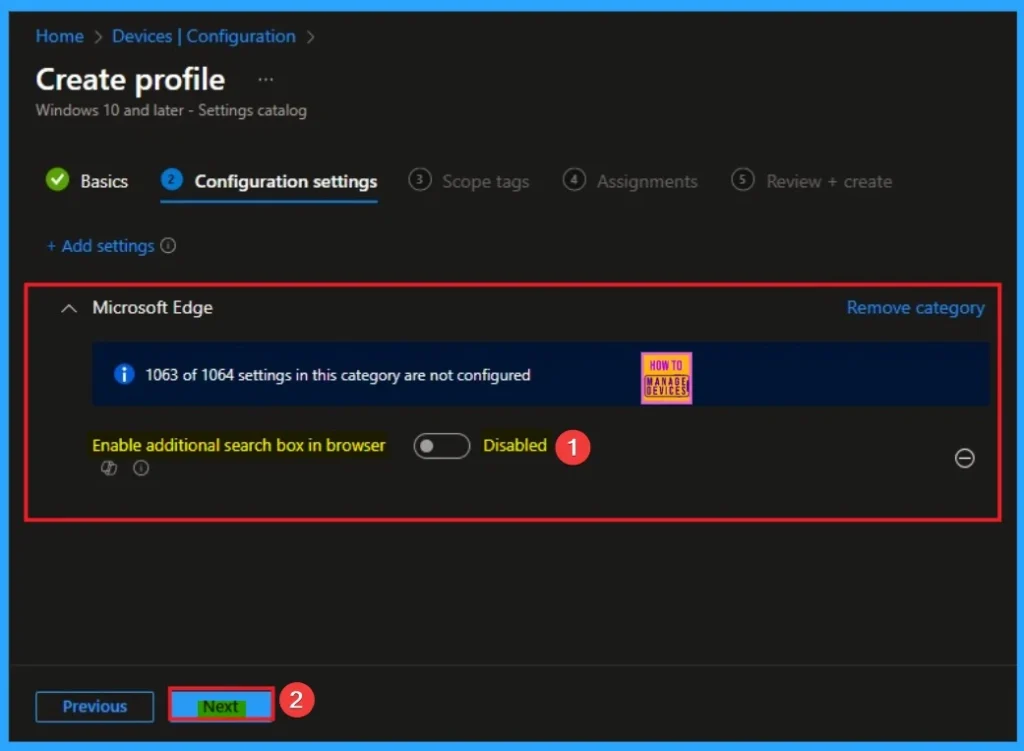
Disable Enable Additional Search Box
By disabling this policy, you cannot access the Enable Additional Search Box. It will be hidden, and you must use the address bar or manually visit a search engine. Disable is the default value of this policy. Click on the Next button.
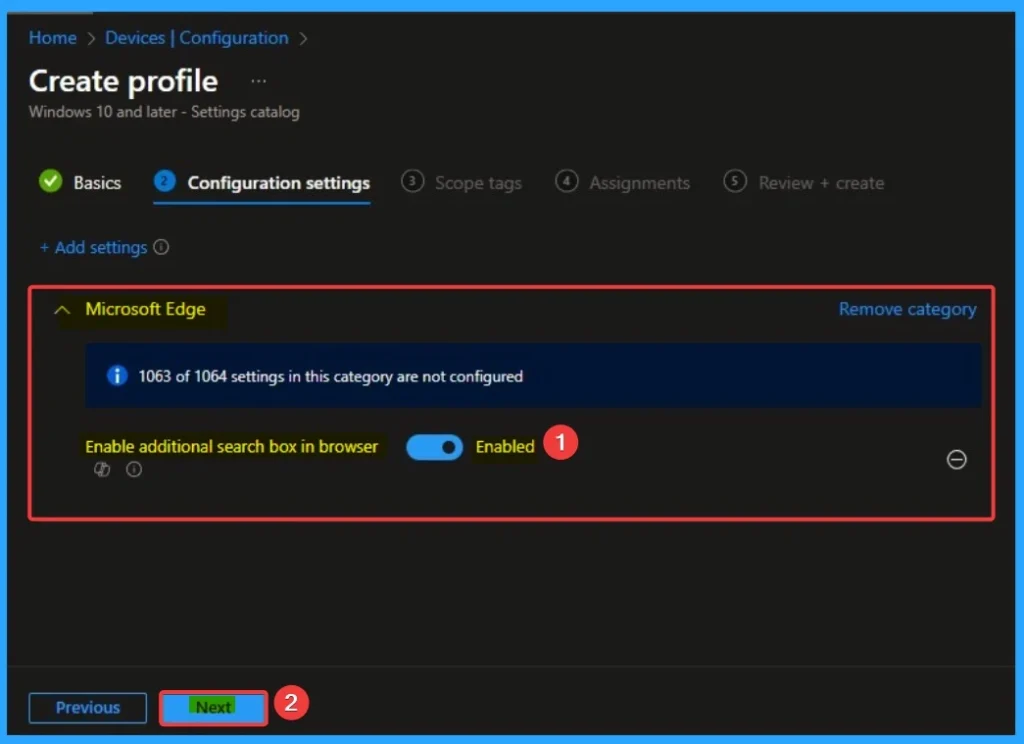
Enable Additional Search Box
By enabling an additional search box, you can access it on your Edge browser. You can see the additional search box near the Address Bar. Here I would like to enable the policy.
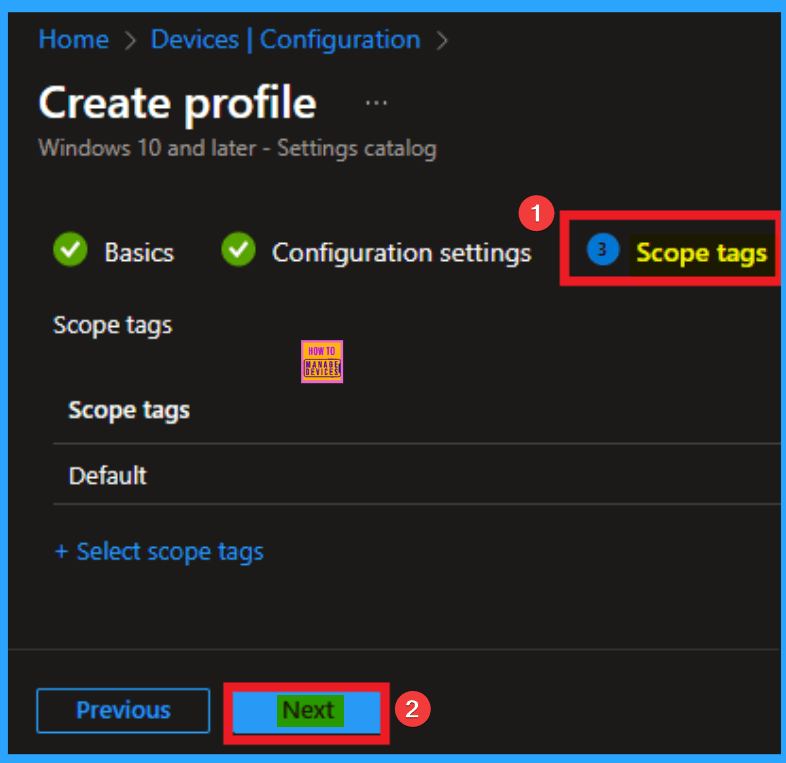
Adding Scope Tags
By adding scope tags, you can determine which administrators can see and manage a specific policy. If you want to add scope tags for this policy, click on the + select scope tags. Otherwise, click on the next button to continue.
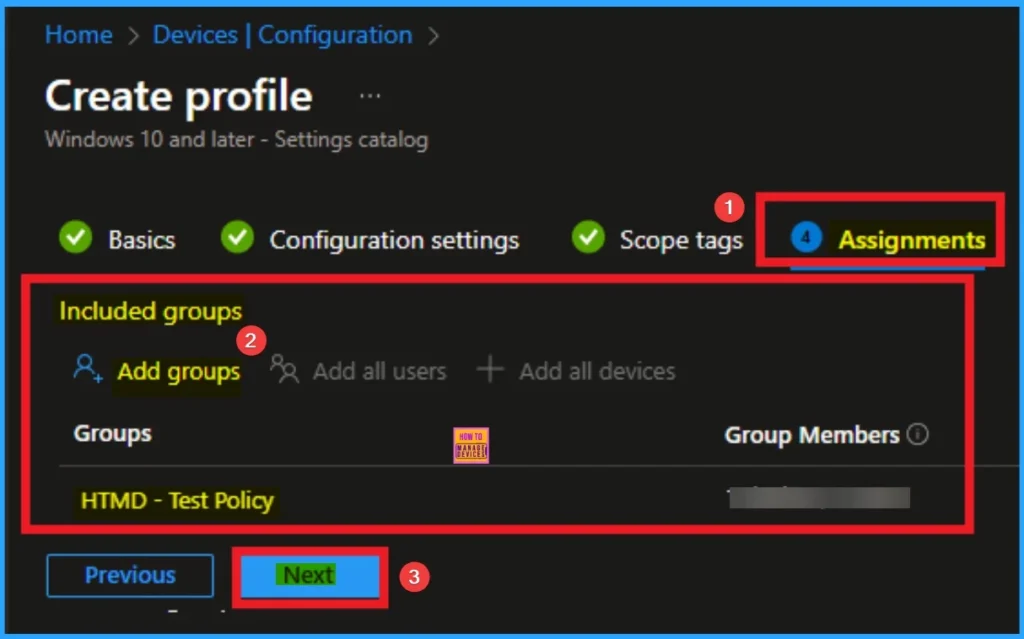
Assignment Tab
The assignment tab helps admins to deploy this policy to targeted groups on your organizatio. This is a critical step because a policy is useless if it’s not applied to anyone. Here I click, +Add groups option under Included groups. I choose a group from the list of groups and click on the Select button. Again, I click on the Select button to continue.
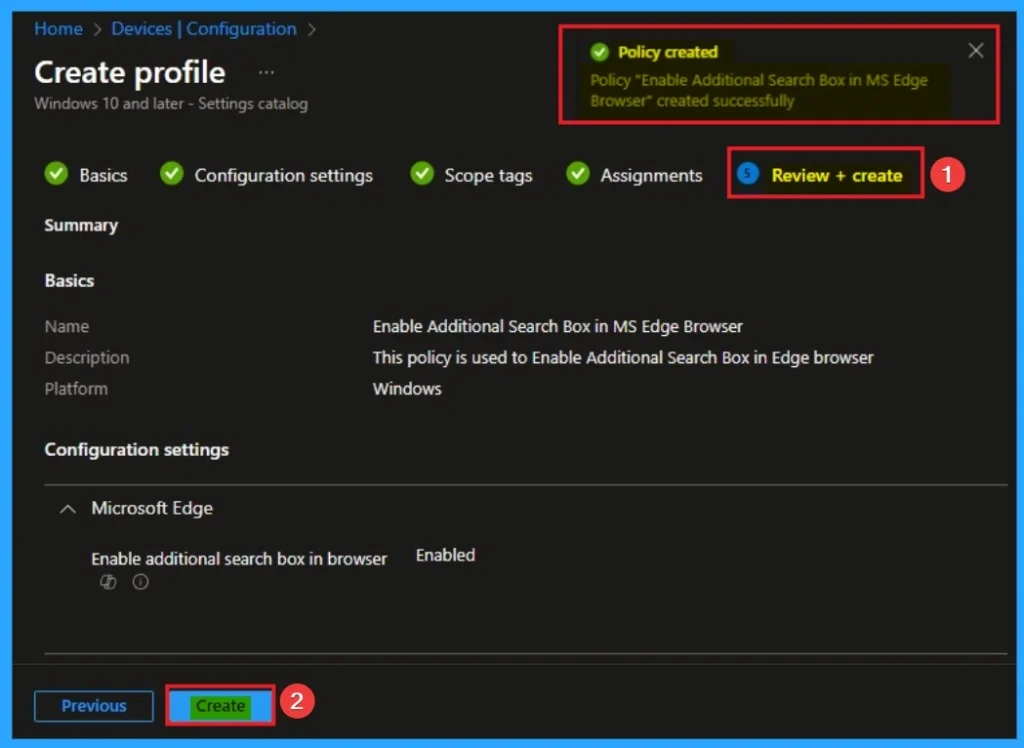
Review + Create Tab
With the Review + create tab, you can verify all the policy details before completing the policy creation. After verifying all the details, click on the Create Button. After creating the policy, you will get a success message.
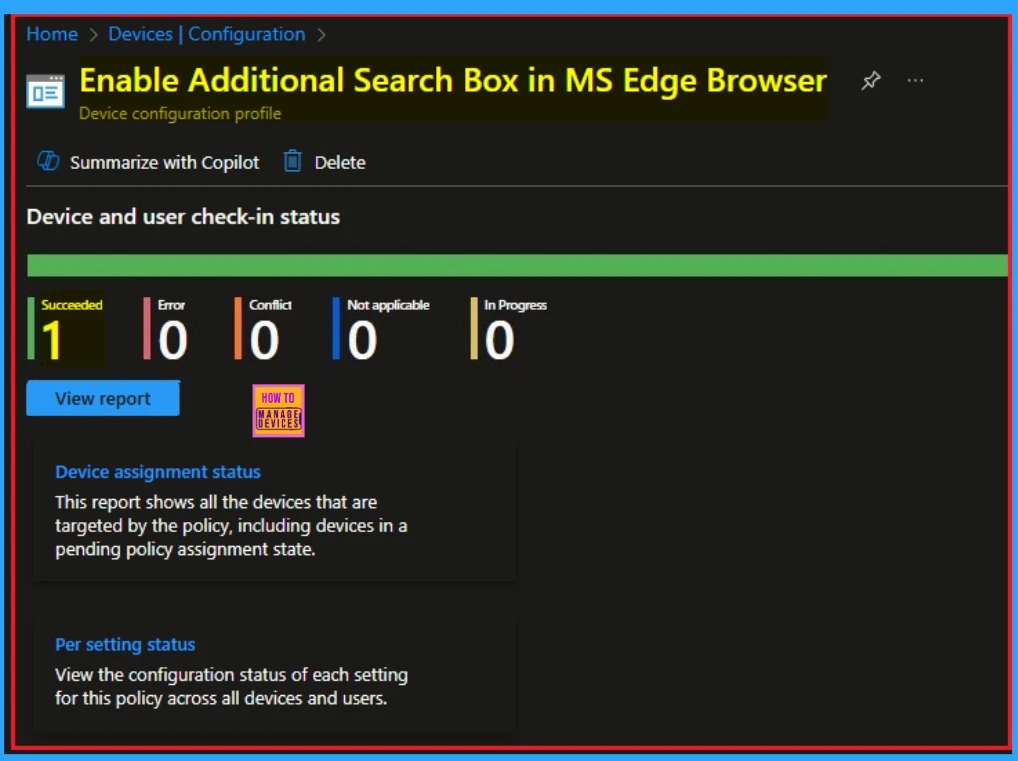
Monitoring Status
The Monitoring Status page shows if the policy is succeeded or not. o quickly configure the policy and take advantage of the policy sync the assigned device on Company Portal. Open the Intune Portal. Go to Devices > Configuration > Search for the Policy. Here, the policy shows as successful.
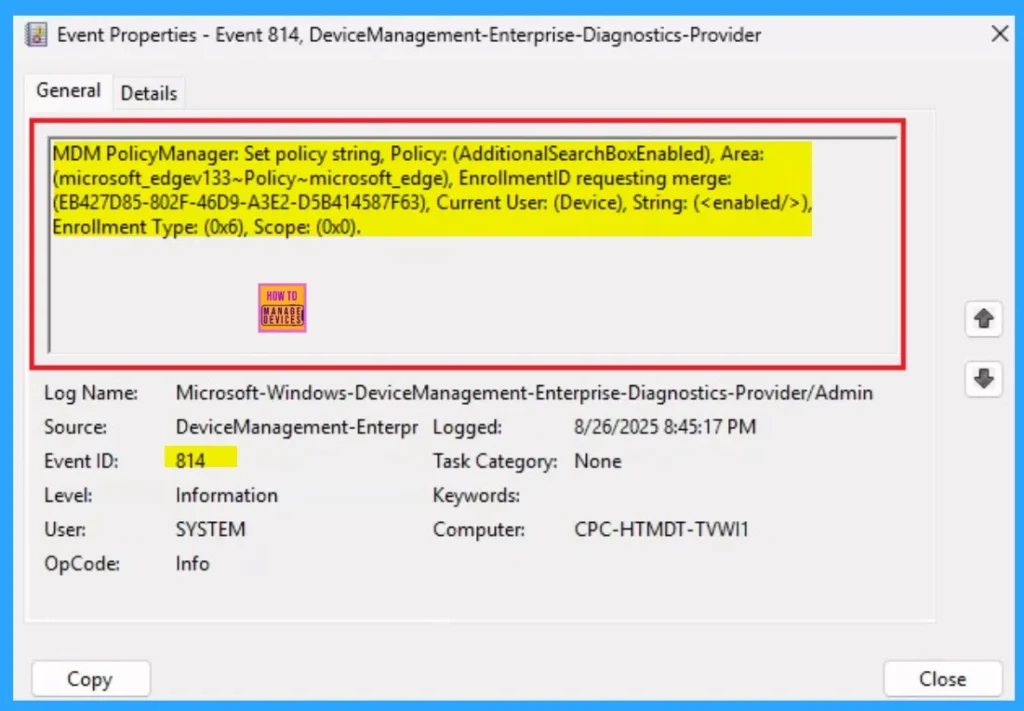
Event Viewer Details
Event Viewer helps you check the client side and verify the policy status. Open the Client device and open the Event Viewer. Go to Start > Event Viewer. Navigate to Logs: In the left pane, go to Application and Services Logs > Microsoft > Windows > DeviceManagement-Enterprise-Diagnostics-Provider > Admin.
- Filter for Event ID 814: This will help you quickly find the relevant logs.
Removing the Assigned Group from these Settings
If you want to remove the Assigned group from the policy, it is possible from the Intune Portal. To do this, open the Policy on the Intune Portal, edit the Assignments tab, and then remove the policy.
To get more detailed information, you can refer to our previous post – Learn How to Delete or Remove App Assignment from Intune using by Step-by-Step Guide.

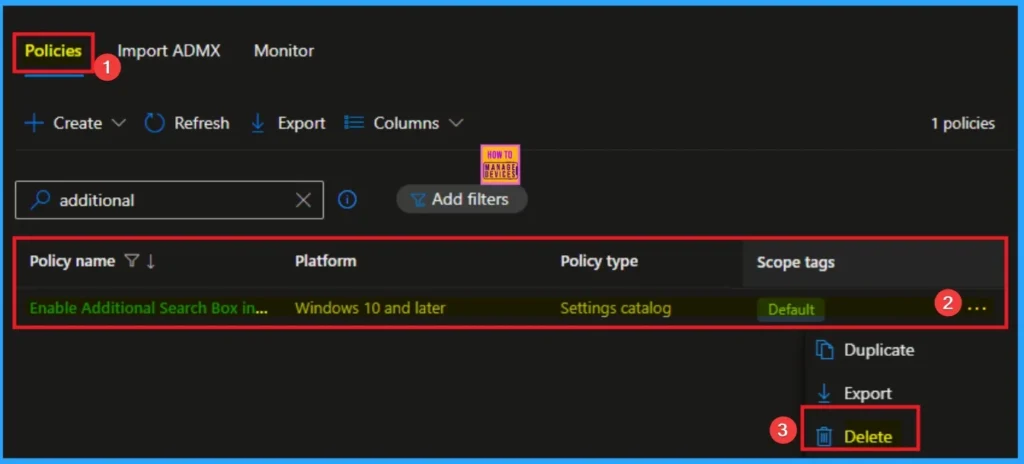
How to Delete Disable Edge Additional Search Box Settings
You can easily delete the Policy from the Intune Portal. From the Configuration section, you can delete the policy. It will completely remove it from the client devices.
For detailed information, you can refer to our previous post – How to Delete Allow Clipboard History Policy in Intune Step by Step Guide.
Need Further Assistance or Have Technical Questions?
Join the LinkedIn Page and Telegram group to get the step-by-step guides and news updates. Join our Meetup Page to participate in User group meetings. Also, Join the WhatsApp Community to get the latest news on Microsoft Technologies. We are there on Reddit as well.
Author
Anoop C Nair has been Microsoft MVP for 10 consecutive years from 2015 onwards. He is a Workplace Solution Architect with more than 22+ years of experience in Workplace technologies. He is a Blogger, Speaker, and Local User Group Community leader. His primary focus is on Device Management technologies like SCCM and Intune. He writes about technologies like Intune, SCCM, Windows, Cloud PC, Windows, Entra, Microsoft Security, Career, etc.

