Hi, Let’s discuss about New Tab Page Search Box Policy in MS Edge Browser using M365 Admin Center. As you all know that Microsoft 365 is platform there you can deploy different type of policies. The New Tab Page Search Box Policy is a setting in web browsers that controls how the search box works on a new tab.
It helps users search easily and allows customization based on their preferences. Knowing how it works can make browsing faster and more convenient. The New Tab Page Search Box Policy allows customization, where users and organizations can set their preferred search engines for a personalized experience.
The New Tab Page Search Box Policy lets users decide how they search when opening a new tab. They can choose to use either the search box or the address bar, but this option is available only if the search engine is set to something other than Bing.
To make this change, some browser settings need to be enabled. If the policy is not set up, the browser follows default rules searches use the search box if Bing is the search engine, but if another search engine is used, users get the option to switch to the address bar for searches.
Table of Contents
How Does the New Tab Page Search Box Policy Work in Edge
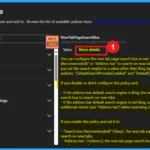
This policy controls whether searches on the new tab page use the search box or the address bar. It only takes effect if a non-Bing search engine is set using the DefaultSearchProviderEnabled and DefaultSearchProviderSearchURL policies.
New Tab Page Search Box Policy in MS Edge Browser using M365 Admin Center
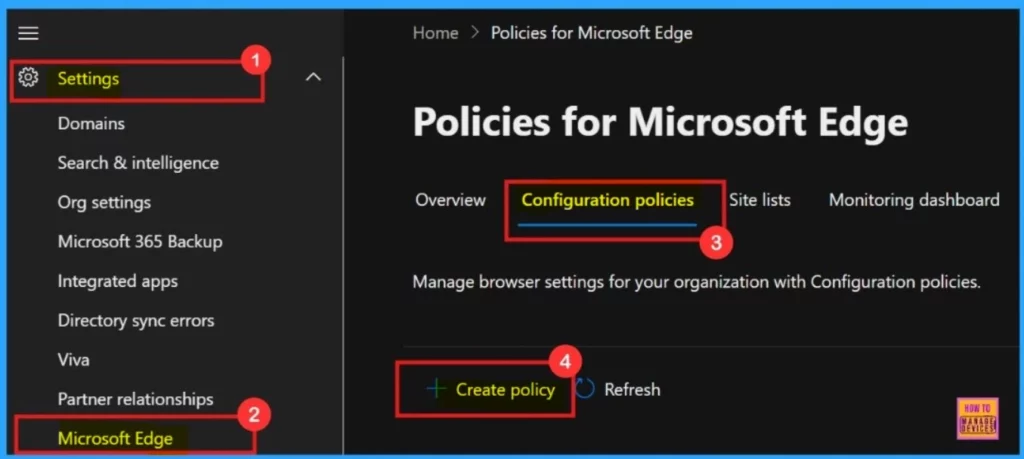
Above we discussed about New Tab Page Search Box Policy in MS Edge Browser using M365 Admin Center. Microsoft Edge provides users with two primary methods for searches on a new tab such as search box and search bar. To access and configure this policy, open the Microsoft 365 admin center.
Navigate to Settings, then choose Microsoft Edge. Next, go to the Configuration Policies tab and click + Create policy to begin setting it up.
- Turn ON or OFF Edge Browser Additional Flexible Search Box on Your Windows Desktop Device
- Add Remove Web Pages From Favorites Bar In Microsoft Edge Browser And Set Visibility Registry Method
- Enable Disable Deleting Browser History in Edge using the Microsoft 365 Admin Center Policy
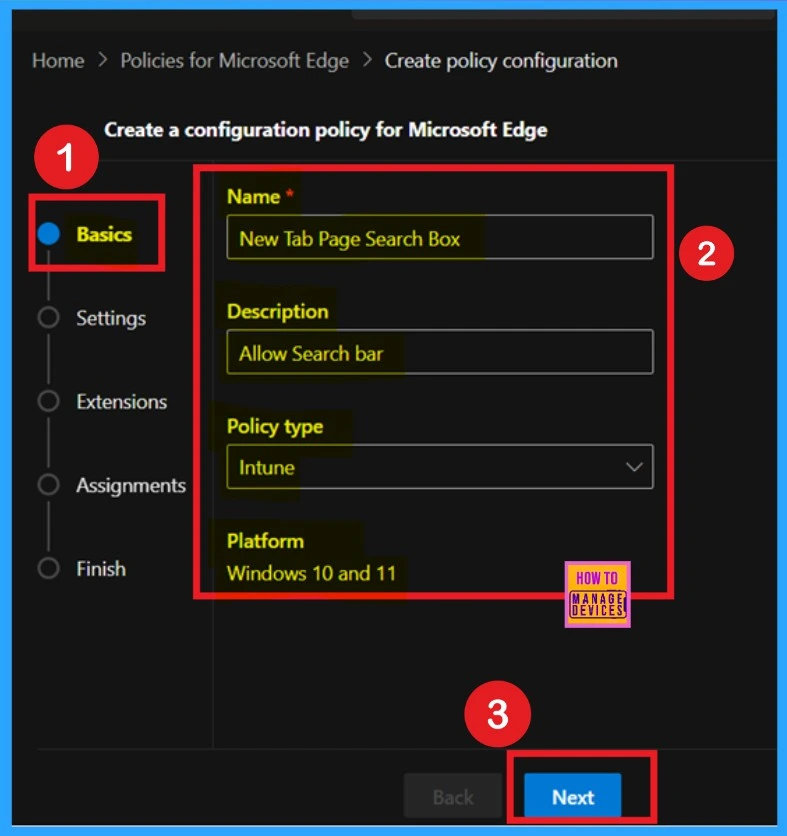
Basics
The first step in creating the configuration policy is the Basics section. Here, you’ll need to provide essential information such as the Policy Name, an optional Description, and any other details. Once you’ve filled in the required fields, click Next to proceed to the next step in the setup process.
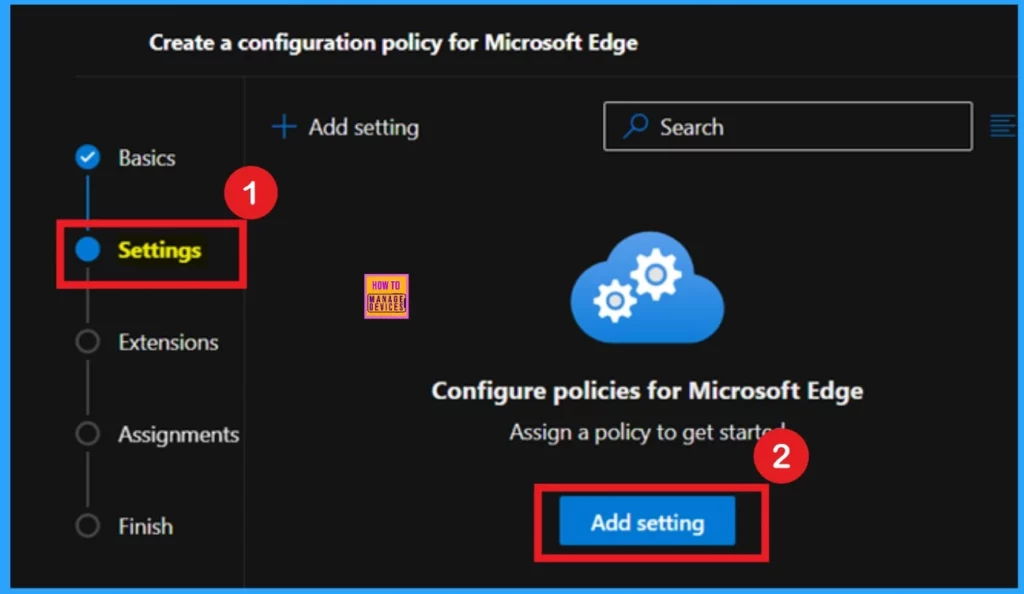
Settings
The next important step is the Settings section. Here, you can enable or disable specific configuration options. To begin, click on + Add setting (or Add settings) to choose the settings you want to include in the policy.
Configure Settings
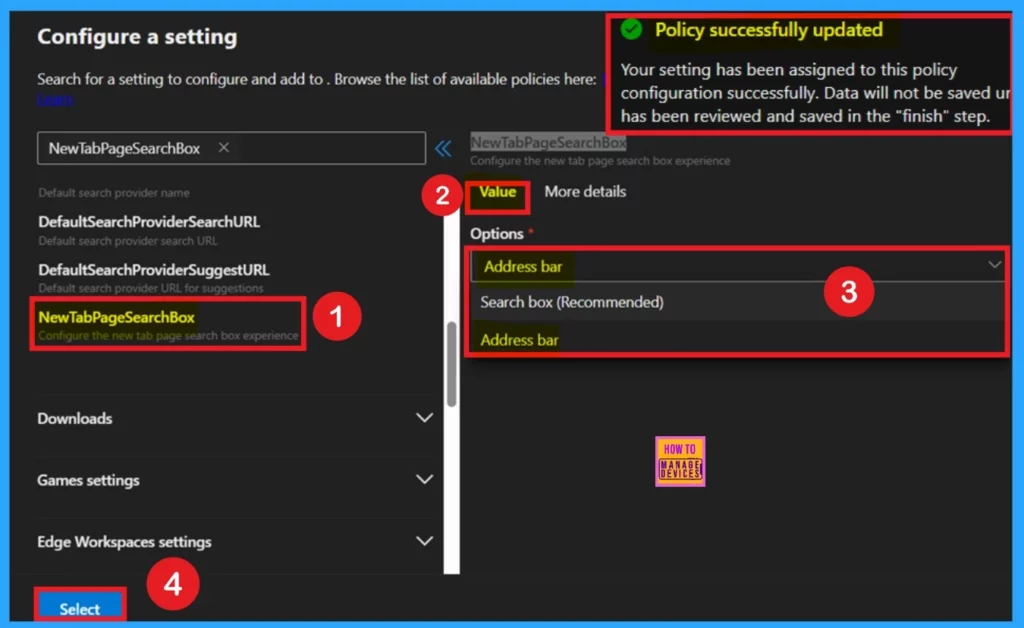
When you click Add settings, you’ll be directed to the Configuration settings page. Start by using the search bar or find the specific policy name you want to configure. Once you locate the desired policy, click on it to select it. The selected policy will then appear under 2 tabs: Value and More details. In the Value tab, you’ll see three available configuration options to choose from.
- There are 2 Configuration Options Address bar and Search box (Recommended).
- I selected the Address bar Option.
More Details
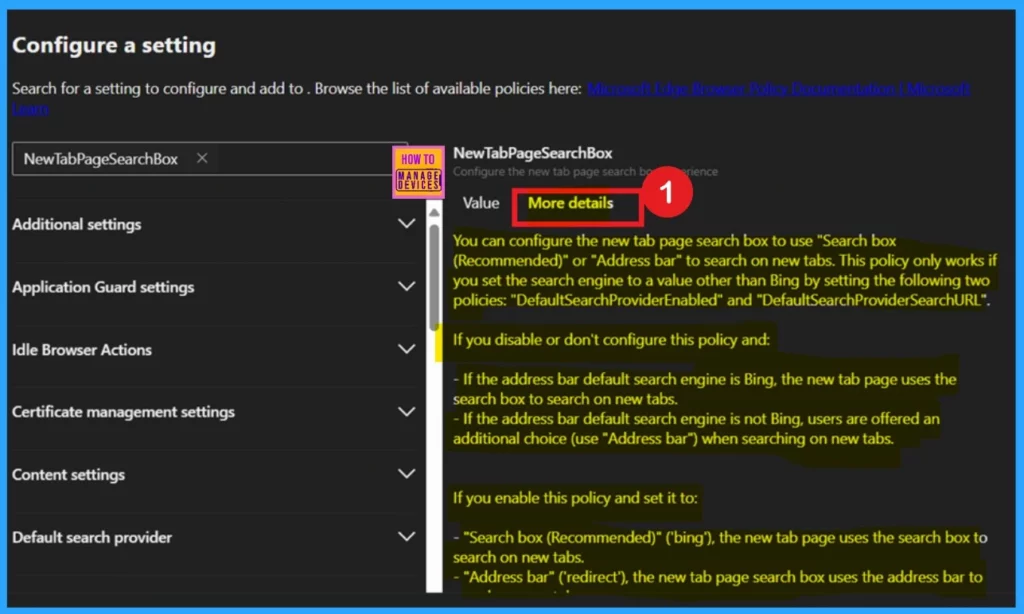
In the more details will provide you the more details about the selected policy. Here it shows that you can configure the new tab page search box to use “Search box (Recommended)” or “Address bar” to search on new tabs. This policy only works if you set the search engine to a value other than Bing by setting the following two policies: “DefaultSearchProviderEnabled” and “DefaultSearchProviderSearchURL”.
- After reviewing More details, you can close the Configuration Settings window.
| Policy Status | How New Tab Page Works |
|---|---|
| Disabled or Not Configured (Bing) | Uses the search box for searches |
| Disabled or Not Configured | Users are offered a choice to use the Address bar |
| Enabled – Address bar | Forces the use of the search box for new tab searches |
| Enabled – Search box (Recommended) | Redirects new tab searches to the address bar |
Extension
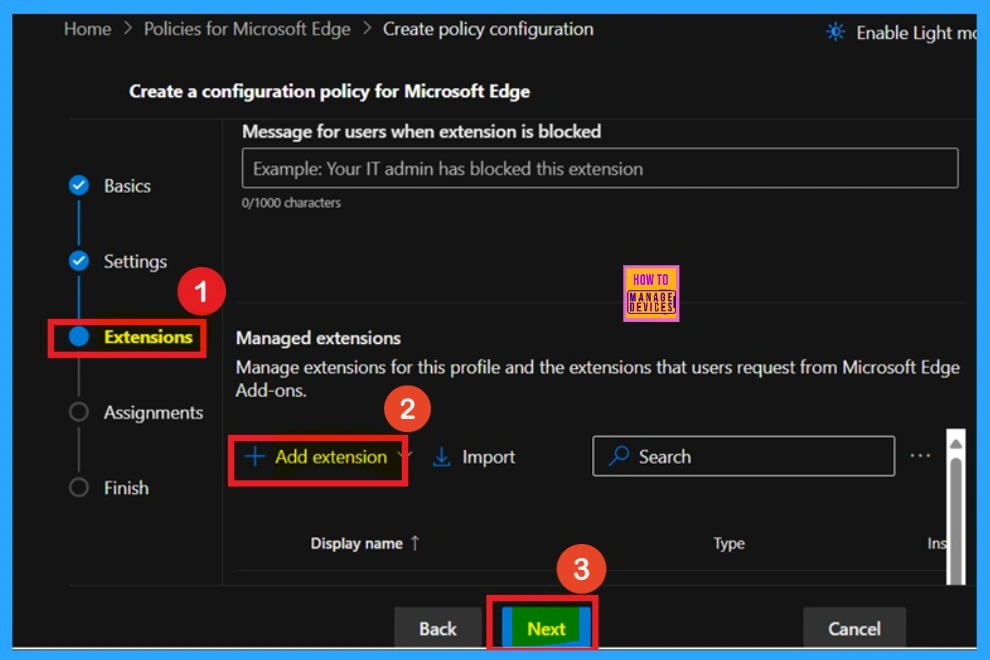
In the Extensions section, you can control how extensions behave through various policies, including installation settings and permissions. To include a specific extension in your policy, click the + Add extension button. If no further configuration is needed for the extension, simply click Next to continue.
Assignments
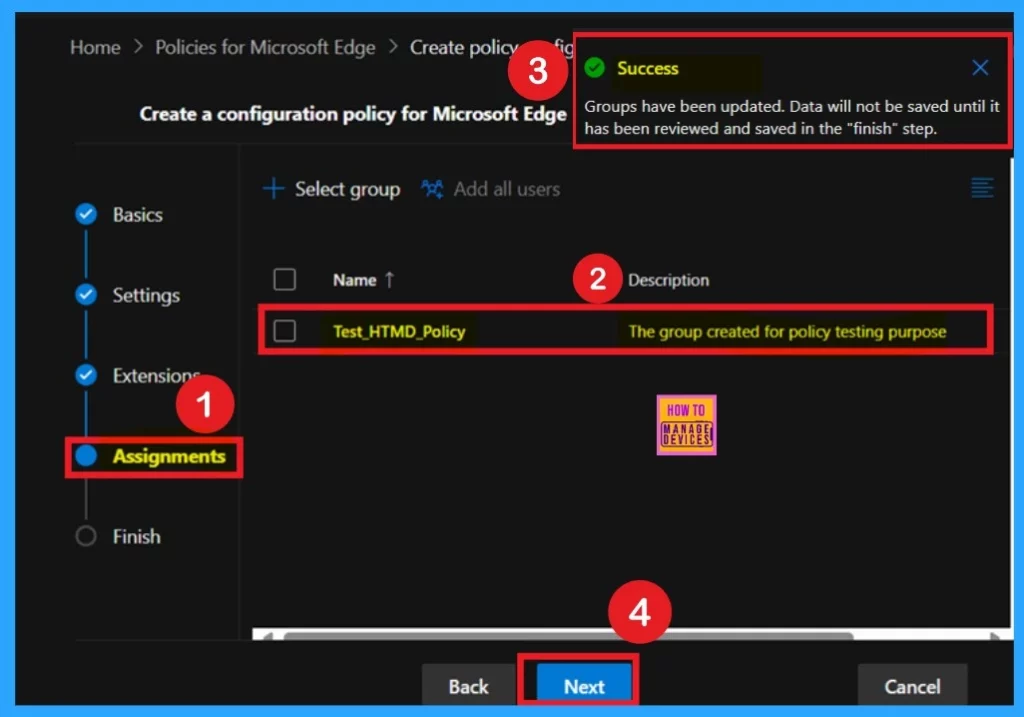
The Assignments tab, which is the next step in the policy configuration process, allows you to specify the users, groups, or devices that should receive the policy. To assign the policy, click + Select group, then choose the appropriate group from the available Microsoft Entra groups for example, you might select Test_HTMD_Policy. After making your selection, click Select.
- Once the group is chosen, a notification will confirm that the group assignment has been successfully updated. Then, click Next to proceed to the final steps.
Finish
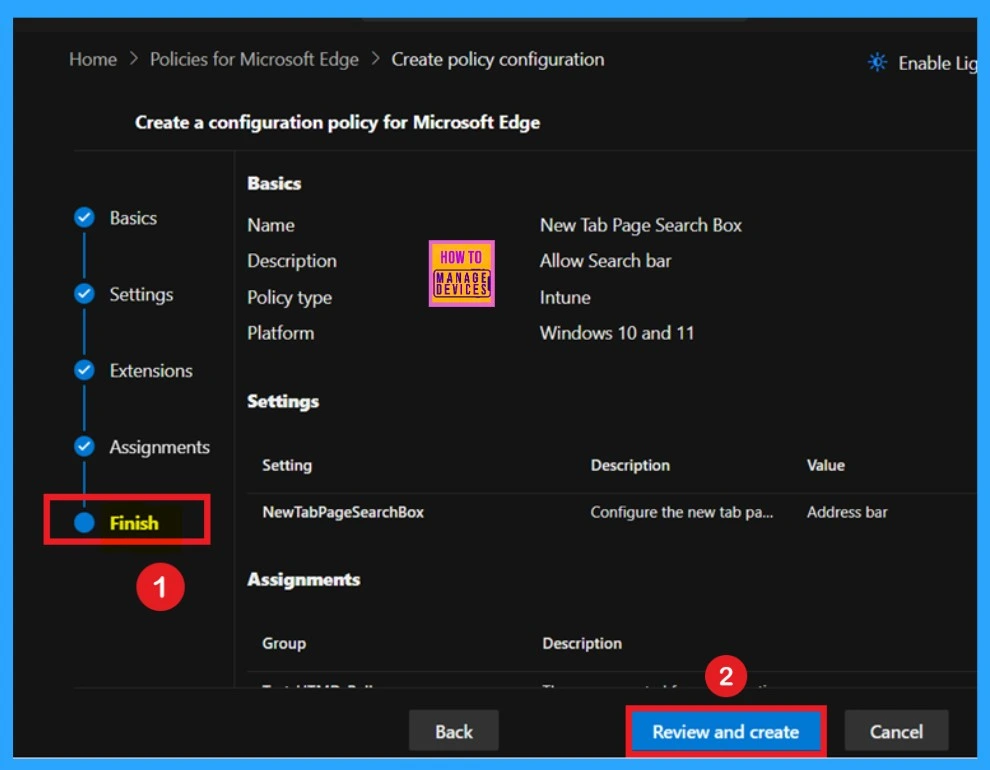
The Finish stage is the final step in creating your policy, where you can review all the settings configured in the previous steps. If you need to make any adjustments, use the Back button to return to the relevant section. Once you’ve confirmed that all settings are correct, click Review + Create to finalize the policy.
- After submission, you’ll receive a notification confirming that the policy has been successfully created.
Monitoring status
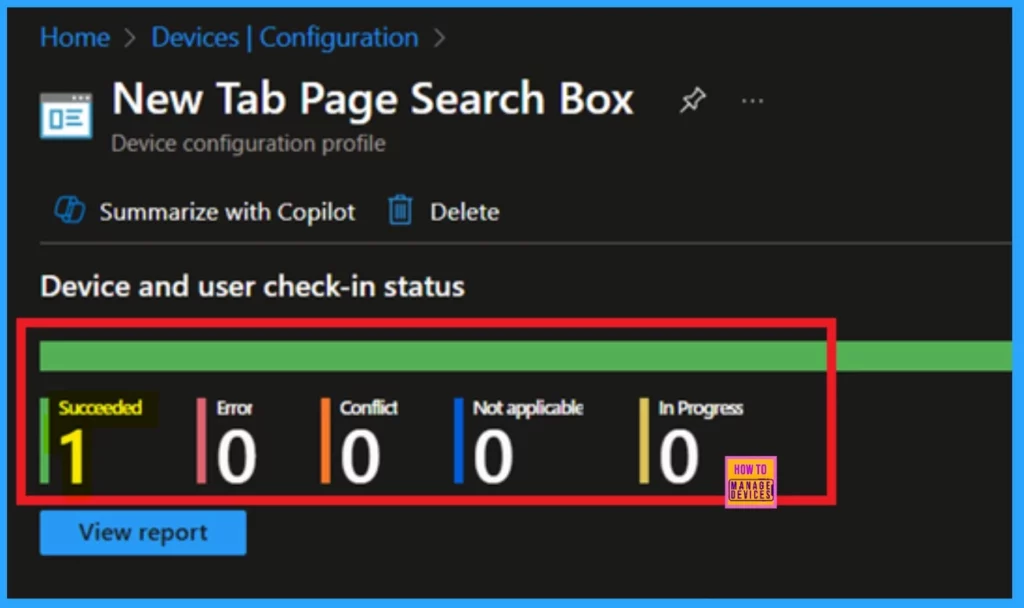
After manually syncing the device through the Company Portal, you can verify the policy deployment in the Intune Portal. Navigate to Devices > Configuration, then open the Policies tab to locate the policy. A status of “Successful” confirms that the policy has been correctly applied to the device.
Client Side verification
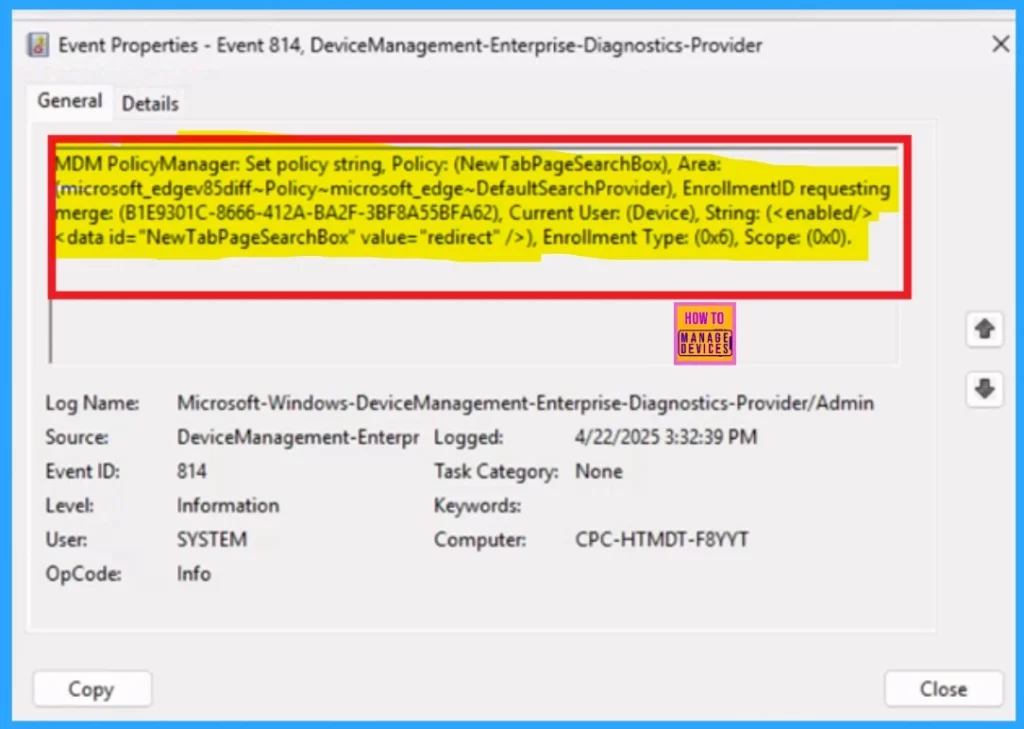
Administrators can check policy status on individual devices using Windows Event Viewer. To verify client-side compliance, go to Applications and Services Logs > Microsoft > Windows > DeviceManagement-Enterprise-Diagnostics-Provider > Admin, and then filter for Event ID 814.
| Policy Detail |
|---|
| MDM PolicyManager: Set policy string, Policy: (NewTabPageSearchBox), Area: (microsoft_edgev85diff~Policy~microsoft_edge~DefaultSearchProvider), EnrollmentlD requesting merge: (B1E9301C-8666-412A-BA2F-3BF8A55BFA62), Current User: (Device), String: ( ), Enrollment Type: (0x6), Scope: (0x0). |
End User Experience
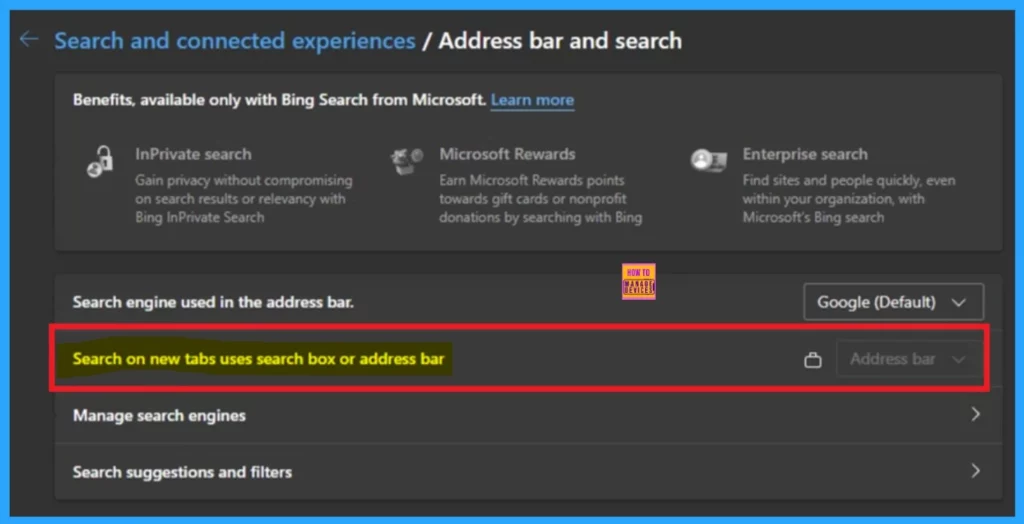
To check if the New Tab Page search box is enabled in Microsoft Edge, open a new tab and see if the search box appears in the center. Go to Settings, then Privacy> search, and services or new tab page settings to check if the search bar is set as the default.
- New tabs uses search box or address bar is locked on the Address bar option.
Need Further Assistance or Have Technical Questions?
Join the LinkedIn Page and Telegram group to get the latest step-by-step guides and news updates. Join our Meetup Page to participate in User group meetings. Also, Join the WhatsApp Community to get the latest news on Microsoft Technologies. We are there on Reddit as well.
Author
Anoop C Nair has been a Microsoft MVP for 10 consecutive years from 2015 onwards. He is a Workplace Solution Architect with more than 22+ years of experience in Workplace technologies. He is a Blogger, Speaker, and Local User Group Community leader. His primary focus is on Device Management technologies like SCCM and Intune. He writes about technologies like Intune, SCCM, Windows, Cloud PC, Windows, Entra, Microsoft Security, Career, etc.
