Let’s learn how you can assign Azure AD Roles to Azure AD Groups for Effective Role Based Access Control. This can save a significant amount of time and effort, especially in organizations with a large number of users or frequent changes.
Assigning Azure AD roles to Azure AD groups is a powerful way to streamline access management and improve security within your organization. Creating groups with specific roles and responsibilities allows you to easily assign and manage access to resources and applications in Azure Active Directory.
By assigning roles to groups rather than individual users, you can ensure that only those with the appropriate level of access can perform certain actions or access sensitive data. This helps to mitigate the risk of accidental or malicious breaches and can help your organization meet compliance requirements.
You can only assign a role to a group created with Azure AD roles can be assigned to the group turned on or created with the ‘isAssignableToRole’ property set to True. This group attribute makes the group one that can be assigned to a role in Azure Active Directory.
You can manage just-in-time assignments to all Azure AD roles and all Azure roles using Privileged Identity Management (PIM) in Azure AD, that also part of Microsoft Entra.
- Assign Azure AD Roles Using Privileged Identity Management PIM
- Configure Multiple Admin Approvals In Intune For Apps And Scripts
Assign Azure AD Roles to Azure AD Groups
Let’s follow the steps below to create a role-assignable group in Azure AD. To create an Azure AD group, you must have Global Administrator or Privileged Role Administrator permissions in Azure AD.
- Sign in to the Azure portal or Azure AD admin center.
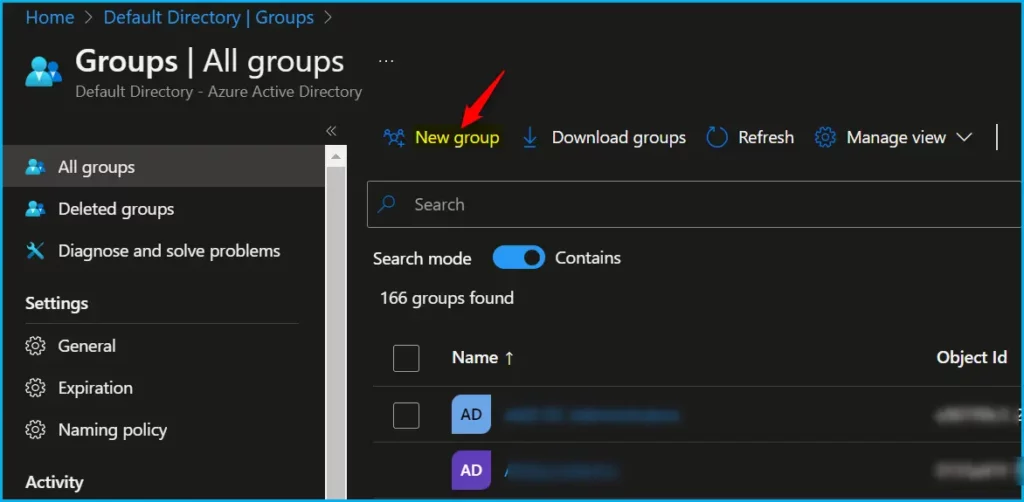
- Select Azure Active Directory > Groups > All groups > New group.
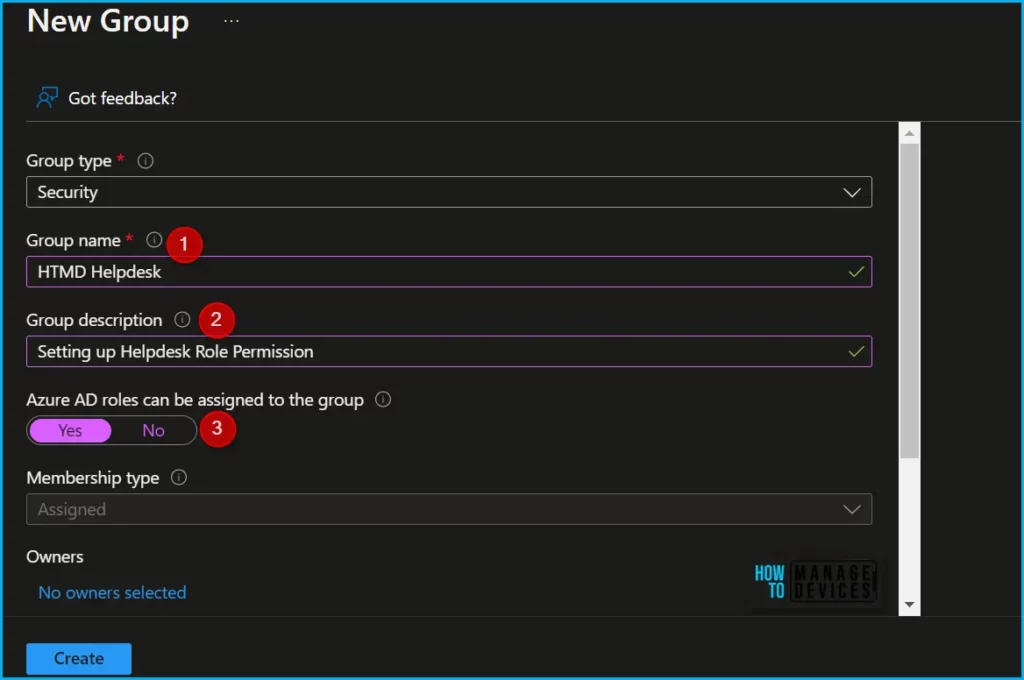
On the New Group tab, provide the group type, name, and description. Turn on Azure AD roles that can be assigned to the group. This switch is visible only to Privileged Role Administrators and Global Administrators because these are the only two roles that can set the switch.
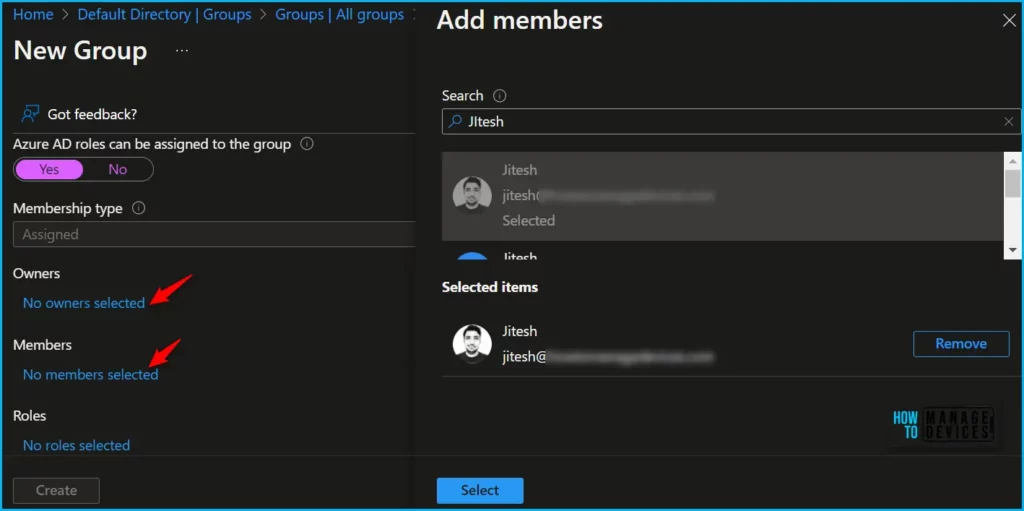
Select the members and owners of the group. You also have the option to assign roles to the group, you can assign them later.
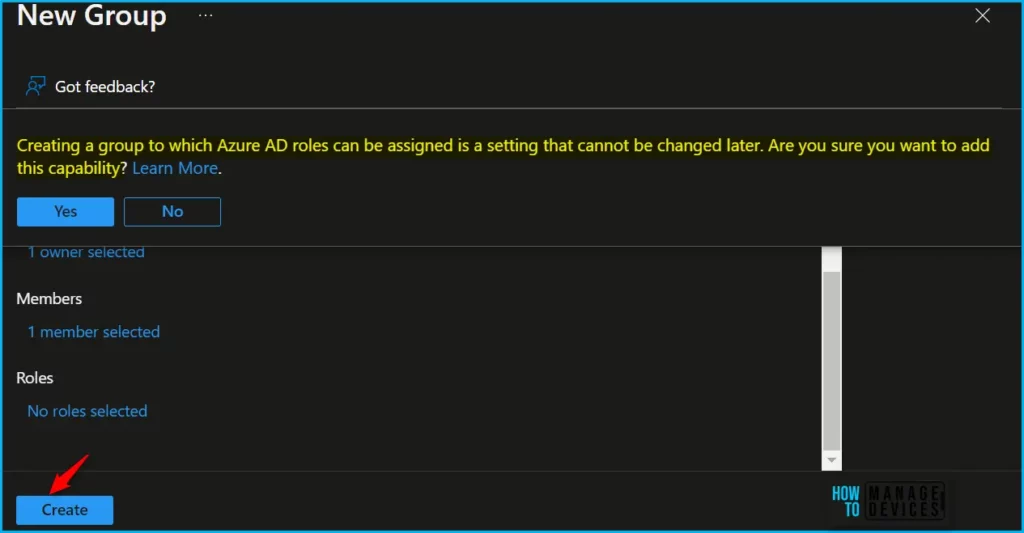
After the members and owners are specified, select Create. The group is created with any roles you might have assigned to it.
A popup message will appear at the top, Create a group to which Azure AD roles can be assigned is a setting that cannot be changed later. Are you sure you want to add this capability? Click on Yes.
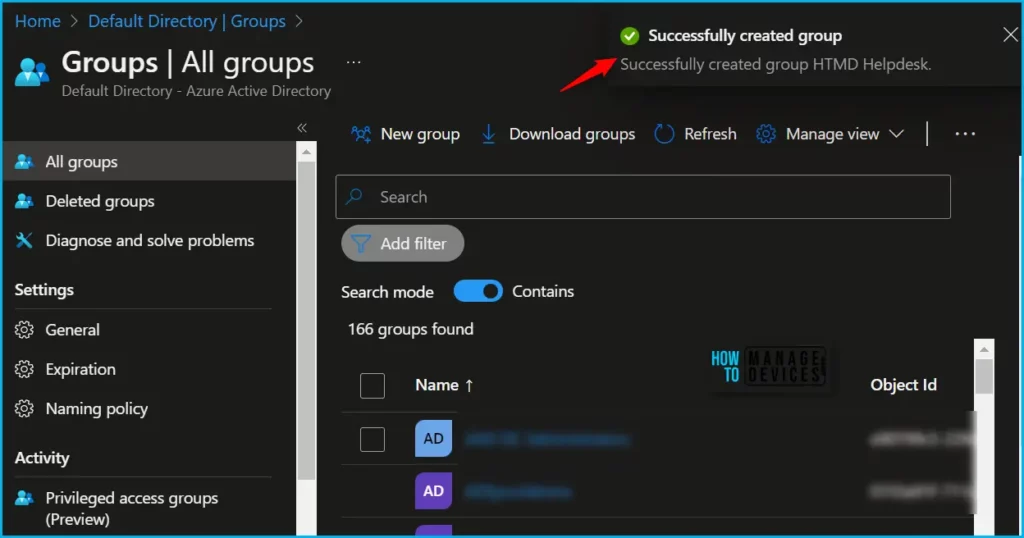
A notification will appear automatically in the top right-hand corner with a message. Here you can see, Successfully created group HTMD Helpdesk. Click the Refresh button at the top to quickly see the roles. You will see the HTMD Helpdesk group created.
Assign Azure AD Roles Using Privileged Identity Management
Let’s follow the steps to assign Azure AD roles using PIM. With Azure Active Directory, a Global administrator can make permanent Azure AD admin role assignments.
- Sign in to the Azure portal or Azure AD admin center.
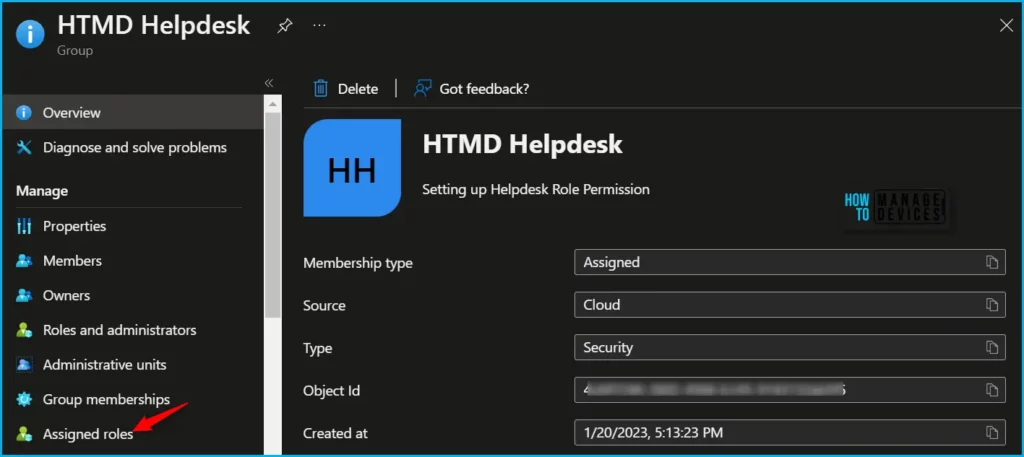
- In Azure AD Group, Select your group for roles assignment and click on Assigned roles.
You can also select Azure Active Directory > Roles and administrators and select the role you want to assign to the Azure AD group.
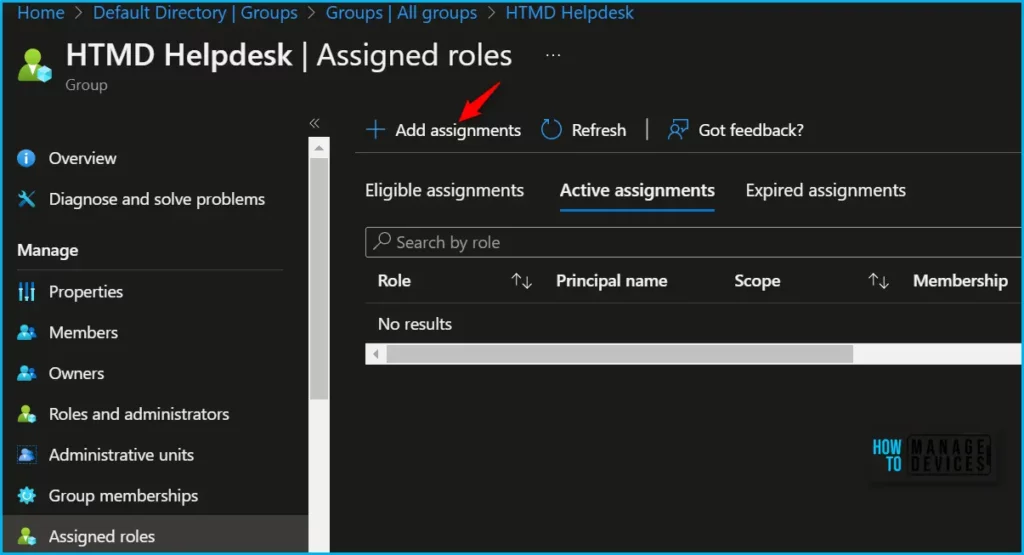
Under the Assigned roles, click on the Add assignment.
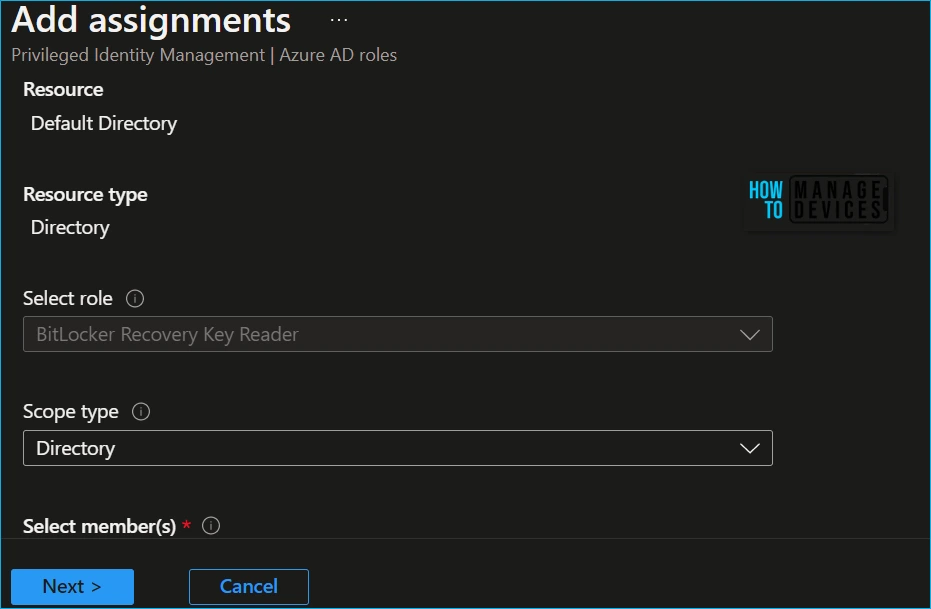
Select Roles to see the list of roles for Azure AD permissions. For Example, I selected the BitLocker Recovery Key Reader custom role for assignments.
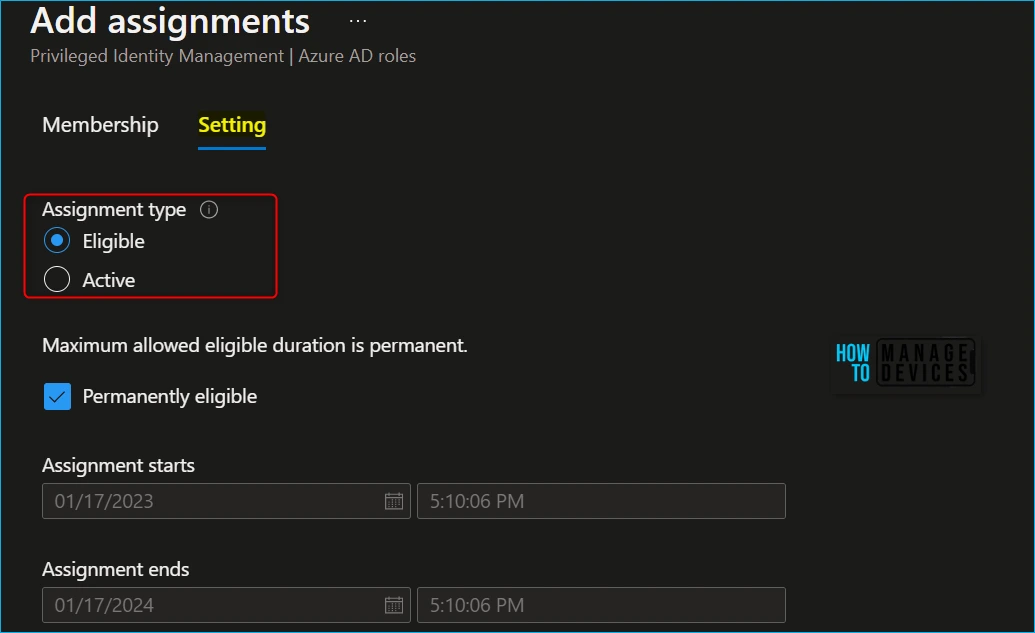
In the Assignment type list on the Membership settings pane, select Eligible or Active.
- Eligible assignments require the member of the role to perform an action to use the role. Actions might include performing a multi-factor authentication (MFA) check, providing a business justification, or requesting approval from designated approvers.
- Active assignments don’t require the member to perform any action to use the role. Members assigned as active have the privileges assigned to the role at all times.
Add start and end date and time boxes to specify a specific assignment duration. When finished, select Assign to create the new role assignment.
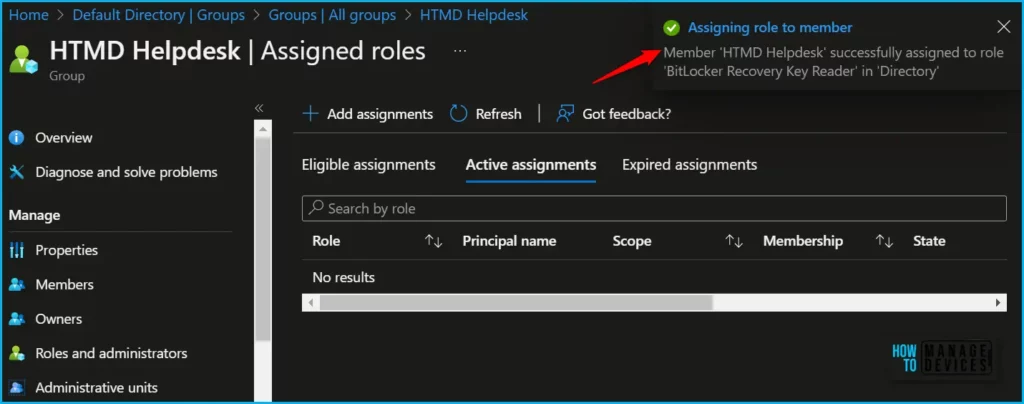
After the role is assigned, an assignment status notification is displayed. Member ‘HTMD Helpdesk’ successfully assigned to role ‘BitLocker Recovery Key Reader’ in ‘Directory’.
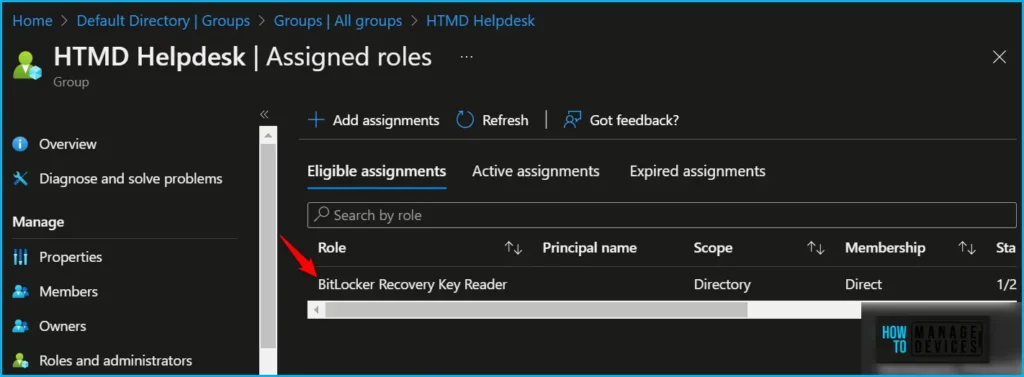
Here you can see Azure AD roles have been added to your eligible Azure AD roles.
Author
About Author – Jitesh, Microsoft MVP, has over six years of working experience in the IT Industry. He writes and shares his experiences related to Microsoft device management technologies and IT Infrastructure management. His primary focus is Windows 10/11 Deployment solution with Configuration Manager, Microsoft Deployment Toolkit (MDT), and Microsoft Intune.
