Let’s discuss the best way to Install the Zoom Rooms App using the Intune Enterprise App Catalog App. As you all know, Microsoft Intune is a cloud-based service focusing on MAM and MDM. With its benefits, Intune can focus on devices and applications.
One of the best tools of Microsoft Intune is the Enterprise catalog app. Enterprise Catalog App is to help IT administrators easily manage applications in an organization.This is especially useful for large organizations where manual app installation and updates take time and effort.
Zoom is a top company for video communication. It has an easy and reliable cloud platform for video and audio calls, chats, and webinars on mobile, desktop, and room systems Zoom Room is one of the most famous applications that enhance video conferencing experiences, making it better for businesses and educational institutions.
Zoom Rooms are systems that use Zoom’s video conferencing platform to create a complete meeting experience. They combine hardware and software to set up in any space, from small rooms to large halls, providing a simple and better user experience. You know Zoom Rooms provide HD video and excellent audio for clear communication. They allow various video layouts and screen-sharing options.
Table of Contents
What is a Zoom Room?
Zoom is the leader in modern enterprise video communications. Zoom Rooms are software-based conference room solutions used globally in boardrooms, conference rooms, huddle spaces, training rooms, executive offices, and classrooms.. It is Founded in 2011. Zoom is a publicly traded company based in San Jose, California.
Zoom Rooms App using Intune
Above we discussed an overall topic of Best way to Install Zoom Rooms App using Intune Enterprise App Catalog App. Here you can see that how to install the zoom Rooms using Intune Enterprise catalog app.

- How to Install Google Backup and Sync App with Intune Using Enterprise App Catalog App
- Deploy Windows Catalog App type using Intune Enterprise Application Catalog
- Best way to Install Bullzip PDF to Word App using Intune Enterprise App Catalog App
How to Use
If you’re looking to deploy Zoom Rooms in your organization through Microsoft Intune, you can simplify the process and ensure a secure, consistent experience for users using the Enterprise App Catalog.
- Sign In to the Microsoft Intune Admin Center using your Intune administrator credentials.
- Go to Apps > Windows > Add > Enterprise app catalog app
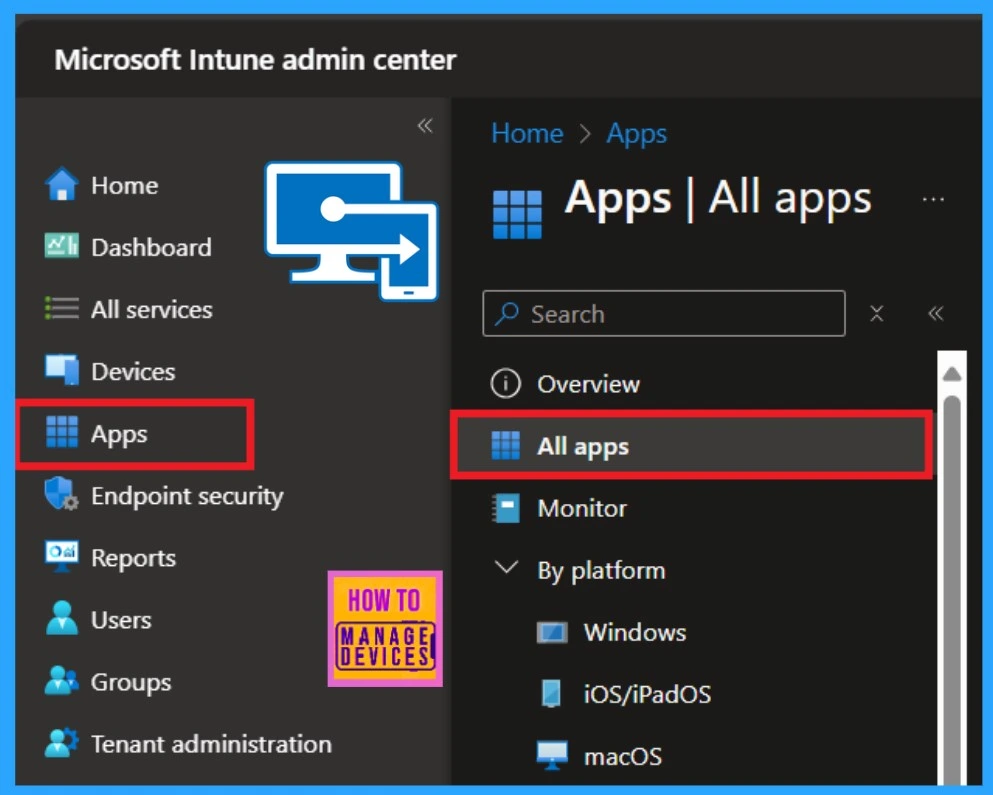
The Enterprise App Catalog feature is especially useful for adding custom or internal applications that are not available in the Microsoft Store. In the Apps section, you’ll find the Add option. Click on it to begin. Once you click Add, you’ll be prompted to select the App type. In this case, select Enterprise app catalog app. After selecting the app type, click Next to continue.
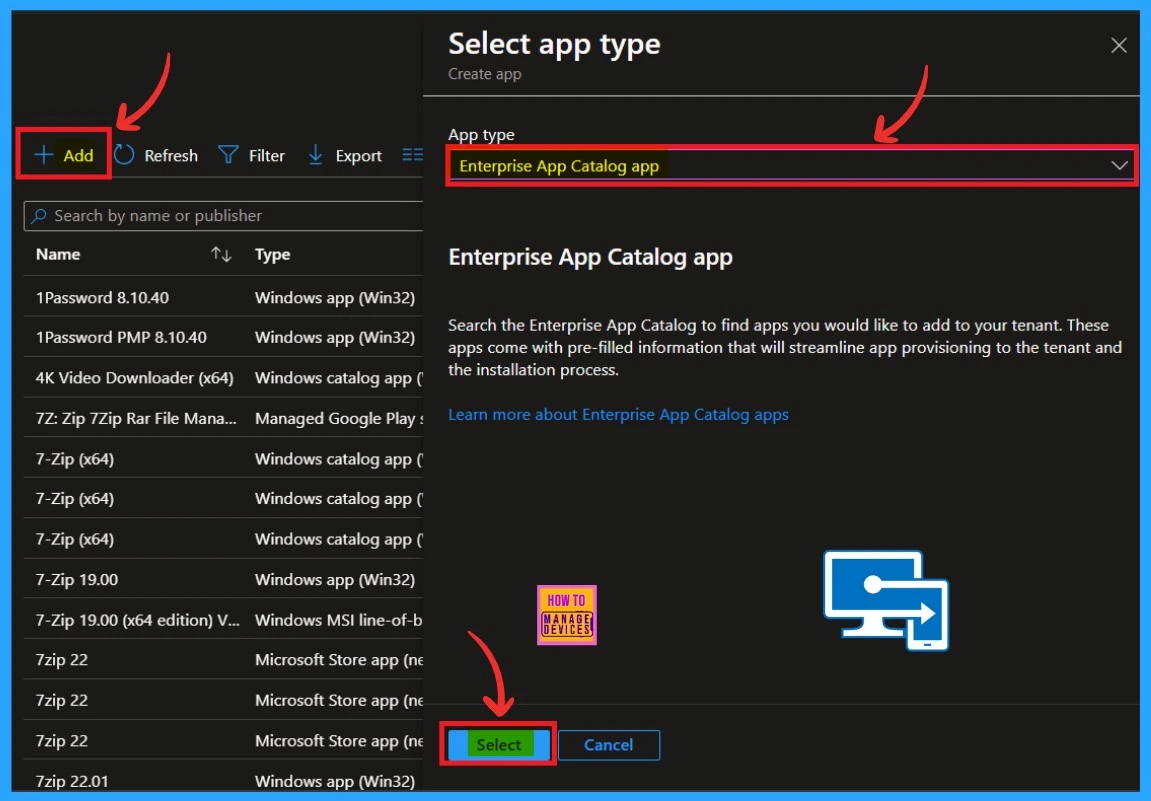
In the App information, you will get the option to select apps. Now, you can get options for Selecting Apps and Configuration. You can search for the app under the select app option. You can search for the Zoom app or scroll down to see the zoom app. When you select Zoom Rooms, you can click on the Next option.
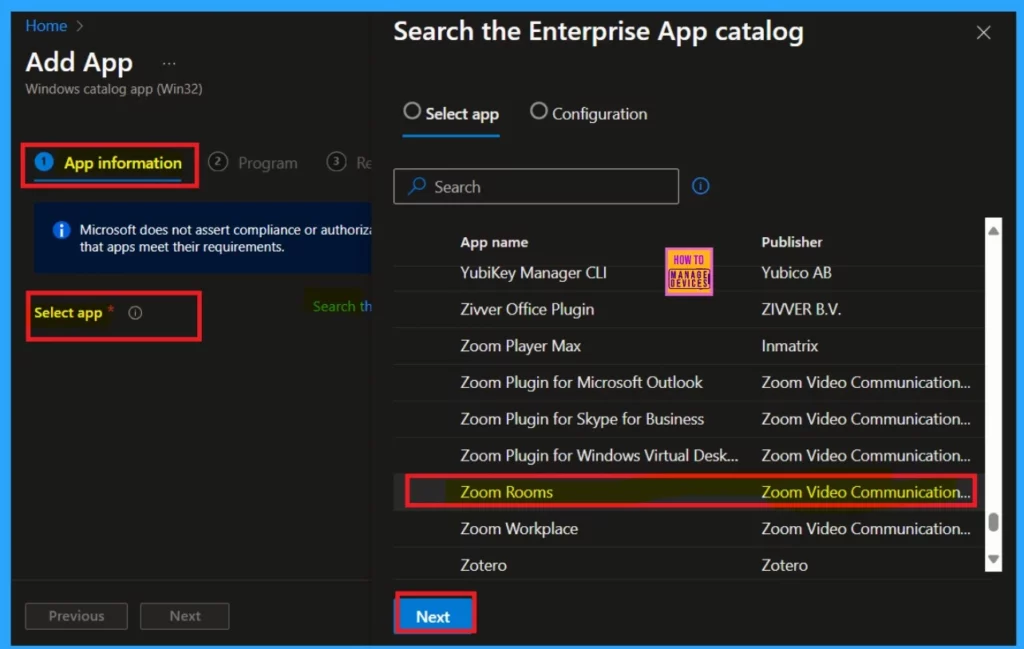
The Configuration tab presents key details such as the app’s package name, language, architecture, and version. The table below offers a more detailed shows of these settings for quick reference.
| Package Name | Language | Architecture | Version |
|---|---|---|---|
| Zoom Rooms (x64) | en-US | x64 | 6.27 |
The App Information settings display essential details about Zoom Rooms, such as its name, description, publisher, and version. Zoom is the leader in modern enterprise video communications, with an easy, reliable cloud platform for video and audio conferencing, chat, and webinars across mobile, desktop, and room systems.
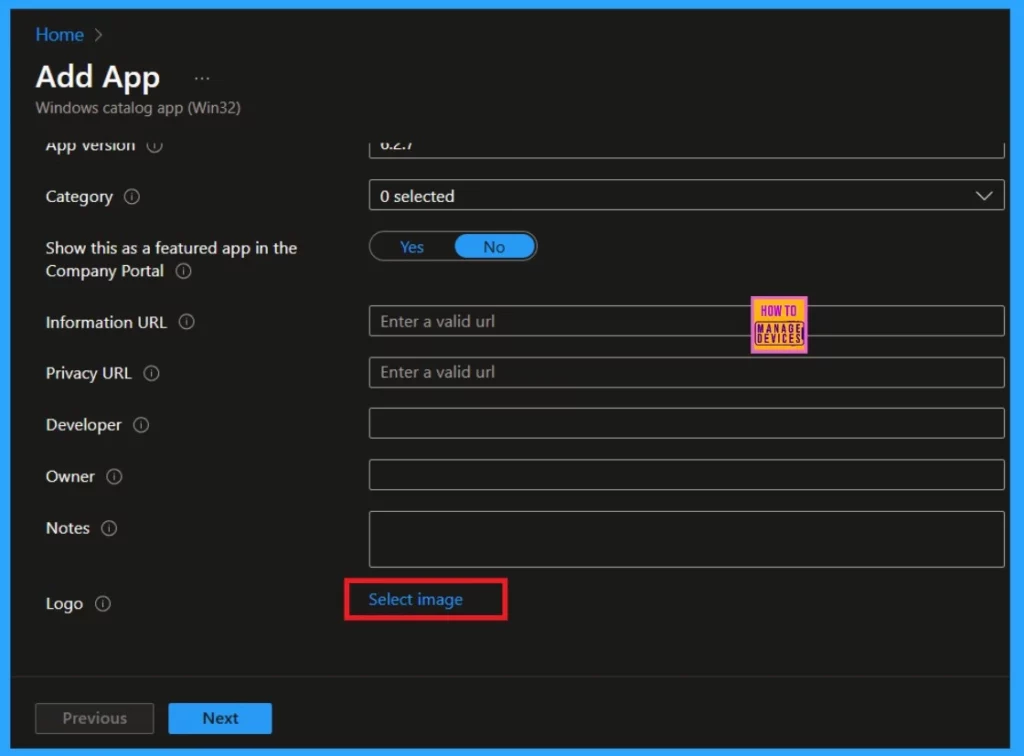
- To add a logo, click on the Select Image hyperlink next to the Logo section.
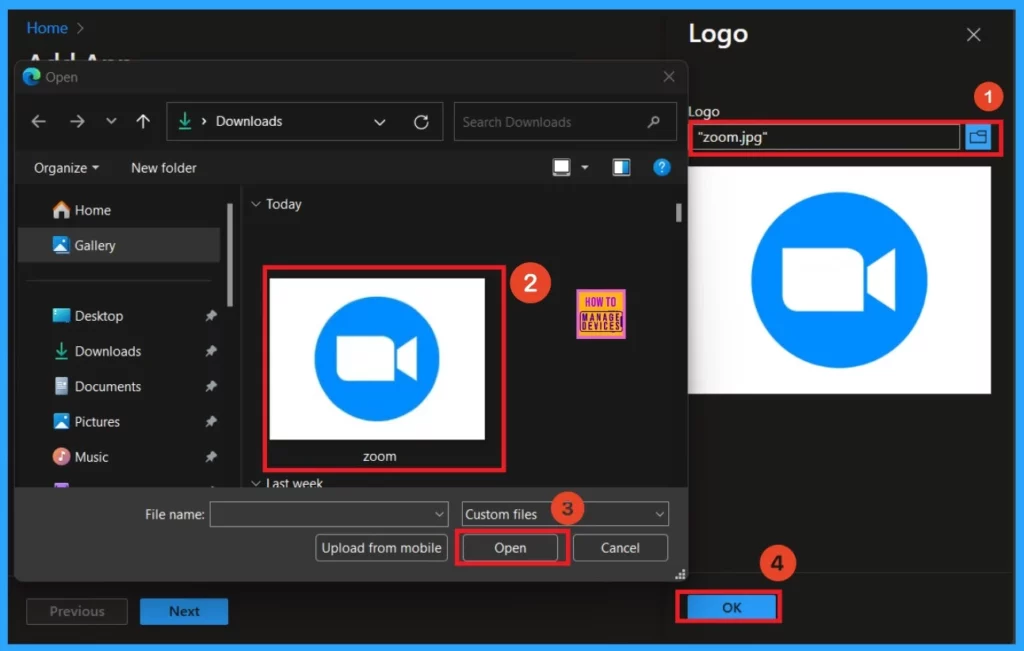
Now click on the file icon in the Logo window to choose the logo file from your device. Once the logo is selected, you will see a notification in the Intune Portal saying, “Upload Completed.” The logo will now appear in your Intune Portal. You can then click the Ok button.
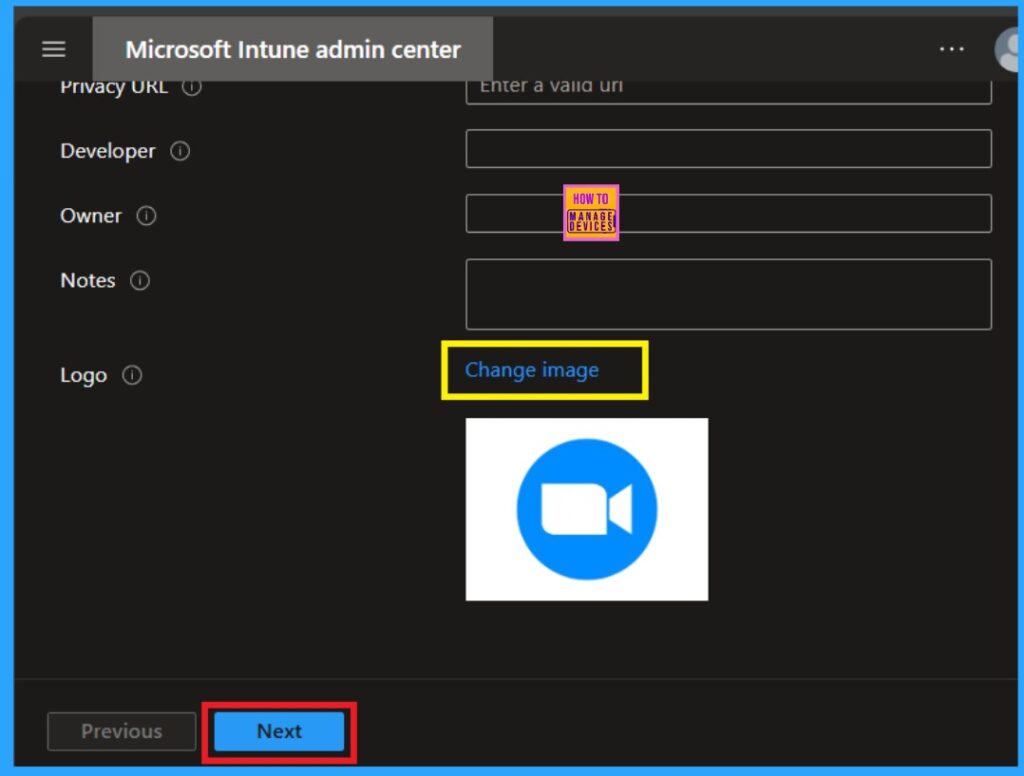
If you need to update the logo, simply click on the Change Image option to make adjustments. Once done, click Next to proceed with further changes.
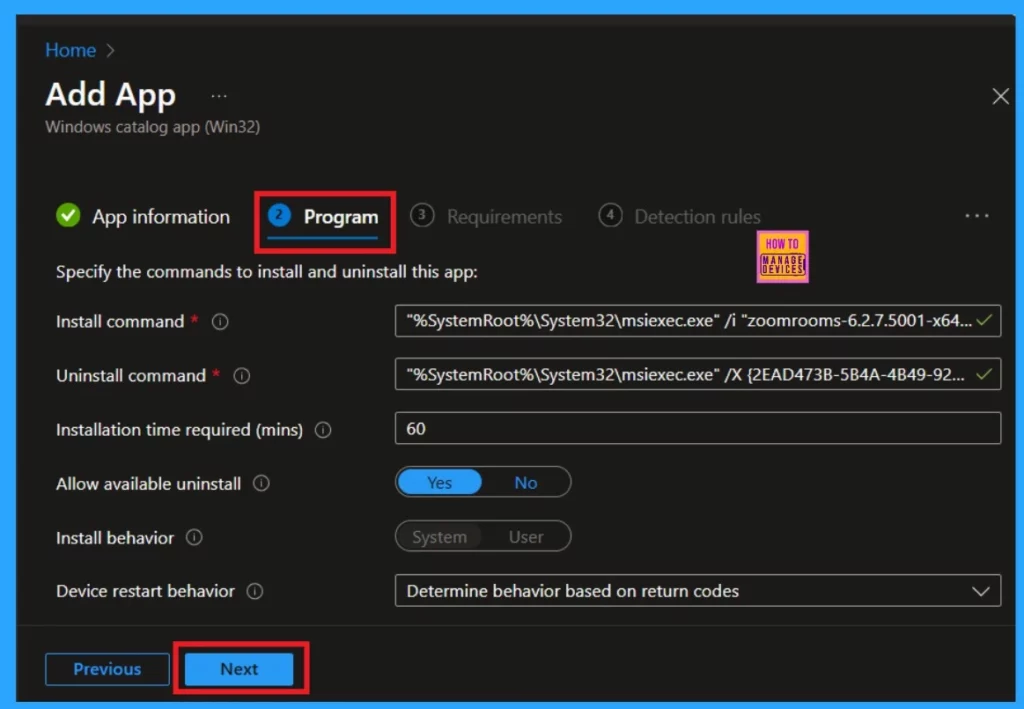
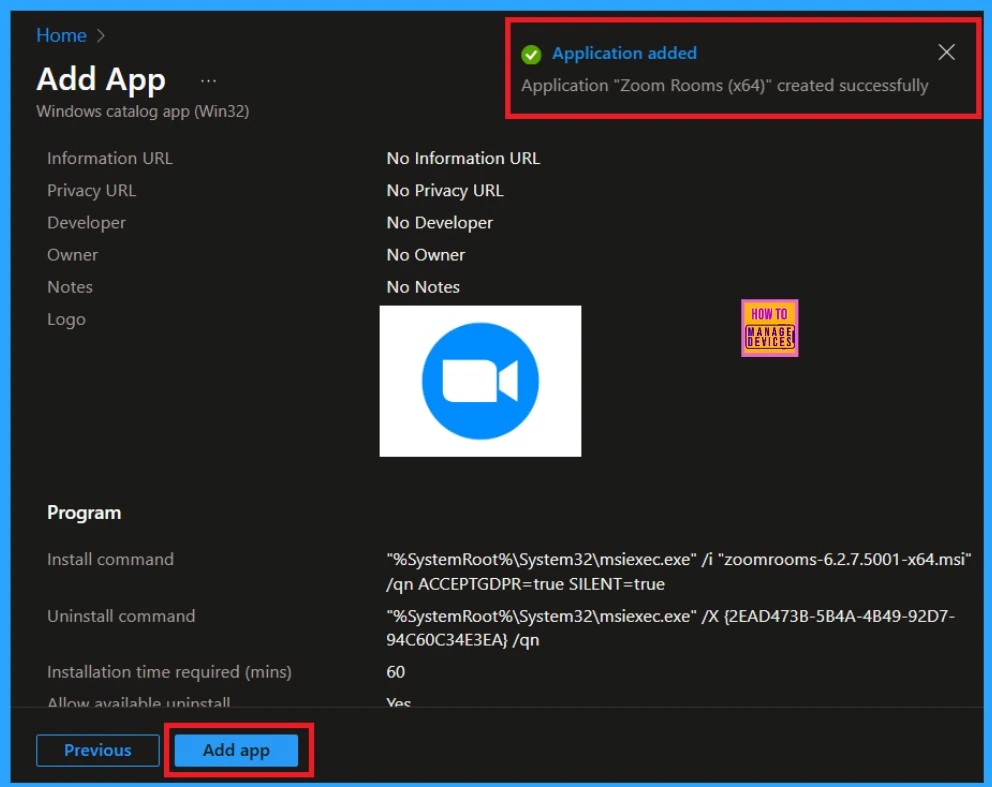
The Program Tab offers detailed information about the app’s installation and uninstallation processes. The App Installation Commands specify the commands needed to install the app on devices, while the Uninstallation Commands outline the commands used to remove the app from devices.
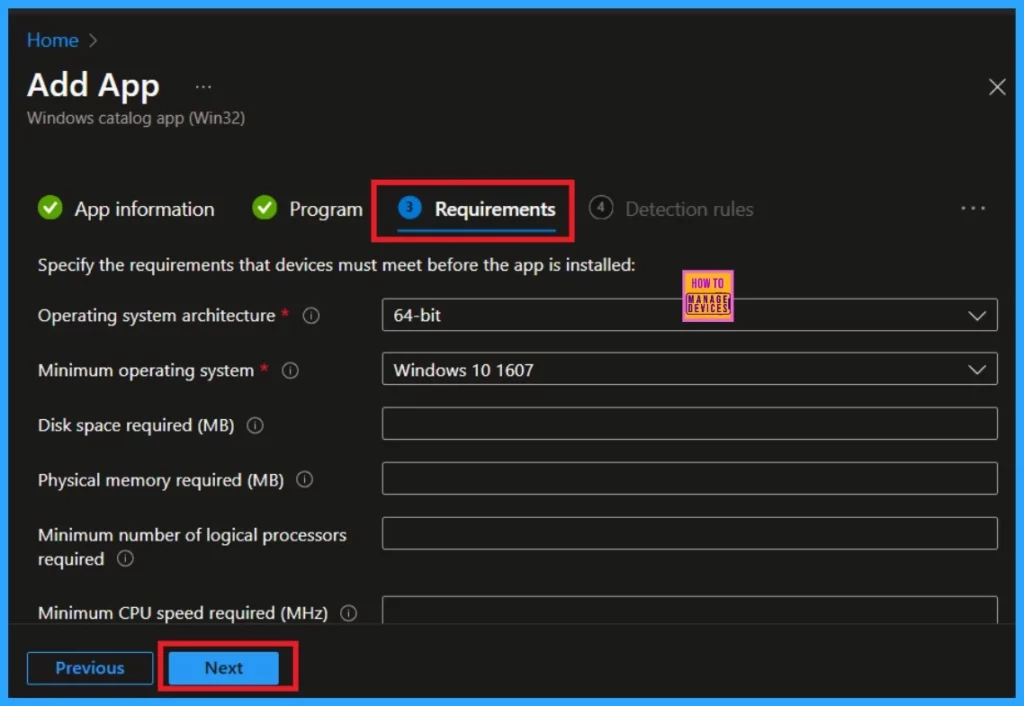
On the Requirements Tab, you have the option to either skip this step if you don’t need to set any specific requirements or define the conditions that devices must meet for the app to be installed. If you choose to specify requirements, you can see the details such as operating system version, OS architecture.
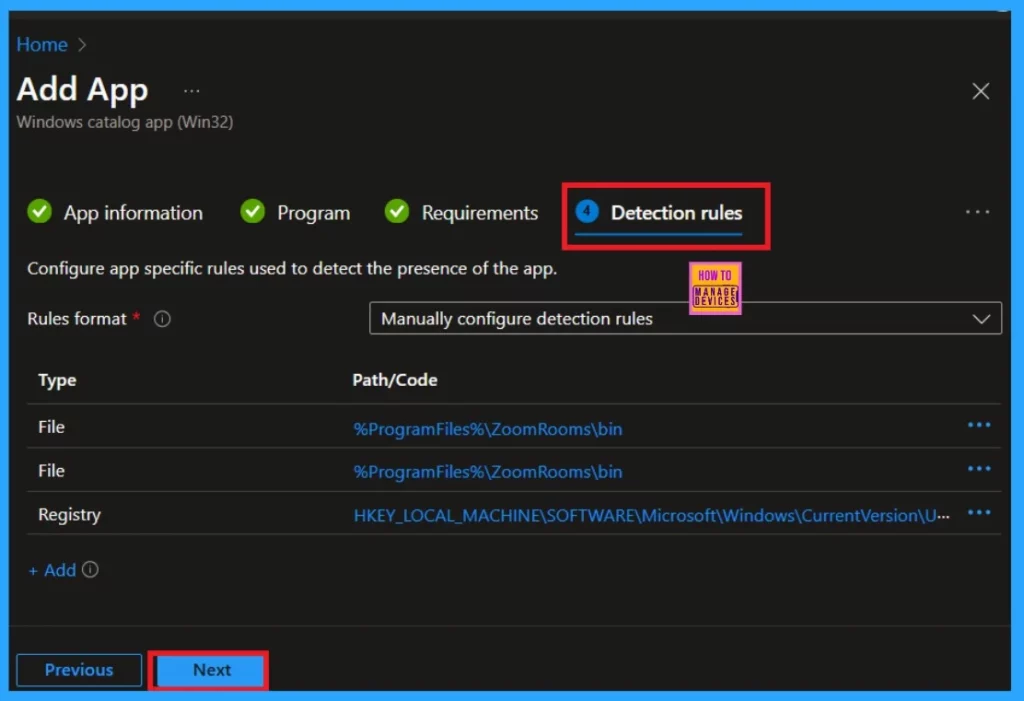
The Detection Rule Tab enables you to set up rules that check if the app is already installed on a device. These rules help identify whether the app is present and if any further actions, like installation or updates, are necessary. If you don’t need to configure any rules, you can skip this tab.
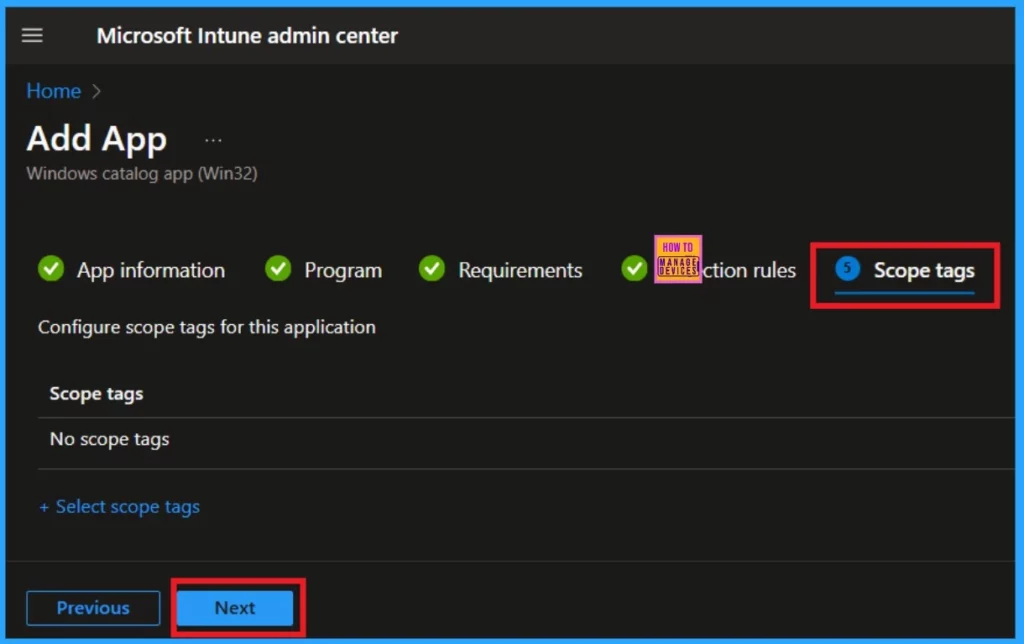
After the detection rules,, you have to add the scope tags. This section is completely mandatory. I skipped this tab here, so you can now click on the Next option.
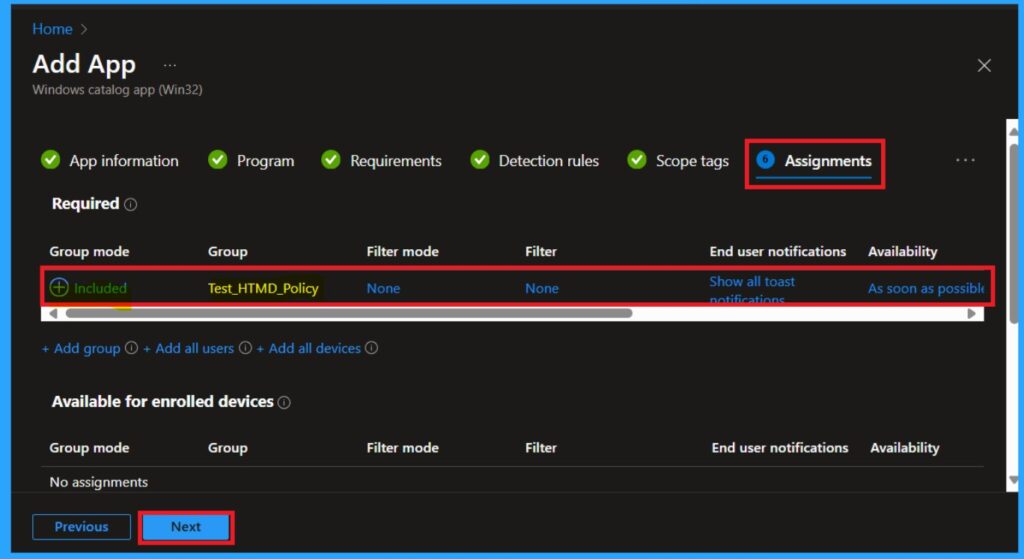
In the Assignments section, you can choose the groups for Zoom Room app deployment. You can define Included Groups and Excluded Groups. To assign the app, click on the Included Groups section. The “Include” option will appear after you select “Add group” in the required category.
- A new window will open where you can select the group to deploy the app. After selecting the group, click Next to continue.
Now you are on the Review + Create, here you can see the information relating to the Zoom Rooms. Including configuration, requirements, detection rules, and assignments. If everything looks good, click the Add App button.
- Now the application is Added successfully
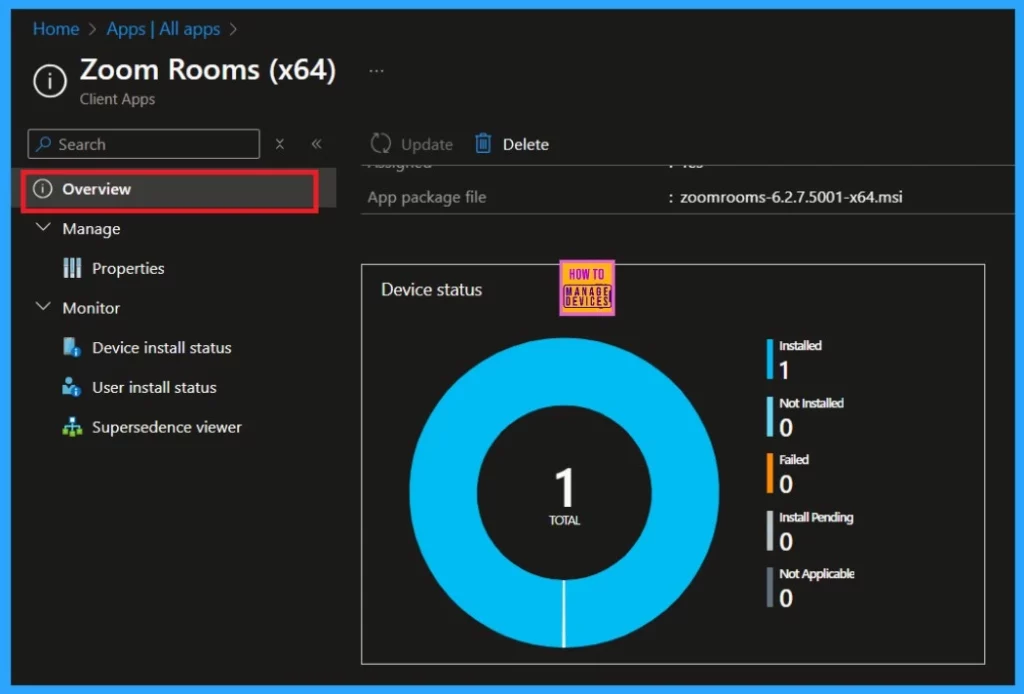
Monitor Status
Monitor status is an important part of this app installation. It means that the app was installed successfully in the specified groups. When you assign an app to the specified groups, it may take 8 hours for the app to deploy. So, you can manually sync the policy in the company portal.
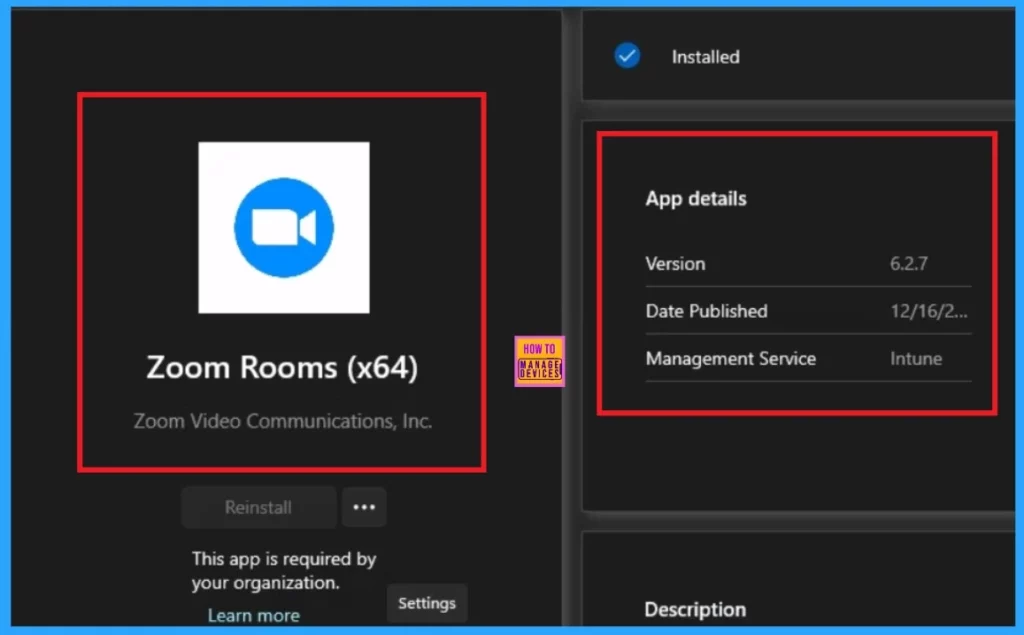
End User Experiance
After the manual syncing, it will automatically be deployed to the workstation. To verify the installation, open the company portal and go to downloads and updates. Now, you can search for the Zoom Room to confirm that it has been successfully installed.
- Here, you will get some details about your installed applications, such as the version date published, etc.
Need Further Assistance or Have Technical Questions?
Join the LinkedIn Page and Telegram group to get the latest step-by-step guides and news updates. Join our Meetup Page to participate in User group meetings. Also, Join the WhatsApp Community to get the latest news on Microsoft Technologies. We are there on Reddit as well.
Author
Anoop C Nair has been Microsoft MVP from 2015 onwards for 10 consecutive years! He is a Workplace Solution Architect with more than 22+ years of experience in Workplace technologies. He is also a Blogger, Speaker, and Local User Group Community leader. His primary focus is on Device Management technologies like SCCM and Intune. He writes about technologies like Intune, SCCM, Windows, Cloud PC, Windows, Entra, Microsoft Security, Career, etc.
