This post helps you to configure Custom message for Android using Intune. You can create an Android device restrictions configuration profile for enrolled and managed Android Enterprise devices for sending custom support message on corporate-owned devices.
Customizing support information is crucial to providing a personalized and user-friendly experience for individuals using Intune. By tailoring support messages, you can address specific concerns, guide users through processes, and create a more inclusive environment.
Android for work enrolment is for users using their devices to access corporate data. Intune has limited device management capabilities in managing the devices. In contrast, corporate-owned devices with Work Profile will provide admins with full MDM capabilities and meanwhile, segregate personal and corporate data securely.
By default, the OEM default messages are shown. When you deploy a custom message using Intune, the Intune default message is also deployed. If you don’t enter a custom message for the device’s default language, then the Intune default message is automatically shown.
- Prepare Android Virtual Device For Intune Deployment Testing
- Configure Android System Update Setting Using Intune
Configure Custom Message for Android using Intune
Before you begin, Create an Android device restrictions configuration profile. When you create device restriction policies for Android Enterprise corporate-owned work profile security settings, there are many settings available.
The setting inside Device Restrictions configure custom support message for Android by navigating to the (Android Enterprise > Fully Managed, Dedicated, and Corporate-Owned Work Profile > Device Restrictions).
- Sign in to Microsoft Intune Admin Center https://intune.microsoft.com/
- Navigate to the Devices > Android > Configuration Policies. I selected the existing device restriction configuration profile for modification.
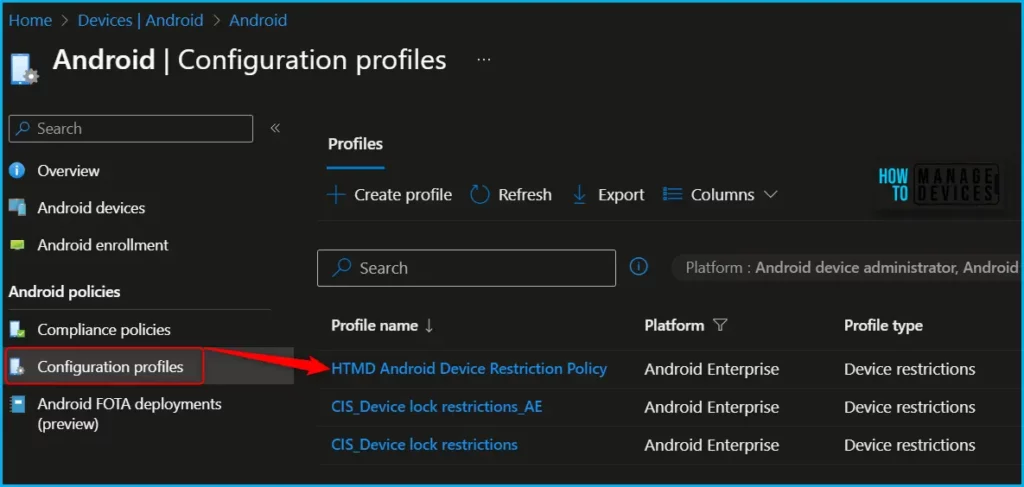
You can see the different categories of applied configuration in the configuration settings for Android Enterprise corporate-owned devices with a work profile. The Work profile settings allow you to configure settings that specifically apply to the Android work profile on this device.
When you configure the Custom message for Android corporate owned work profile devices, you have the following options to configure support information.
- Short support message
- Long support message
- Lock Screen message
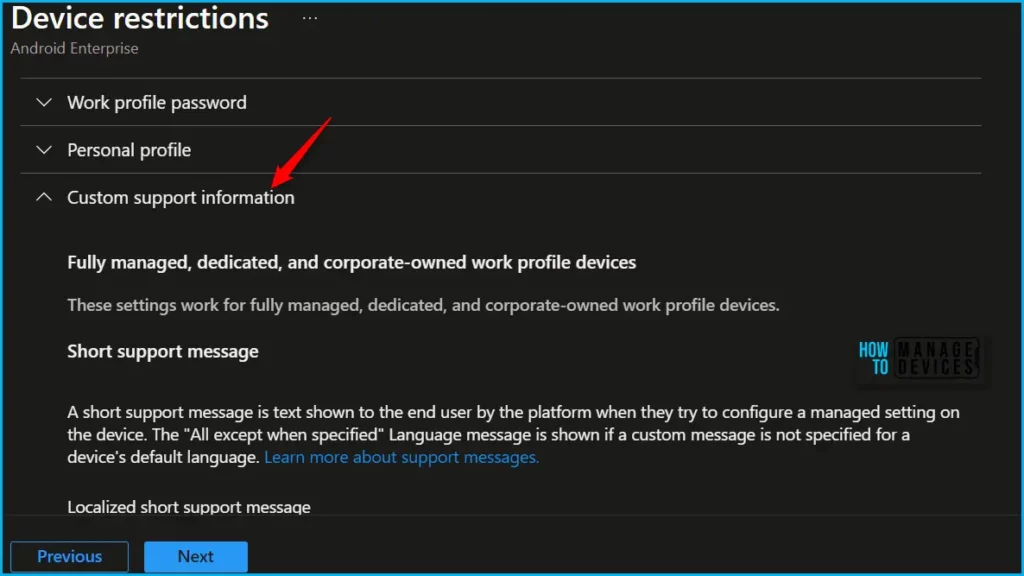
You can configure the following settings to Short support custom message for Android: When users try to change a setting that’s managed by the organization, a short message is shown. You can customize this message and enter a different message for different languages using the following settings. By default, this message is in English (United States).
- All, except when specified: This message is the Intune default message, and is shown for all languages. If you don’t enter a custom message, then this text is automatically shown. This text is also automatically translated to the device’s default language.You can change this message. Any changes aren’t translated. If you delete all the text in this message and leave this setting blank, then the following original short Intune default message is used and is translated:
You do not have permission for this action. For more information, contact your IT admin. - Select Locale: Select the locale or region to show a different custom message for that specific locale.For example, to show a custom message on devices using Spanish as the default language, select Spanish (Spain). Only devices using the Spanish (Spain) default language see your custom message. All other languages see the All, except when specified message text.You can add multiple locales and messages.
- Message: Enter the text you want shown, a max of 200 characters. The text you enter isn’t translated to the device’s default language. So if you want to show a message in Spanish, enter the text in Spanish.
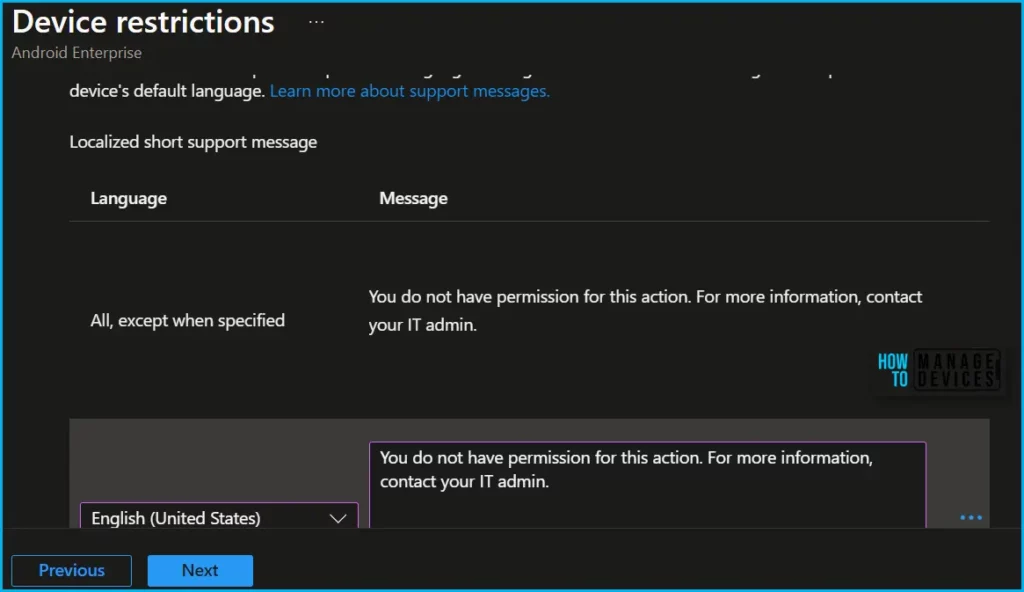
Long support custom message for Android: On the device, in Settings > Security > Device admin apps > Device Policy, a long support message is shown.Using the following settings, you can customize this message and enter a different message for different languages. By default, this message is in English (United States).
- All, except when specified: This message is the Intune default message, and is shown for all languages. If you don’t enter a custom message, then this text is automatically shown, and is automatically translated to the device’s default language.You can change this message. Any changes aren’t translated. If you delete all the text in this message and leave this setting blank, then the following original long Intune default message is used and is translated:
The organization's IT admin can monitor and manage apps and data associated with this device, including settings, permissions, corporate access, network activity and the device's location information.- Select Locale: Select the locale or region to show a different custom message for that specific locale.For example, to show a custom message on devices using Spanish as the default language, select Spanish (Spain). Only devices using the Spanish (Spain) default language see your custom message. All other languages see the All, except when specified message text.You can add multiple locales and messages.
- Message: Enter the text you want shown, a max of 4096 characters. The text you enter isn’t translated to the device’s default language. So if you want to show a message in Spanish, enter the text in Spanish.
Lock screen message: Enter the text you want to be shown on the device lock screen. You can customize this message and enter a different message for different languages using the following settings. By default, this message is in English (United States).
- All, except when specified: Enter the text you want to be shown for all languages, a max of 4096 characters. This text is automatically translated to the device’s default language. If you don’t enter a custom message, then Intune doesn’t change or update this setting. By default, the OS might not show a lock screen message.
- Select Locale: Select the locale or region to show a different custom message for that specific locale. For example, to show a custom message on devices using Spanish as the default language, select Spanish (Spain). Only devices using the Spanish (Spain) default language see your custom message. All other languages see the All, except when specified message text. You can add multiple locales and messages.
- Message: Enter the text you want shown, a max of 4096 characters. The text you enter isn’t translated to the device’s default language. So if you want to show a message in Spanish, enter the text in Spanish.
When you configure the Lock screen message, you can also use the following device tokens to show device-specific information:
{{AADDeviceId}}: Microsoft Entra device ID{{AccountId}}: Intune tenant ID or account ID{{DeviceId}}: Intune device ID{{DeviceName}}: Intune device name{{domain}}: Domain name{{EASID}}: Exchange Active Sync ID{{IMEI}}: IMEI of the device{{mail}}: Email address of the user{{MEID}}: MEID of the device{{partialUPN}}: UPN prefix before the @ symbol{{SerialNumber}}: Device serial number{{SerialNumberLast4Digits}}: Last four digits of the device serial number{{UserId}}: Intune user ID{{UserName}}: User name{{userPrincipalName}}: UPN of the user
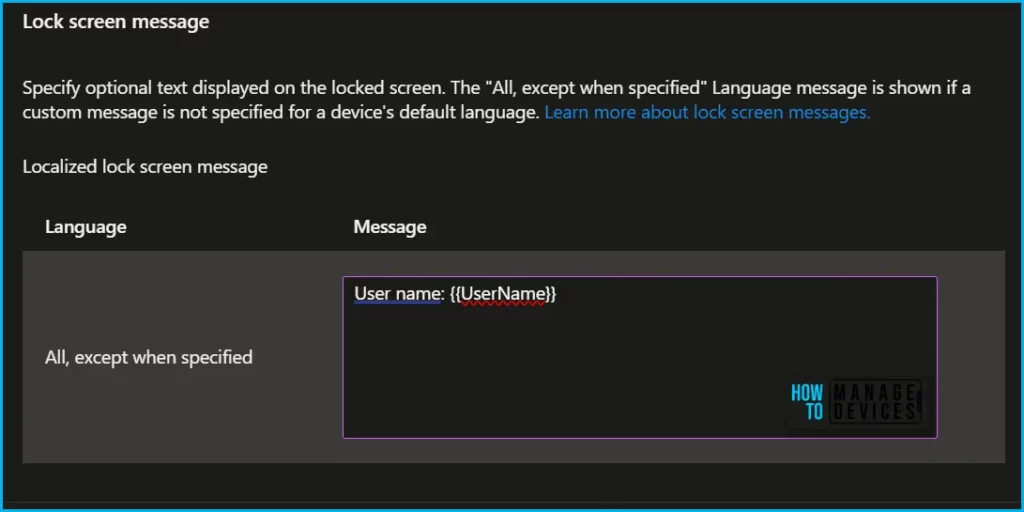
Here you can review the available restriction settings under Work profile settings. You can select and customize them as per your requirements and click Review + Save.
The next step is to review the setup policy and Save. A notification prompt will appear when you save the profile, Policy “HTMD Android Device Restriction Policy” saved successfully.
You can monitor the Android device policy to ensure that the users won’t be able to get Work profile Notifications. To confirm the behaviour, Checking for the enrolled device is recommended to ensure the applied profile is working as expected.
We are on WhatsApp. To get the latest step-by-step guides and news updates, Join our Channel. Click here –HTMD WhatsApp.
Author
About Author – Jitesh, Microsoft MVP, has over six years of working experience in the IT Industry. He writes and shares his experiences related to Microsoft device management technologies and IT Infrastructure management. His primary focus is Windows 10/11 Deployment solution with Configuration Manager, Microsoft Deployment Toolkit (MDT), and Microsoft Intune.
