In this blog post, we will learn how to configure the Support Approved EPM Elevation as an administrator using Microsoft Intune Policy for normal users. Endpoint Privilege Management (EPM) is a security solution designed to control and manage user privileges on devices within an organization’s network.
Support Approved EPM refers to obtaining necessary approvals to implement EPM within an organization. This involves securing backing from key stakeholders, such as IT, security, and executive teams, who recognize the need for more robust security controls to protect endpoint devices. Approval often follows a review of the system’s ability to enhance security while maintaining user productivity and operational efficiency.
Once EPM is elevated and approved, the solution can be rolled out across the organization. It enables real-time monitoring, control, and reporting of privileged activities, ensuring compliance with internal policies and regulatory requirements. Organizations can reduce vulnerabilities and mitigate potential security threats by managing endpoint privileges effectively.
Endpoint Privilege Management supports your Zero Trust journey by helping your organization achieve a broad user base running with the least privilege while allowing users to run tasks that are still allowed by your organization to remain productive.
Table of Contents
Requirements for Endpoint Privilege Management (aka EPM)
By regulating user access to sensitive systems and applications, EPM minimizes the risk of unauthorized activities, such as installing malicious software or unapproved changes to system configurations. It typically operates on the principle of least privilege, ensuring users have only the access rights necessary for their job functions.
Here, Microsoft recommended Endpoint Privilege Management, which has the following criteria.
- The Device should be in Microsoft Entra Joined or Microsoft Entra Hybrid Joined.
- EPM Support Both Windows 10 and Windows 11
- We require an additional license to activate EPM beyond the Microsoft Intune Plan 1 license, a stand-alone license that adds only EPM or with Intune Suite EPM already incorporated.
- Microsoft Intune Enrolled or Microsoft Configuration Manager co-managed devices support EPM (no workload requirements)
- The clear line of sight (without SSL-Inspection) to the required endpoints
- Supported Operating System versions
Endpoint Privilege Management supports the following operating systems with the mentioned KB or later installed.
| OS Version | Required KB Details |
|---|---|
| Windows 11, version 23H2 (22631.2506 or later) | with KB5031455 |
| Windows 11, version 22H2 (22621.2215 or later) | with KB5029351 |
| Windows 11, version 21H2 (22000.2713 or later) | with KB5034121 |
| Windows 10, version 22H2 (19045.3393 or later) | with KB5030211 |
| Windows 10, version 21H2 (19044.3393 or later) | with KB5030211 |
- Easily Create New Intune EPM Rules directly from the Elevation Reports
- Intune EPM Support Approve Scenario Explained
- Quick and Easy way to Turn on PowerShell Audit using Intune Policy
Create a Support Approved EPM Elevation Settings Policy
To create a Support Approved Endpoint Privilege Management Elevation Policy from scratch, follow the below steps.
- Sign In to the Microsoft Intune admin center
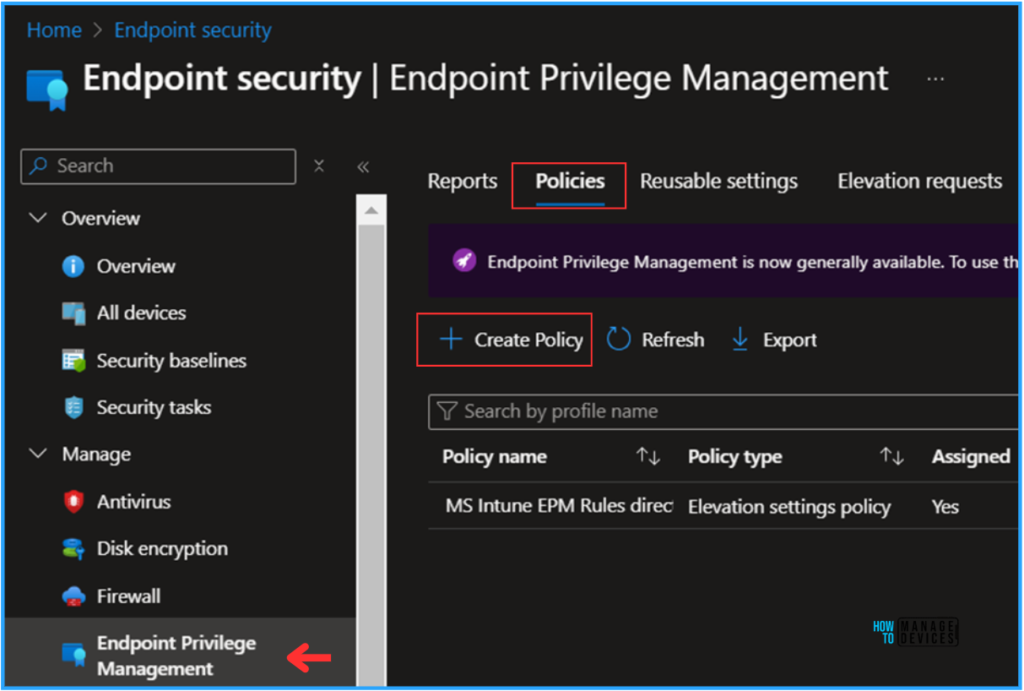
- Navigate to Endpoint Security> Endpoint Privilege Management > Choose Policies.
- Click on +Create policy
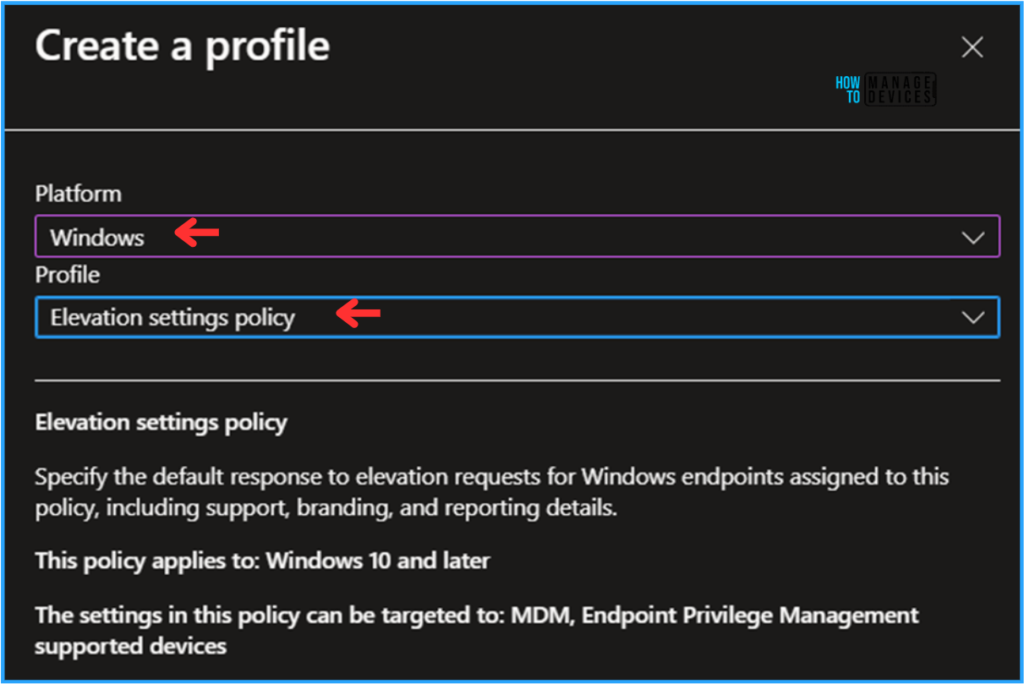
Under the Create a profile window, choose Platform as “Windows“, and the Profile is “Elevation settings policy” One more Profile is available in EPM; the “Elevation rules policy” configures specific predefined rules to support our Elevation settings policy. Here, we are only talking about the Elevation settings policy.
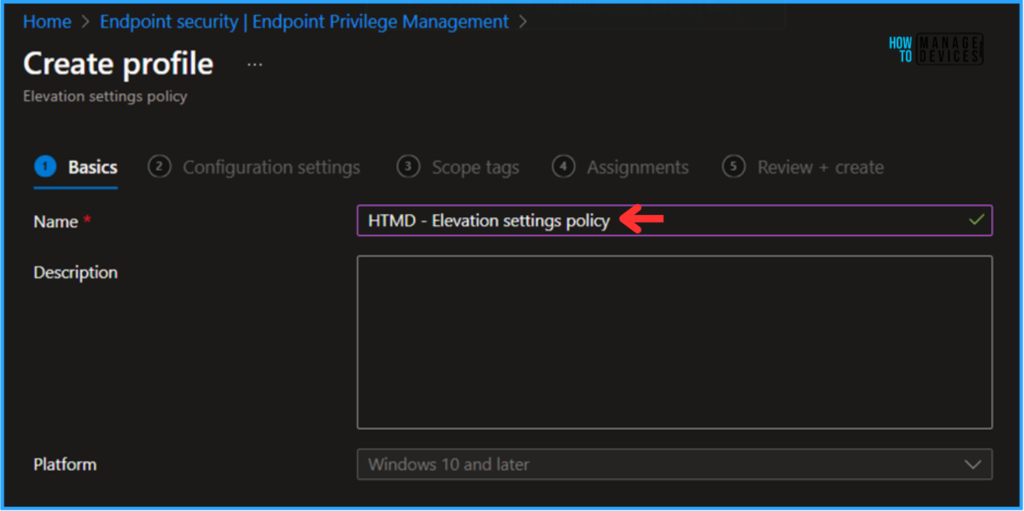
On the Basics details pane, I am giving our policy name, “HTMD – Elevation settings policy.” If needed, provide a brief policy description and click Next.
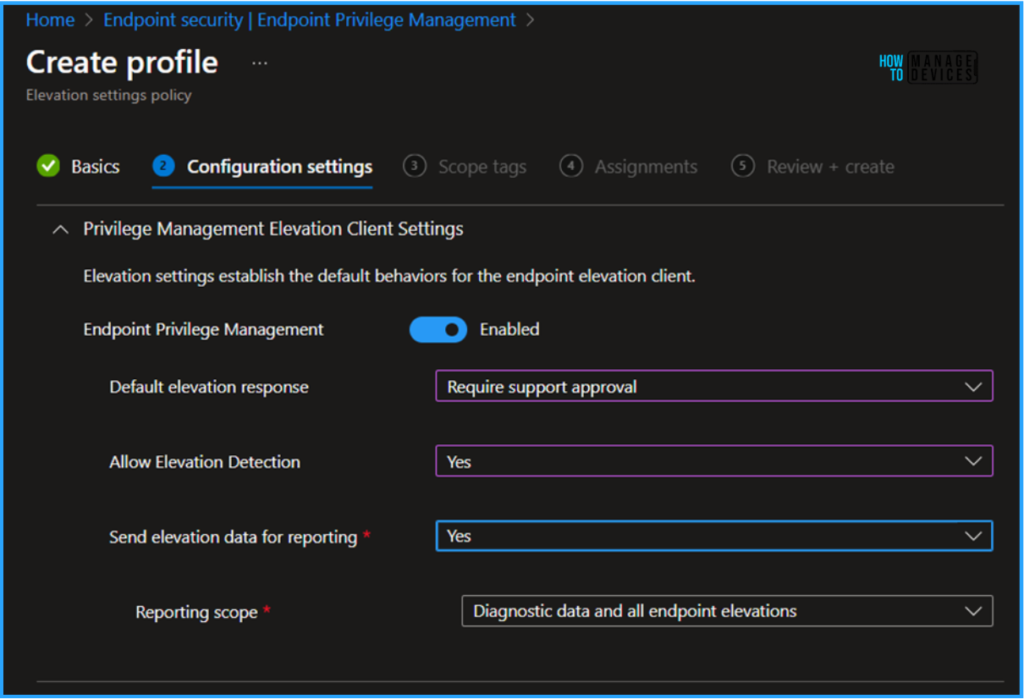
In the Configuration settings pane, we can configure the settings based on the Support Approved EPM concept. A few options are mandatory.
- Endpoint Privilege Management – Enabled
- Default elevation response – Require support approval
- Allow Elevation Detection – Yes
- Send elevation data for reporting – Yes
- Reporting scope – Diagnostic data and all endpoint elevations
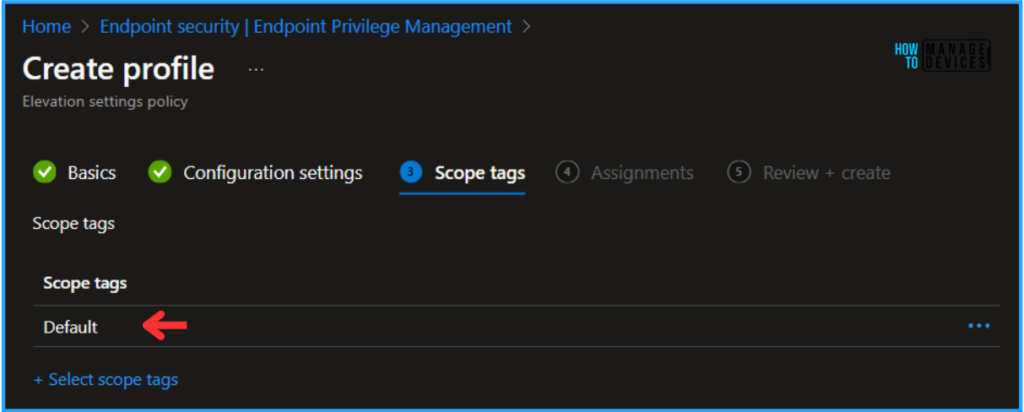
On the next page, leave the scope tags default; if you have any other custom scope tag available, you can select one based on your requirements.
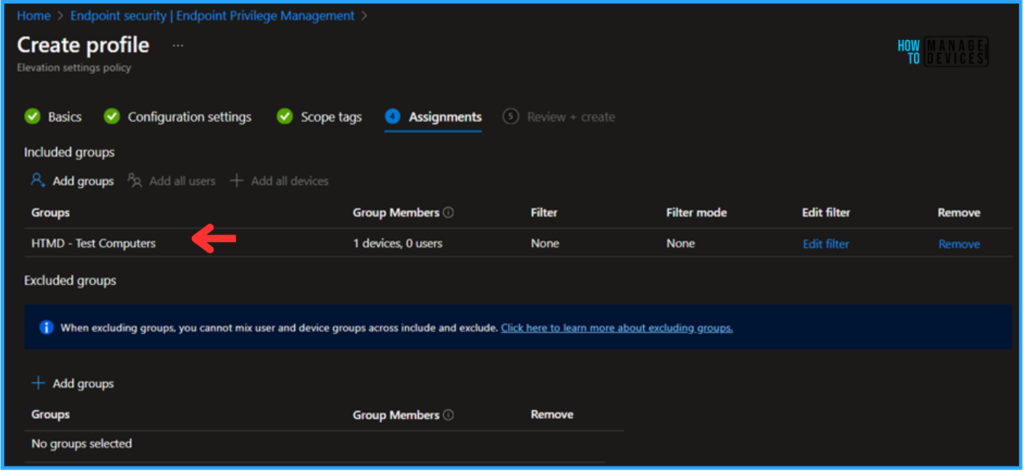
Click Next and assign our Elevation settings policy to a Device Group or a User Group. Both support it. In this example, I am deploying it to a device group, HTMD – Test Computers. To do so, click Add Groups under the Included Groups section and select the required device group.
- Quick Fix to your Windows OS Issues with Detection and Remediation Scripts with Intune
- Insights of Microsoft Intune Suite Roadmap from Microsoft Secure Event
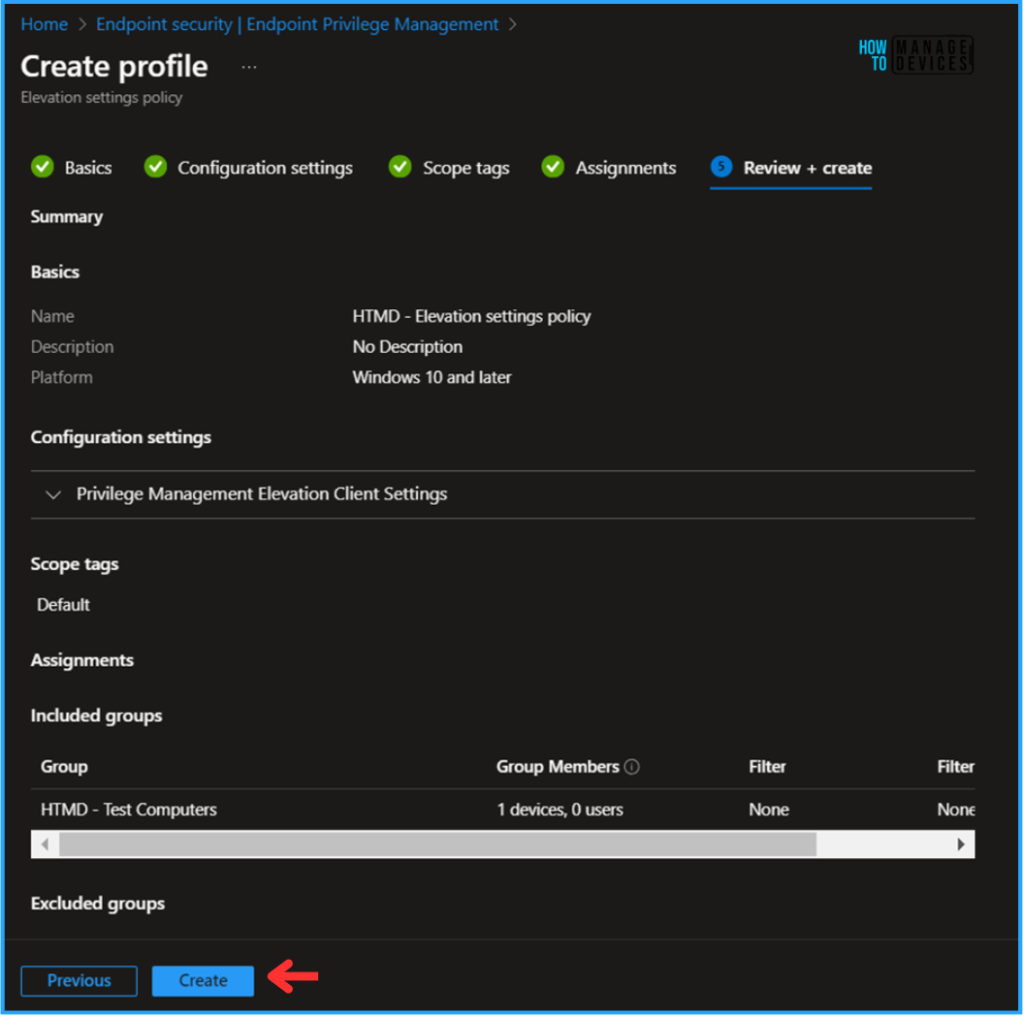
On the Review + Create pane, carefully review all the settings you’ve defined for the Support Approved EPM Elevation. Select Create to implement the changes once you’ve confirmed everything is correct.
Monitor the Support Approved EPM Elevation Policy Deployment in Intune
Our newly created EPM policy has been deployed to the Microsoft Entra ID group (HTMD – Test Computers). The policy will take effect as soon as possible once the device is synced.
To monitor the policy deployment status from the Intune Portal, follow the steps below.
- Navigate to Endpoint Security> Under Manage > Endpoint Privilege Management > Policies.
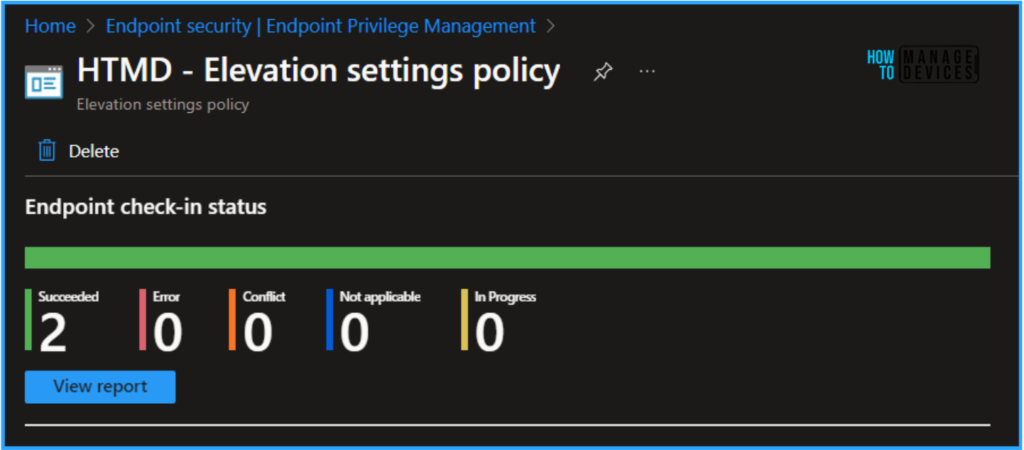
Search for the HTMD – Elevation settings policy, Support Approved EPM Elevation. Click on that to see our policy’s Endpoint check-in status. Selecting View Report allows you to drill through the deployment, device name, logged user, check-in status, etc.
End User Experience – Support Approved EPM Elevation Policy
Now, we must check whether the Support Approved EPM Elevation Policy is working fine or not. Log in to one of the policy-targeted devices. We need to verify a few things here. The first one is the Microsoft EPM Agent Service. Even if we have targeted an EPM policy, this service will be created automatically. The second one is the Log location (C:\Program Files\Microsoft EPM Agent\Logs)
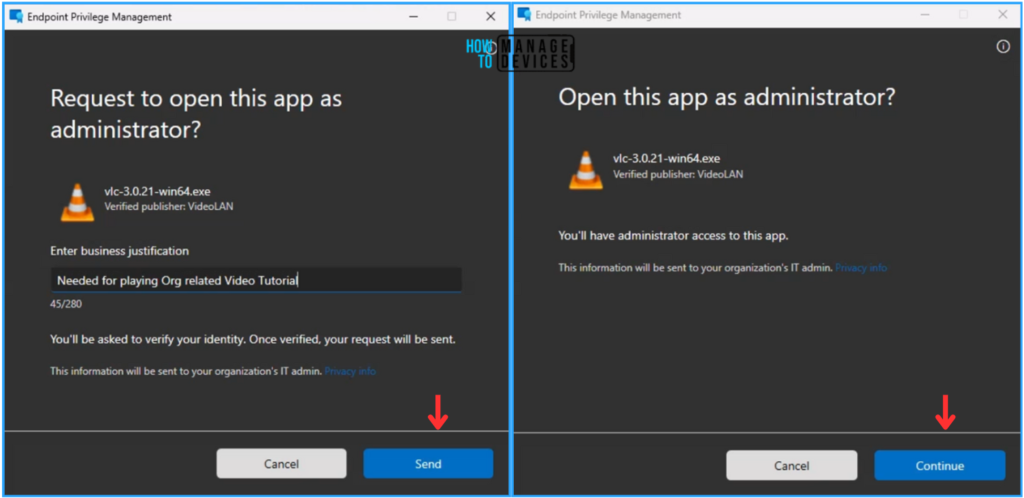
In this example, I just downloaded and kept vlc-3.0.21-win64.exe and tried to install the VLC Player for a non-admin user. Follow the below steps.
Since the user doesn’t have Admin Rights to install the same, Right-click on the binary and select “Run with elevated access.“
- Enter Business justification and Click on Send
- The request will be reflected in the Intune Portal Elevation requests section. When the Intune Admin Approves the request, the respective user can install the requested software with Elevated access.
Join the LinkedIn Page and Telegram group to get the latest step-by-step guides and news updates. Join our Meetup Page to participate in User group meetings. Also, Join the WhatsApp Community to get the latest news on Microsoft Technologies. We are there on Reddit as well.
Author
Vaishnav K has over 11 years of experience in SCCM, Device Management, and Automation Solutions. He writes and imparts knowledge about Microsoft Intune, Azure, PowerShell scripting, and automation. Check out his profile on LinkedIn.
