Hey there, Let’s discuss about the deployment process of costed network behavior background priority using Intune settings catalog. This policy settings defines the default behavior that the Background Intelligent Transfer Service (BITS) uses for background transfers when the system is connected to a costed network.
Background Intelligent Transfer Service (BITS) is a component of Microsoft Windows that facilitates asynchronous, prioritized, and throttled transfer of files between machines using idle network bandwidth. It is used by various applications such as Windows Update, Windows Defender, and Microsoft Office to download updates and files in the background.
If we enable this policy setting, we can define a default download policy for each BITS job priority. This setting doesn’t override a download policy explicitly configured by the application that created the BITS job, but it does apply to jobs that are created by specifying only a priority.
Our blog post will help us to gain knowledge of Costed Network Behavior Background Priority using Intune Setting Catalog. Now, we will see step-by-step guidance on how to deploy this policy using Intune.
Table of Contents
What is a Costed Network?

A costed network is a type of network where every connection (also called an edge or link) between points is given a specific cost or weight. These costs usually represent something measurable, like distance, time, bandwidth, or expense, based on how the network is being used.
Costed Network Behavior Background Priority using Intune – Windows CSP Details
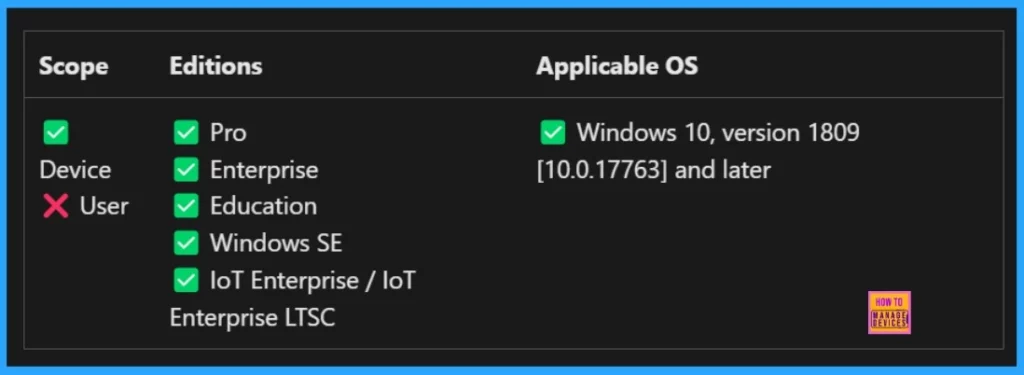
Understanding the details of Configuration Service Providers (CSPs) is important for getting policies deployed successfully. CSPs make sure our policies work by explaining which OS versions are supported. We can find the option to configure (enable or disable) the home button policy under the Browser settings category.
| Property Name | Property Value |
|---|---|
| Format | int |
| Access Type | Add, Delete, Get, Replace |
| Default Value |
Allowed Values
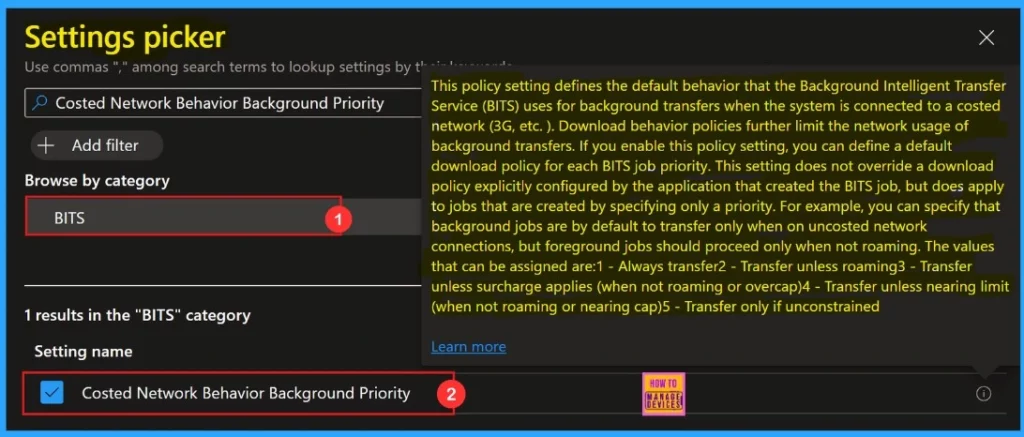
we can specify that background jobs are by default to transfer only when on uncosted network connections, but foreground jobs should proceed only when not roaming. The values that can be assigned are:
| Value | Description |
|---|---|
| 1 (Default) | Always transfer |
| 2 | Transfer unless roaming |
| 3 | Transfer unless surcharge applies (when not roaming or over cap) |
| 4 | Transfer unless nearing limit (when not roaming or nearing cap) |
| 5 | Transfer only if unconstrained |
./Device/Vendor/MSFT/Policy/Config/BITS/CostedNetworkBehaviorBackgroundPriority
- Easy Way to Set Bandwidth Throttling End Time using Setting Catalog Via Intune
- Enable or Disable App Install Control Policy using Intune Setting Catalog
- Best way to Activate Internet Printing through Setting Catalog Via Intune
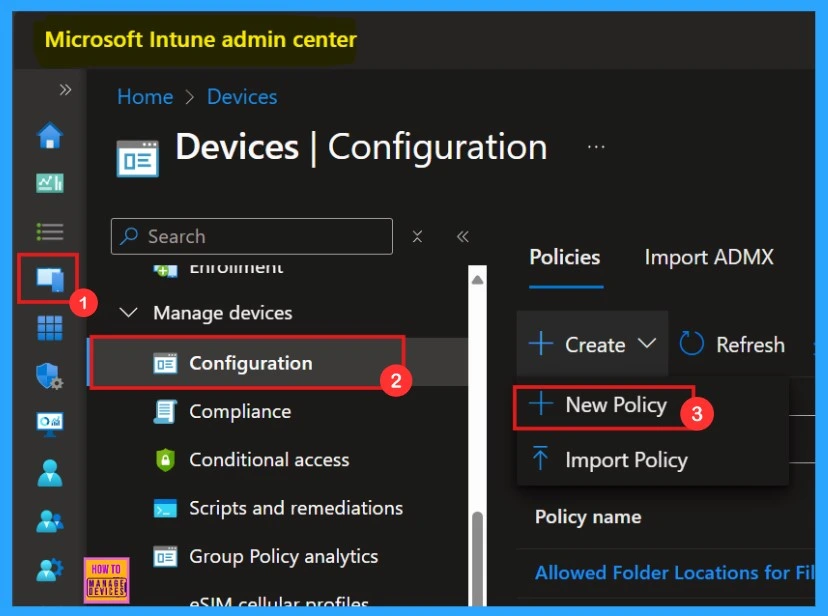
First we need to login to Microsoft Intune admin center with our credentials for deploying the Intune policy. The first step is to create a profile. We need to open the Device section, then click Configurations then click create a new policy.
- Devices > Configurations > Create Policy > New Policy
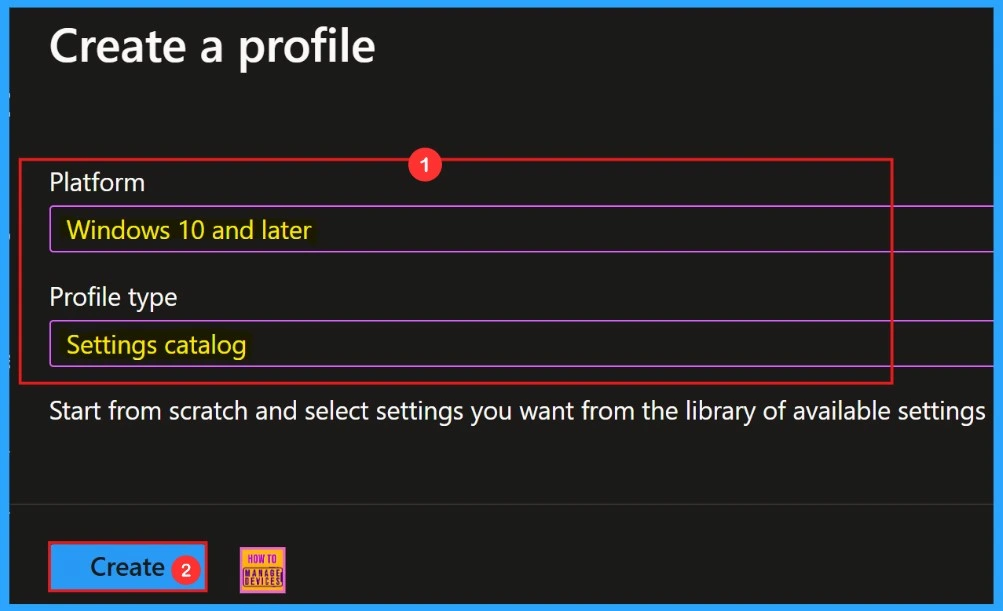
In this section we need to add the platform name as Windows 10 and later. Then we must select the profile type as “Settings Catalog” from the list. Finally, click on the “Create” option.
- Click Create button after adding the Name and Description.
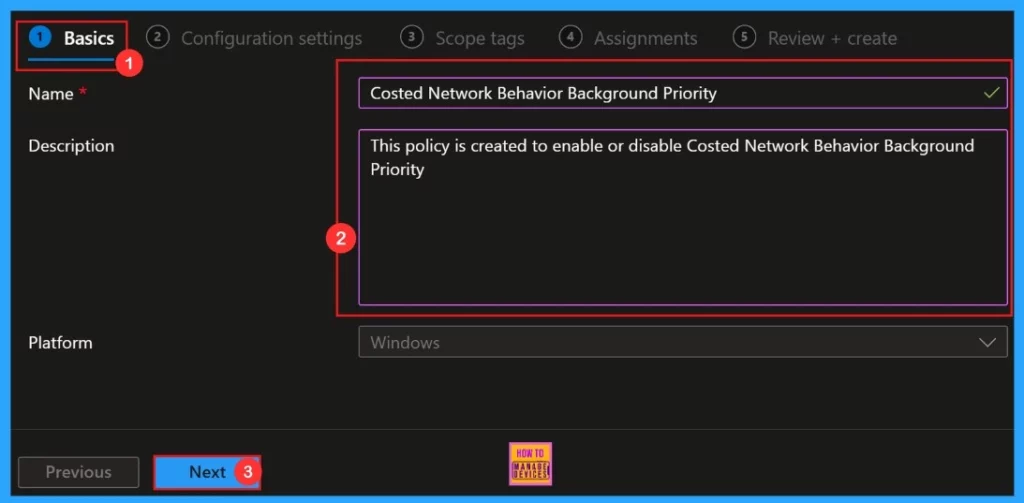
Basics
The first section of the profile creation process is Basic. In this section, we can provide the appropriate Name and Description of policy we want to deploy. This is an important section, and users must add it to continue creating Profiles.
Configuration Settings
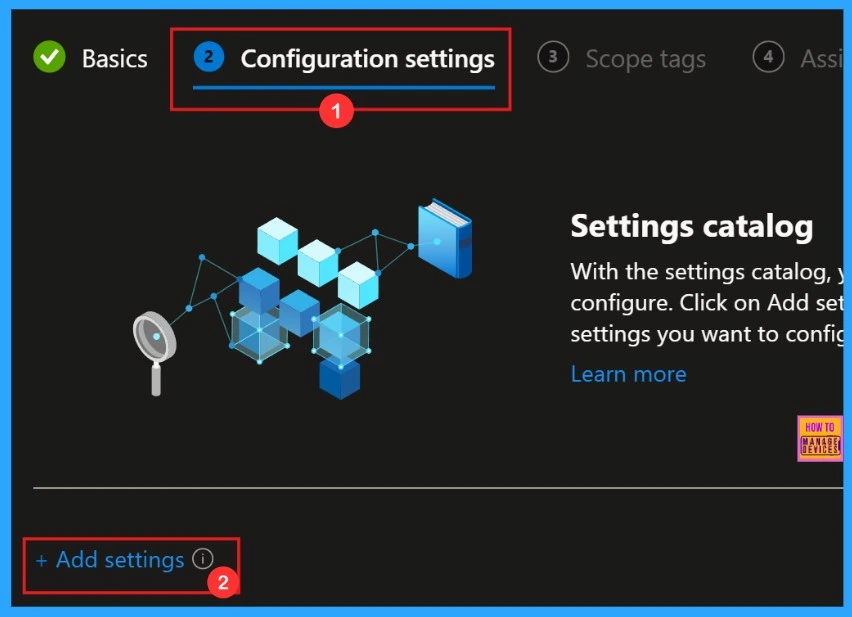
Next, head over to the Configuration settings section to hit +Add settings and keep creating the profile. This part lets us to pick the settings we want to set up. We need to finish this section.
Costed Network Behavior Background Priority
The Settings Picker window allowing us to search for our desired policy. Here we gave the keyword as our policy name. Click the Search button to proceed. Afterwards, we can browse by category and select “BITS.” In that category, we can find “Costed Network Behavior Background Priority.”
Always Transfer in Costed Network Behavior Background Priority
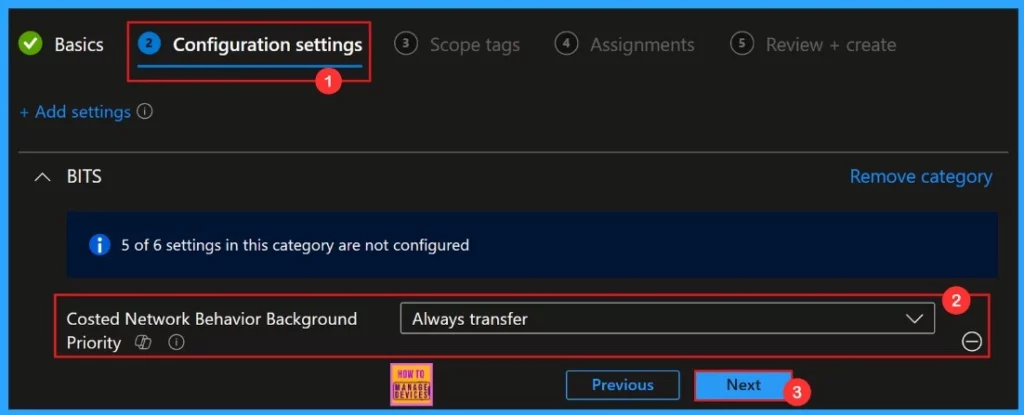
The window displayed below presents the Configuration Settings window. In this section, we can observe a drop-down list and find some options. Here, we select Always transfer by default. Then, we need to click Next to proceed.
Other Settings Also Available
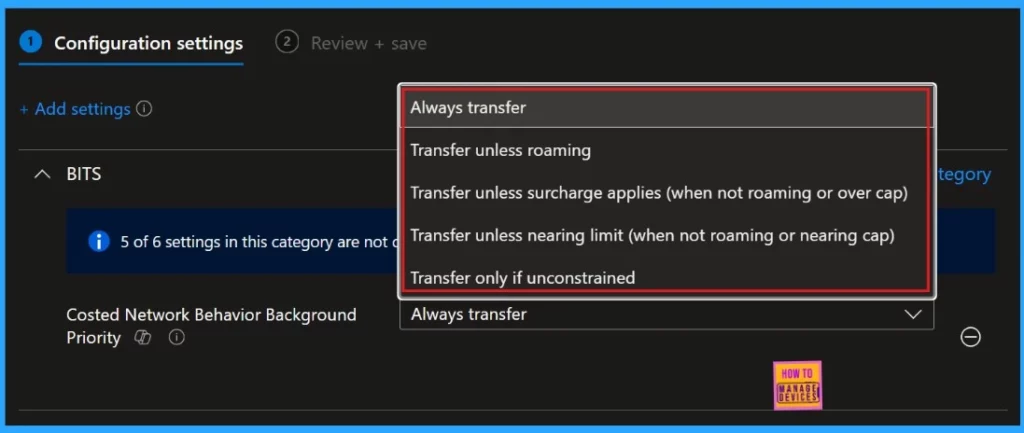
In the configuration settings, we can observe a few more settings available in the drop-down list. We can select whichever setting we want to apply to the policy. The available settings are given below:
- Always transfer (default)
- Transfer unless roaming
- Transfer unless surcharge applies (when not roaming or over cap)
- Transfer unless nearing limit (when not roaming or nearing cap)
- Transfer only if unconstrained
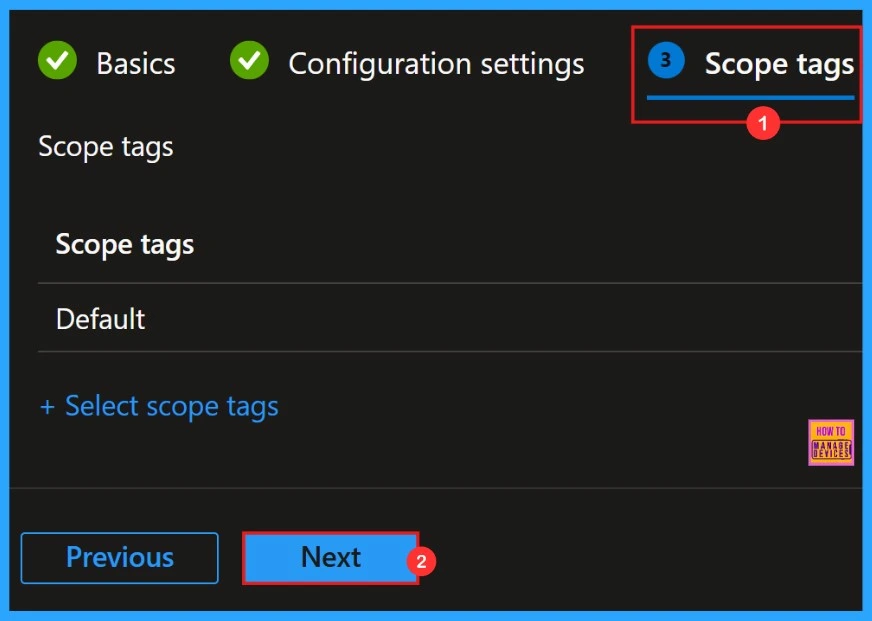
Scope Tags
An optional setting!! yes, scope tag is not mandatory to deploy our desired policy. We can choose to skip this section, or we can add Scope Tags to your profile if you wish.
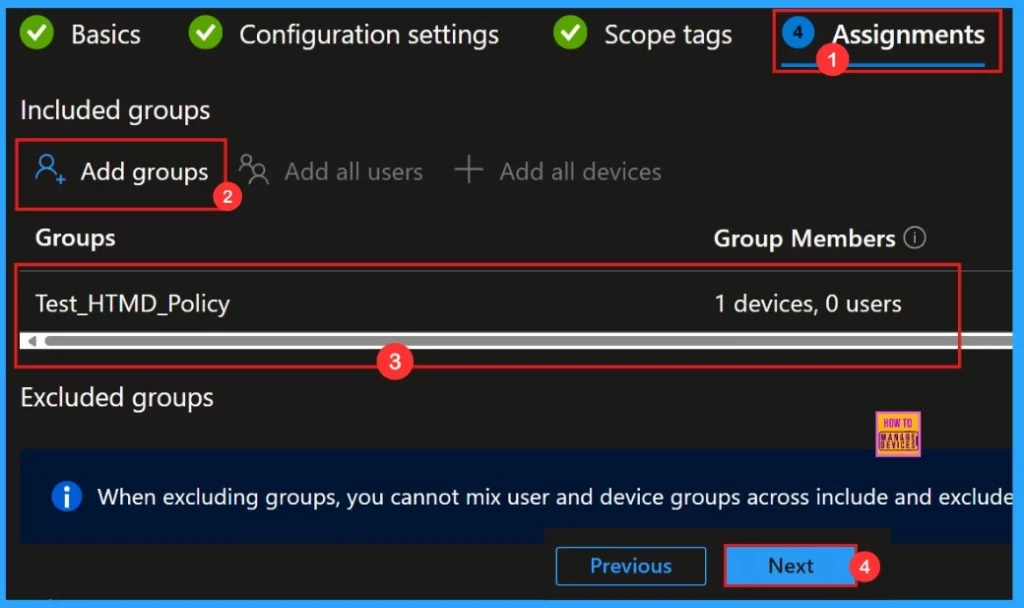
Assignments
Next is the Assignments section. In this section, we can Add groups to our policy. We can add groups to the included groups. Then, a new window will appear, and we can select a group from here. Then click on the Select button and click on the Next button.
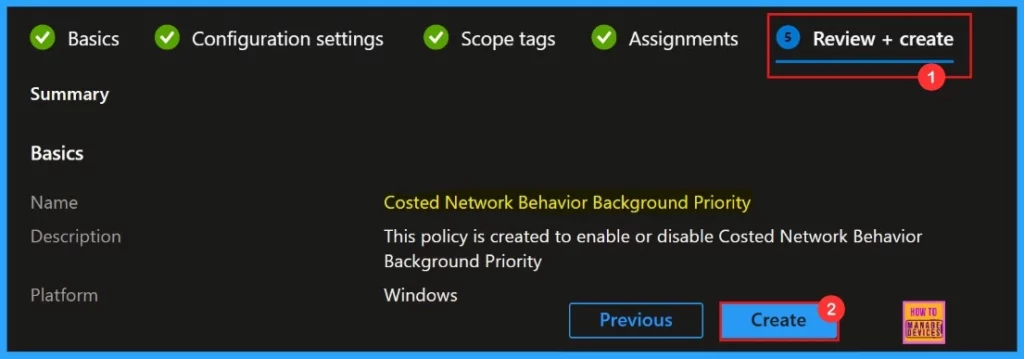
Review + Create
“Review + Create” is the last step in the policy creation process. It gives us a summary of the policy we are deploying, including the policy name, descriptions, platform, and other details.
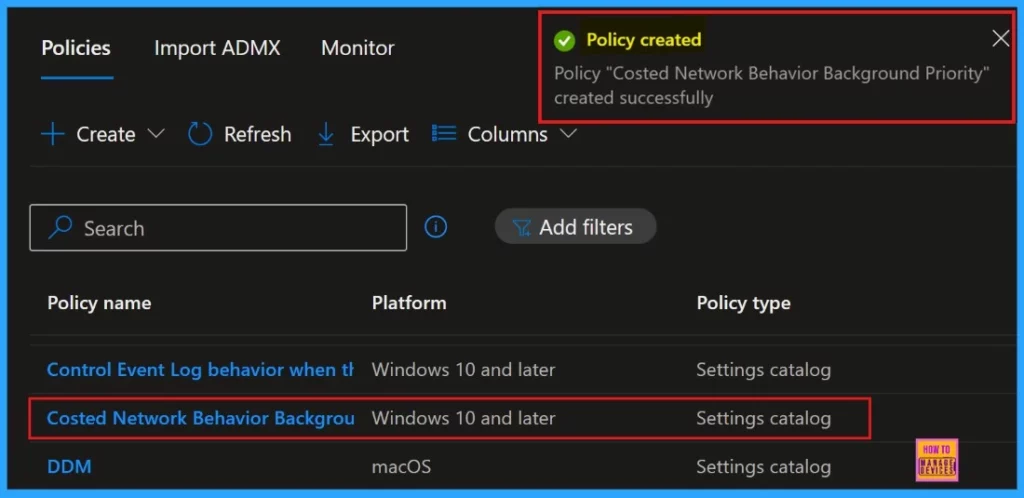
After we hit the Create button, we’ll get a notification on the Intune Portal that the Policy “Cost network behavior background priority” has been “created successfully“. We can easily check out the created policy in the Intune Portal.
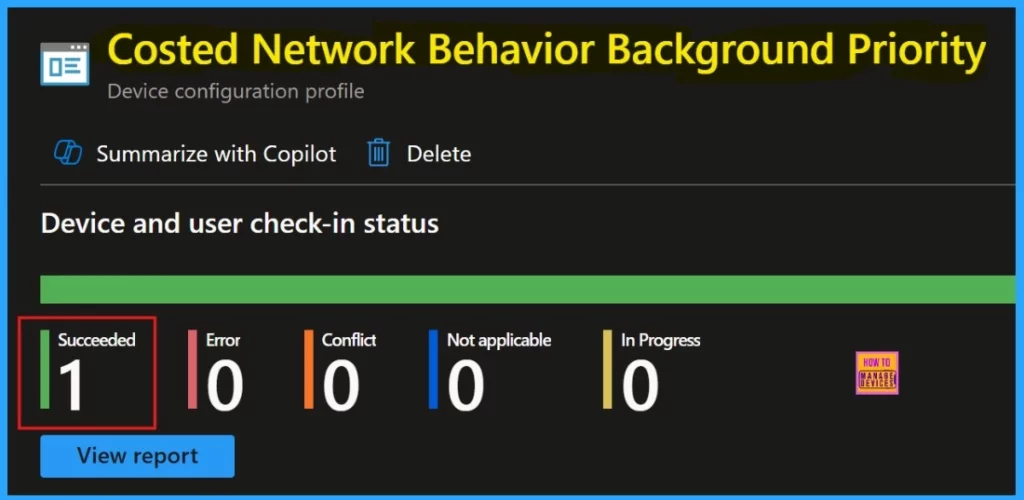
Device and User Check-in Status
When we click on the policy, we can see if it was successful. we create a policy, verifying whether it has been successfully implemented is essential. To see the monitoring status, go to the device settings and look for the policy we created.
Client-side Verification
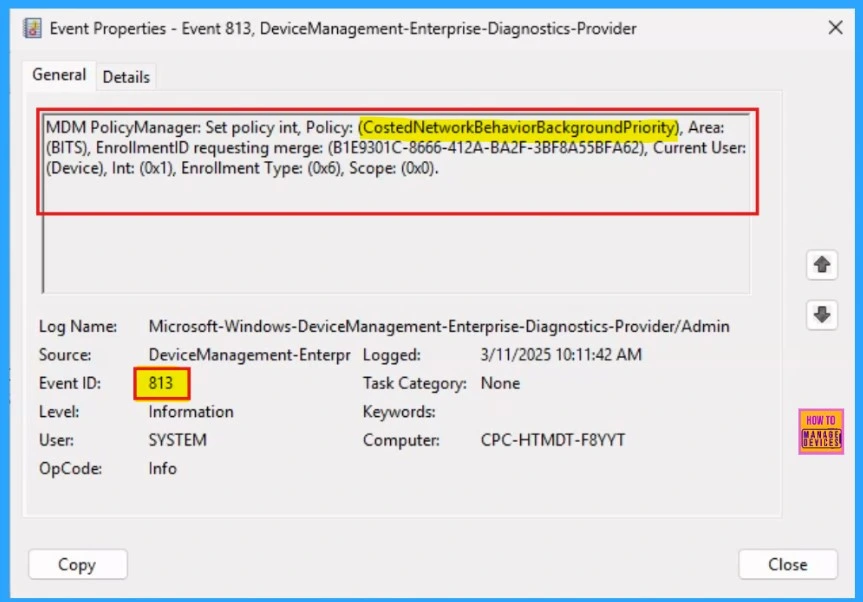
The Intune event ID 813 assure that a string policy is applied on the Windows 11 or 10 devices. You can also see the exact value of the policy being applied on those devices.
We can check the Event log path to confirm this – Applications and Services Logs – Microsoft – Windows – Devicemanagement-Enterprise-Diagnostics-Provider – Admin.
Need Further Assistance or Have Technical Questions?
Join the LinkedIn Page and Telegram group to get the latest step-by-step guides and news updates. Join our Meetup Page to participate in User group meetings. Also, Join the WhatsApp Community to get the latest news on Microsoft Technologies. We are there on Reddit as well.
Author
Anoop C Nair has been Microsoft MVP for 10 consecutive years from 2015 onwards. He is a Workplace Solution Architect with more than 22+ years of experience in Workplace technologies. He is a Blogger, Speaker, and Local User Group Community leader. His primary focus is on Device Management technologies like SCCM and Intune. He writes about technologies like Intune, SCCM, Windows, Cloud PC, Windows, Entra, Microsoft Security, Career, etc.
