Let’s learn the Best Ways to Create Desktop Shortcuts in Windows 11. Making shortcuts for desktops for frequent use is one of the essential needs. In the new Windows 11 UI, things get tricky for basic functions. Creating desktop shortcuts has not changed, as it upgraded to Windows 11.
There are very fast and easiest ways to create shortcuts on desktops. You can use the drag-and-drop from the start menu to create a desktop shortcut, File Explorer, the inbuilt create shortcut wizard or the registry editor.
The desktop shortcuts allow you to access any important files, applications, drives, and websites quickly and very easily. If you are using any of these things regularly, it is suggested to create shortcuts as the best way to access those with no time.
Shortcuts are the links that point to a specific location to access quickly, saving you time. There are various ways to create desktop shortcuts in Windows 11. In this post, you can learn the different methods to create desktop shortcuts.
- New Azure Virtual Desktop App in the Microsoft Store Winget and Intune
- Disable or Enable Keyboard Shortcut to Temporarily Unmute in Microsoft Teams
How to Create Desktop Shortcuts for Files, Folders, and Apps in Windows 11
For any files, folders, and Apps in your device, you can create desktop shortcuts for them to access easily. Various ways are listed below to create desktop shortcuts for files, folders, and apps.
- Method 1: Send to Option
- Method 2: Shortcut Wizard
- Method 3: Drag & Drop
- Method 4: Context Menu
- Method 5: Start Menu
Method 1: Send to Option
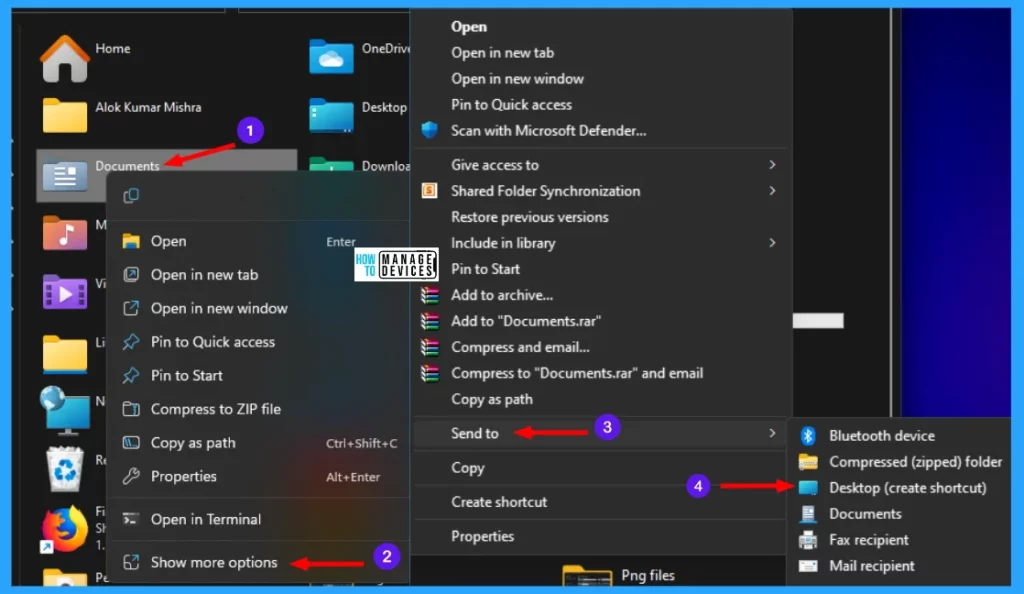
To do this, select the file, folder, or app to create a desktop shortcut. Right-click on the selected file, folder, or app you want to create a shortcut. From the menu click on Show more options, now select Send to, and from the list of options, click on Desktop (create shortcut), and it’s done as illustrated below.
NOTE! This is only creating shortcuts for the internal files and folders other than desktop files and folders.
Method 2: Shortcut Wizard
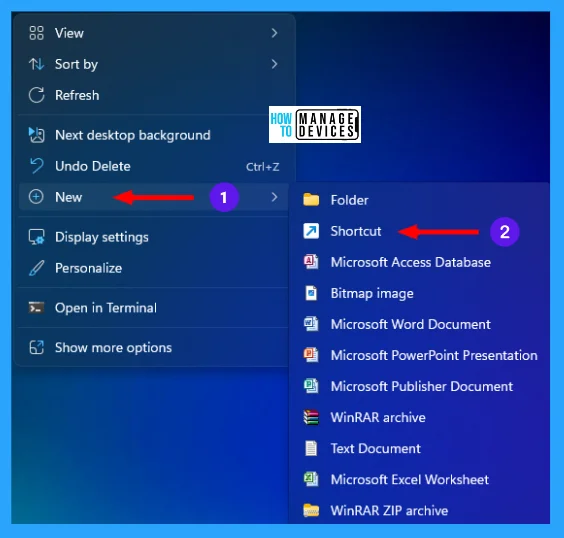
The shortcut wizard is the in-built feature of Windows 11. You can use it to create desktop shortcuts. To do so, right-click on the desktop. Then hover over New and choose Shortcut.
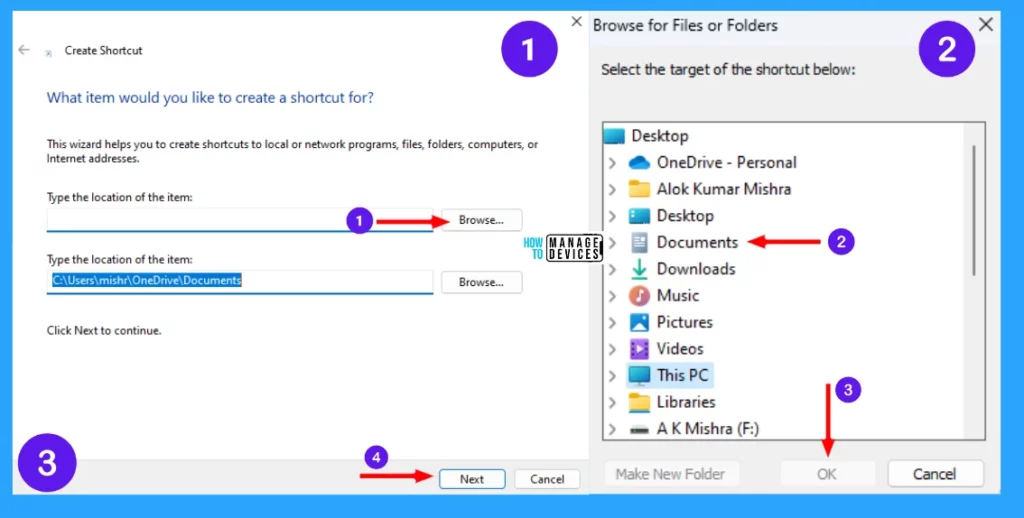
The Create Shortcut window opens, and it asks, “What item would you like to create a shortcut for?”. This wizard helps to create shortcuts to local or network programs, files, folders, computers, or Internet addresses. Under Type the location of the item, you can insert the location, or you can Browse the file you want to and click Next to continue.
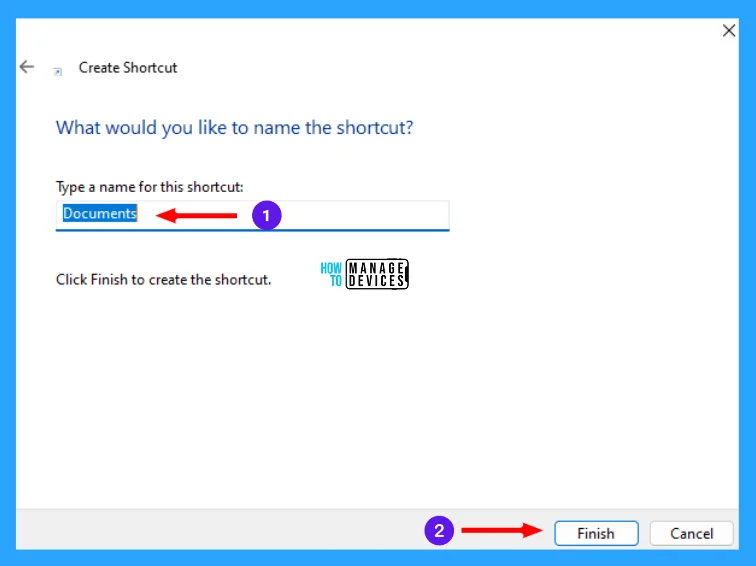
After clicking next in the second window, it asks, “What would you like to name the shortcut?“. In the blank box under Type a name for this shortcut, provide a name and click Finish to create the shortcut.
Method 3: Drag & Drop
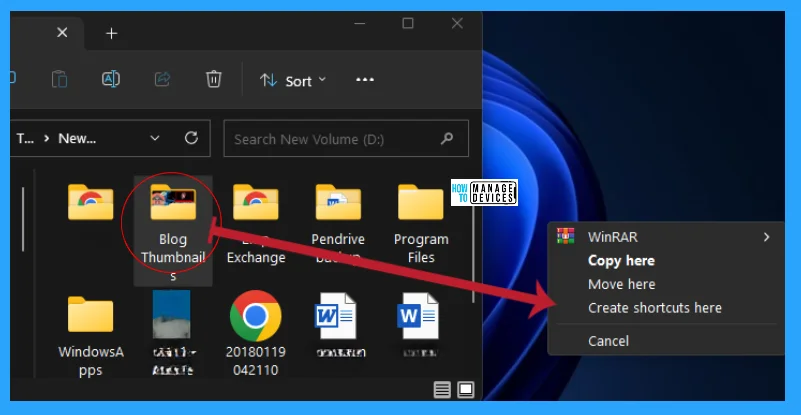
To perform the drag & drop option, open File Explorer, then find the targeted file for which you want to create shortcut. Right-click and drag that file or folder to desktop and drop it. Then one option menu open from them Click on Create shortcuts here, and your shortcut created on the desktop.
- WinRAR
- Copy here
- Move here
- Create Shortcuts here
- Cancel
Method 4: Context Menu
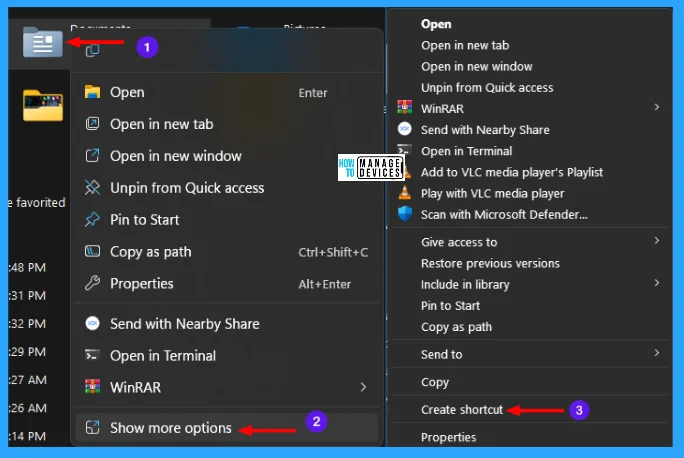
By using the context menu you also can create desktop shortcuts. To do so, open File Explorer, then browse the file, folder, or app you want to create shortcut. Right-click on the chosen file. From the menu click on Show more options, now select & click on create shortcut as illustrated below.
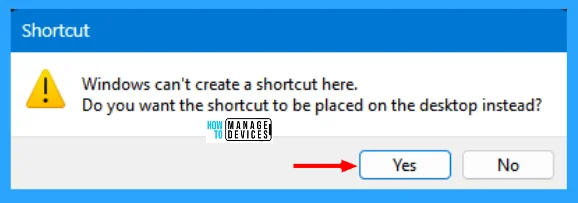
Now a shortcut confirmation window opens. Windows can not create a shortcut here as the folder is in the same location. It asks, “Do you want the shortcut to be placed on the desktop instead?”. Click Yes to continue, and the shortcut is created.
Method 5: Start Menu
Click on Windows Key to open the Start Menu, here you can find various applications and recently accessed system information present. Now click on All Apps in the top right corner of the Start Menu.
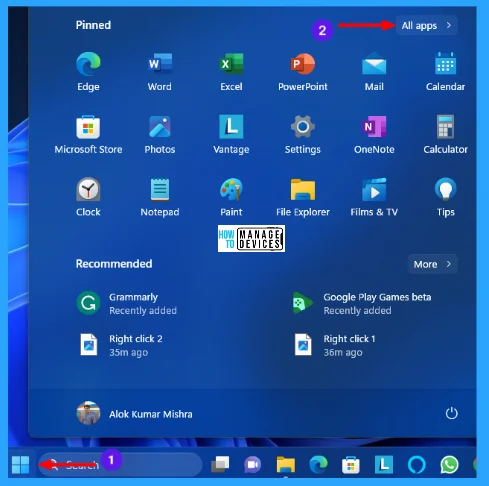
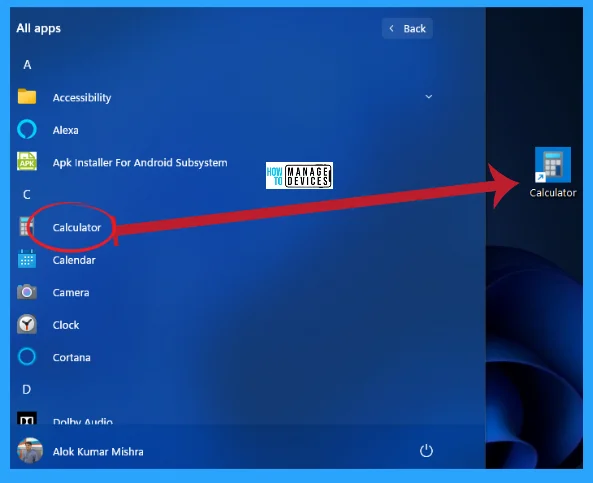
When All apps open, the list of applications appears to select one of them. Click and drag the application and drop it on the desktop, the shortcut is created as illustrated below.
How to Create Desktop Shortcuts for WebSites in Windows 11
Like the above, there are options to create desktop shortcuts for websites. You can create desktop shortcuts for websites, and the methods are listed below.
- Method 1: Drag & Drop
- Method 2: Shortcut Wizard
Method 1: Drag & Drop
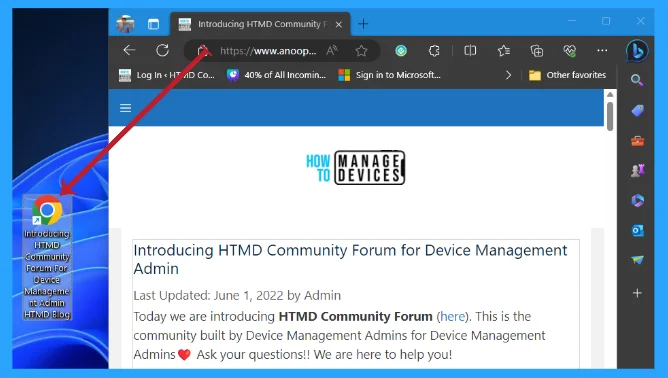
Drag and drop is also applied to the websites. Open any website, click on the URL, drag it to the desktop, and drop it. Your website shortcut is created on desktop.
Method 2: Shortcut Wizard
Open the shortcut wizard as shown in Fig. 3 above. Then copy the URL you want to create shortcut. At the item location place paste the URL copied earlier. And click on next to continue, as illustrated in the image below.
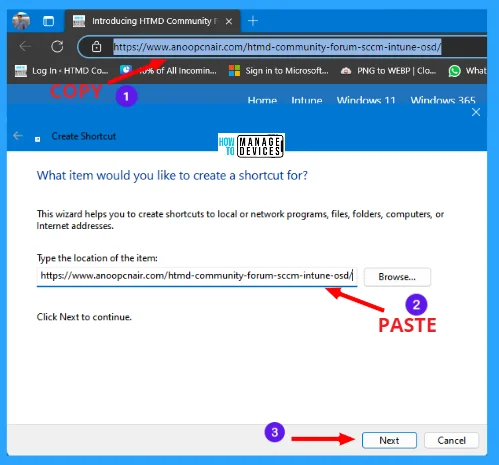
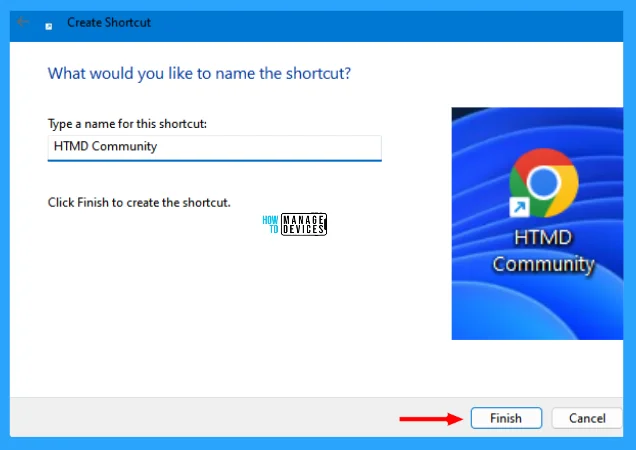
Under the type a name for this short, provide a name as per your shortcut. Here I named HTMD Community and clicked on Finish to create the shortcut.
I hope the information on the Best Ways to Create Desktop Shortcuts in Windows 11 is helpful. Please follow us on HTMD Community and visit our website HTMD Forum, if you like our content. Suggest improvements, if any, and we love to know which topic you want us to explore next.
Author
Alok is a Master of Computer Applications (MCA) graduate. He loves writing on Windows 11 and related technologies. He likes to share his knowledge, quick tips, and tricks with Windows 11 or Windows 10 with the community.
