Hello, everyone. In today’s post, let’s learn how to create and Protect Data using Data Loss Protection Policies in the Compliance Portal. In our previous blogs, we discussed how to create sensitivity labels and policies to enable users to classify and encrypt corporate data. In this blog, we will discuss a different approach to protecting data.
In recent days, corporate data has been all around in the cloud and remote locations; due to this, employees have more ways to access the data from anywhere. Data Loss Protection policies identify confidential data, track its usage, and prevent unauthorized users from accessing it. So, it is always better to have DLP in place to protect the data.
Data loss Protection(DLP) is one of the offerings of Microsoft Purview and will be protected wherever the sensitive data is travelled and present. DLP policies monitor the sensitive data on how a user uses it at rest, in transit, and on use and provide protective actions.
As a best practice, we must identify sensitive and vulnerable data that pose more risk. After identifying the data, we need to establish a DLP framework, educate users, monitor data and fine-tune policies as per the outcome of the policies created.
- Create Sensitivity Labels in Microsoft 365 to Protect Corporate Data
- Publish Sensitivity Labels in Microsoft 365 to Protect Corporate Data
Prerequisites
We need the required access to configure DLP policies in the Microsoft Purview portal. We can assign roles from Microsoft Entra or Microsoft Purview built-in roles. Let’s see what roles are necessary for a member to create DLP policies.
- Compliance Administrator
- Compliance Data administrator
- Information Protection
- Information Protection Admin
- Security Administrator
Create Data using Data Loss Protection Policies
Until now, we have discussed DLP policies and what they can do. Let’s start creating a DLP policy and see how it works in real time. Before creating a DLP policy, we need to make sure of the business requirements and intent so that we can choose a policy template and create conditions to protect the data. So, let’s create a DLP policy to save Credit Card information.
- Login to Microsoft Purview portal
- Click on Data Loss Protection
- Click on Overview
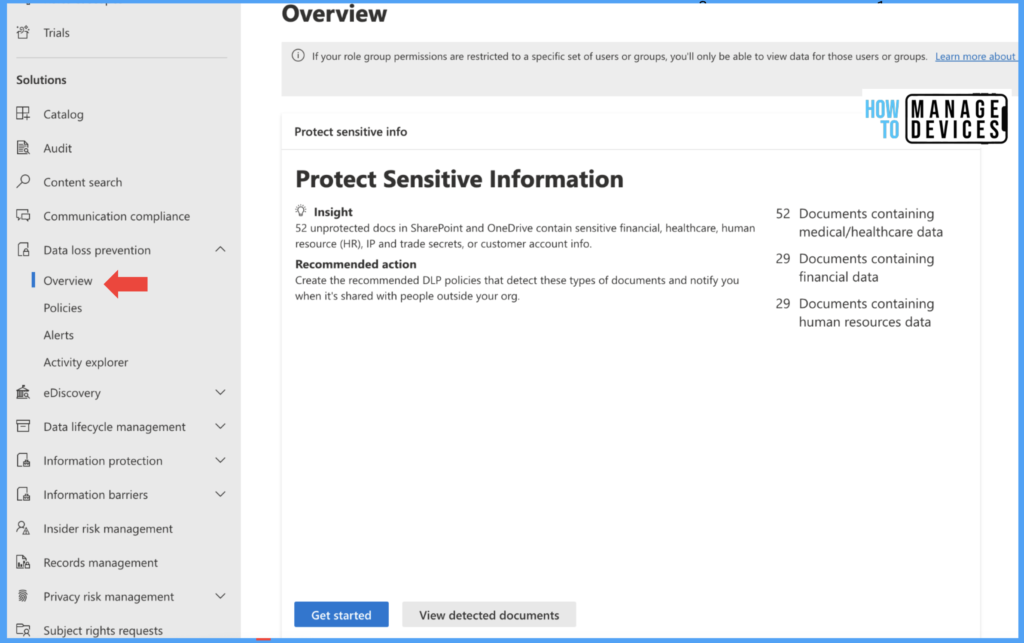
This is the page where admins can have an overview of all the documents that are protected and required to be protected. It also provides information on DLP. Now click on policies on the left side of the menu to view the created policies.

By default, a default policy will be created for our tenant. Now click on Create Policy to create a new policy. Now, for our understanding, I will use a template to protect credit card information in our organization.
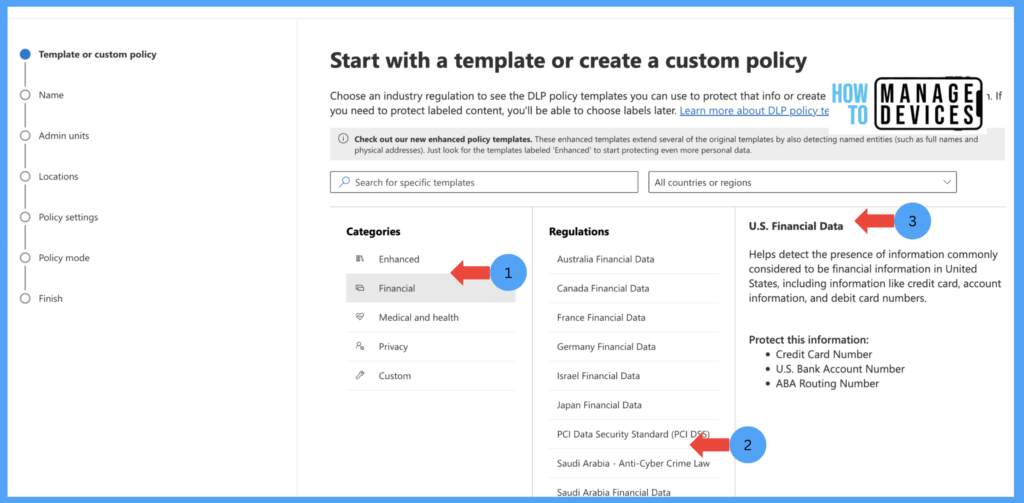
We can utilize ready-to-use templates for various sectors like Financial, Medical and Health Information, Privacy and Enhanced Legal protection templates. We can also create a custom template as per our requirements. I’m choosing a Financial template and selecting U.S. Financial Data to protect Credit Card information.
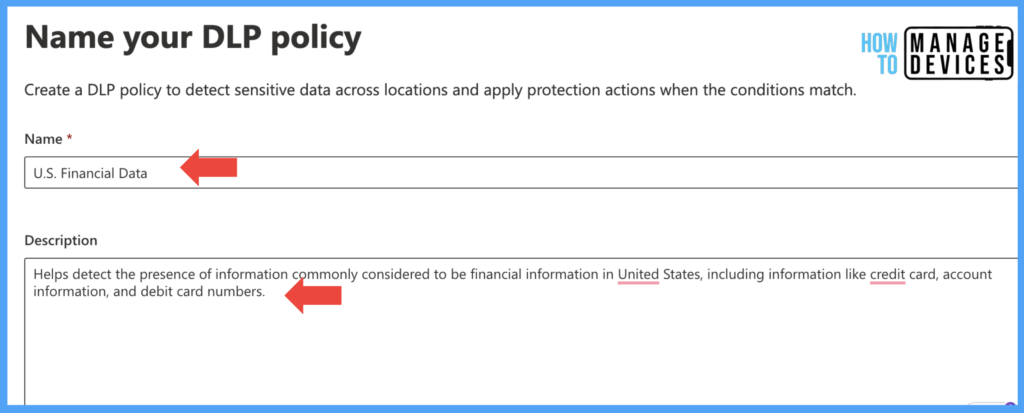
After selecting the template, Next, to provide the name of our policy. Let’s enter a user-readable name to the policy under the name and provide a description. By default, the name and description are auto-populated. We can modify them as per our requirements. (The above screenshot has Microsoft’s default name and description).
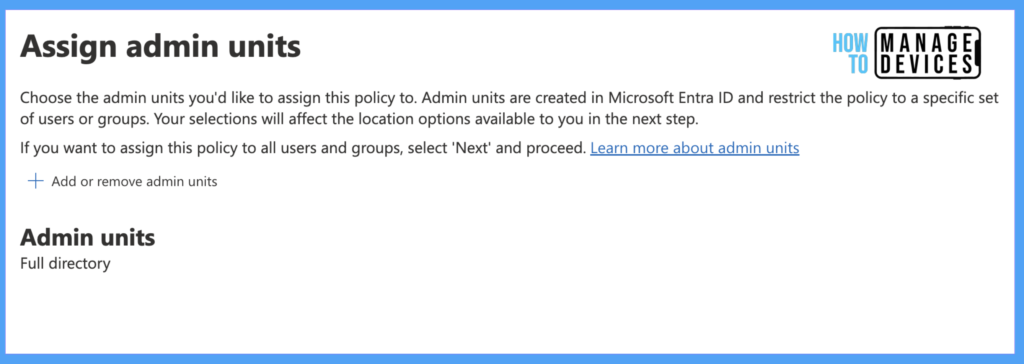
After providing the name and description, click Next to Admin Unit page. Here, we can assign the admin units that are created in Microsoft Entra ID. If we define admin units, this will restrict a specific set of users or groups. We can skip this step if you do not wish to define the admin units. I don’t have any admin units created, so I’m moving to the next step.
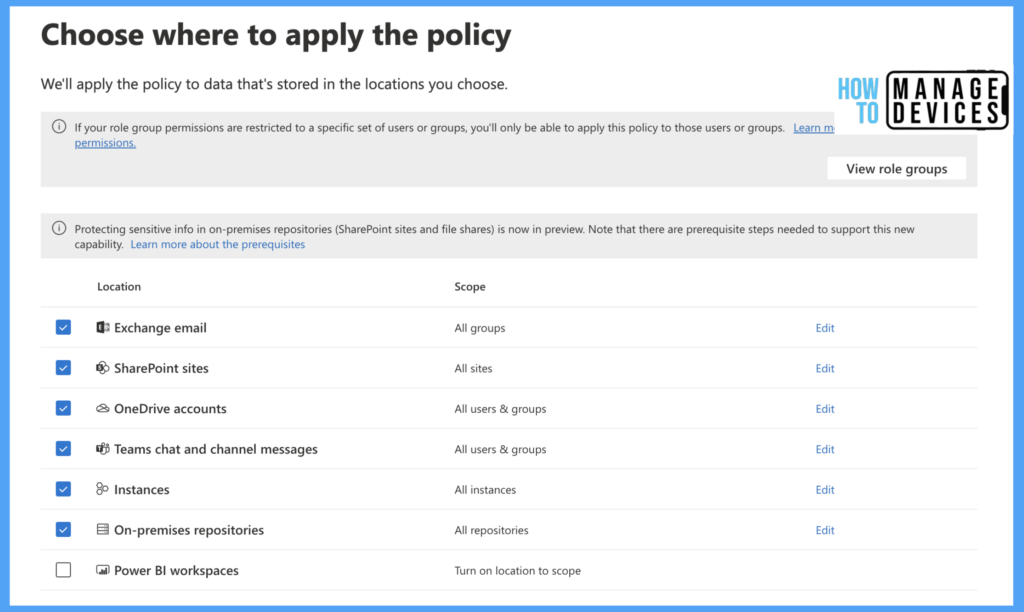
In the next step, we need to choose the locations in which we need to protect the data. We have multiple locations like Exchange Online, SharePoint online sites, etc. We can edit the scope, add selected groups, and exclude unwanted groups to which the policy should not be applied. After selecting the locations and required groups, click on Next.

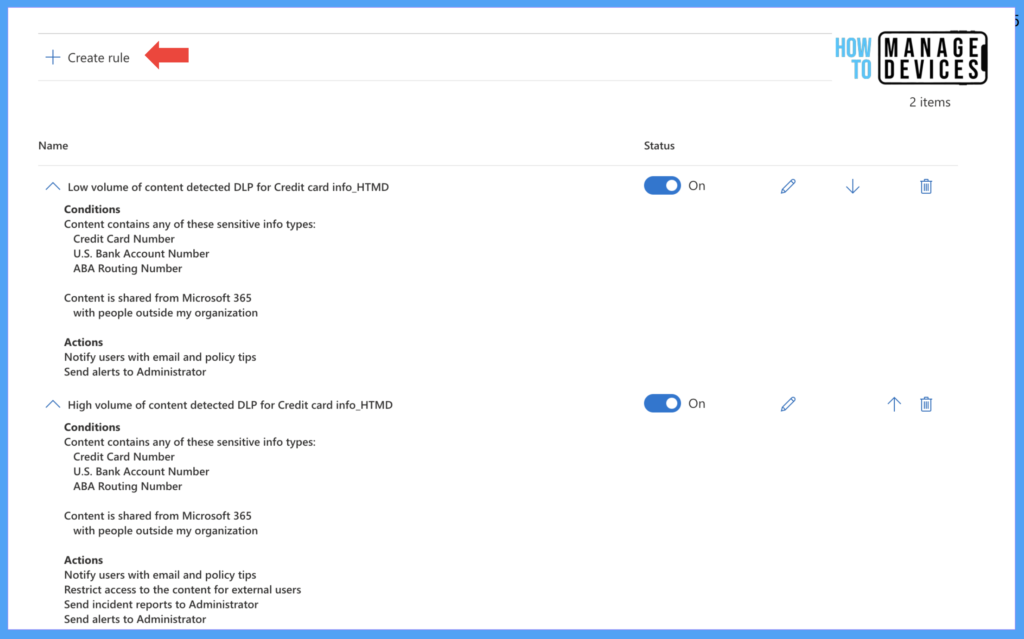
As a next step, we need to define the policy settings. We can choose the default policy settings and proceed further, or we can select Custom policy settings and specify the settings per your organizational requirements. When we select Custom settings, we will have options to create new rules per our requirements.

We can also create or edit the custom rules and conditions available in Custom Settings. This will provide an organization with more flexible rules as per their requirements. So, creating these Data Loss Protection policies online or in agreement with your organization’s security team is always advised. Choose the Custom or Default settings and click on Next.
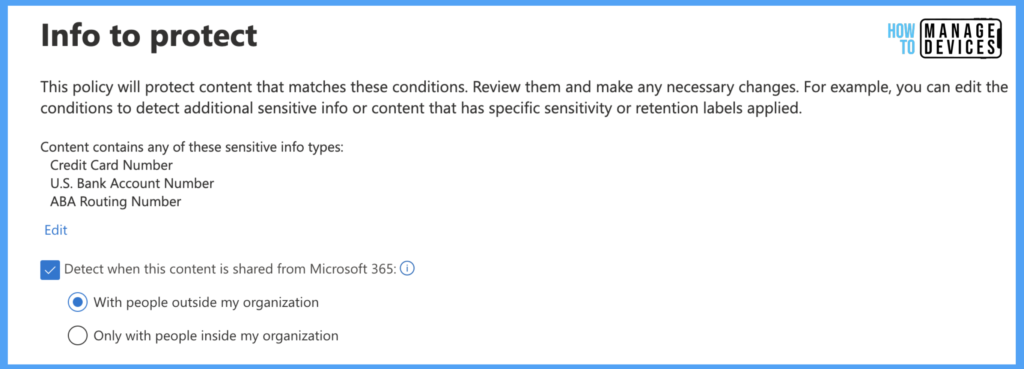
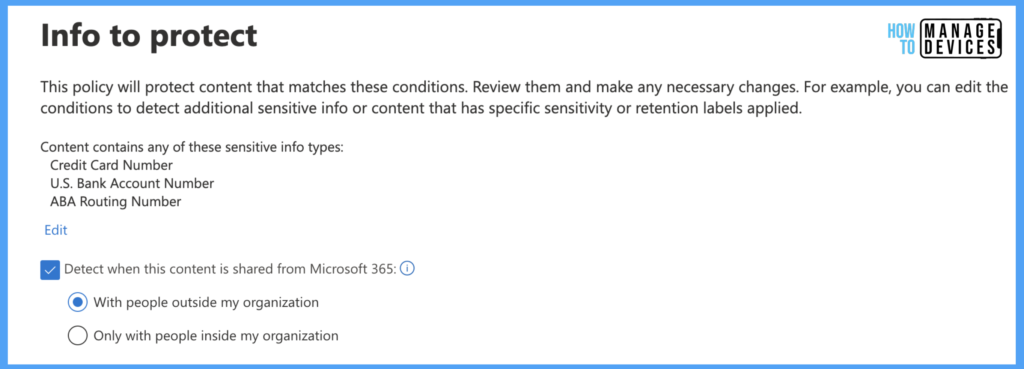
I have chosen default settings for our discussion. In the Info to Protect screen, we can choose what kind of data to protect and edit the conditions to protect sensitive information. Select Detect when this content is shared from Microsoft 365 and choose where the data should be protected inside or outside the organization.
Click on Next in the Protection actions, and define the actions you want to provide to the end users and admins. We can alert users by showing the tips to the end users. These tips help end users learn more about how to protect their data.
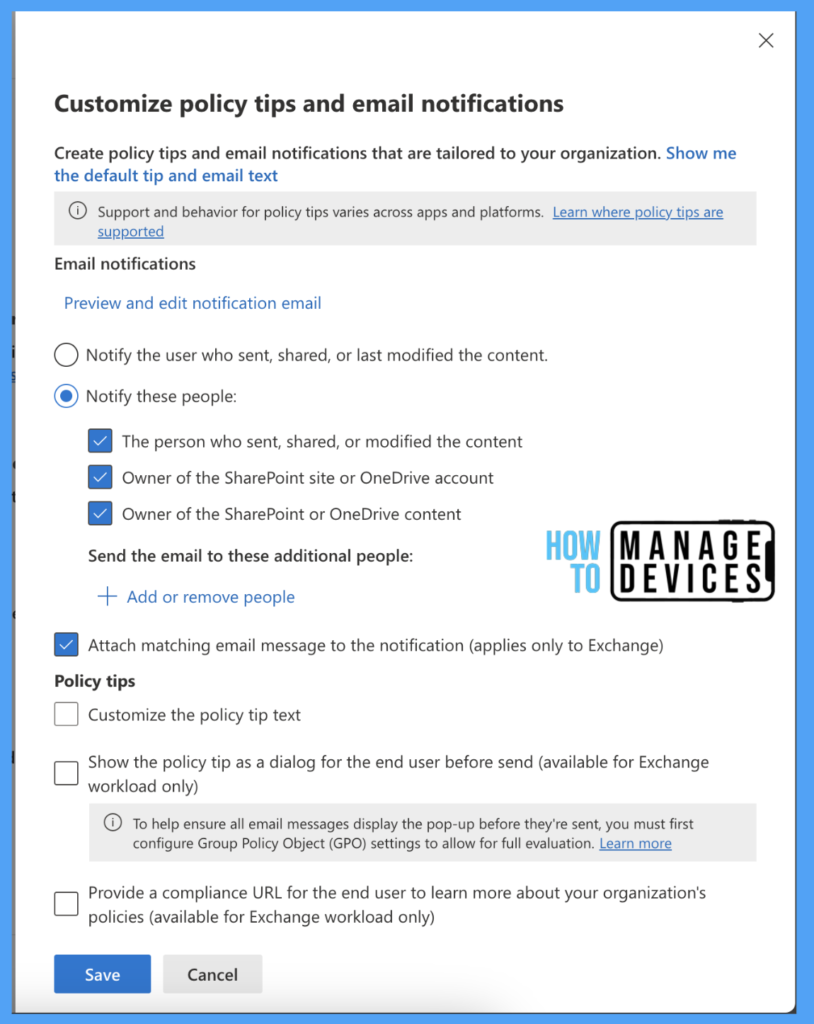
We can also customize the tip and email that users view, exclude a set of groups, and notify a few sets of users. We can also add compliance URLs in the policy tips so that users can refer to more details before sending sensitive information to others.
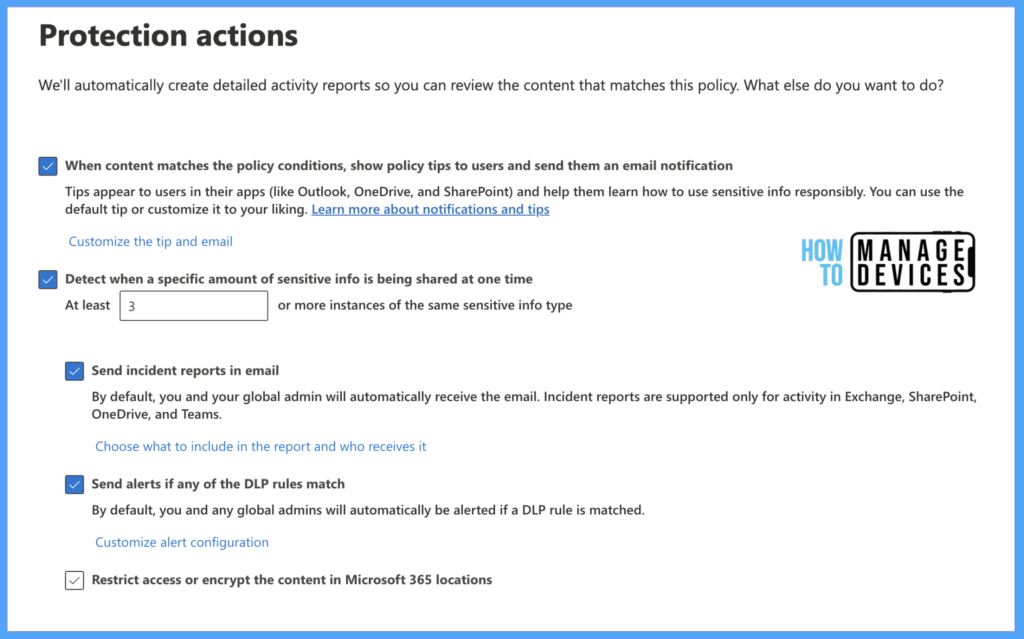
After customizing the policy tips and email as per your requirement, check all the required actions to protect data and click Next to Customize access and override settings page. By default, the users are blocked from sending the protected data within SharePoint Teams chat. Still, on this page, we can block or override the default settings and allow a few sets of users to override the policy settings.
I’m not overriding any default settings and proceeding next. In Policy Mode, we can run the policy in test mode before turning on the policy and applying it to all users. We have three options.
- Run the policy in Test Mode.
- Turn on the policy immediately.
- Leave the policy turned off.
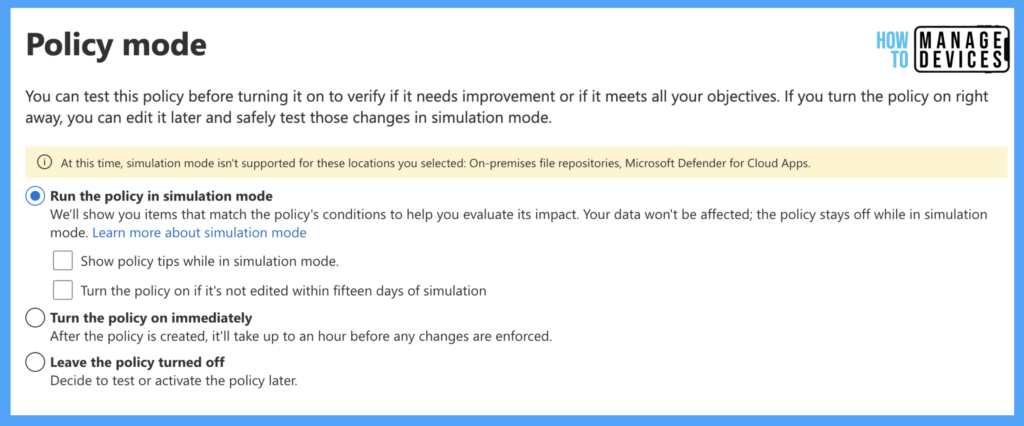
I’m choosing to turn “Run the policy in the test Mode“. This will enable admins to test and review the settings and alerts before applying them to all users. Policies in this mode will not be enforced to the end users. It is always better to test before assigning to all users. When you select Leave, the policy is turned off, and the policy will be created, and it is neither in test mode nor applied to the end users.
Click Next, Review the settings and create the policy. If you need to make any changes to the policy, you can click and Edit on the particular section and make changes as per your requirement.
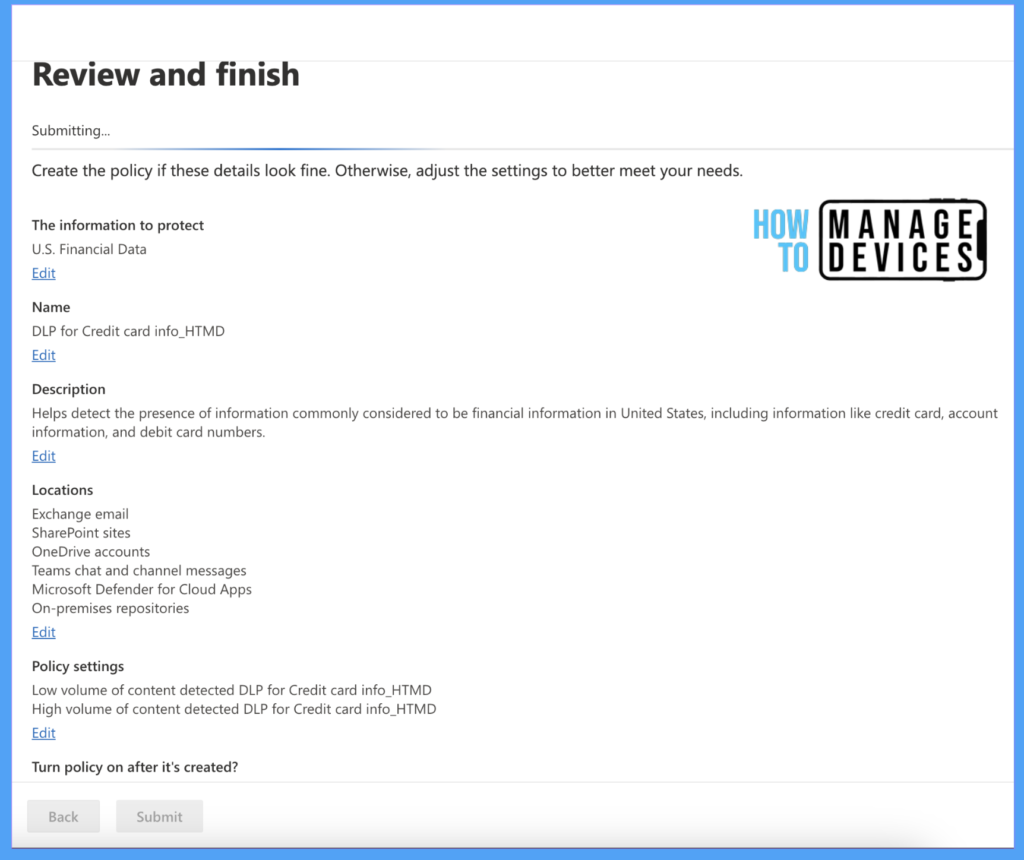
Click on Submit to create the policy in test mode. The creation of policy would take a few minutes to create. After creating the policy, we need to create a few additional tasks in order to protect data, like an insider risk policy to investigate, a records management policy to automatically retain or delete sensitive content and a communication compliance policy to detect inappropriate content in messages.
Conclusion
We have successfully created the DLP policies but have not applied the policies to end users. We can use the Simulation mode to simulate the data and check for data that is already available in the locations we have selected while creating the policy. We will discuss that in another article. Till then, have a happy learning.
We are on WhatsApp now. To get the latest step-by-step guides, news, and updates, Join our Channel. Click here.
Author
About Author – Narendra Kumar Malepati (Naren) has 11+ years of experience in IT, working on different MDM tools. Over the last seven years, Naren has been working on various features of Intune, including migration from different MDMs to Intune. Naren mainly focuses on Android, iOS, and MacOS.
