In today’s article, let’s discuss how to Publish Sensitivity labels and the user experience. In our previous article, we learned what sensitivity labels are, how to create them, their prerequisites and the license requirements.
In this article, let’s discuss how to publish the sensitivity labels and assign them to Users and groups. Also, we will discuss how users can interact with the sensitivity labels and force users to provide a reason when they change the label.
With the sensitivity labels, an organization will get insights on taking the right actions on the right content. An admin or a user can identify the sensitivity of data across your organization, and the label can enforce protection settings that are appropriate for the sensitivity of that data.
The sensitivity labels are stored in the metadata of files or emails, so they are persistent across the data wherever they are stored. These labels appear as tags to your organizational users in the apps they use and can easily changed, but for external users, they don’t appear as tags.
- Create Sensitivity Labels in Microsoft 365 to Protect Corporate Data
- Microsoft Defender Offline Scan Options for Windows PCs
Create a Policy to Publish Sensitivity Labels
To publish labels, we need to create a Policy, define the various labels and assign the policies to the users and groups. In this section, let’s learn how to create a policy to publish sensitivity labels.
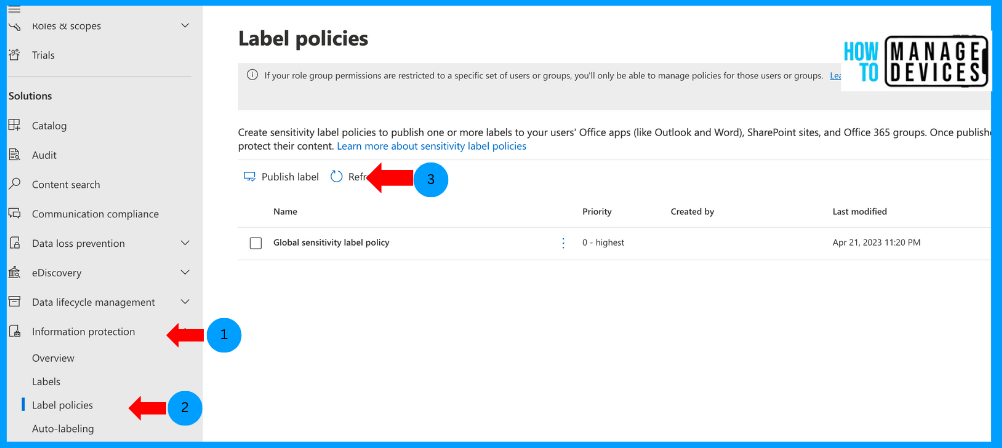
- Login to Microsoft Purview portal
- Click on Information Protection on the left side of the bar
- Click on Label Policies
- Click on Publish Label
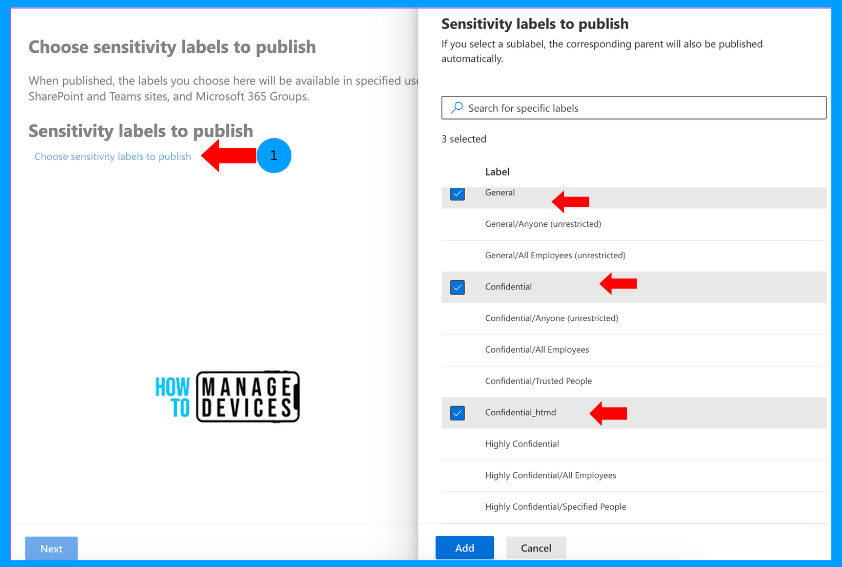
On the Choose sensitivity labels to publish page, we need to choose the Sensitivity labels we created. We can choose multiple labels in a single policy. Click on Choose Sensitivity labels, select the labels as per requirement, and click on Add.
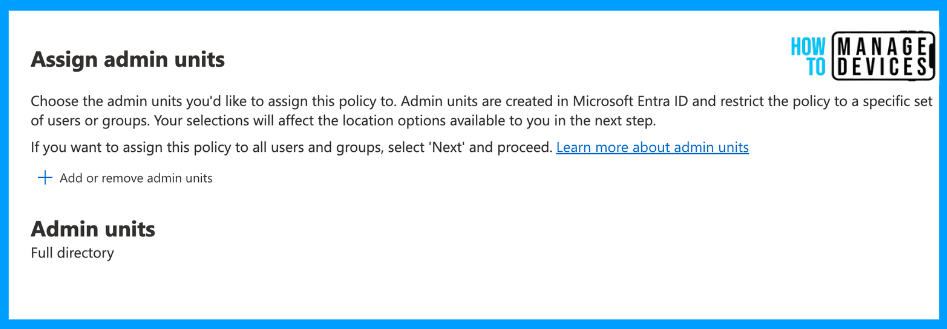
After adding labels, you can view all the labels you have selected. Click on Next to navigate to Assign admin units. Here, we can add admin units if you want to restrict specific users and/or groups. The admin units are created in Mircorosft Entra. I’m skipping the Admin Units and clicking on the Next.
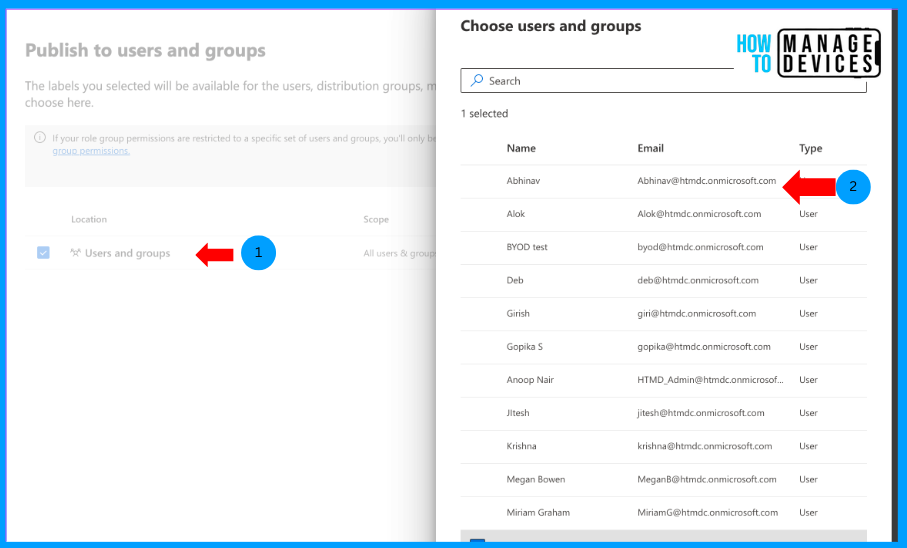
We will be taken to the Publish to Users and Groups page. This is the area where we select the required users and groups. The labels are applied to the selected users or groups. Click on Edit and select the required users and groups. I have chosen two users for our demo.
Click on Next to move to the Settings page. Here, we will configure settings for the policy, such as users providing a justification before removing a label or replacing the applied labels and forcing users to use the labels while saving files and sending emails.
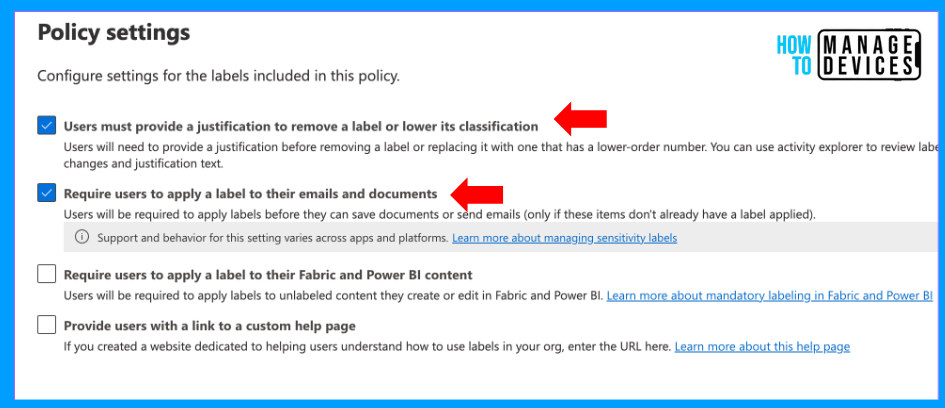
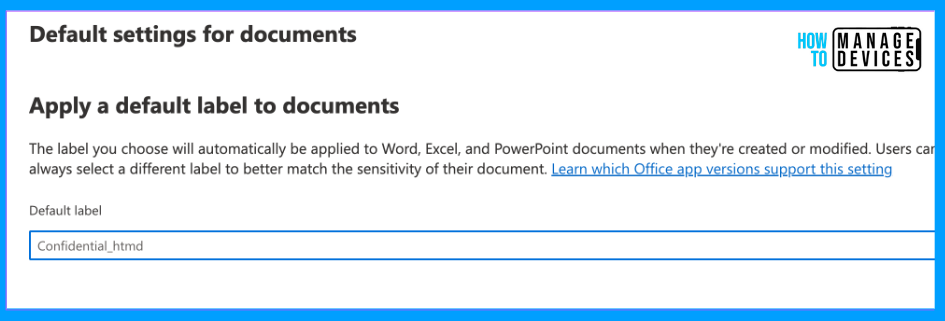
Click Next. Now, we can apply default settings for documents; from the drop-down, select the label you want to use for documents by default, or you can leave it None. If None is selected, the user can choose the labels that are opted for the file and emails.
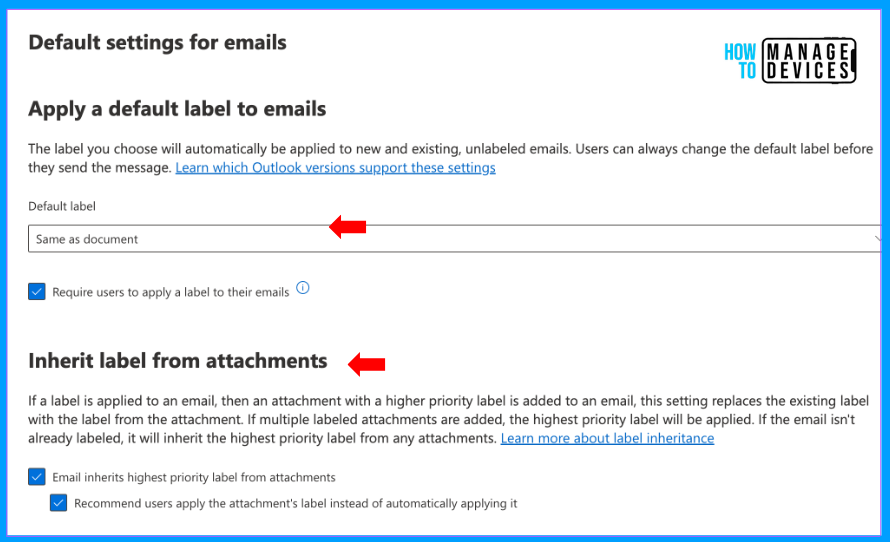
Click Next, and now we must select the default Emails label. We can either set a New label to the emails, leave it as None or inherit the label from the document. I’m choosing the same as the documents. In the second section, we need to set for attachments.
Inherit labels from attachments lets you enable auto-inheriting higher priority labels from attachments. For example, if your user attaches a labelled file to an email, the email will get the same label. The email label won’t be changed won’t if the attachment is a lower priority. If you attach multiple protected documents, an email message will inherit the highest priority label.
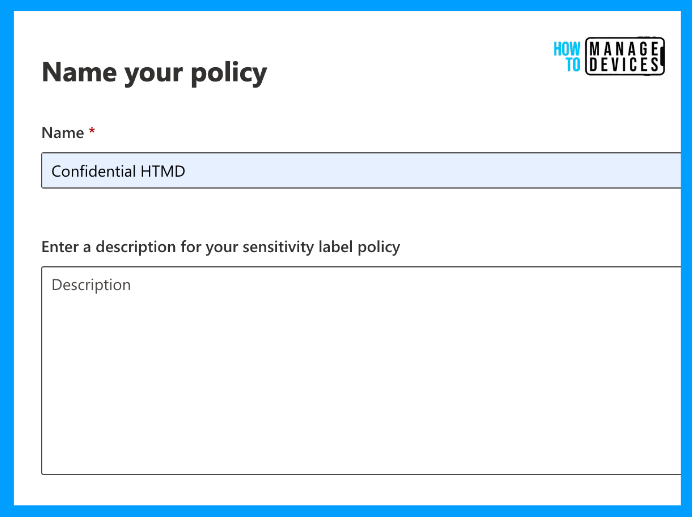
Click Next, and I’m skipping emails for meetings and PowerBi. Now, on Name your policy, please provide the name and description for the policy to identify it for future purposes.
As a final step, please review the configured settings and click Submit. We can always click on Edit in the respective section to make changes. If you do not wish to make any changes, click submit and create the policy.
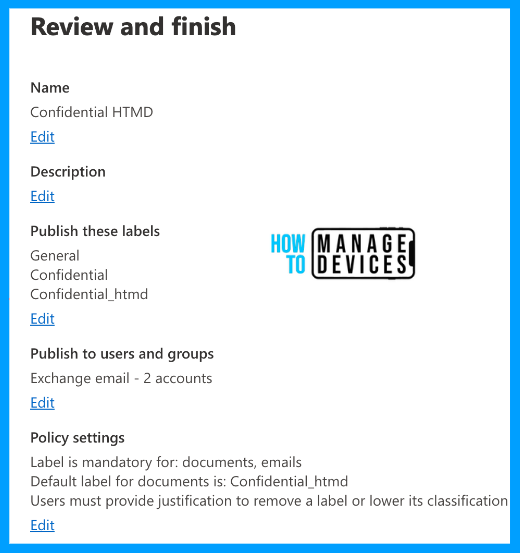
This might take a minute or two to create the policy and can take up to 24 hours to publish the labels to the selected users’ apps.
End User experience
Let’s see how the labels are applied to the end users. We have applied labels to Emails and Files. So, I’ll show you how labels are applied to Emails and Word documents. The policies might take a bit of a longer time, as shown above. If the labels are not applied, don’t panic.
- Open a browser
- Sign in to the Outlook web version using the account with labels applied.
- Open a new Email.
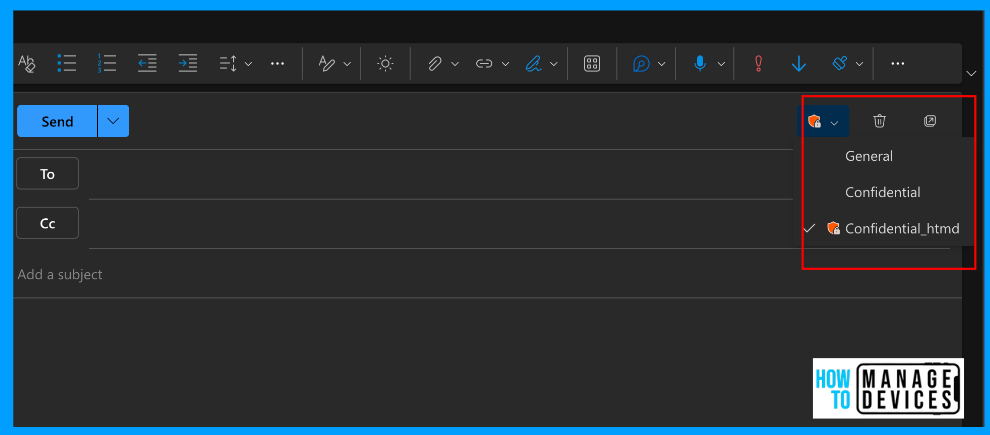
You can view which labels are available to apply for an email. Choose the correct label and apply for the email. We are shown three labels to choose from as we have chosen three. I have chosen the confidential label we created in our previous blog post.
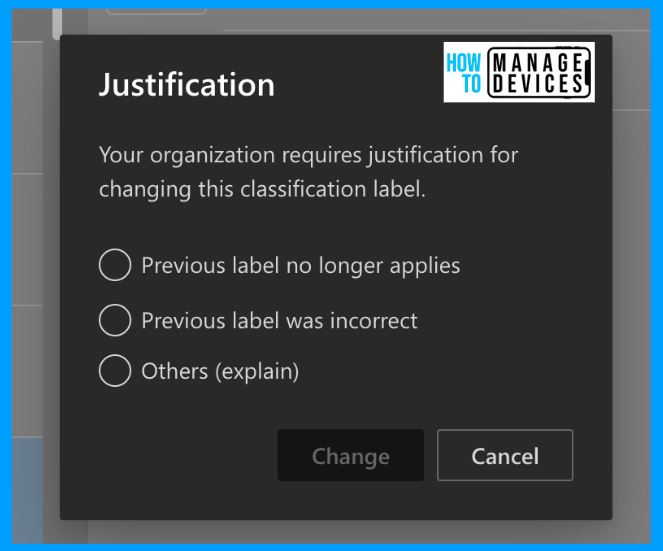
Now, if you try. to change the label, the user is required to provide a reason for changing the label. Unless the user provides the reason, the user won’t be able to change the label.
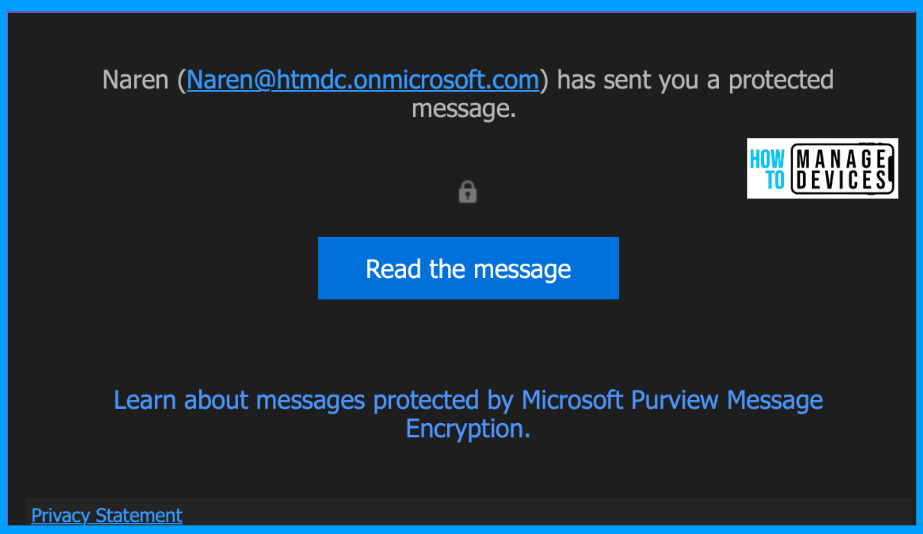
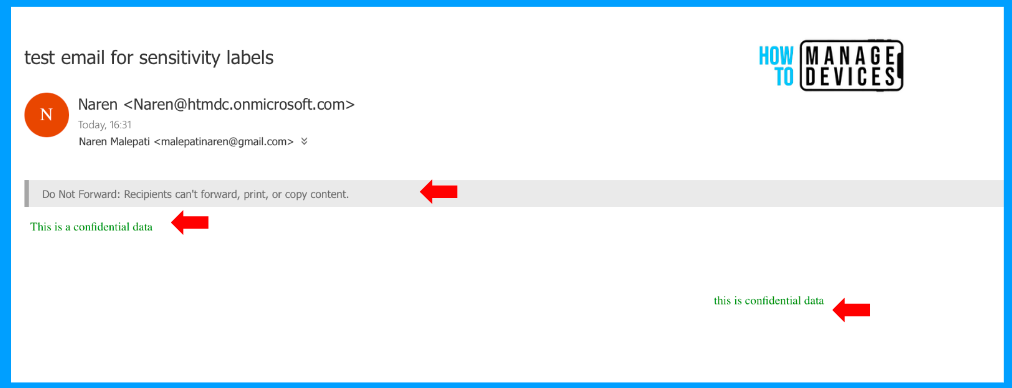
Suppose a User sends an email to external users. In that case, the email will be encrypted, and the recipient won’t be able to open the email and will be forced to authenticate to validate the correct user.
Once the user is authenticated, the user can view the email content. You can see the user is unable to forward the email as we restricted in label settings. Also, you can see the header we set
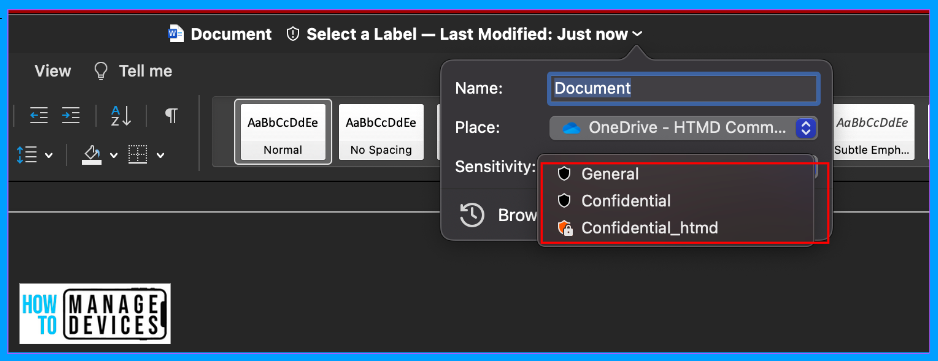
Now, let’s see how the labels are applied to Word documents. Open a Word document and sign with the credentials that have labels applied. Create a new document on top of the file, and you can view the option to apply labels.
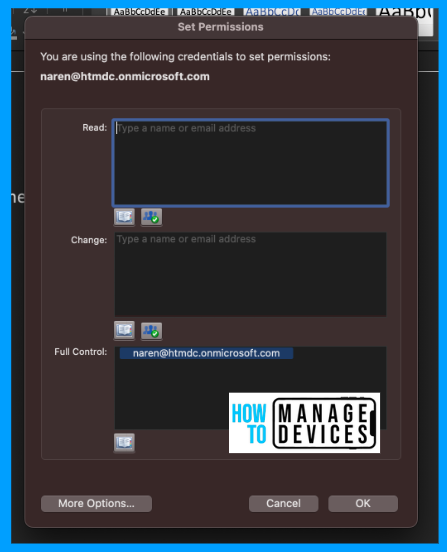
Similarly, if you want to change the label of the file, the user will be prompted with different permissions required for other users to edit the file.
You can also view the header and footer, which are automatically applied per the confidential label we created.
So, sensitivity labels not only classify and encrypt data but also restrict access to the data by unknown users when data is forwarded outside the organization. So, let’s use the Sensitivity labels for your corporate data and protect data from unintended persons.
Conclusion
Microsoft provides various ways to protect data. One of the ways is applying sensitivity labels. This way, the author or user has control and makes decisions about what type of data they are dealing with and classifies the data based on their choice. Have a happy learning, and let’s meet in another blog post.
We are on WhatsApp now. To get the latest step-by-step guides, news, and updates, Join our Channel. Click here.
Author
About Author – Narendra Kumar Malepati (Naren) has 11+ years of experience in IT, working on different MDM tools. Over the last seven years, Naren has been working on various features of Intune, including migration from different MDMs to Intune. Naren mainly focuses on Android, iOS, and MacOS.
