In this article, we will explore and gain knowledge about Disable Lock Screen Camera Policy using Intune. We will apply Disable Lock Screen Camera Policy using Intune. We will make use of Configuration Profiles from Intune to implement this policy.
Disable Lock Screen Camera Policy using Intune deactivates the toggle switch for the lock screen camera in PC Settings and blocks camera activation on the lock screen. By default, users have the option to enable camera usage on the lock screen. Enabling this setting removes the ability for users to toggle lock screen camera access in PC Settings, and it also prevents the camera from being invoked on the lock screen.
By default, users have the option to invoke an available camera on the lock screen. This means that they can use the camera without having to unlock the device. However, enabling the “Disable Lock Screen Camera” policy using Intune removes this capability.
Once the policy is applied, users will no longer be able to enable or disable camera access on the lock screen through the PC Settings interface. Additionally, attempting to invoke the camera on the lock screen will be prevented.
This policy can be implemented using Configuration Profiles from Intune, which is a cloud-based service provided by Microsoft for managing and securing devices in an organization. Intune allows administrators to configure and enforce policies on devices, ensuring compliance and security.
- Best Guide to Apply Audit PNP Activity Policy using Intune
- Complete Guide to Disallow Digest Authentication Using Intune
Windows CSP Details PreventEnablingLockScreenCamera
We will see Windows CSP Details for this Policy setting PreventEnablingLockScreenCamera. The lock screen camera policy is a configuration setting that allows administrators to control camera access on the lock screen of devices. When this policy is enabled, it disables the toggle switch in PC Settings that allows users to enable or disable camera access on the lock screen.
CSP URI – ./Device/Vendor/MSFT/Policy/Config/DeviceLock/PreventEnablingLockScreenCamera

Disable Lock Screen Camera Policy Using Intune
To apply Disable Lock Screen Camera Policy Using Intune, follow the steps stated below:
- Sign in to the Intune Admin Center portal https://intune.microsoft.com/.
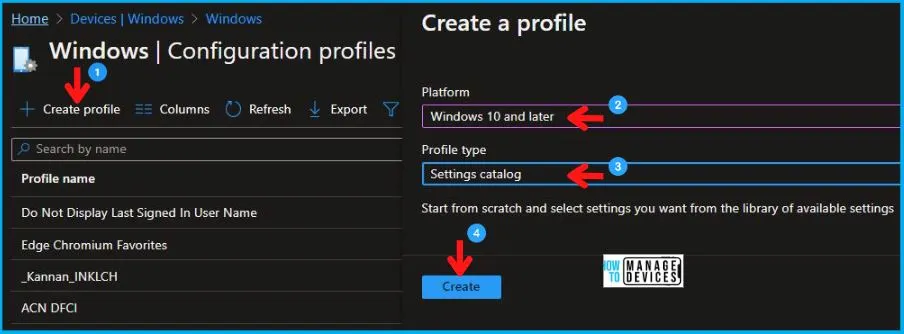
- Select Devices > Windows > Configuration profiles > Create a profile.
In Create Profile, Select Windows 10 and later in Platform, and Select Profile Type as Settings catalog. Click on Create button.
| Platform | Profile Type |
|---|---|
| Windows 10 and later | Settings Catalog |
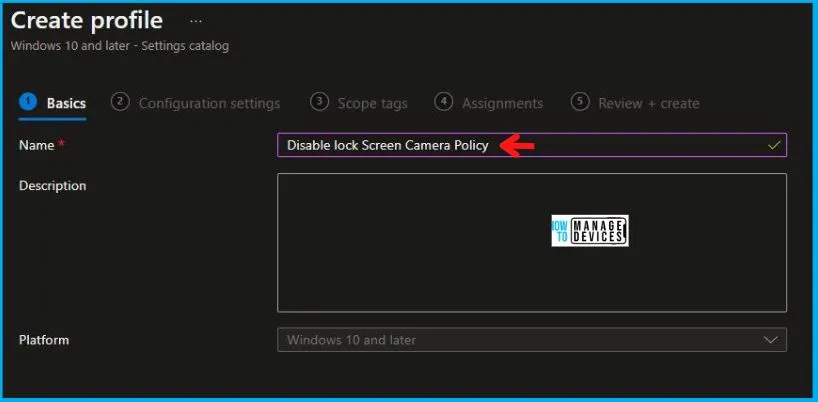
On the Basics tab pane, provide a name for the policy as “Disable Lock Screen Camera Policy.” Optionally, you can enter a description for the policy, and then proceed by selecting “Next.”
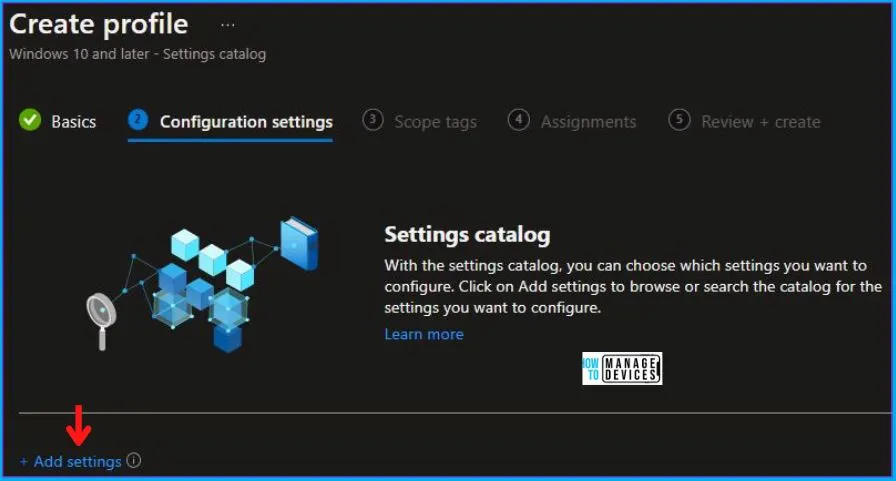
Now in Configuration settings, click Add Settings to browse or search the catalog for the settings you want to configure.
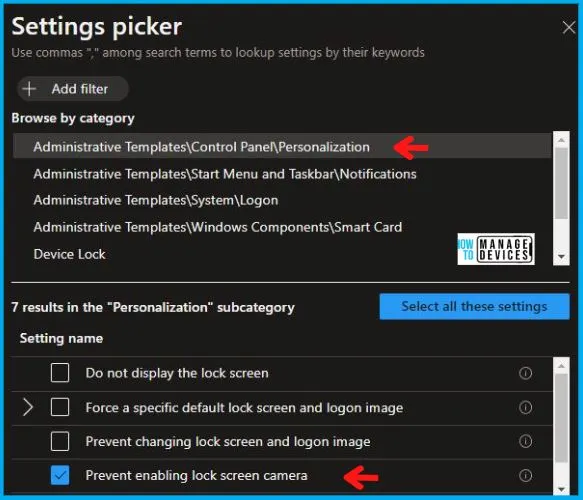
In the Settings Picker windows, search by the keyword Personalization, among many, you will see Administrative Templates\Control Panel\Personalization, and select this.
When you select the option as stated above, you will see only multiple settings, select Prevent enabling lock screen camera. After selecting your setting, click the cross mark at the right-hand corner, as shown below.
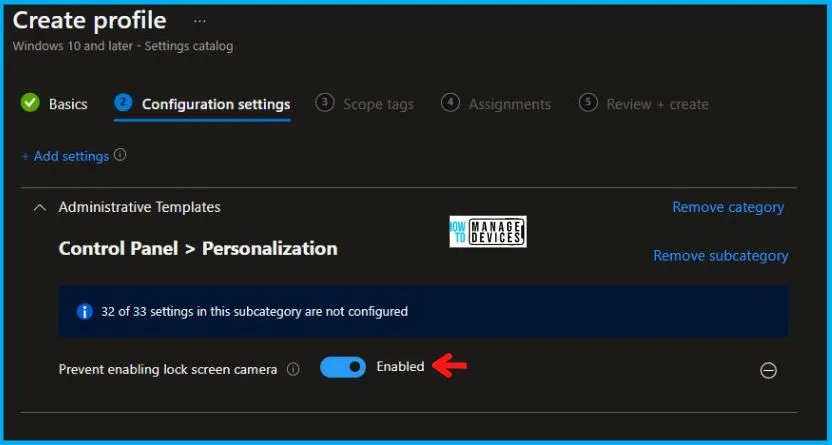
Now, in the Administrative Templates, Enabled the Prevent enabling lock screen camera, as shown below in the image.
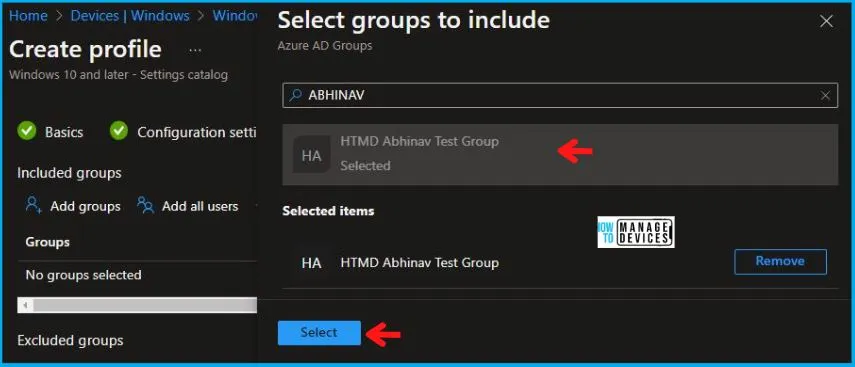
Using Scope tags, you can assign a tag to filter the profile to specific IT groups. One can add scope tags (if required) and click Next to continue. Now in Assignments, in Included Groups, you need to click on Add Groups, choose Select Groups to include one or more groups, and click Next to continue.
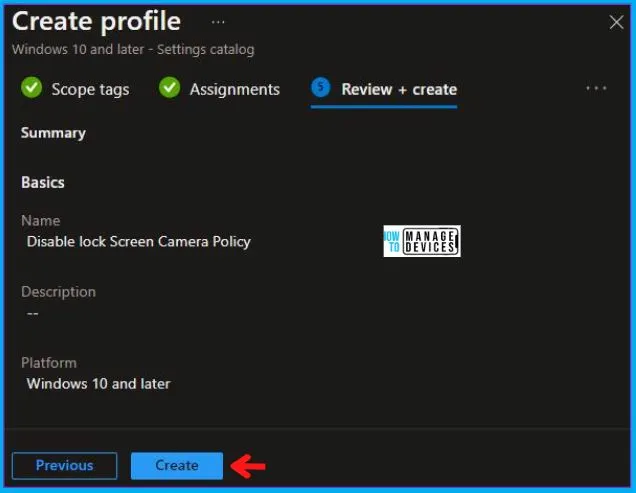
In the Review + Create tab, you need to review your settings. After clicking on Create, your changes are saved, and the profile is assigned.
An automatic notification will be displayed in the top right-hand corner to indicate the successful creation of the “Disable Lock Screen Camera Policy.“ Additionally, you can verify its presence by checking the Configuration Profiles list, where the policy will be clearly visible.
Your groups will receive your profile settings when the devices check in with the Intune service. The Policy applies to the device.
Intune Report for Disable Lock Screen Camera Policy Using Intune
From Intune Portal, you can view the Intune settings catalog profile report, which provides an overview of device configuration policies and deployment status.
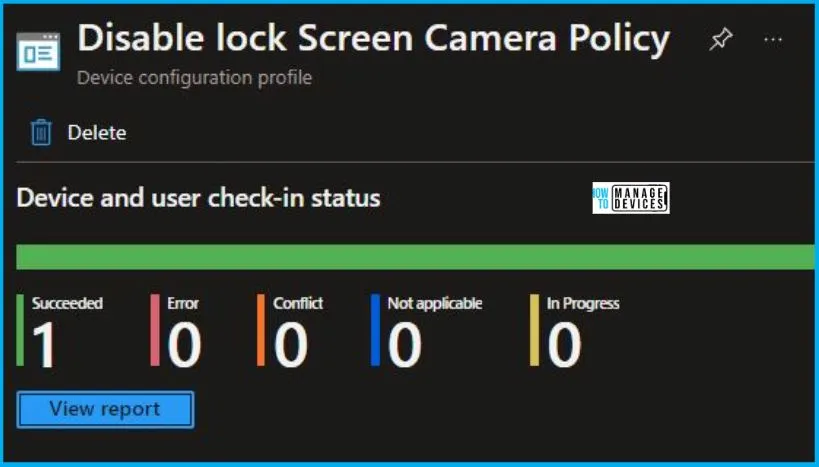
To monitor the assignment of the policy, you must choose the appropriate policy from the list of Configuration Profiles. You can check the device and user check-in status to see if the policy has been successfully applied. If you wish to view more information, you can click on “View Report” to see additional details.
Intune MDM Event Log
To ascertain the successful application of String or integer policies on Windows 10 or 11 devices using Intune, event IDs 813 and 814 can be utilized. By analyzing these event IDs, you can identify both the policy’s application status and the specific value associated with the applied policy on those devices. For this specific policy, the value is a string and is associated with event ID 814.
To confirm this, you can check the Event log path – Applications and Services Logs – Microsoft – Windows – Devicemanagement-Enterprise-Diagnostics-Provider – Admin.
MDM PolicyManager: Set policy string, Policy: (PreventEnablingLockScreenCamera), Area: (DeviceLock), EnrollmentID requesting merge: (4009A089-4FBA-482B-9D17-9E5A8428CB98), Current User: (Device), String: (<enabled />), Enrollment Type: (0xD), Scope: (0x0).
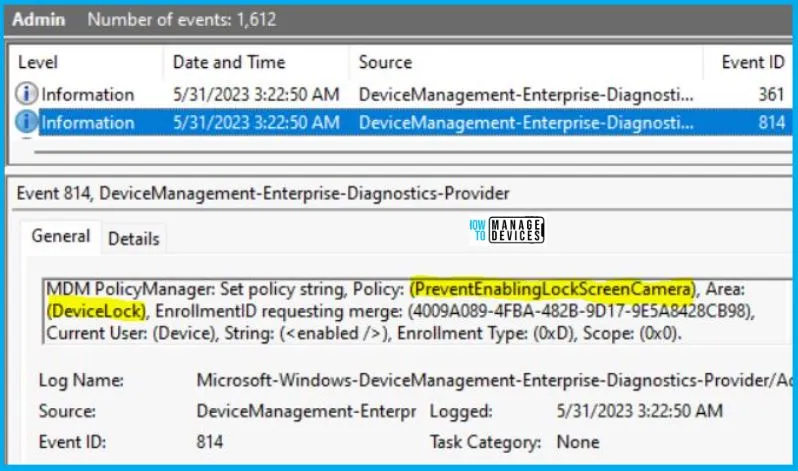
Upon examining the above-mentioned log in the Event Viewer, you will discover crucial details such as the Area and Enrollment ID. These pieces of information are instrumental in identifying the registry path. To find the relevant information, kindly refer to the table provided below:
| Area | Policy | String | Scoped | Event ID |
|---|---|---|---|---|
| DeviceLock | PreventEnablingLockScreenCamera | Enabled | Device | 814 |
The information provided in the above table for Disable Lock Screen Camera Policy Using Intune can be utilized to access the registry settings storing group policy configurations on a target computer. By running “REGEDIT.exe” on the target computer, you can navigate to the specific registry path where these settings are stored.
- Computer\HKEY_LOCAL_MACHINE\SOFTWARE\Microsoft\PolicyManager\providers\4009A089-4FBA-482B-9D17-9E5A8428CB98\default\Device\DeviceLock
When you navigate to the above path in the Registry Editor, you will find the registry key with the name PreventEnablingLockScreenCamera. Refer to the table and image below.
| Registry Name | Value |
|---|---|
| PreventEnablingLockScreenCamera | Enabled |

Author
Abhinav Rana is working as an SCCM Admin. He loves to help the community by sharing his knowledge. He is a B.Tech graduate in Information Technology.
