This post walks you through the steps to Enable Trusted Launch for existing Azure Virtual Machines. Enabling Trusted Launch for Azure Virtual Machines improves the security of generation 2 VMs to safeguard your workloads against advanced threats, enhancing the trustworthiness of the boot process.
Azure offers trusted launch as a seamless way to improve the security of generation 2 VMs. Trusted launch protects against advanced and persistent attack techniques against boot kits, rootkits, and kernel-level malware.
Trusted launch requires the creation of a new virtual machine scale set (VMSS). You cannot enable trusted launch on existing VMSS that were initially created without it. Trusted launch as default for VMs deployed through the Azure portal.
Enabling Trusted Launch on existing VM presents certain limitations in specific scenarios within the Azure environment. Generation 1 VMs are not currently compatible with Trusted Launch. Additionally, Trusted Launch is not supported for Azure Virtual Machine Scale Sets (VMSS) in both Uniform and Flex configurations.
- Azure Networking Services Training | Azure Tips
- Best Way To Use Azure Capacity Reservation To Reduce The Azure Cost
Prerequisites for Enabling Trusted Launch for Azure VMs
Following the prerequisites is essential if you are planning to enable trusted launch on existing Azure Virtual Machines.
- Azure Generation 2 VM(s) is configured with Trusted launch supported size family and supported OS Image. The base image should be Trusted launch capable of custom OS images or disks.
- Azure Generation 2 VM(s) should be stopped and deallocated before enabling the Trusted launch security type.
- Azure Backup, if enabled for Generation 2 VM(s) should be configured with Enhanced Backup Policy. Trusted launch security type cannot be enabled for Generation 2 VM(s) configured with Standard Policy backup protection.
Enable Trusted Launch for Azure Virtual Machines
The steps help you through using the Azure portal to enable Trusted launch on existing Azure Generation 2 VM, You also have the option to Create a virtual machine with trusted launch enabled.
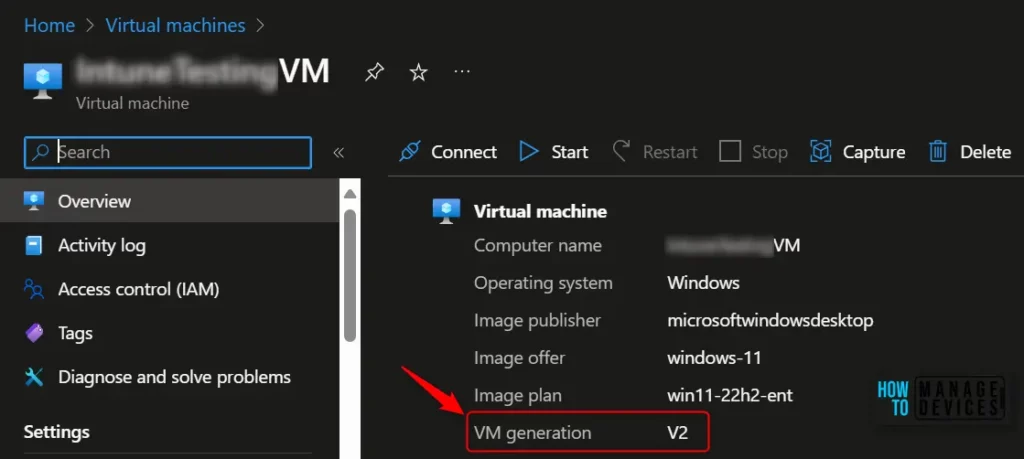
- Log in to the Azure portal. Navigate to the Virtual Machines tab for Validating virtual machine generation is V2 and Stop the VM if it is already in running state.

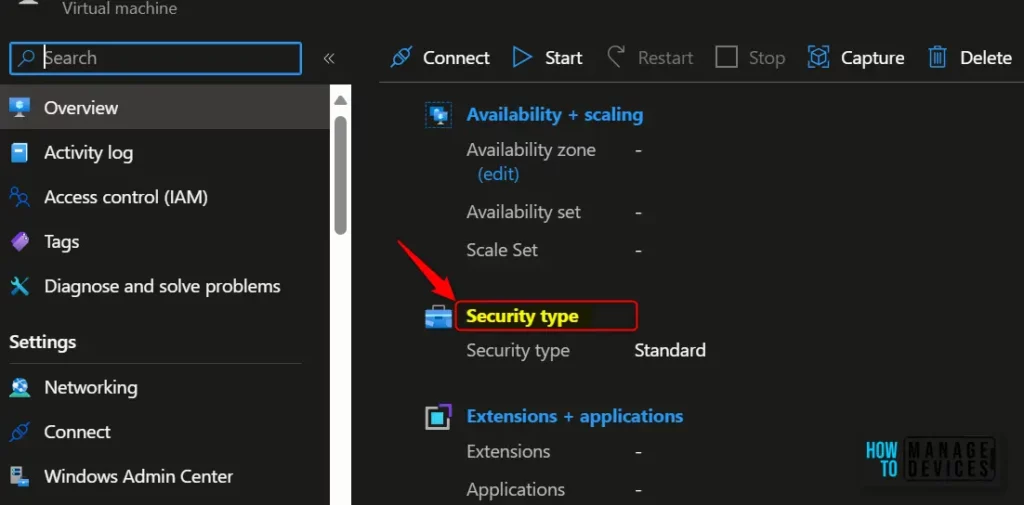
On the Overview page in VM Properties, Select Standard under Security type. This navigates to the Configuration page for VM.

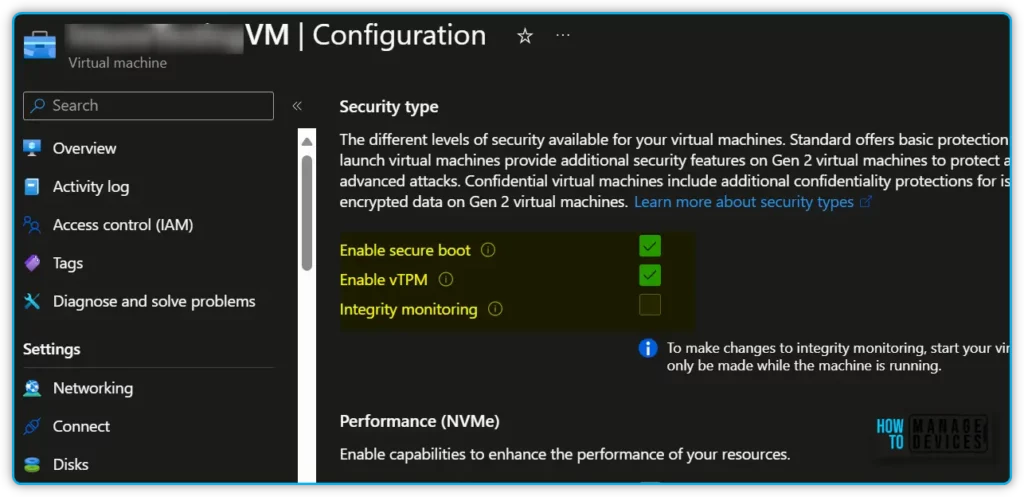
Select the drop-down Security type under the Security type section of the Configuration page. Select Trusted Launch under the drop-down and select checkboxes to enable Secure Boot and vTPM. Click Save after making the required changes.
- Secure boot – At the root of trusted launch is Secure Boot for your VM. This mode, implemented in platform firmware, protects against installing malware-based rootkits and boot kits. Secure Boot works to ensure that only signed operating systems and drivers can boot.
- vTPM is a virtualized version of a hardware Trusted Platform Module compliant with the TPM2.0 spec. It serves as a dedicated secure vault for keys and measurements.

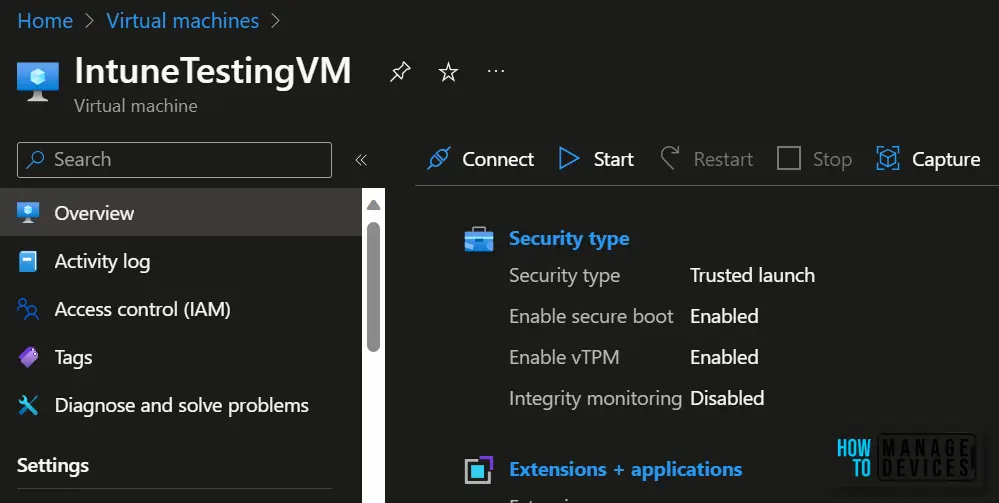
Close the Configuration page once the update is successfully complete and validate the Security type under Virtual machine properties.

Once you start the upgraded Trusted launch VM ensure that it has started successfully, and verify that you are able to log in to the VM using RDP (for Windows VM).
Author
About Author – Jitesh, Microsoft MVP, has over six years of working experience in the IT Industry. He writes and shares his experiences related to Microsoft device management technologies and IT Infrastructure management. His primary focus is Windows 10/11 Deployment solution with Configuration Manager, Microsoft Deployment Toolkit (MDT), and Microsoft Intune.
