Let’s check how to fix the SCCM Server Trust Relationship Issue with the Primary Domain. I had an issue with the Hyper-V lab environment.
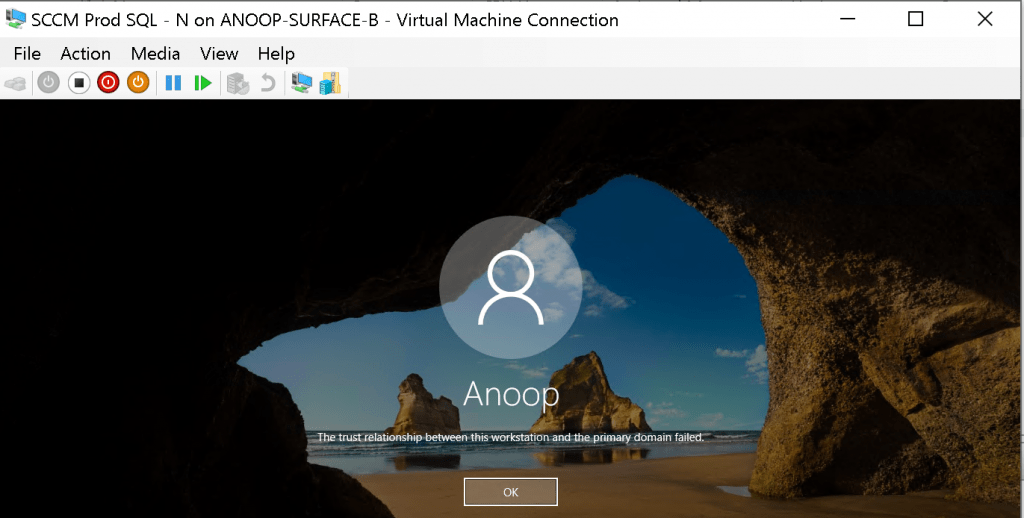
I could not log in to the SCCM LAB server with Domain User and Local Administrative User. The exact error was “The trust relationship between this workstation and the primary domain failed.”
Problem Statement
I could not log in to the SCCM|SQL server after reinstalling the Windows 10 hyper-v device. The VM is connected to the same virtual network as Domain Control.
The Error – The trust relationship between this workstation and the primary domain failed.
Even I don’t remember the local user name and password to remove the Hyper-V virtual machine from the domain and add it back.
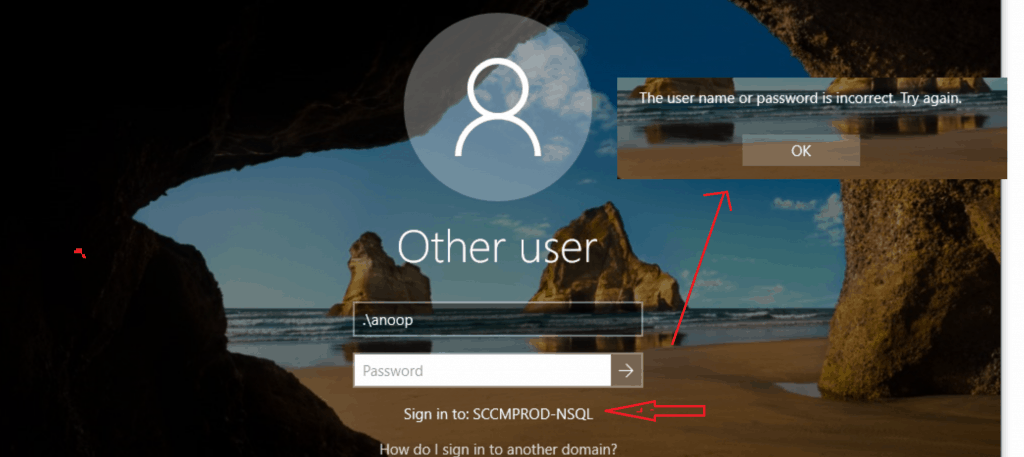
Solution – FIX SCCM Server Trust Relationship Issue
To better understand, I have split the solution or fix to the SCCM server Trust Relationship Issue into several sub-topics below.
Remove the Network Adapter
- Shutdown the SCCM virtual machine from the Hyper-v console
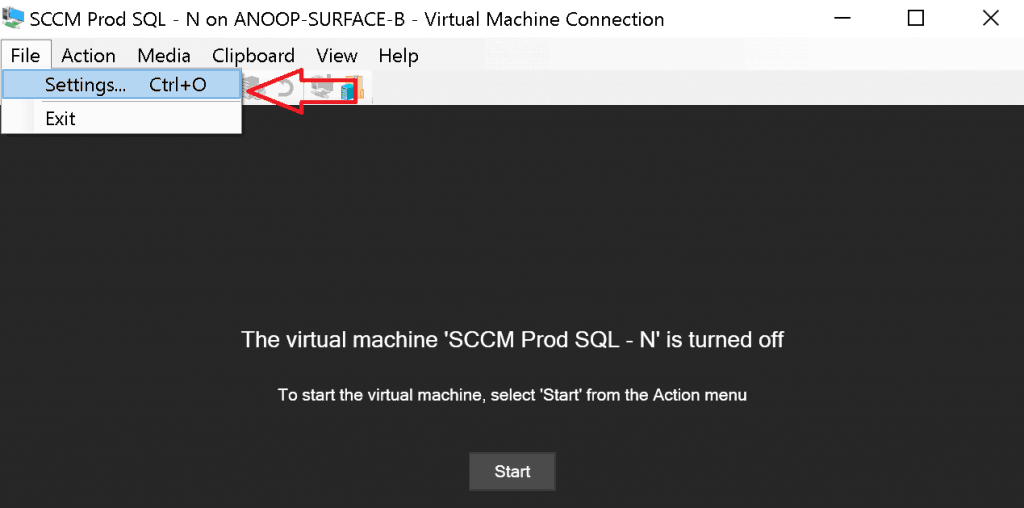
- Click on File – Settings from the Virtual Machine Window
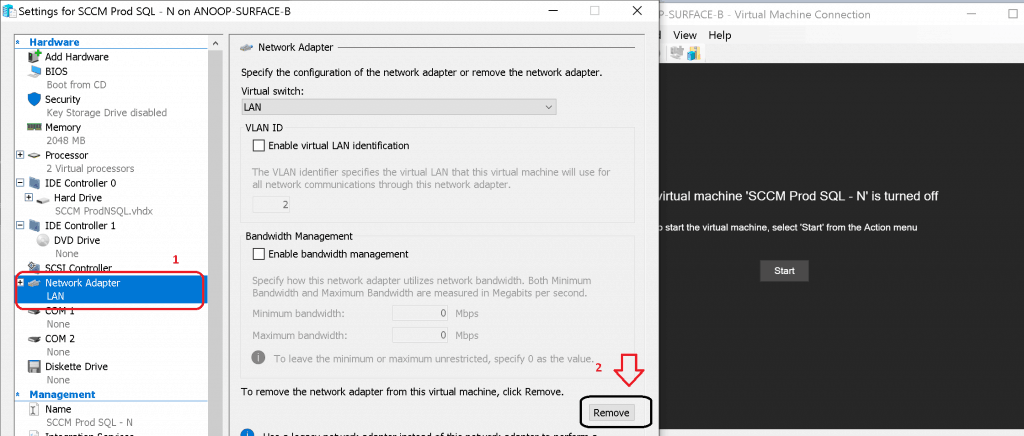
- Click on the Network Adapter option on the left side pane of the Settings page
- Click on the REMOVE button to detach the SCCM virtual machine from the network
- Click on Apply and OK to close the settings window
- Click on the Start button to start the Virtual Machine
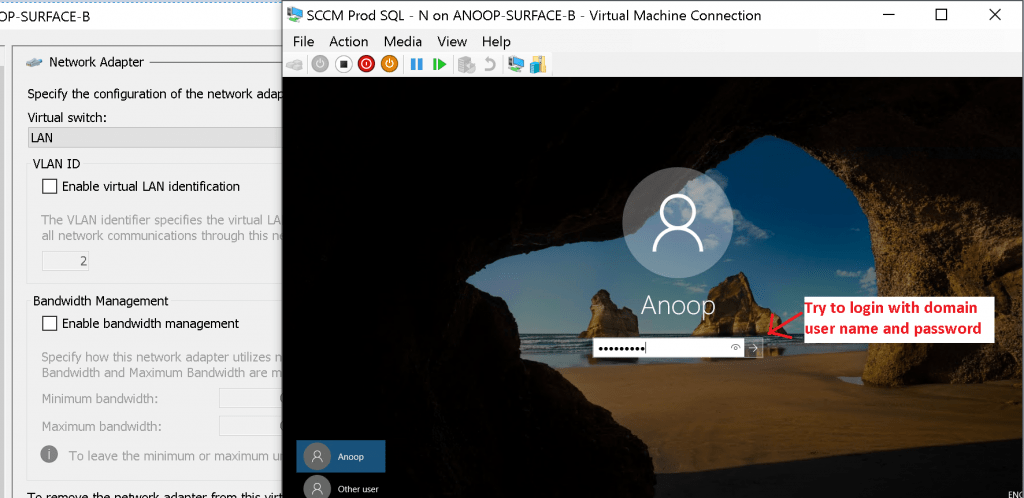
- Try to log in with the domain username and password
- Successfully able to login to VM with cached domain credentials and temp user profile
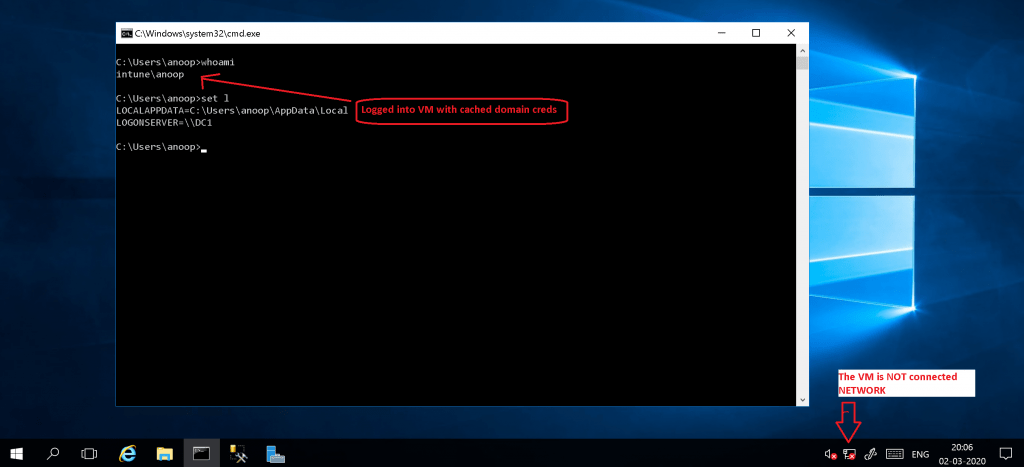
Reset the Local User Password of the SCCM Server
- Now we have logged into the SCCM virtual machine, let’s reset the password of the local user account
- Add the user to the local administrator’s group
- Run the following command “compmgmt”
- Select the User called Anoop from the Local Users and Groups node
- Right-click on the user and select the RESET Password option

Remove the ConfigMgr Virtual Machine from the Domain
- Open Control Panel – Search with the keyword “Rename“
- Click on Rename this Computer link

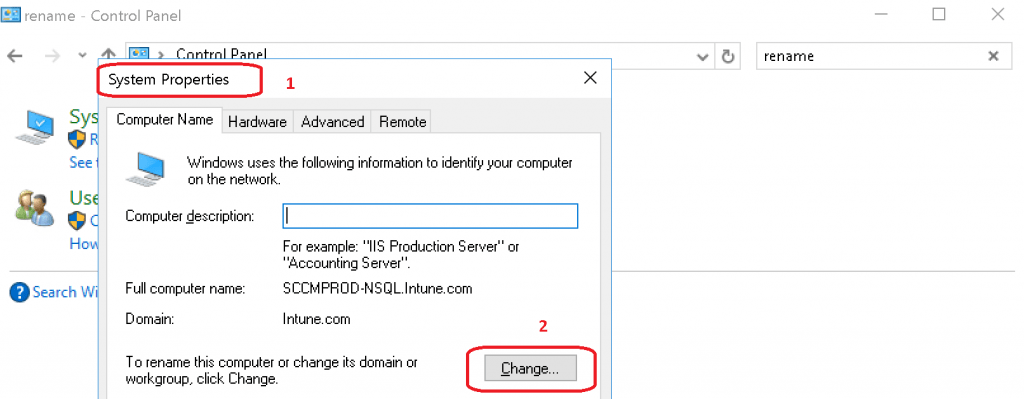
- From the System Properties window- click on the CHANGE button
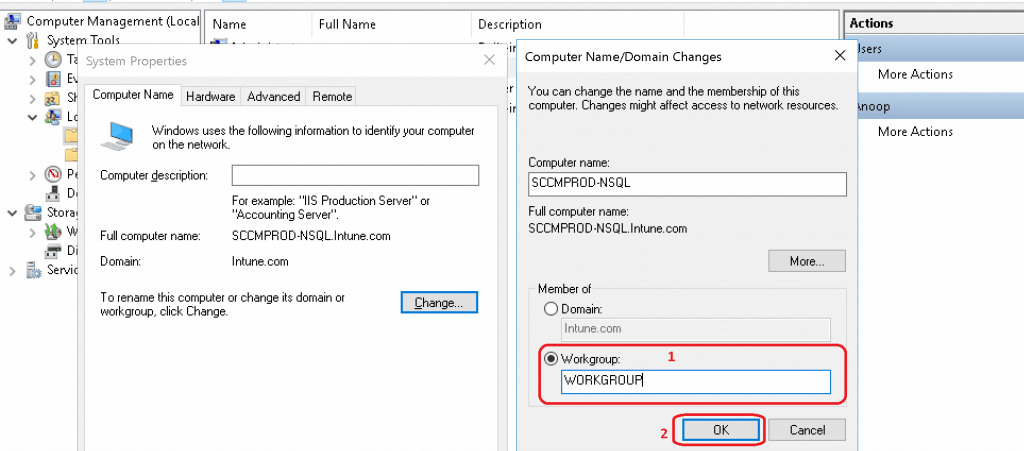
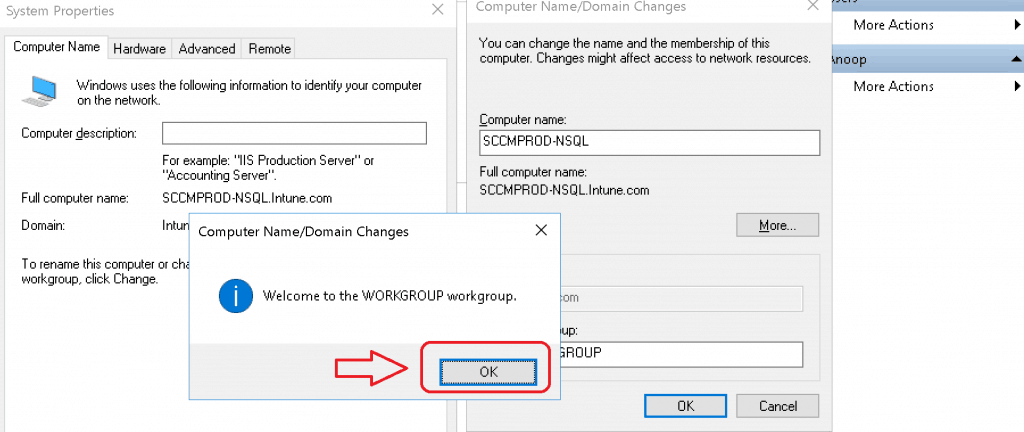
- Select the Workgroup option under a member of the section from the Computer Name/Domain Change window
- Click on the OK button to continue
- Click OK on the popup message “After you leave the domain, you must know the local administrator account password to log in to your computer. Click OK to continue.”
- Confirm the Domain User name and password in the popup window
- Click OK on the “Welcome to the WORKGROUP workgroup” popup window
- Click OK on “You must restart your computer to apply these changes. Before restarting, save any open files and close all programs.” window
- Shutdown the SCCM Virtual Machine
Add the Network Adapter Back
I removed the network adapter in the above section. Now, it’s time to add another one to reconnect connectivity to a primary domain controller in the LAB.
- Click on File – Settings from the Virtual Machine Window
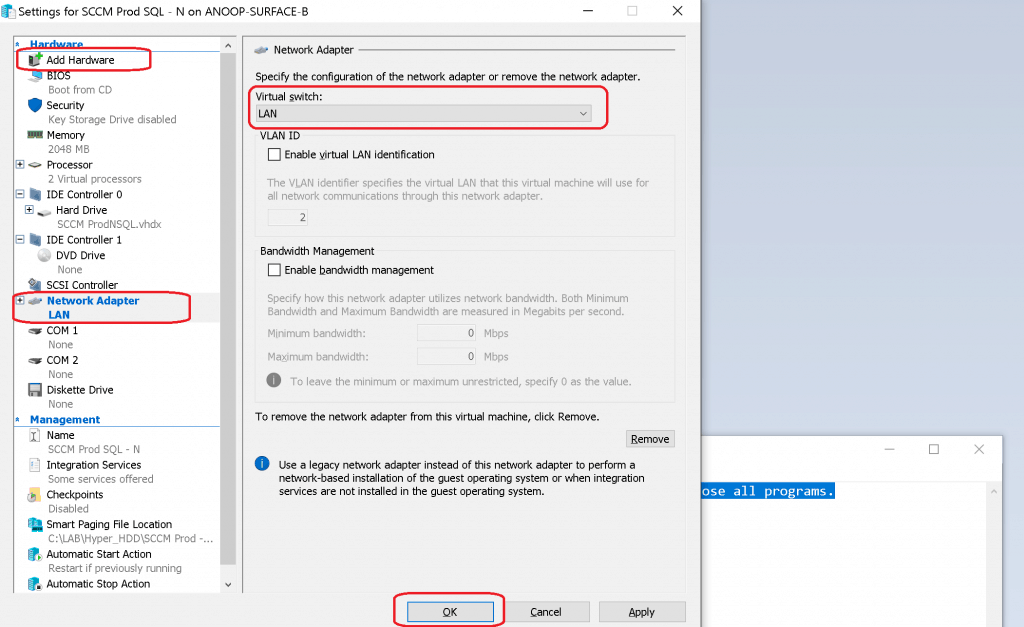
- Click on ADD Hardware option on the left side pane of the Settings page
- Select Network Adapter and click on ADD button to attach the SCCM virtual machine back to the LAN network
- Select the virtual Switch you want to connect “LAN” in my scenario
- Click on Apply and OK to close the settings window
Add Virtual Machine back to Domain
- Start the Virtual Machine
- Login to Virtual Machine with a local user account and password (did reset the password in the above step)
- Open Control Panel – Search with the keyword “Rename“
- Click on Rename this Computer link
- From the System Properties window- click on the CHANGE button
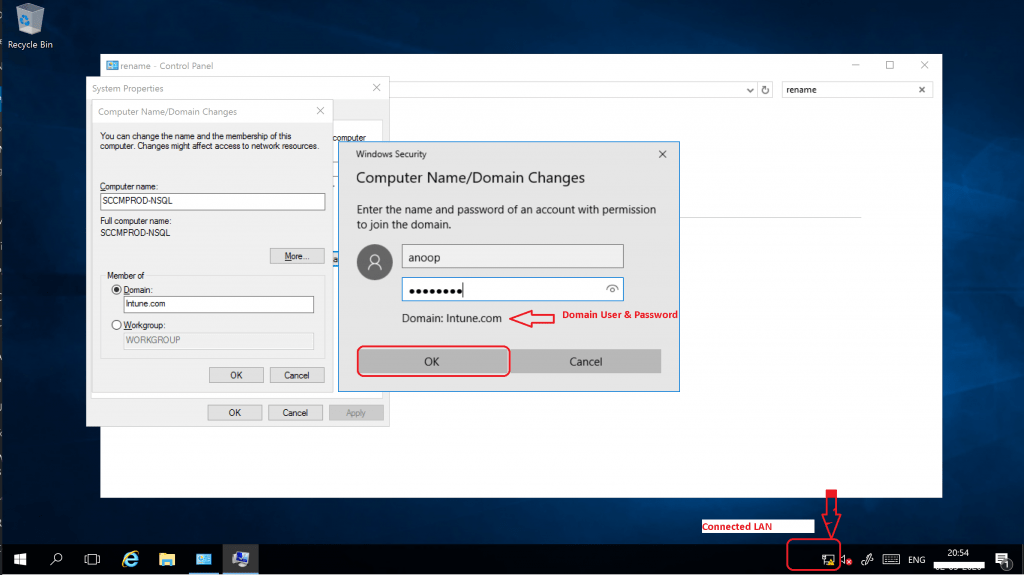
- Select the Domain option under a member of the section from the Computer Name/Domain Change window
- Enter your domain FQDN “Intune.com”
- Enter the domain user name and password
- Click on the OK button to continue
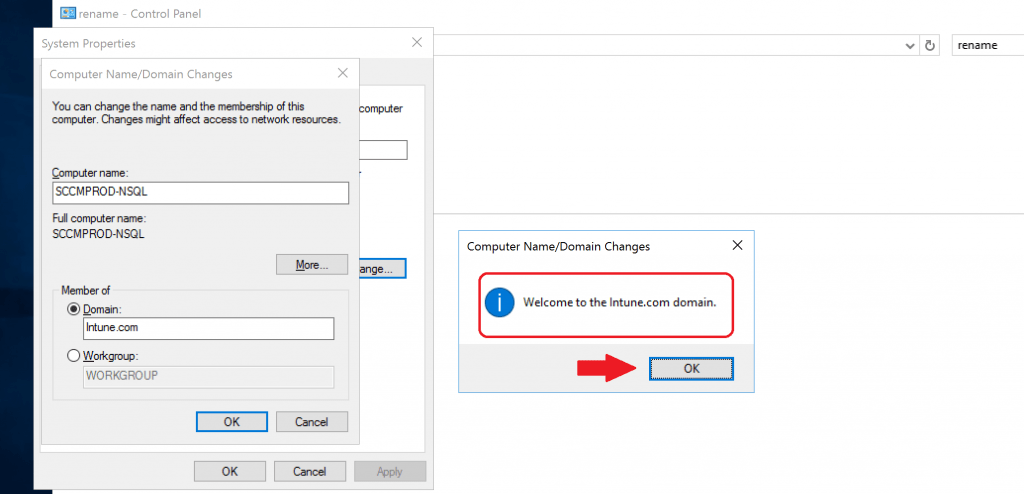
- Click OK on the popup window message “Welcome to the Intune.com domain.“
- Restart the Virtual Machine to complete the domain join process
Results
- Log in to a virtual machine with a domain username and password
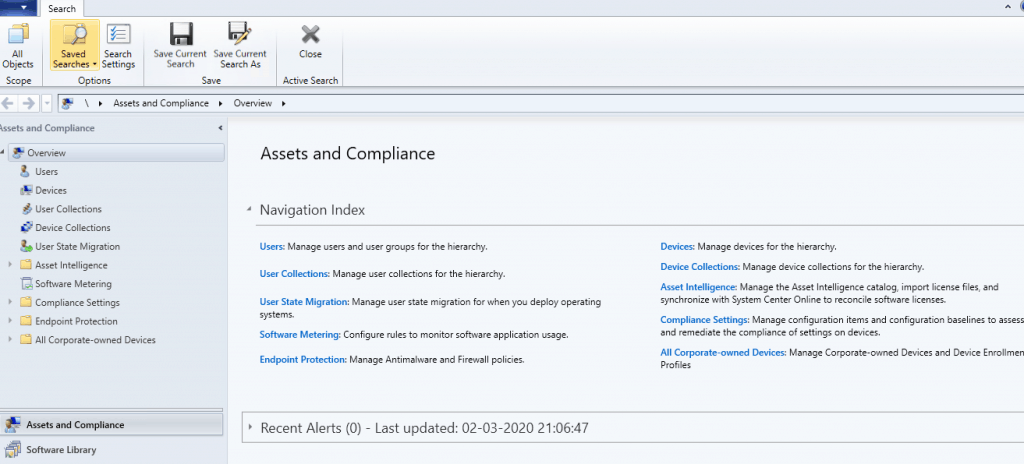
- Launch the SCCM console successfully
Resources
- New ConfigMgr Primary Server Installation Step-by-Step Guide
- Windows 10 Hyper-v Lab Setup with Surface Book
We are on WhatsApp. To get the latest step-by-step guides and news updates, Join our Channel. Click here –HTMD WhatsApp.
Author
Anoop C Nair is Microsoft MVP! He is a Device Management Admin with more than 20 years of experience (calculation done in 2021) in IT. He is a Blogger, Speaker, and Local User Group HTMD Community leader. His main focus is on Device Management technologies like SCCM 2012, Current Branch, and Intune. He writes about ConfigMgr, Windows 11, Windows 10, Azure AD, Microsoft Intune, Windows 365, AVD, etc.

thank you so much for this; this just happened to me. you are a lifesaver