
Key Takeaways:
- Enable Chrome Process Isolation Policy
- Prevent unauthorized access of Content through Google Chrome
- Helps to improves the security of Google Chrome
- Control Tampering of Google Chrome Processes
Let’s discuss about Deploy Chrome Process Isolation to Stop Data Tampering using Intune. Process Isolation is a security policy for Google Chrome to prevente authorized applications on the system from tampering with or reading the contents of Google Chrome’s running processes. This helps prevent other applications on the system from gaining access to Google Chrome’s encrypted data.
Table of Contents
Table of Contents
Deploy Google Chrome Process Isolation to Stop Data Tampering using Intune
This policy controls the Process Isolation settings for Google Chrome. If this policy is unset, Google Chrome will follow the default rollout process for the Process Isolation feature, which means that the feature will be gradually rolled out to an increasing number of users.
Note: This policy is applied when Google Chrome starts. If the policy is changed while Google Chrome is running, the new setting will take effect on the next restart.
- Disable Automatic Download of GenAI Mode in Google Chrome with an Intune Settings Catalog Policy
- Enable In-Browser Protection with Microsoft Edge for Business to Securing Cloud Apps Without Proxies
- Enable Importing Cookies Policy to Transfer Data from Google Chrome to Microsoft Edge using Intune
Example Scenario
A corporate analyst has an internal treasury management portal open in Tab 1 while simultaneously browsing an unverified external news or market research site in Tab 2. Unknown to the user, the external site serves a malicious payload designed to execute a speculative execution side-channel attack.

With this policy the operating system enforces absolute memory address separation between Tab 1 and Tab 2. Even if the external site’s renderer is entirely compromised, it resides in a totally isolated memory space with zero visibility into the treasury portal.
Steps to Configure Google Chrome Process Isolation Policy
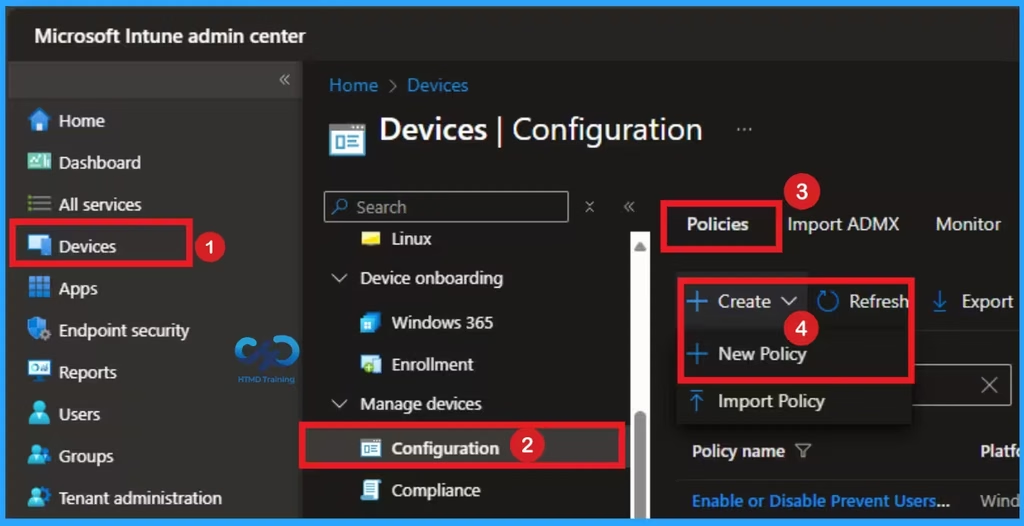
Using Microsoft Intune you can quickly configure Chrome Process Isolation. Sign in Intune Admin Center portal. Go to Devices > Windows > Configuration > Create > New Policy.
Selecting Profile and Platform
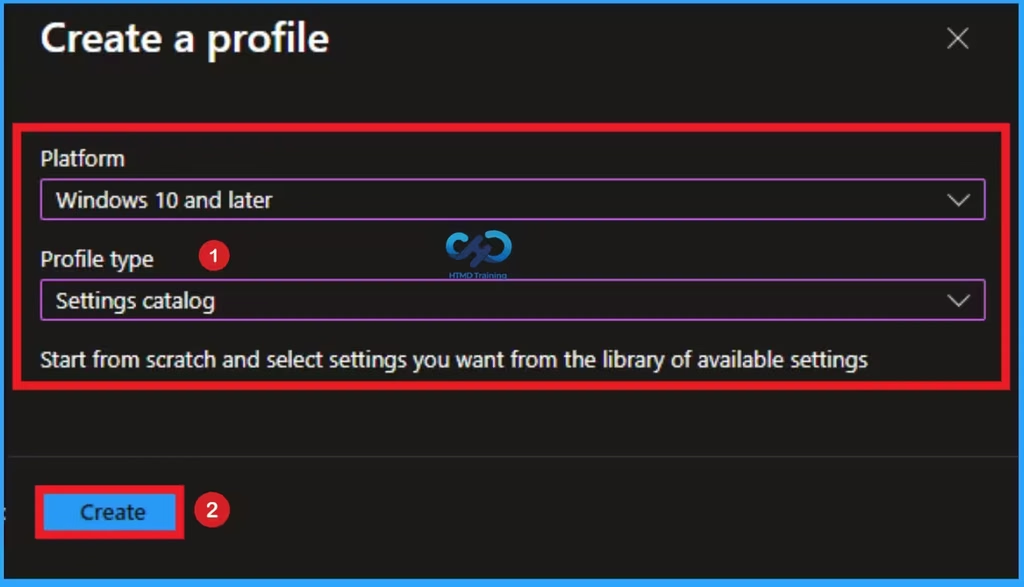
Profile type and platform selecting is the next step you have to do before configuring policy. This is very necessary step for policy creation. Here I selected Windows 10 and later as the Platform and Settings catalog as the profile type. Then click on the Create button.
Naming Policy with Basic Tab
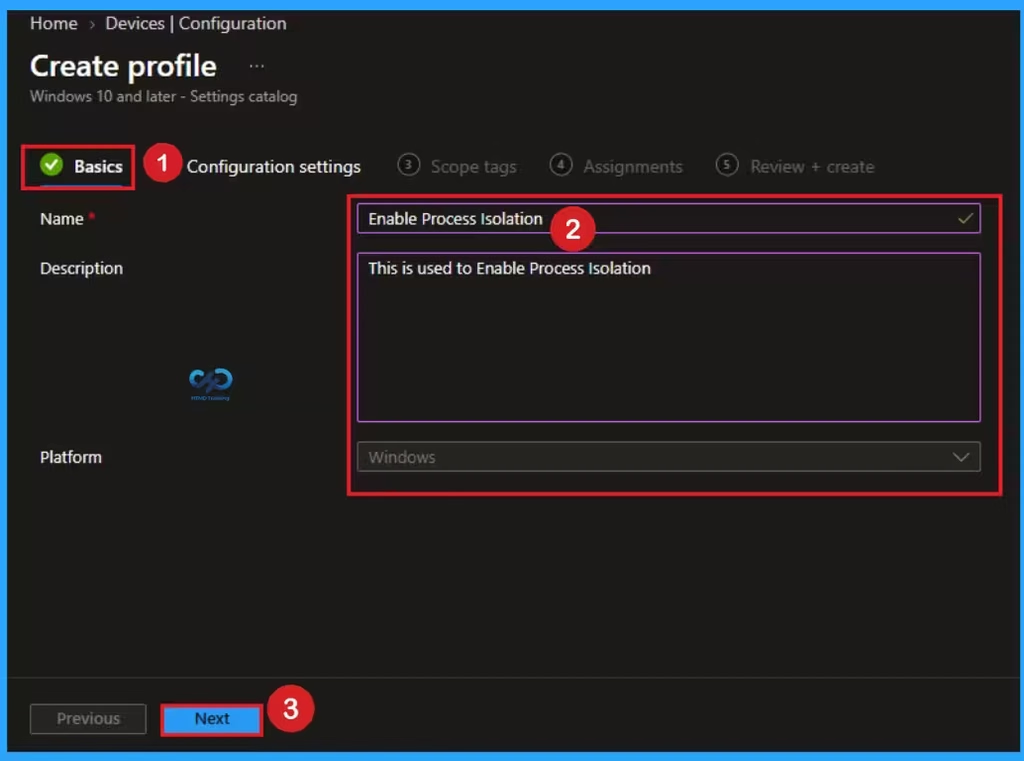
Basic Tab is used to give an identity for the policy by adding name and description. Here Name is Mandatory and Description is optional. After adding these details click on the Next button.
Configure the Process Isolation Policy
The Configuration settings page is helps to select specific settings to create the policy. The Settings Catalog provides a huge number of settings. To select a settings click on the +Add settings hyperlink. Then you will get Settings Picker. Choose Google Chrome > Process Isolation. Then I close the Settings Picker.
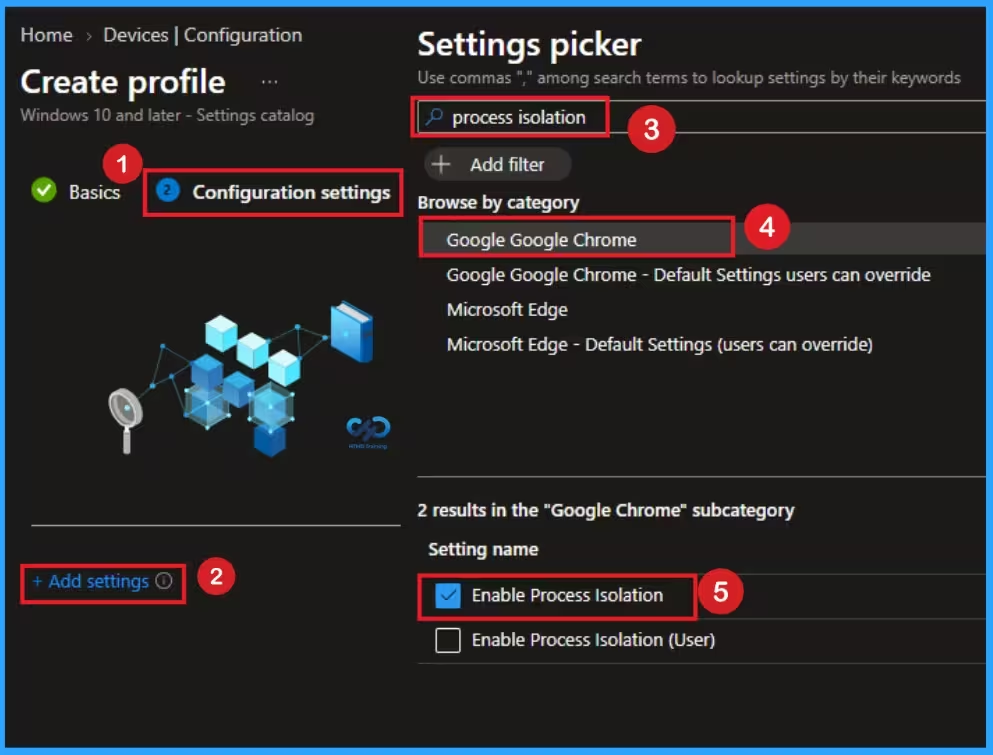
Disable Process Isolation Policy
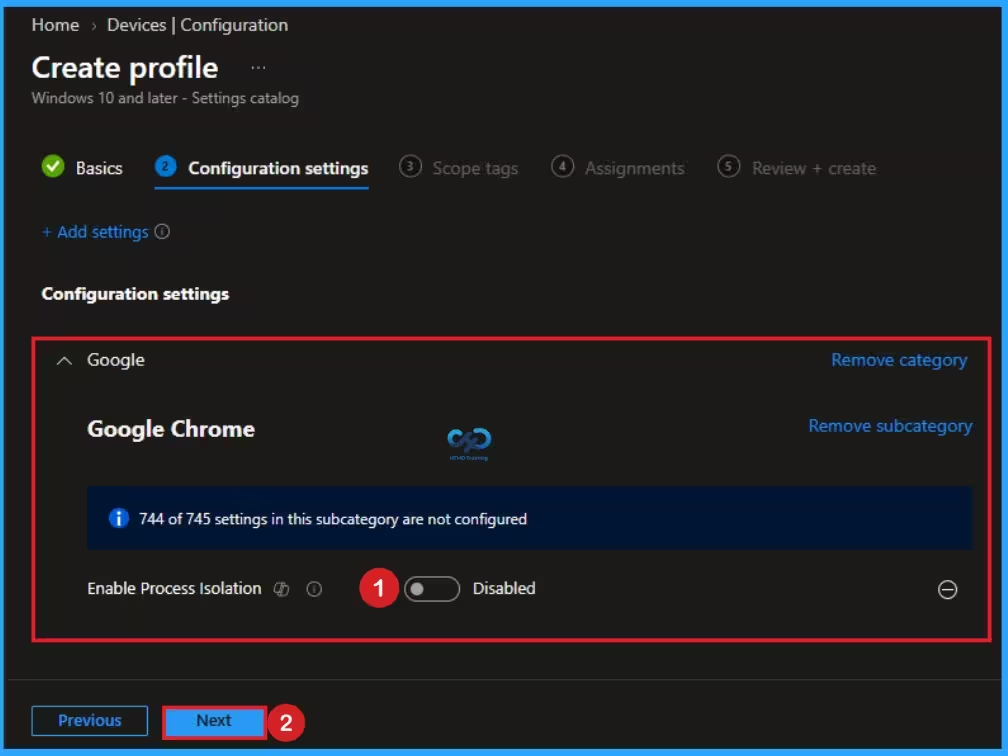
Process isolation creates a dedicated OS process for every distinct domain/origin loaded across all tabs. Disabling it allows Chrome to group multiple sites into shared renderer processes, reducing Chrome’s overall RAM usage by roughly 10% to 13%. Disable is the default value of this policy. If you like to go with this value, click on the Next button.
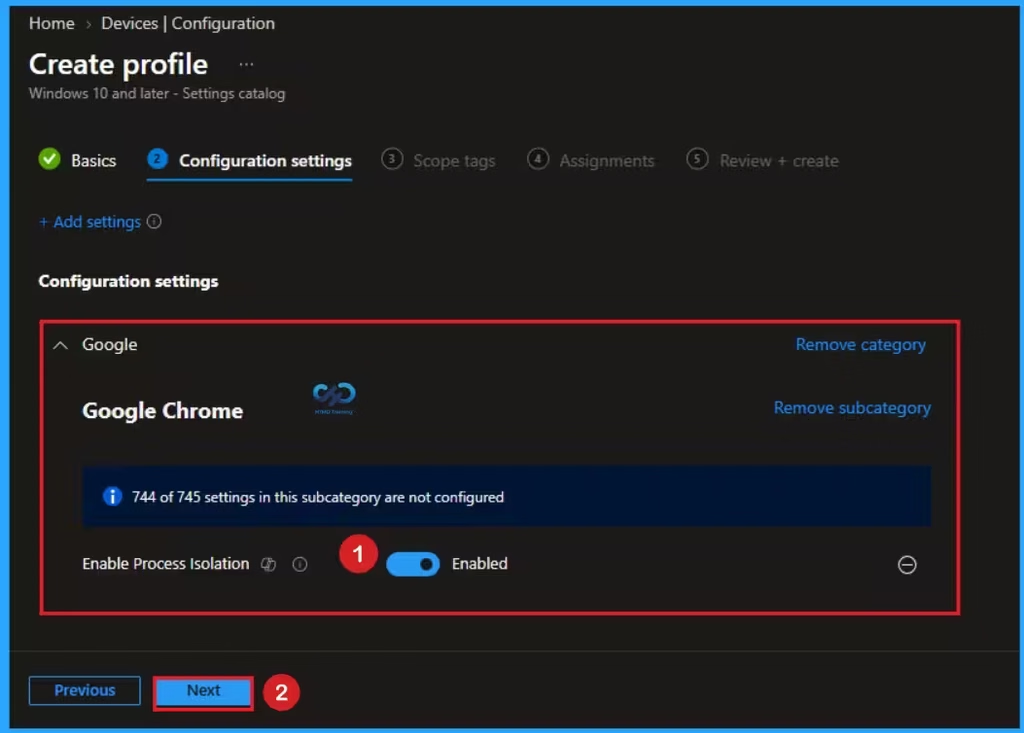
Enable Process Isolation Policy
Enabling Process Isolation may cause incompatibilities with third party applications that rely on being able to inject or tamper with Google Chrome’s processes, such as antivirus, screen reader or window manager applications. Here I enable this policy and click on the Next button.
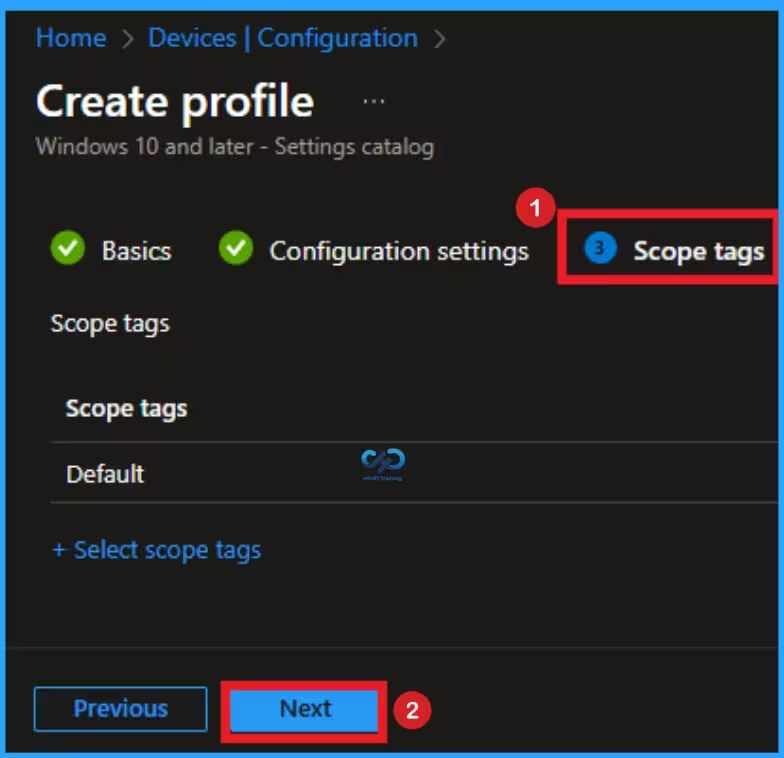
Scope Tags for Process Isolation Policy
By using scope tags you can restrict the visiblity of Enable Process Isolation Settings. It is helps to organize resources as well. Here I would like to skip this section, because it is not mandatory. Click on the Next button.
Assign this Policy to Specific Groups
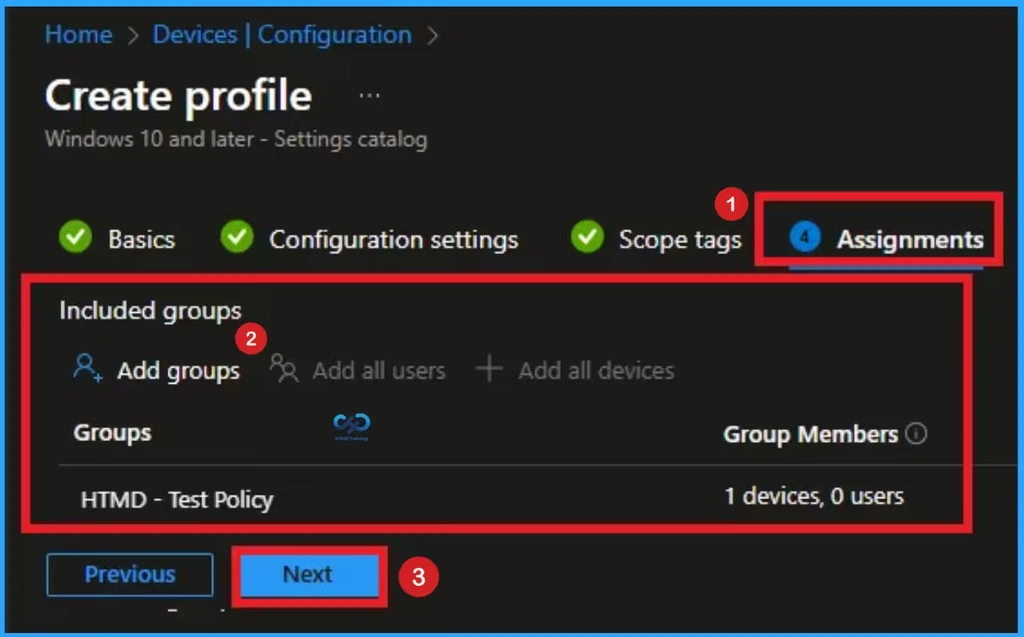
To assign the policy to specific groups you can use Assignment Tab. Here I click, +Add groups option under Included groups. I choose a group from the list of group and Click on the Select button. Again I click on the Select button to continue.
Last Step of Policy Creation
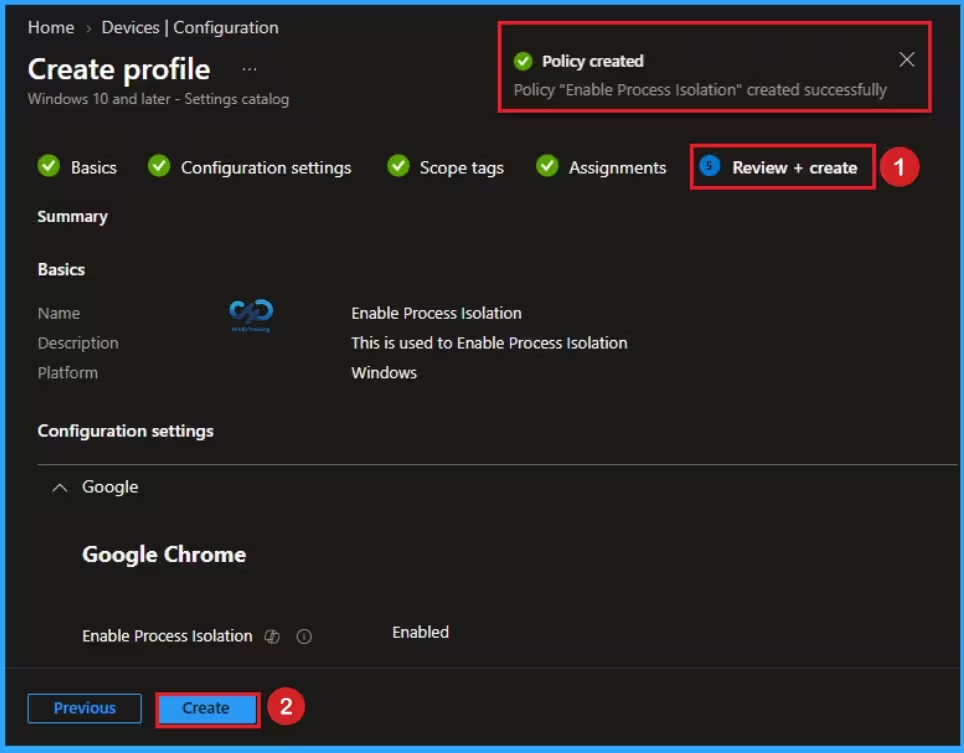
To complete the policy creation you can review all the policy details on the Review + create tab. It helps to avoid mistakes and successfully configure the policy. After varifying all the details click on the Create Button. After creating the policy you will get success message.
Monitoring Status
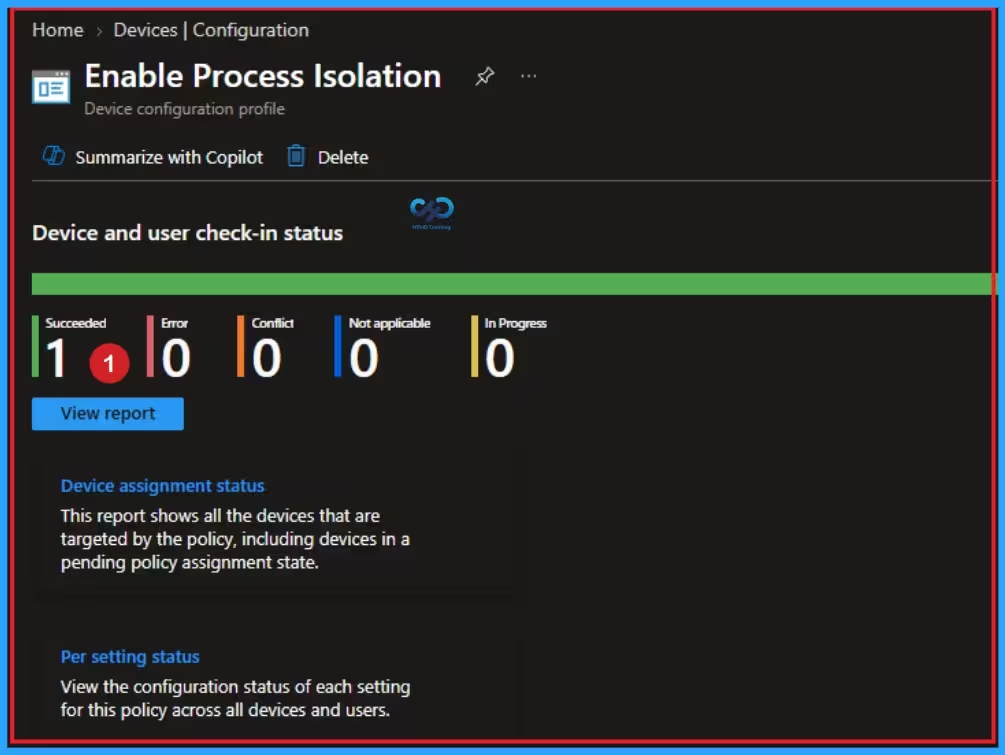
The Monitoring Status page shows whether the policy has succeeded or not. To quickly configure the policy and take advantage of the policy sync, the device on the Company Portal, Open the Intune Portal. Go to Devices > Configuration > Search for the Policy. Here, the policy shows as successful.
Client Side Verification with Event Viewer
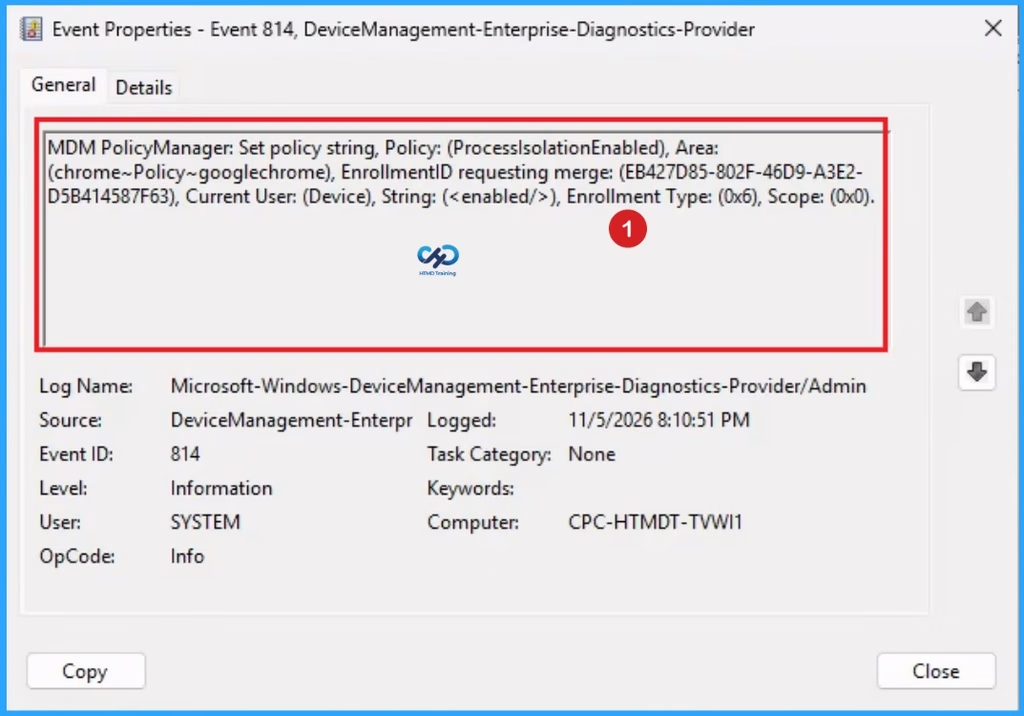
If you get success message, that doesn’t means you will get the policy advanatges. To varify the policy successfully configured to client device check the Event Viwer.
Open Event Viewer: Go to Start > Event Viewer. Navigate to Logs: In the left pane, go to Application and Services Logs > Microsoft > Windows > DeviceManagement-Enterprise-Diagnostics-Provider > Admin. Filter for Event ID 814: This will help you quickly find the relevant logs.
| Details of Event ID |
|---|
| MDM PolicyManager: Set policy string, Policy: (ProcesslsolationEnabled), Area: (chrome~Policy~googlechrome), EnrollmentID requesting merge: (EB427D85-802F-46D9-A3E2- D5B414587F63), Current User: (Device), String: (), Enrollment Type: (0x6), Scope: (0x0). |
Removing the Assigned Group from Enable Process Isolation
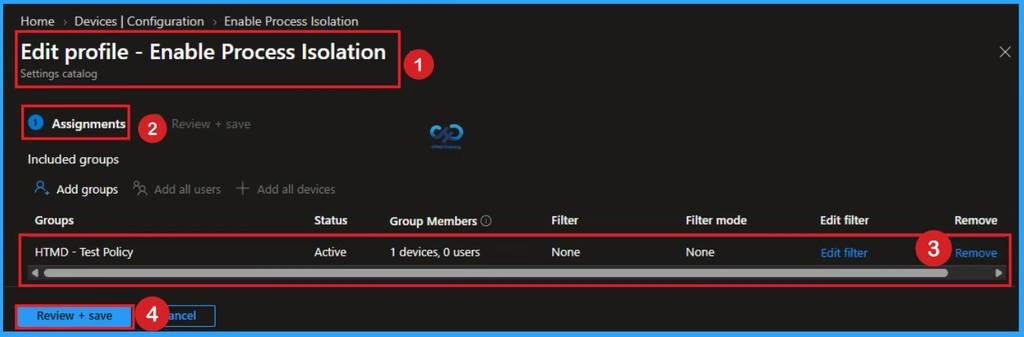
Removing policy is necessary for some situation. If you want to remove the Assigned group from the policy, it is possible from Intune Portal. To do this open the Policy on Intune Portal and Edit the Assignments tab and Remove the Policy.
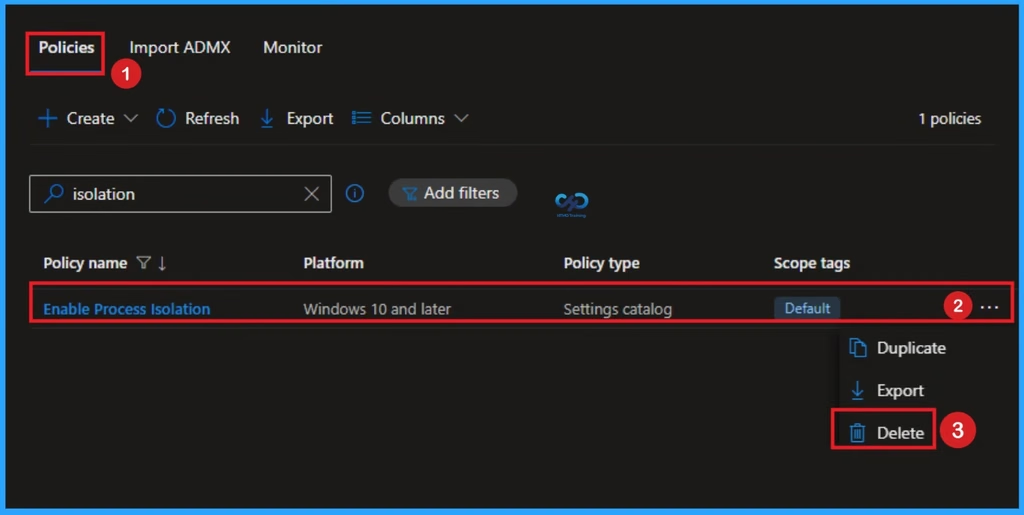
How to Delete Process Isolation
You can easily delete the Policy from Intune Portal. From the Configuration section you can delete the policy. It will completely remove from the client devices.
Need Further Assistance or Have Technical Questions?
Join the LinkedIn Page and Telegram group to get the latest step-by-step guides and news updates. Join our Meetup Page to participate in User group meetings. Also, join the WhatsApp Community and the Whatsapp channel to get the latest news on Microsoft Technologies. We are there on Reddit as well.
Author
Anoop C Nair is Workplace Technology solution architect with 25+ years of experience in global enterprise organizations such as JP Morgan, Capgemini, etc. He is Microsoft Certified Trainer. Microsoft MVP from 2015 onwards for consecutive 11 years! He also conducts Intune and modern workplace tech training for enterprise organizations. He is Blogger, Speaker, and Founder of HTMD Community and HTMD Conference. His focus is on Device Management technologies such as Intune, Windows, Cloud PC. He writes about technologies like Intune, SCCM, Windows, Cloud PC, Windows, Entra, Microsoft Security.