Let’s learn in this post how to Install Additional SMS Provider Role on Remote SCCM Server. You can install multiple SMS Providers with your ConfigMgr hierarchy. SMS Provider, a site server role in SCCM that acts as a bridge between SCCM and the Database server.
The SMS Provider in SCCM is a WMI provider that allows read and write access to a site’s SCCM database. Using either WMI or managed classes, SMS Provider can be accessed through Windows Management Instrumentation (WMI).
To manage or use the SCCM console, Configuration Manager connects to an instance of SMS Provider. When you build a new SCCM infrastructure, you need Central Administrative Site (CAS), an optional and a Primary Site. By default SMS provider will installed on the site server. At least one SMS provider is required for each CAS and Primary site.
Now additional SMS Provider role can be installed on the same site. But to do that, you have to install some prerequisites. So lets us discuss the prerequisite required to install the additional SMS Provider and other stuff.
Requirement of Additional SMS Provider Role
Why do we need an additional SMS provider in the current SCCM environment? What is the requirement for an additional SMS provider? Let us discuss some points below.
- Maybe there is a business requirement for SMS Providers to be highly available to your environment.
- A large number of administrative users frequently access the SCCM console simultaneously.
Note! SMS provider roles are not supported in ConfigMgr Secondary sites.
Prerequisite of SMS Provider
Let us discuss one by one what prerequisites are required for SMS Provider. Below are the prerequisites required to install the SMS provider.
- Windows Automated Deployment Kit (ADK) is required to install the SMS provider role. The computer must have at least 650 MB of free space to support the Windows ADK components installed with the SMS provider.
- The computer should be in a domain with two-way trust with the site server and database systems.
- The computer must run with an operating system that supports the site server.
- The computer cannot install with a site system role from a different site.
- The computer also cannot install with an SMS provider role from any site.
Install Windows ADK
As part of the prerequisite, we must first install the Windows ADK on the computer we want to use for the SMS provider role. Ensure your computer matches the same ADK version installed on the site server.
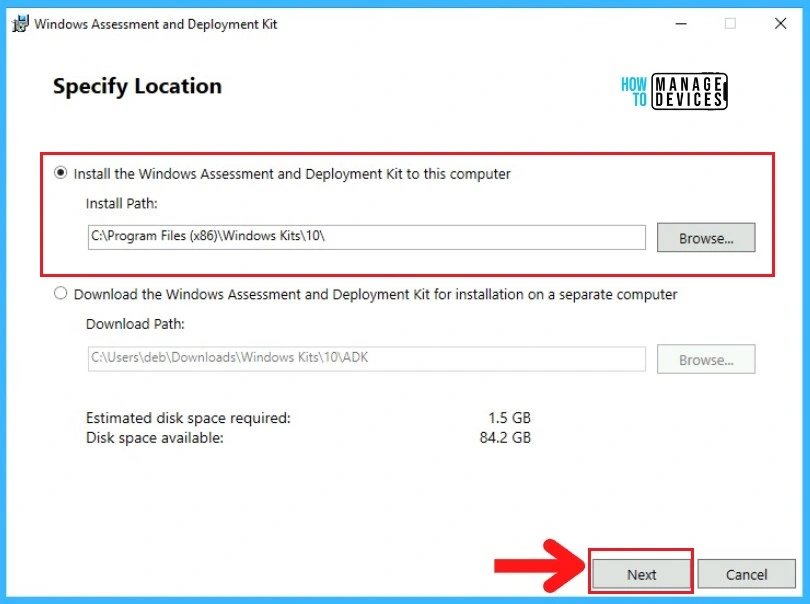
To install the Windows ADK go to the patch where you downloaded files. First, run the adksetup.exe. Specify the path where you want to install the Windows ADK. Here is the selected default path. Click Next.
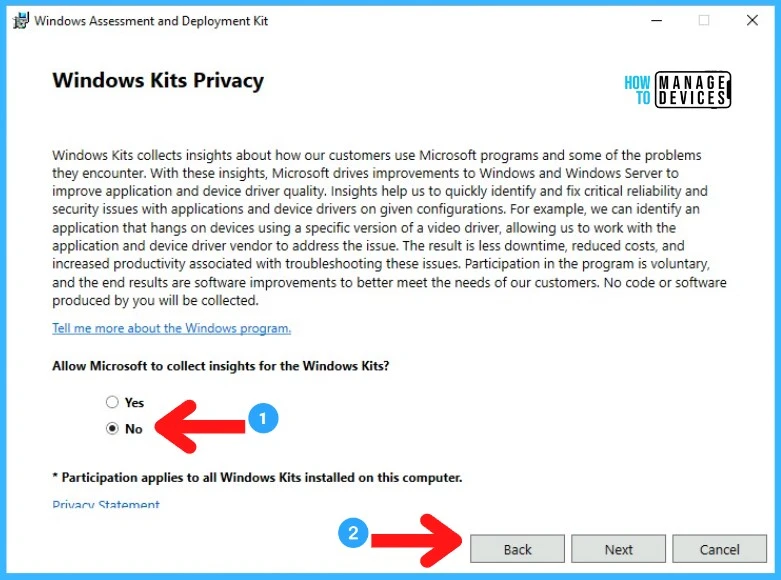
On the Windows Kits Privacy page, in the “Allow Microsoft to collect insights for the Windows Kits?” option select No. Click Next.
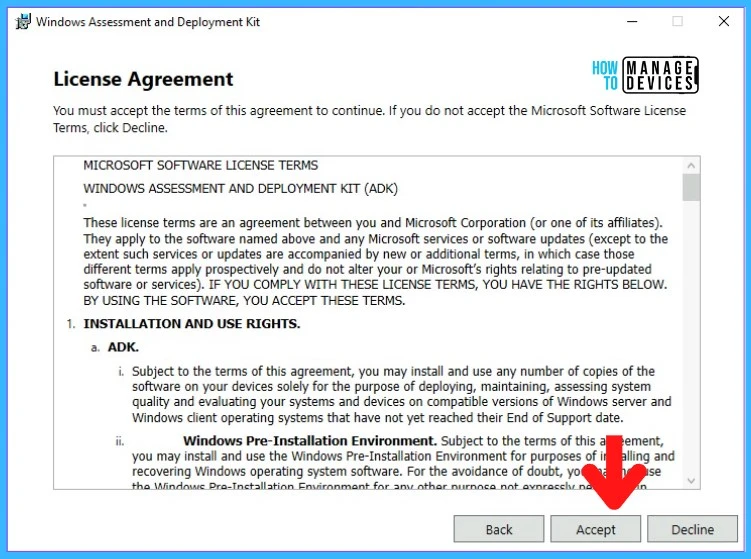
On the License Agreement page, click on Accept and click Next.
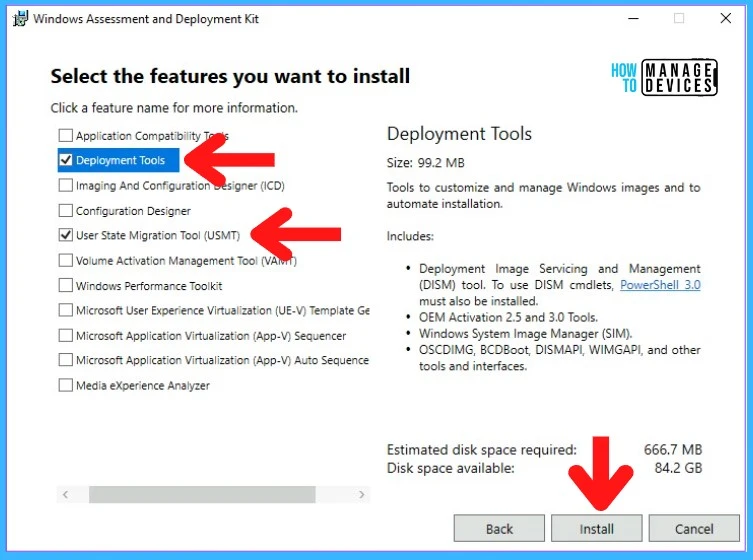
On the next Feature selection page, select the component you want to install on the site server, Deployment Tools, and User State Migration Tool (USMT), then click Next.
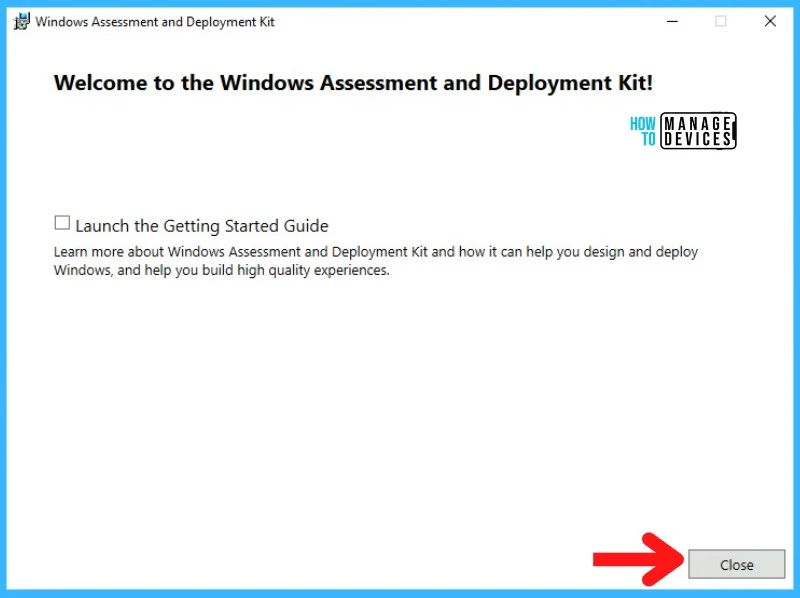
The ADK installation will start. It will take some time to download the component and install it. Once the ADK installation is completed, it will show the “Welcome to the Windows Assessment and Deployment Kit” page. Click on Close.
Note!- Starting from Windows ADK 1809, Microsoft has changed Windows Preinstallation Environment(WinPE) tool to be released separately from the Assessment and Deployment Kit (ADK).
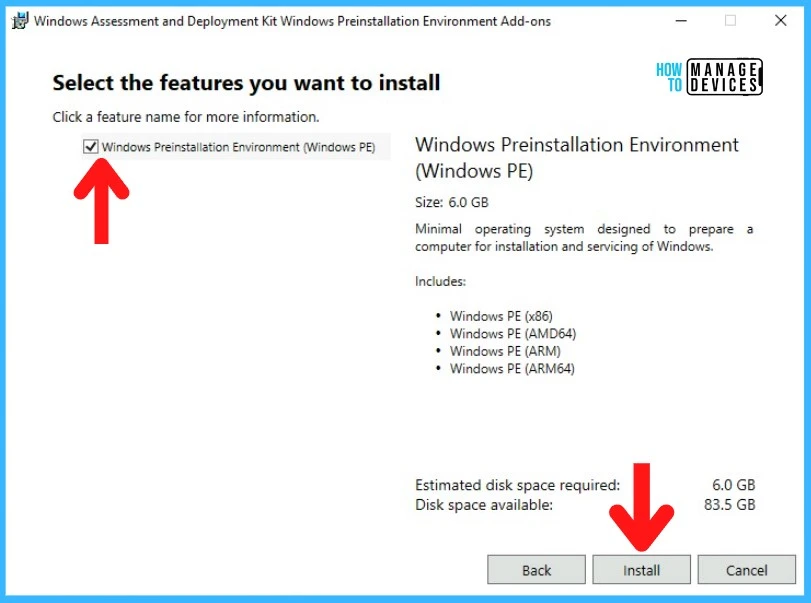
So you need to install the same version of Windows Preinstallation Environment(WinPE) on the computer. Run the “adkwinpesetup.exe” and click Install to begin the installation.
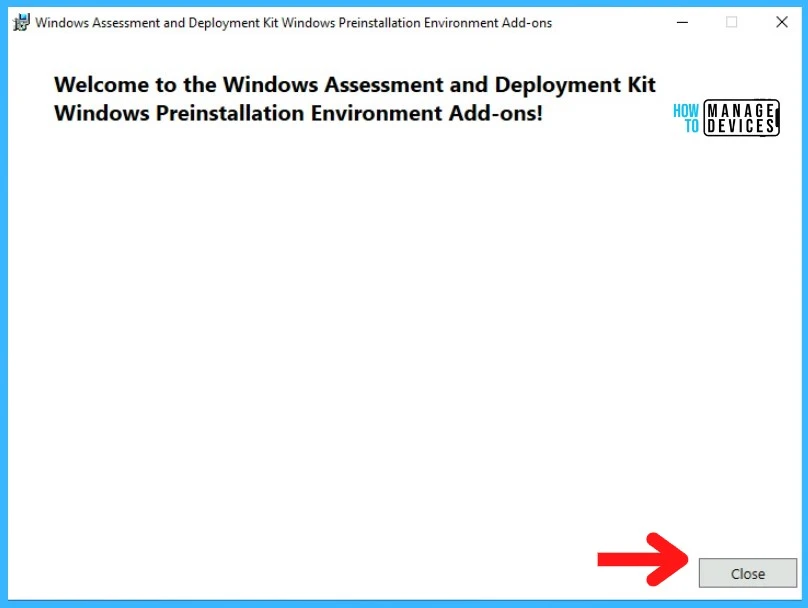
The Windows Preinstallation Environment(WinPE) installation is complete. Close the “Welcome to the Windows Assessment and Deployment Kit Windows Preinstallation Environment Add-ons” setup window.
- Check the complete guide Download Windows 11 ADK Installation Guide Step by Step.
Install Additional SMS Provider Role on Remote SCCM Server
Now will see how to add or install an additional SMS provider role in the existing ConfigMgr (a.k.a SCCM) setup. Login into the Primary site server. Click on Start and search for Configuration Manager Setup.
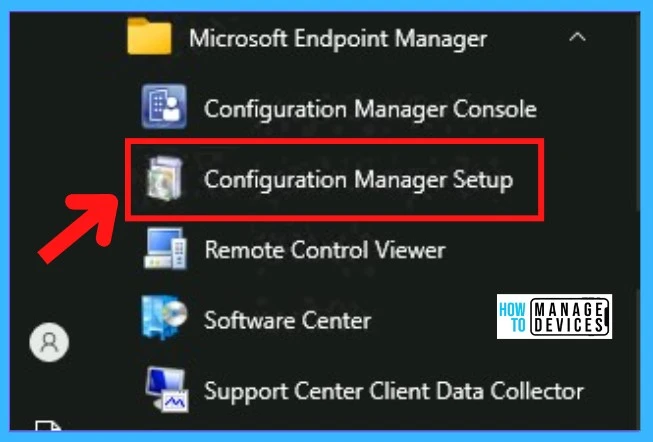
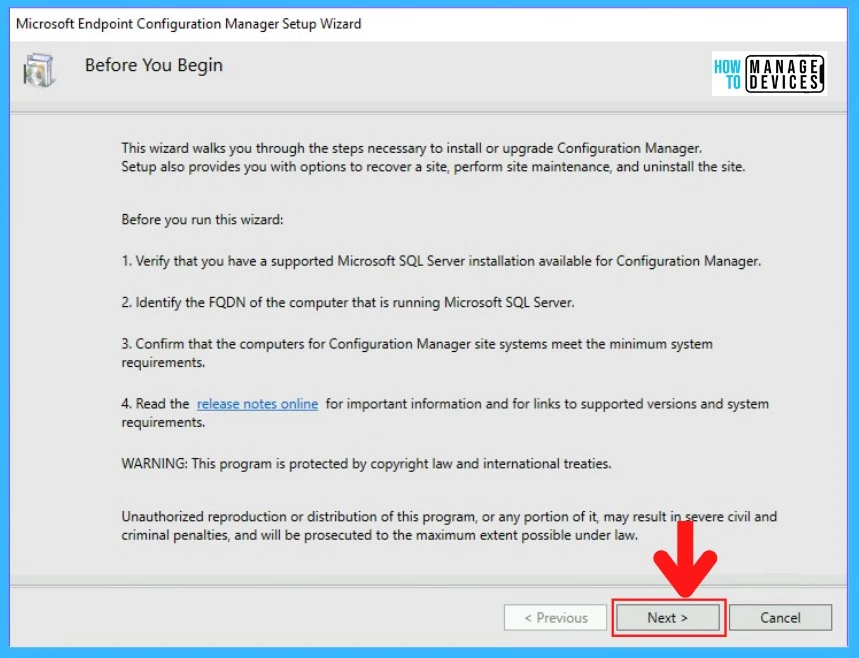
Once you click on the Configuration Manager Setup file, the Before You Begin window will appear. Click Next.
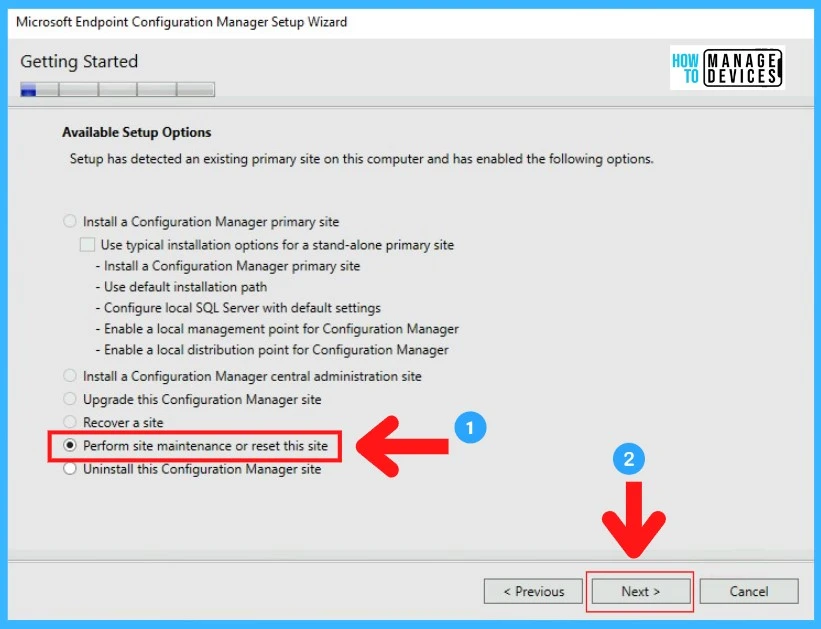
In the next step, you will see the Getting Started window. In this window, you will see different options. Choose the “Perform site maintenance or reset the site” option and click Next.
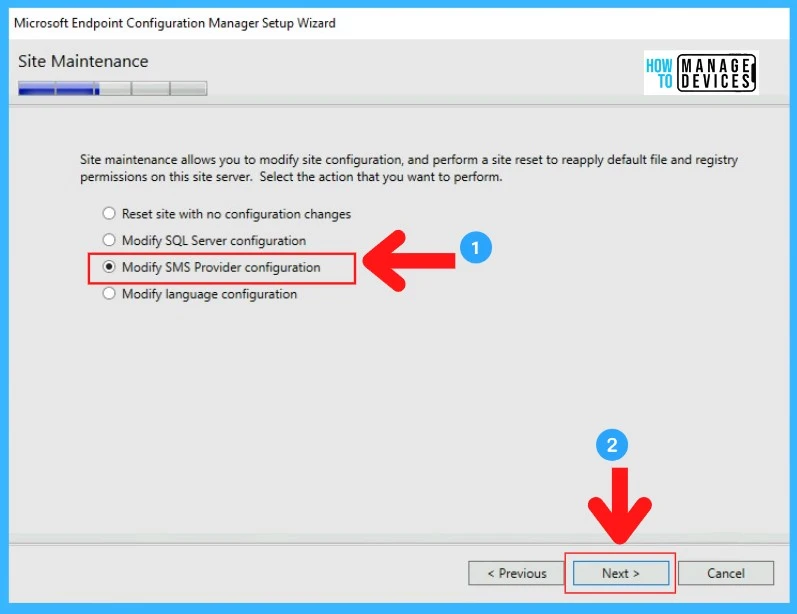
On the Site Maintenance window, choose the option “Modify SMS Provider configuration” and click Next.
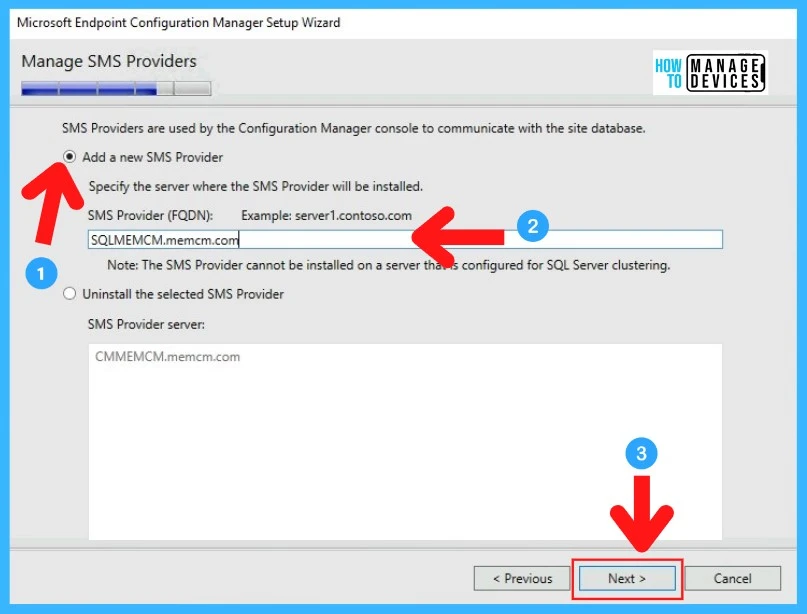
On the Manage SMS Providers window, from the list “Add a new SMS Provider” section, specify the SMS Provider FQDN of the computer where you install the prerequisites and want to install the new SMS provider role. Click Next.
Now the SMS provider role installation is in progress. Once all the processes are completed, you will see in the Configuration windows the Core setup has completed. That means the installation is completed successfully with no error.
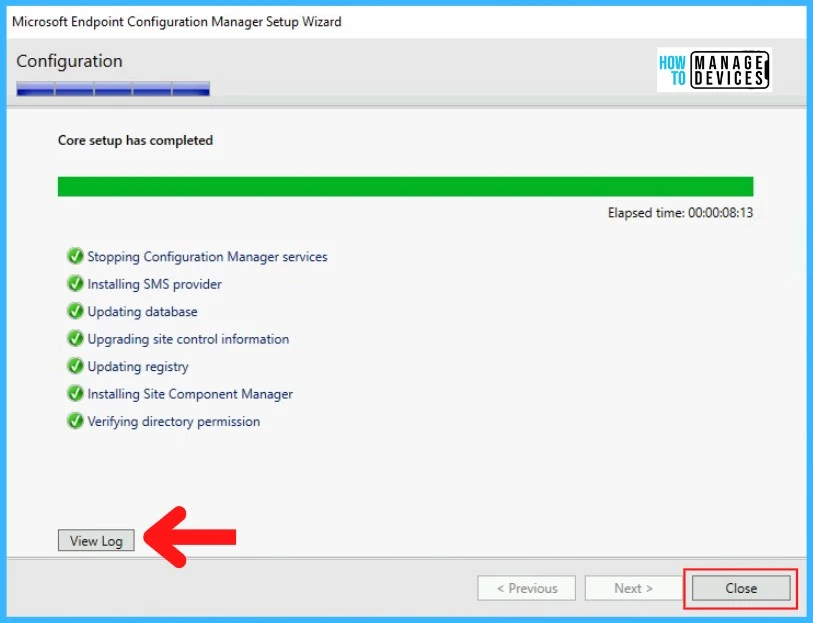
You can view the logs if you click on the View Log option. The ConfigMgrSetup.log will open. Verify the installation information inside the logs. Logs path -> C:\ConfigMgrSetup.log
How to find additional SMS Provider Role in SCCM
Now, check or find the SMS provider role inside the SCCM console. To view the SMS provider role, open the ConfigMgr console.
- Navigate to Administration > Expand the Site Configuration > Sites.

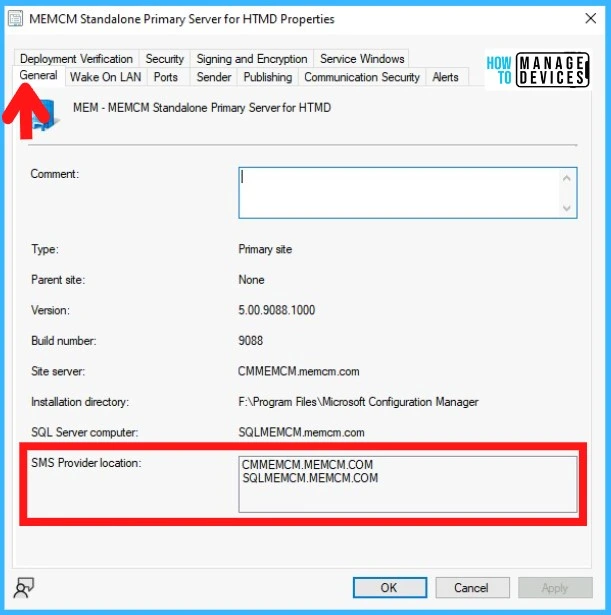
Select the Primary Sites from the list. Right click > Properties.

On the General tab of the site properties, a list of the SMS Provider location displayed on it
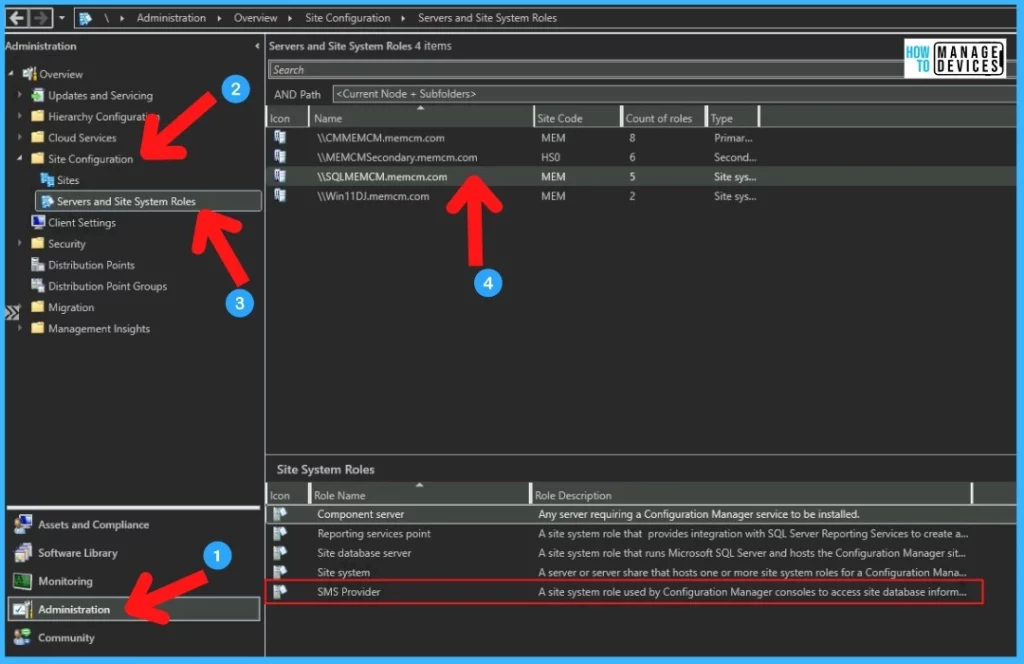
Also, Navigate to Administration > Expand the Site Configuration > Servers and Site System Roles.
Select the computer/server where you install the SMS provider role. In the below Site System Roles, you will find the SMS Provider role has been added.
How to Uninstall the Additional SMS Provider Role in SCCM
Now find out how we can uninstall the SMS Provider role in SCCM. Let’s discuss the step-by-step process to uninstall the SMS Provider role.
- To uninstall the SMS Provider role, Click on the Start and search for Configuration Manager Setup again.
- On Before You Begin window > Click Next.
- On Getting Started window, choose the “Perform site maintenance or reset the site” option and click Next.
- On the “Site Maintenance” window, choose the option “Modify SMS Provider configuration” and click Next.
On the Manage SMS Providers window, from the list “Uninstalled the selected SMS Provider” section, select the SMS Provider you want to uninstall. Click Next.
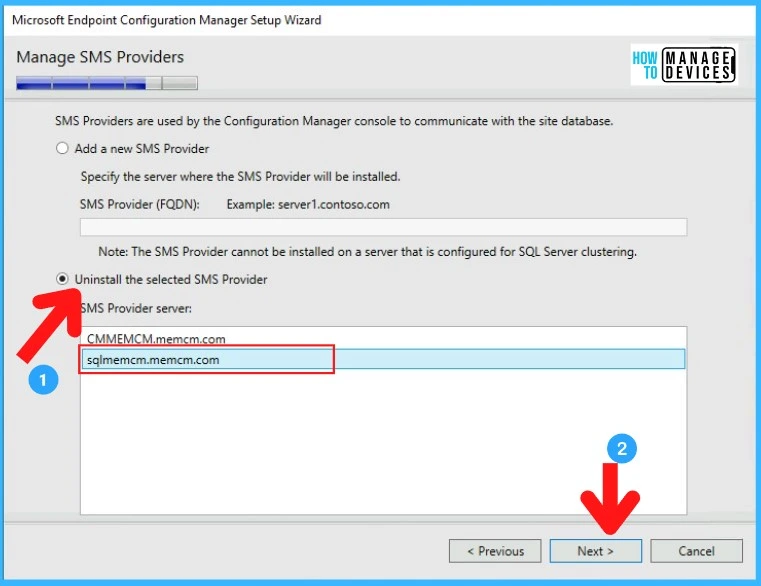
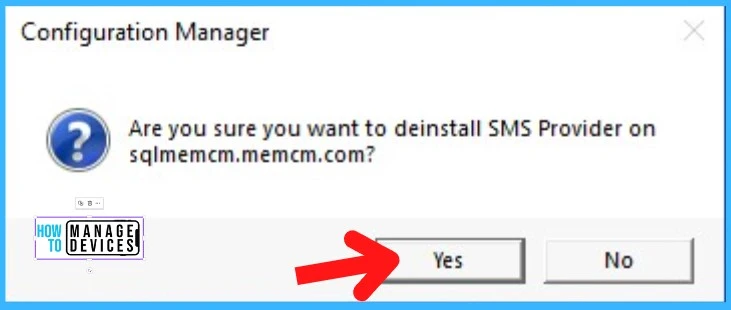
Now Configuration Manager will prompt for confirmation. Select Yes to proceed with the uninstallation.
Once the uninstallation is completed successfully, you will see in the Configuration windows the Core setup has completed. Click on Close to finish.
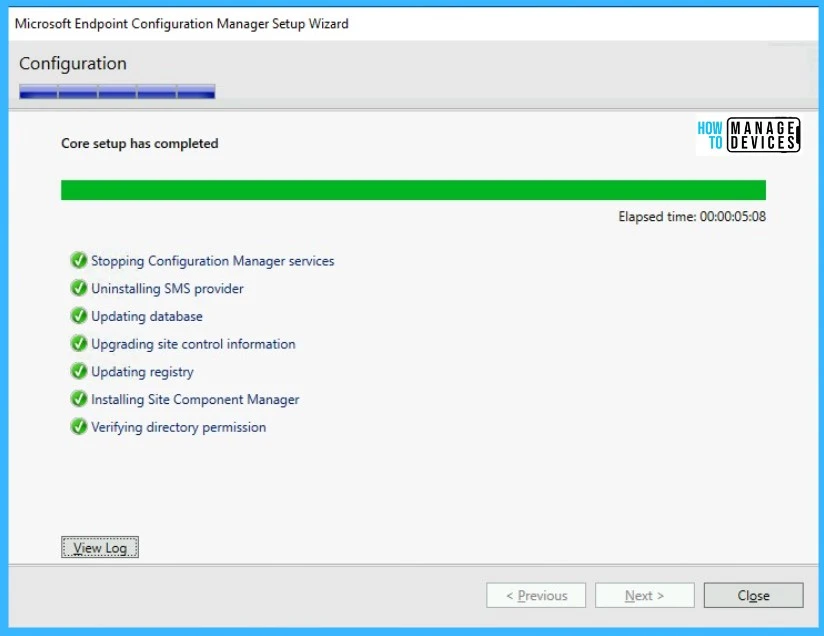
Verify the uninstallation logs from C:\ConfigMgrSetup.log path.
Author
Debabrata Pati has more than 7+ years of experience in IT. Skilled in MEMCM, Azure, and Powershell. More than five (5) years of experience in MEMCM (SCCM) administration, OSD, and Troubleshooting for the environment with more than 100K client devices.

