Let’s look into the topic How to install fonts on Windows devices using Intune. Additionally, we are going to offer insights into downloading specific fonts required for all Windows devices managed within an organization.
Proper Windows font installation is crucial for organizations and helps maintain consistency and uniformity in their documents. Furthermore, it enhances readability, which is essential for conveying messages effectively.
To install fonts on Windows devices using Intune, follow the guidelines outlined in this article. Additionally, we will outline the best practices for downloading specific fonts for all your devices.
There are three distinct methods for installing fonts on Windows devices using the Intune platform: PowerShell Script, Master Packager Tool, and Intune Win32 App. For this example, we will focus primarily on the Intune Win32 App method, which involves using a package to facilitate installation.
Snehasis Pani has explained the best way to Install Fonts on macOS using Intune. I highly recommend reading his article if you want to see Fonts’ installation on macOS. The additional information regarding the PowerShell Script and Master Packager Tool methods will be provided in a forthcoming detailed article.

We trust that this article will greatly benefit you and your organization. Let’s get started..!!
How to Install Fonts on Windows Devices Manually
Let’s understand more about Fonts in the Windows operating system. Windows devices feature a designated folder for fonts, which come preinstalled with a set of preexisting fonts. To install a custom font, it must be installed in the C:\Windows\fonts directory.
Moreover, the font information is subsequently added to the HKEY_LOCAL_MACHINE\SOFTWARE\Microsoft\WindowsNT\CurrentVersion\Fonts registry path. It is important to note that custom fonts must be installed carefully to ensure they are appropriately integrated into the system and do not cause any issues.
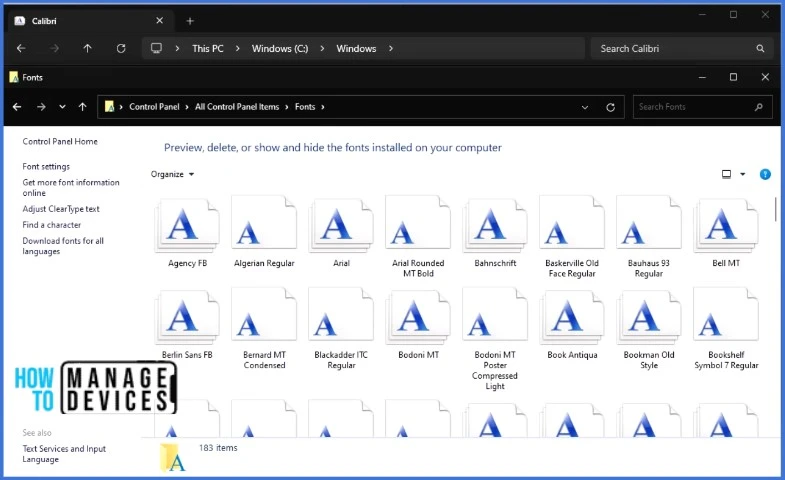
To install a font on your Windows device, select the font of your choice and right-click on it. Choose the Install option from the dropdown menu to initiate the installation process. Y
ou should carefully select the font that best aligns with your business or academic needs. Once installed, the font will be accessible across various applications, providing a consistent and professional look to your documents and presentations.
NOTE! When deploying custom fonts with Intune on Windows, it is imperative to note that the file formats of these fonts should primarily be in either .TTF or .OTF. These two file extensions represent the most commonly used font types for Windows. Thus, to ensure successful deployment of custom fonts with Intune, it is paramount to adhere to these file formats.In case you encounter difficulties while installing fonts manually on your organization’s devices, it is possible that your organization has blocked the installation. Notably, many organizations have already implemented policies restricting the manual installation of fonts.
How to Get the Font File for Deployment
I have explained the manual process of installing fonts on Windows machines above. In certain cases, installing custom fonts that have been procured, created, or downloaded from an external source may become necessary.
This may be particularly relevant in business or academic settings where specialized fonts may be required for specific purposes. It is important to ensure that any such custom fonts are installed in an appropriate and efficient manner while also being mindful of any licensing restrictions that may apply.
- Download the font files from any source.
- When fonts are downloaded from the internet, they are typically compressed into .zip folders. These folders may contain different variations of the same font, such as “light” and “heavy“.
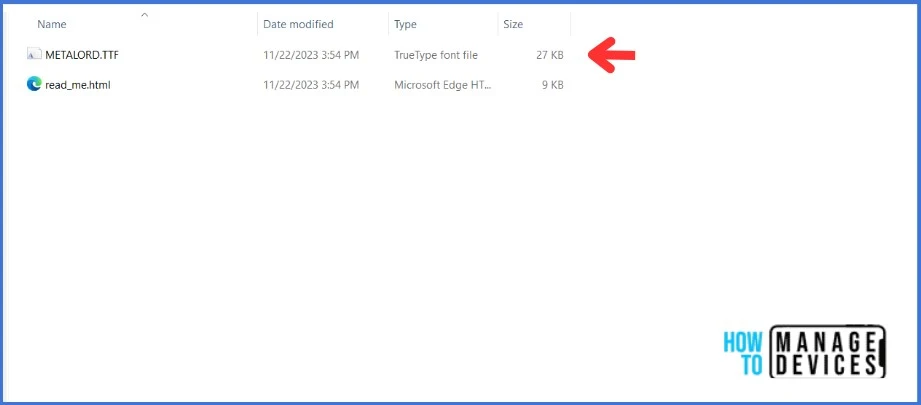
- If you have zipped font files, you’ll need to extract them before you can use them. To do this, simply right-click on the .zip folder and select “Extract”. Once you’ve extracted the files, you should be able to see the available TrueType files.
PowerShell Scripts to Install and Uninstall the Font on Windows OS using Intune
In order to install fonts on Windows devices using the Intune platform, there exist three distinct methods: PowerShell Script, Master Packager Tool, and Intune Win32 App.
The PowerShell script is designed to read both .TTF and .OTF files from the Fonts source directory, install each font in the C:\Windows\Fonts directory, and update the registry for new fonts.
Below is the PowerShell Scripts to Install the Font:
####################################################

# Script: Install-Fonts.ps1

# Scope: The below script will Install the fonts copied under the Fonts directory

# Author: Sujin Nelladath

 ####################################################

#List all fonts from the font directory (.TTF and .OTF)


$FontDirectory =  "C:\temp\planet-benson" #This is the folder where you have placed the fonts for installation


$Fonts = @(Get-ChildItem -Path "$FontDirectory\*.ttf")

$Fonts += @(Get-ChildItem -Path "$FontDirectory\*.otf")


#Register the fonts from the Font Directory

foreach($Font in $Fonts)
{

    Copy-Item -Path "$FontDirectory\$($Font.Name)" -Destination "$env:windir\Fonts" -Force

    New-ItemProperty -Path "HKLM:\SOFTWARE\Microsoft\Windows NT\CurrentVersion\Fonts" -Name $Font.Name -PropertyType String -Value $Font.Name -Force
}

Write-Host "Fonts installed successfully on the Device!"
Below is the PowerShell Scripts to Uninstall the Font:
####################################################

# Script: UnInstall-Fonts.ps1

# Scope: The below script will Uninstall the fonts copied under the Fonts directory

# Author: Sujin Nelladath

####################################################

#List all fonts from the font directory (.TTF and .OTF)


$FontDirectory =  "C:\temp\planet-benson" #This is the folder where you have placed the fonts for installation


$Fonts = @(Get-ChildItem -Path "$FontDirectory\*.ttf")

$Fonts += @(Get-ChildItem -Path "$FontDirectory\*.otf")


#Register the fonts from the Font Directory

foreach($Font in $Fonts)
{
    try{
    Remove-Item -Path "$FontDirectory\$($Font.Name)"  -Force
    Remove-Item -Path "C:\Windows\Fonts\$($Font.Name)" -Force

    Remove-ItemProperty -Path "HKLM:\SOFTWARE\Microsoft\Windows NT\CurrentVersion\Fonts" -Name      $Font.Name -Force
}
catch{
    Write-Host $_
}
}
We will take the above script as a Win32 application source and develop a package using the Win32 app packaging tool
Prepare Win32 App Installation Source for Intune
We need to create a Win32 application source of Fonts to install it on the devices. You can download the Win32 app packaging tool from GitHub.
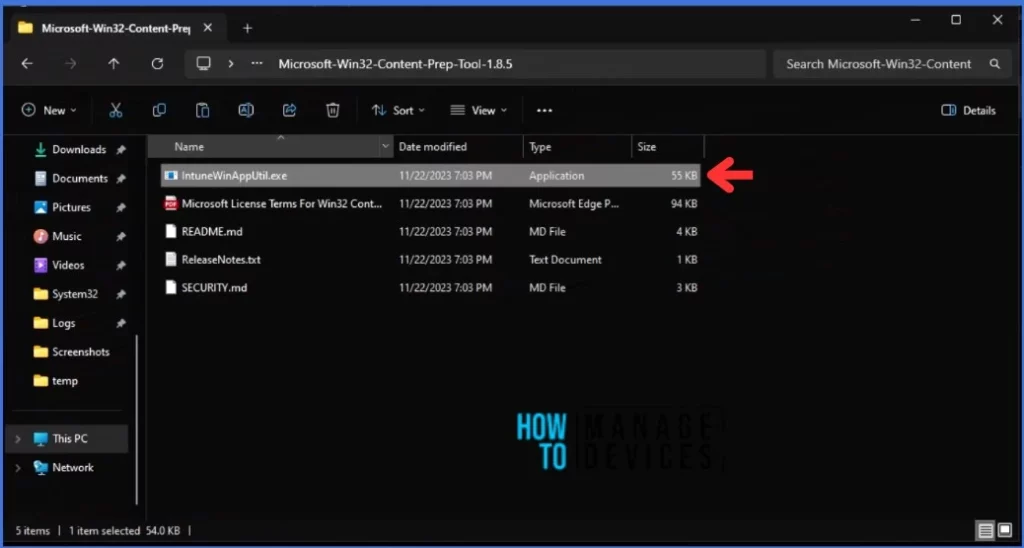
This tool converts the application installation files into the .intunewin format. We will go through a step-by-step guide for installing and configuring the tool. Please follow the instructions below.
- Download the Win32 app packaging tool from GitHub
- You can create a directory on your computer by making a folder.
- Copy the Win32 app packaging tool outside of the installation source folder.
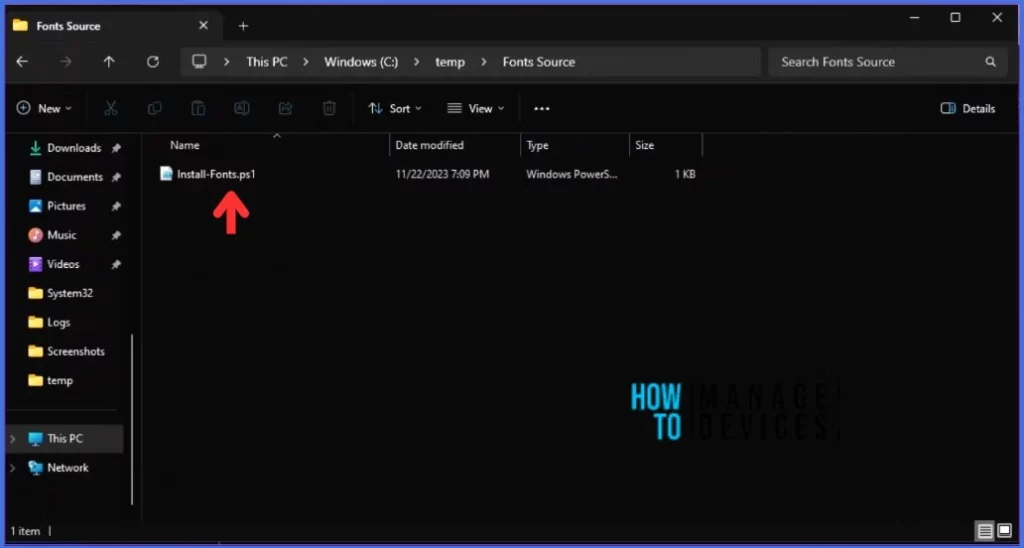
The Fonts installation file is a PowerShell script. Create the script with the name Install-Fonts.ps1 and save it in the folder you created on your computer.
Execute the Win32 app packaging tool (intuneWinAppUtil.exe). The Win32 app packaging tool will prompt for source and output folders and the setup file, which in this case is Install-Fonts.ps1.
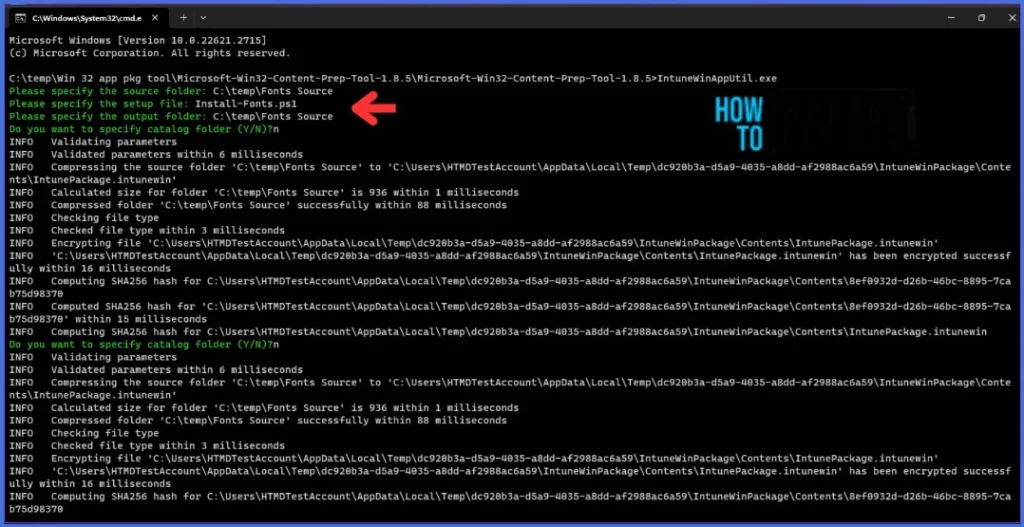
It will create the wrapped File with the extension “Intunewin”. Install-Fonts.intunewin file is compressed and encrypted with a SHA256 hash.
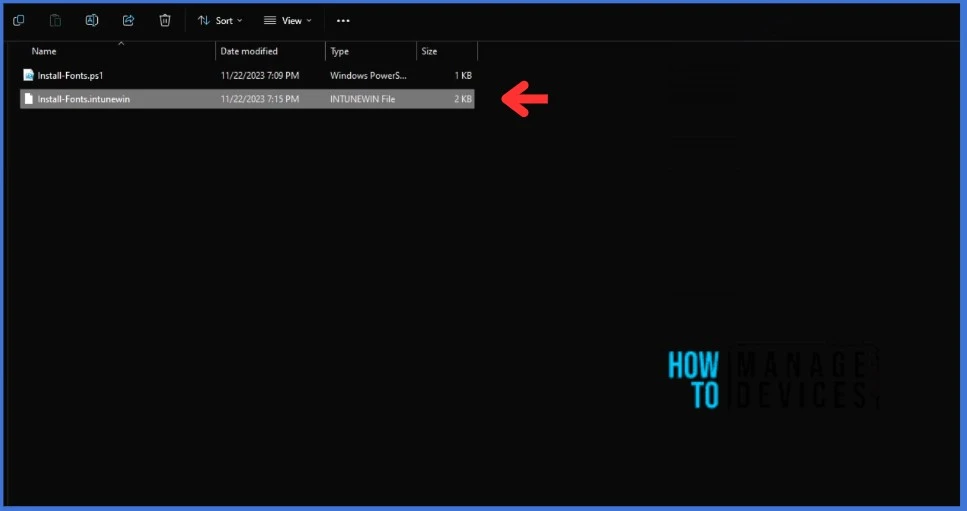
How to Add the Fonts Package to Intune as Win32 App
Please follow the instructions below for the Windows app (Win32) using Intune. The Intunewin file you created above will be used here to create the app.
- Sign in to the Microsoft Intune admin center
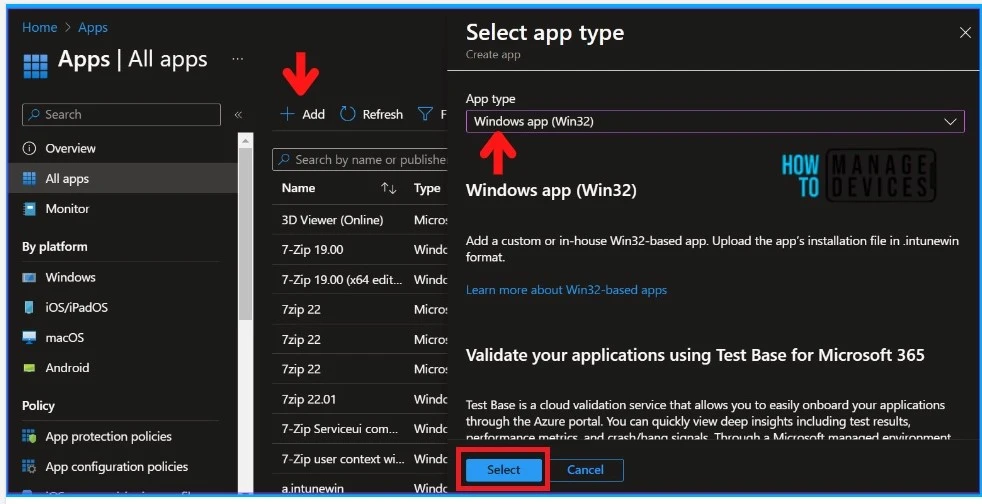
- Select Apps > All Apps> Add, or you can navigate to Apps > Windows > Windows Apps.
- Select Windows app (Win32) under the Other app types and click Select on the Select app type panel.
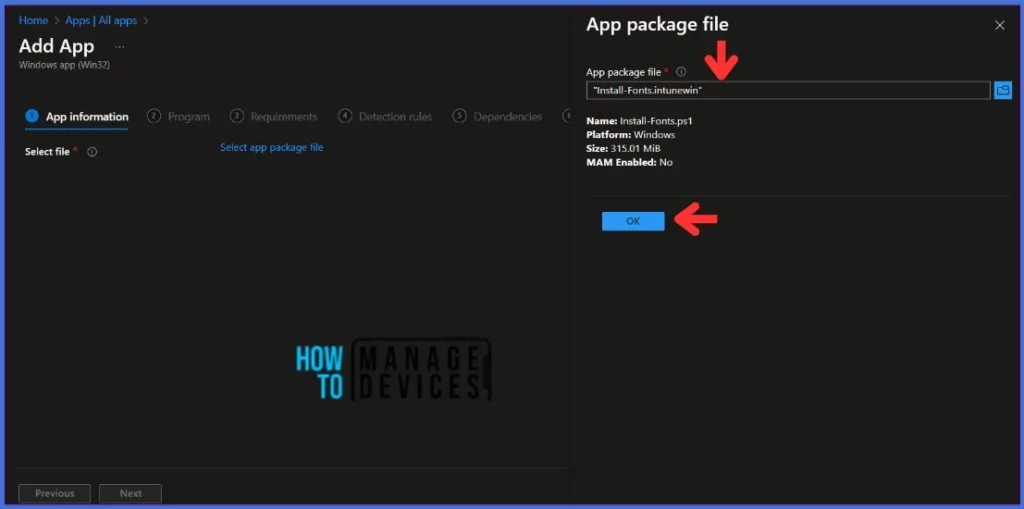
Click on the Select App package file button in the Add App wizard, then browse for the previously created intunewin File using the Win32 app packaging tool.
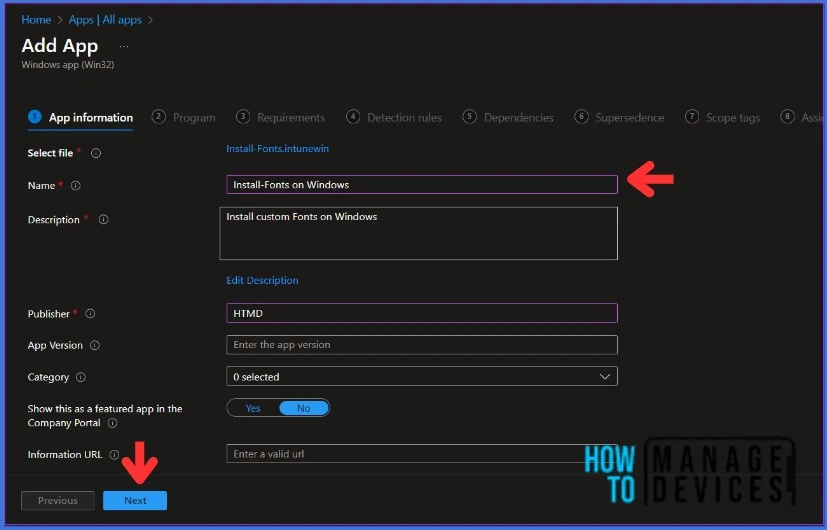
Update the app information such as Name, Description, Publisher, Category, Logo, etc. and click Next
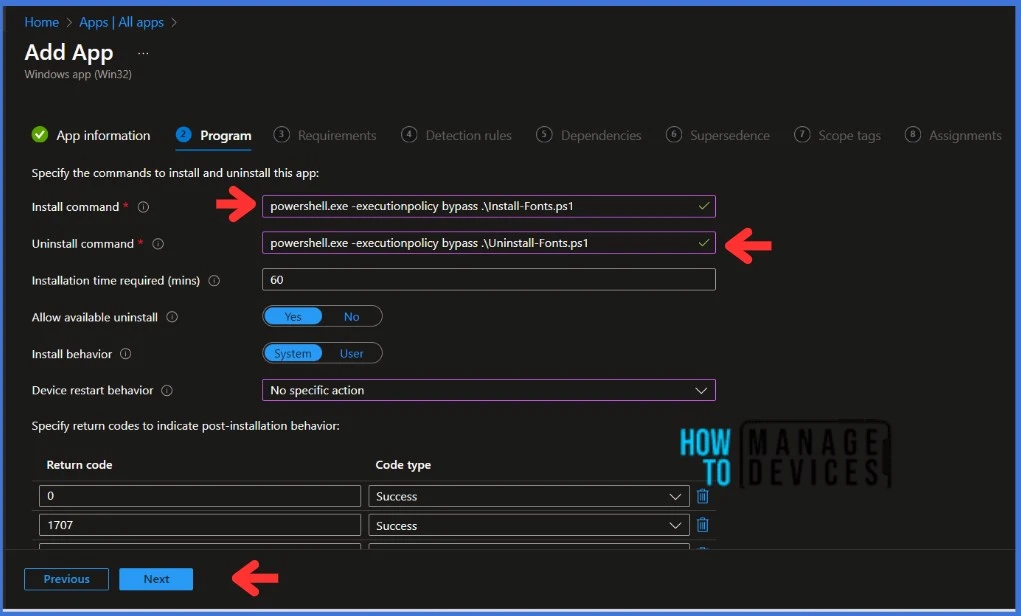
On the next page, you can add the commands to Install and Uninstall. Choose System or User for Install behaviour, and specify Device restart and Post-installation behaviour. Click Next to continue.
| Install Command | Uninstall Command |
|---|---|
| powershell.exe -executionpolicy bypass .\Install-Fonts.ps1 | powershell.exe -executionpolicy bypass .\Uninstall-Fonts.ps1 |
You can set mandatory device requirements on the Requirements page before updating.
- Operating system architecture: Choose the architectures needed to install the app.
- Minimum operating system: Select the minimum operating system needed to install the app.
When creating a Win32 application, you can choose from built-in and custom requirement rules. Explore Intune Win32 App Requirement Rules.

You can configure the Detection rule on the following page. Select Use a custom detection script.
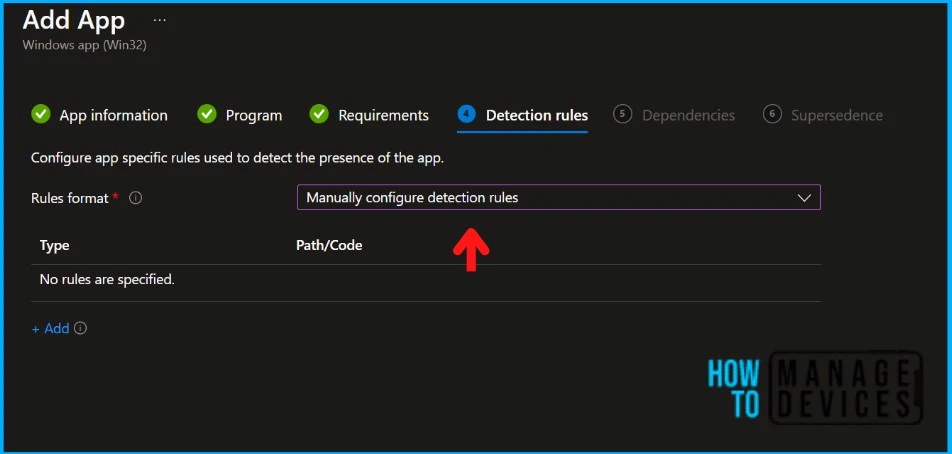
| Rule Type | Description |
|---|---|
| MSI | This detection rule detects the application installation based on the MSI product key or version check. |
| File | This detection rule detects the application installation based on the MSI product key or version check. |
| Registry | This registry-based win32 app detection rule verifies the application’s existence based on the Windows registry key, value existence, string, Integer or version comparison. |
| Use a custom detection script | The custom detection script rule verifies the application’s existence using the script. |
You need to select a PowerShell script that will detect the presence of the app on the client. The app will be detected when the script both returns a 0 value exit code and writes a string value to STDOUT.
$FontDirectory = “C:\temp\planet-benson” #This is the folder where you have placed the fonts for installation

$Fonts = @(Get-ChildItem -Path “$FontDirectory\*.ttf”)

$Fonts += @(Get-ChildItem -Path “$FontDirectory\*.otf”)

#Register the fonts from the Font Directory

foreach($Font in $Fonts)
{

$properties = (Get-ItemProperty -Path “HKLM:\SOFTWARE\Microsoft\Windows NT\CurrentVersion\Fonts”)

foreach ($list in $properties)
{

if ($list -eq $font.Name)
{
Write-Host “Font already exist”
}
else
{

Write-Host “STDOUT”
return 0
}
}
}
In the code above, I have placed the fonts for installation under the C:\temp\planet-benson folder. You may need to modify this path in the script.
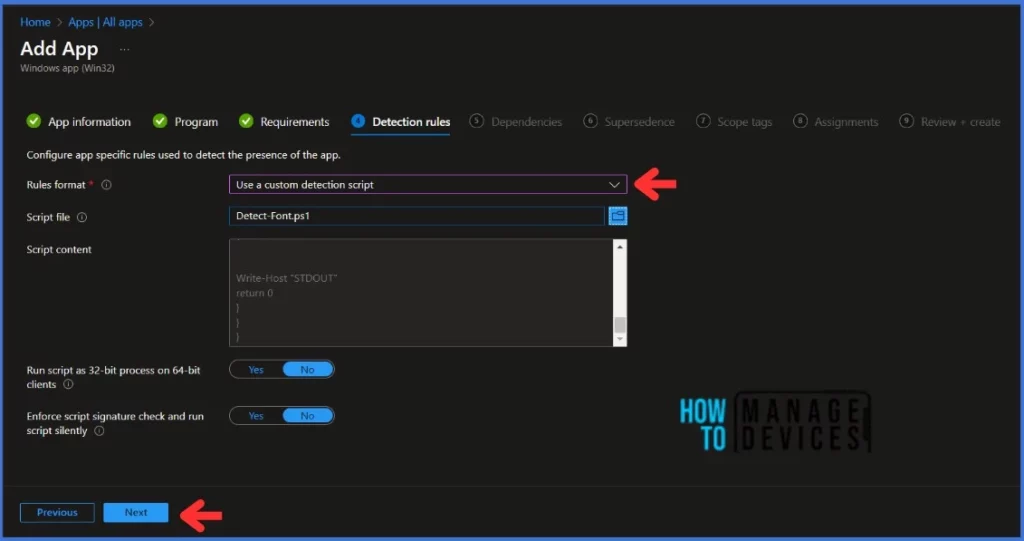
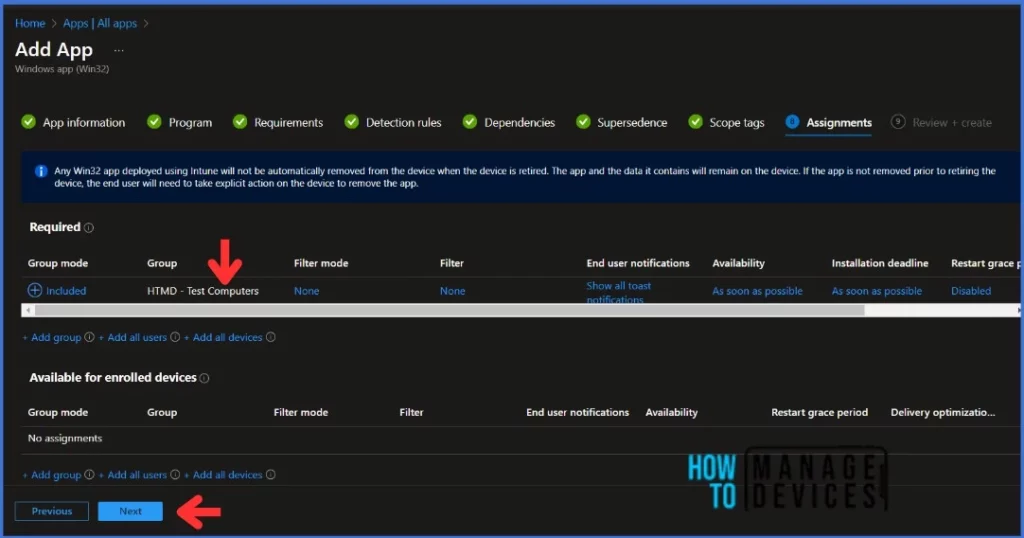
Click Next, and you’ll be prompted to configure Dependencies and the Supersedence. I’m not configuring it in this example. Add the Scope tags if you wish and click Next to assign the policy to computers. I’ll make the deployment as Required and deploy it to the HTMD – Test Computers group.
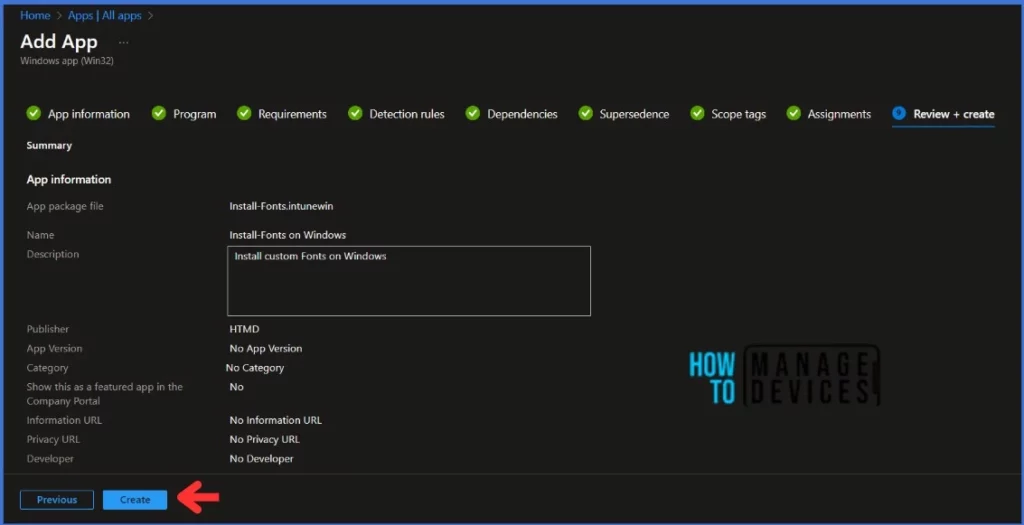
On the next page, carefully review all the settings that you have defined to Install Fonts on Windows Devices using Intune. Once you have confirmed that everything is correct, select Create to implement the changes.
Monitor Deployment from the Intune Portal
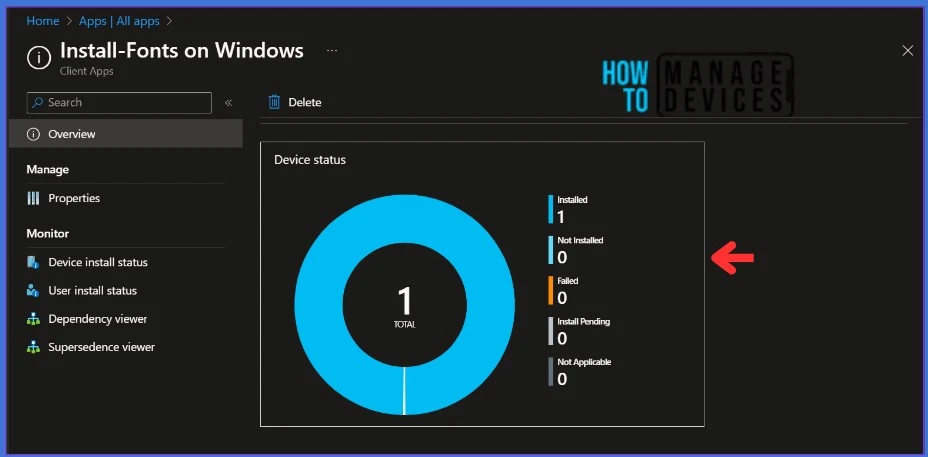
The Font package has been deployed to the HTMD – Test Computers. The installation should take place as soon as possible on the client device Since it’s deployed in Required mode. The installation status can be monitored from the Intune portal. Let’s see how we can monitor the deployment and status of installation from the Intune portal.
- Select Apps > All Apps and enter the name of the application in the search bar
The Intune portal displays the recently created application. Select the desired application and click Overview. You can view a detailed report of recent app deployments, including information on whether the app is Installed, Not Installed, Failed, Install Pending or Not Applicable.
Monitor Deployment from the Client Side
The app will be automatically installed after deploying the Chocolatey package to workstations since it was marked as a required deployment. You may wonder how to monitor the deployment from the client side.
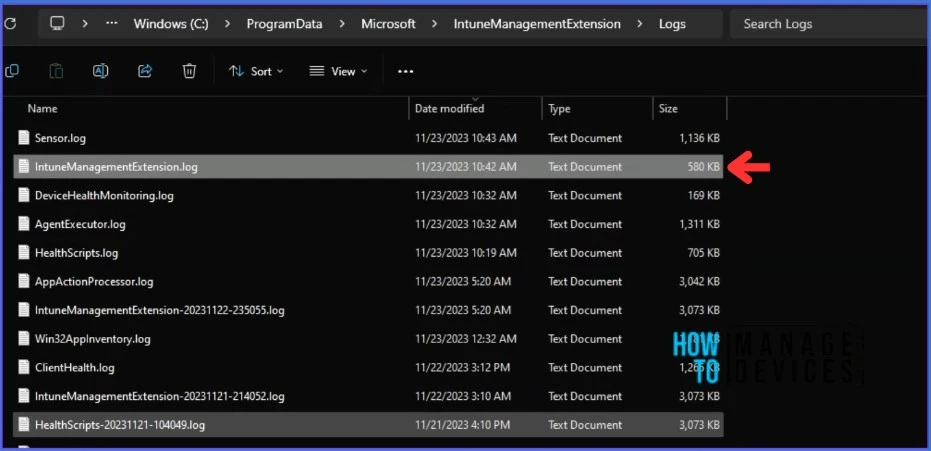
There are multiple ways to monitor the deployment. The Intune management extension is the client-side tool for managing MDM Intune Win 32 app deployment.
- The IntuneManagementExtension.log file can be located in C:\ProgramData\Microsoft\IntuneManagementExtension\Logs. The IntuneManagementExtension.log will help you track the Intune Management extension component events.
Please refer to all the possible ways to monitor a Win32 Application to know more.
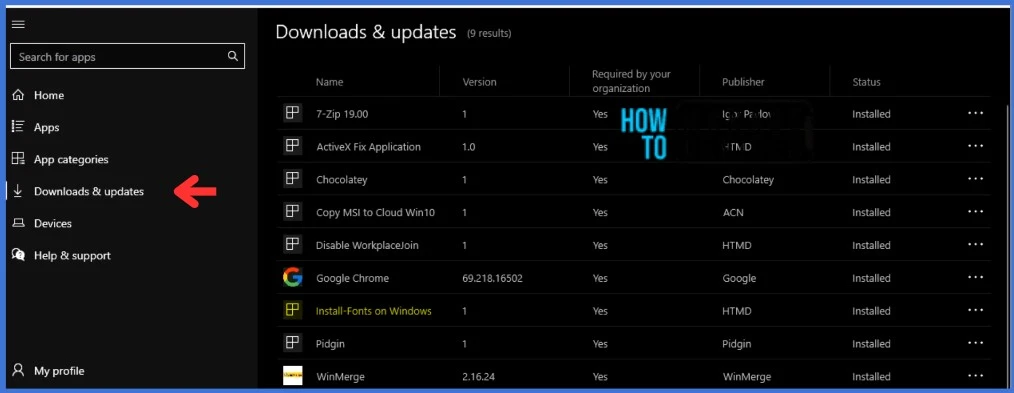
Open the Company Portal on the workstation and navigate to Download & Updates. You can see the Install Fonts on the Windows application as installed.
Thank you for your patience in reading this post. See you in the next post. Keep supporting the HTMD Community.
We are on WhatsApp. To get the latest step-by-step guides and news updates, Join our Channel. Click here – HTMD WhatsApp.
Author
About Author – Sujin Nelladath has over 10 years of experience in SCCM device management and Automation solutions. He writes and shares his experiences related to Microsoft device management technologies, Azure, and PowerShell automation.

“You need to select a PowerShell script that will detect the presence of the app on the client. ”
Can you provide a reference to this script?
$FontDirectory = “C:\temp\planet-benson” #This is the folder where you have placed the fonts for installation
$Fonts = @(Get-ChildItem -Path “$FontDirectory\*.ttf”)
$Fonts += @(Get-ChildItem -Path “$FontDirectory\*.otf”)
#Register the fonts from the Font Directory
foreach($Font in $Fonts)
{
$properties = (Get-ItemProperty -Path “HKLM:\SOFTWARE\Microsoft\Windows NT\CurrentVersion\Fonts”)
foreach ($list in $properties)
{
if ($list -eq $font.Name)
{
Write-Host “Font already exist”
}
else
{
Write-Host “STDOUT”
return 0
}
}
}
This is the script I have used.
Im getting AjaxError: ajaxExtended call failed when I am creating App to add?
Not working, sorry