Hey guys! I hope you’re doing fantastic. Today, we will discuss Deploying a Local Primary Account on macOS using the ADE Method in the Intune MDM solution. Additionally, we will discuss an alternative method of creating a Local account using the Account creation prompt. We will also cover the final configuration setup in Intune, which can vastly improve the end-user enrollment experience.
As we all know, the Intune MDM solution offers multiple enrollment methods for Apple Mac devices, such as Direct enrolment, User-initiated enrolment, both for BYOD and Corporate device enrollment and Automated Device enrolment(ADE), Device Enrolment Manager(DEM) for corporate devices.
If you wish to learn more about the various methods of enrolling Apple MacOS devices in Microsoft Intune and how to set them up step-by-step, please refer to our previous article titled “Types of MacOS Enrolment Methods in Microsoft Intune.“
This article provides valuable insights into the new steps added to the Automated Device Enrollment (ADE) method on Intune Service release 2402. These steps will help you troubleshoot issues that end-users may encounter while logging in to their Macs and guide you in situations where you need to log in without the end-users credentials.
By the end of this article, you will have gained the skills and knowledge necessary to confidently navigate the ADE method and enhance the end-user experience with macOS enrollment. Let’s work together to make this process a success! Let’s dive in and explore these methods together!
If you find my articles informative and helpful, I suggest you take a look at my previous article on How to Install Rosetta 2 on Apple Silicon MacBooks using Intune. This article provides a detailed step-by-step installation process and explores why this app is necessary, which devices require it, and how it can benefit end-user devices.
We aim to help you get the most out of using two operating system platforms and explain the purpose and benefits of doing so efficiently and effectively. Suppose you’ve been following my articles about managing macOS devices with Microsoft Intune. In that case, I invite you to explore my other posts to broaden your knowledge by checking out all my posts here.
I would also like to share my video that provides a detailed guide on how to seamlessly upgrade macOS devices from other MDM solutions like Jamf, Jumpcloud, or Kandji to Microsoft Intune. The video offers comprehensive instructions and step-by-step guidance to ensure a successful upgrade process.
- Get Intune Environment Ready for iOS / Mac Devices Microsoft Endpoint Manager
- Microsoft Intune Vs Jamf macOS Device Management Enhancements
What is the ADE Method of MacOS Enrolment in Intune
Automated Device Enrollment(ADE) is a convenient and efficient method that automates the enrollment process for Mac devices. In this method, newly purchased device information must be entered in either Apple Business Manager(ABM) or Apple School Manager(ASM) so that the Intune enrollment profile can be deployed on the devices over the air, and administrators can enrol devices without needing physical access.
ADE is an excellent tool that significantly reduces the complexity of the enrollment process and streamlines device management, making it more efficient. This process also improves the end-user experience, and more importantly, the device is supervised, as Admins have a better grip on a supervised device than a user-owned managed device such as BYOD.
Prerequisites to Deploy Local Primary Account on macOS
Before proceeding further, let us discuss what prerequisites are required. Admins must verify the following points when enrolling in ADE before creating an enrollment profile or adding new devices.
- Access to Apple School Manager or Apple Business Manager
- List of device serial numbers purchased through Apple authorized seller.
- Authority with Microsoft Intune
- Apple MDM Push certificate (configured in Intune)
Steps to Configure ADE method for MacOS in Microsoft Intune
Before enrolling MacBooks in Intune, it is essential to complete a preliminary check, here are the steps mentioned below in detail.
| No. of Steps | Description | Detail |
|---|---|---|
| 1 | Download the Intune Public Key Certificate | The public key certificate is needed to request a trust-relationship certificate between Apple Business Manager / Apple School Manager and Intune MDM Solution. |
| 2 | Add MDM server and download server token | If an MDM server doesn’t exist in ABM/ASM, Admin can create a new MDM Server and link it to Intune. |
| 3 | Create a token via Apple Business Manager or Apple School Manager | To create a token, After account sign-in, Go to preferences > Your MDM Servers > Click on the “+” icon. |
| 4 | Assign Devices to the MDM server | Once the MDM Server is created, Admins/DEM can assign newly mac purchased devices to a particular MDM Server |
| 5 | Save Apple ID | Save the Apple ID in Intune for future reference for renewal. |
| 6 | Upload server token | Once the Apple token is created, link it in Intune. |
| 7 | Create an Enrollment Profile in the Intune Portal | After completing the above steps, the Intune Administrator can create an Enrollment profile to be pushed onto the end user’s device and configure the settings to be hidden or visible. |
| 8 | Create Articles for End-Users for a smooth Enrolment Experience | Admins can create Knowledge Articles for each step in setting up a new Mac device for a smoother end-user experience. |
Configure Enrolment Profile for Local Primary Account on macOS Intune
As mentioned in the table above, it’s crucial for Admins to pay attention to each step and ensure that it’s completed without any issues. Once everything is finalised, we can move on to Step 7, where we will create the enrolment profile. This process will include creating an Admin Account and final configuration details. We will discuss this step in detail.
The profile defines the enrollment experience for the organization’s Mac devices and enforces enrollment policies and settings on enrolling devices. The profile is deployed to assigned devices over the air. At the end of this procedure, assign this profile to Azure AD device groups. Please follow the below steps to create a profile.
- In the Microsoft Intune admin center, under Devices > macOS enrollment > Enrollment program tokens. Select the previously created enrollment program token.
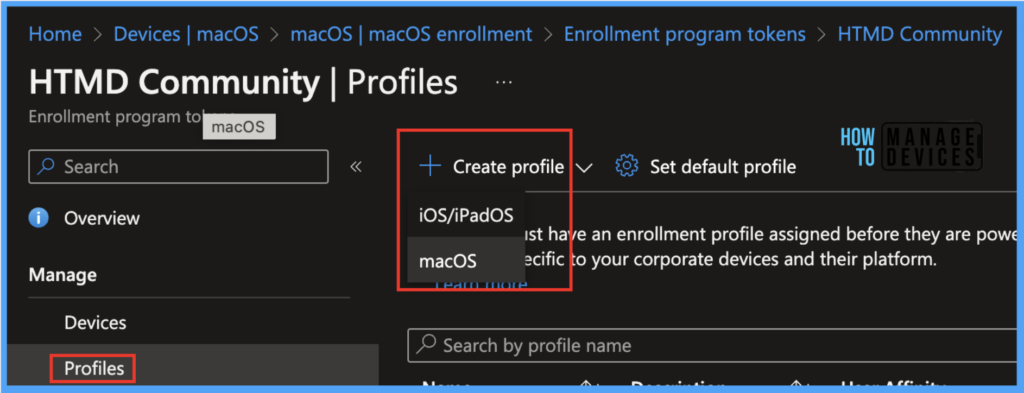
- To create a profile, go to Profiles blade and click on Create profile > macOS.
Under Basics, enter a name and description for the profile.
Note! End users cannot see the Profile Name and Description. Only the admin can view it for reference purposes.

After setting up the configuration on the Management Settings page, with User Affinity and Identification method as shown below :
Note! Devices running macOS 10.15 and later can use Setup Assistant with a modern authentication method. However, older macOS devices can be set up using the legacy Setup method.

As part of the out-of-box Apple automated device enrollment experience in Setup Assistant, a locked experience ensures your device is configured with the most critical device configuration policies.
This setting is applied only once, so end-users can rest assured that the device is set up for optimal performance from the start. Additionally, the user will not be interrupted by this process again unless they choose to re-enroll their Mac.
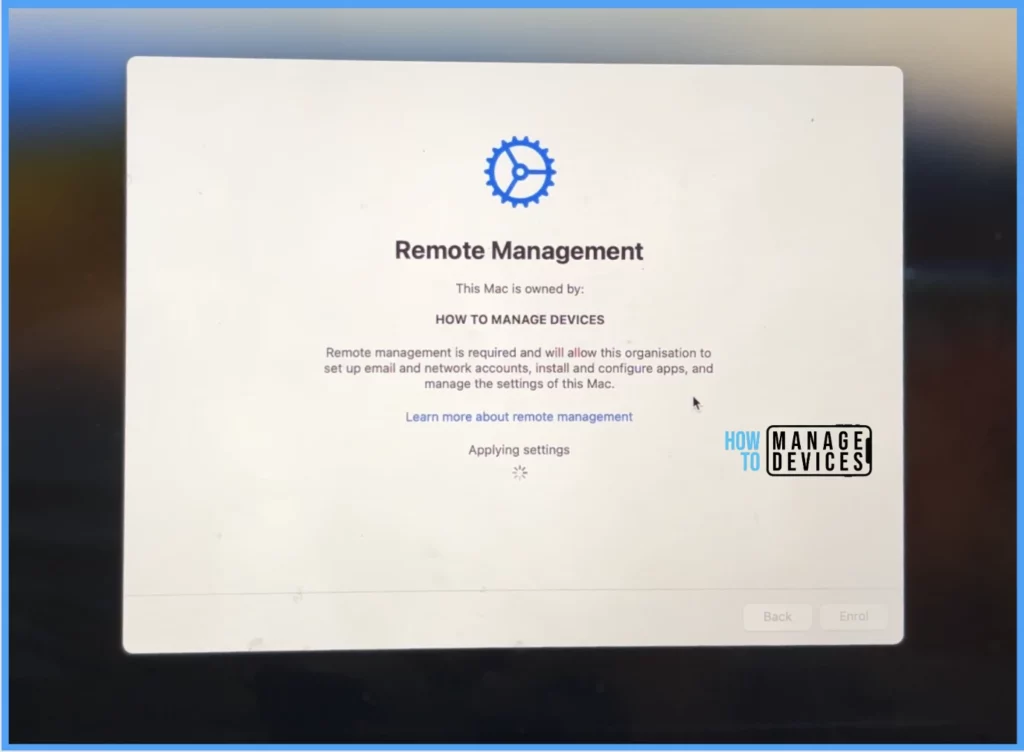
If we select Await final configuration as Yes, Setup Assistant pauses just before the home screen loads, allowing Intune to check in with the device. End-users have to wait for the final configurations to complete while the experience locks. This is the default configuration for new enrollment profiles.
Based on the image below, selecting “Await Final Configuration” as “Yes” will prevent any further progress until all enrollment profiles, policies, and settings have been successfully pushed to the device. This can prolong the time it takes for the user to enrol, so it may be preferable to select “No” instead.
If Admins sets it as No, after the Setup Assistant ends, the device is automatically released to the home screen, regardless of the installation status of policies. This means that users of the device may be able to access the home screen or modify device settings before all policies have been installed. This configuration is for existing enrollment profiles.
Locked Enrollment will prevent users from unenrolling their devices from Intune. After the device enrols, the User cannot change this setting without wiping the device.
On the next page after setting up the configuration on the Setup Assistant page on the Department and Setup Assistant screens as shown below :

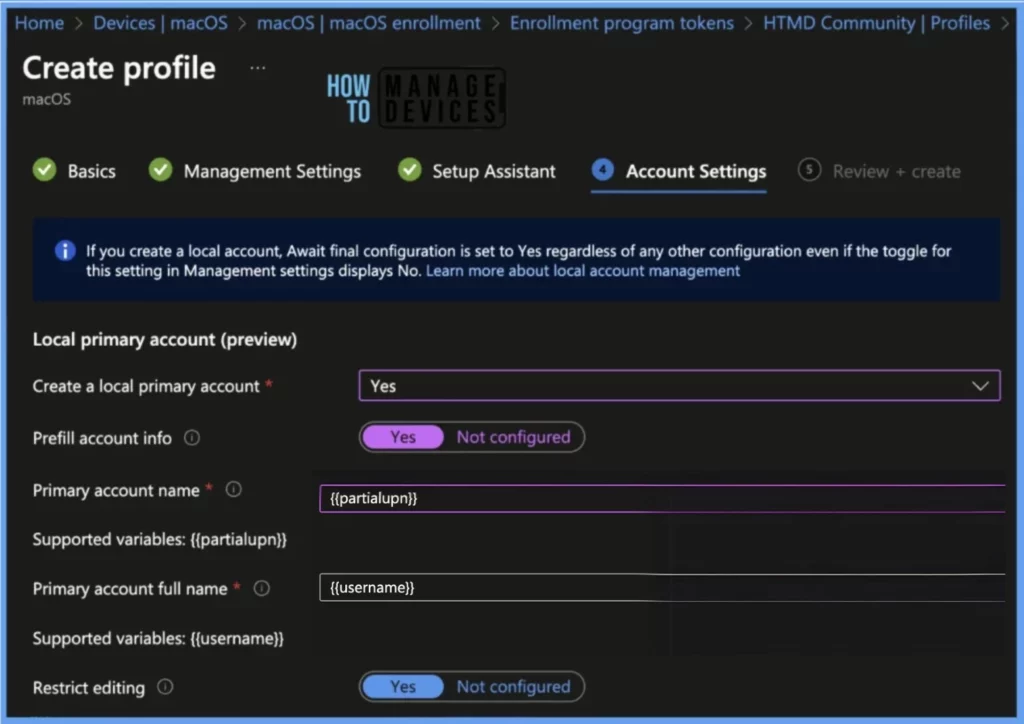
On the next page, We will have the option to Create a Local Primary Account on the End-User device; We will Selection the option below :
| Settings | Description | Values |
|---|---|---|
| Create a local primary account | Choose “Yes” to set up local primary account settings on targeted Macs, or select “Not configured” to skip all account configurations. | Yes/No |
| Prefill account info | By default, users must enter their account username and full name in the Setup Assistant. To prefill this information for them, choose “Yes” and enter the primary account name and full name. | Yes/Not configured |
| Primary account name | Enter the full name of the account. {{partialupn}} is the supported token variable for a full name. | <String Value> |
| Primary account full name | Enter the full name of the account. {{username}} is the supported token variable for full name. | <String Value> |
| Restrict editing | Users cannot change their account and full names if selected as Yes. To enable this, select “Not Configured”. | Yes/Not configured |
Once all the settings have been reviewed, click on Create to finish creating the profile.

After completing the necessary configurations in Intune and the ABM/ASM portal, the new device will be assigned in the ABM portal either by authorized Apple sellers or manually by admins in the organization. Subsequently, the enrollment profile will be automatically pushed to the Mac during setup. Only the toggled options will be presented to the end user.
End User Experience
Once the enrollment setting has been configured, end-users will have a smooth enrollment experience. When they enroll their device, they will be prompted to enter their company email and password, which will be authenticated with Microsoft Entra, as shown below.
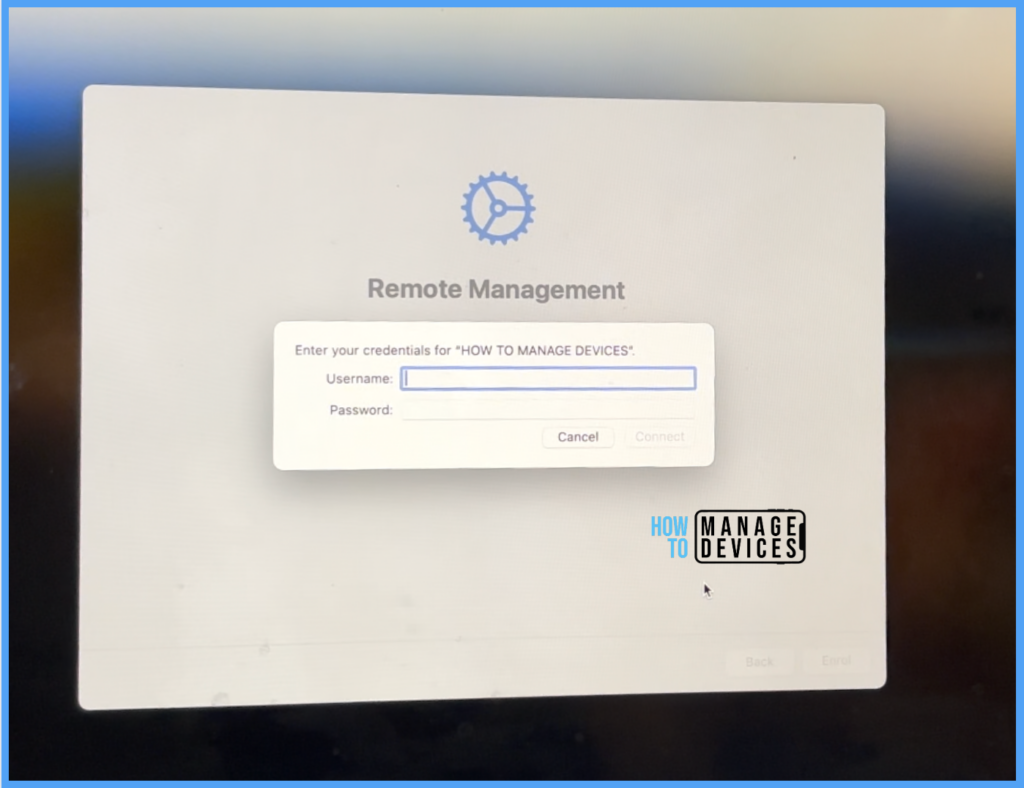
This will initiate the macOS device enrollment process, which will finish promptly. The users will then be presented with their email and password, enabling them to proceed confidently. The following images illustrate this user-friendly process.

Conclusion
In the article, we have presented effective ways for Mac Admins to push settings to users. By enabling the prompt to automatically create Primary accounts, users will no longer have to go through the cumbersome process of setting them up manually.
This improvement in the device enrollment process will ultimately lead to a more seamless and user-friendly experience for everyone involved.
We are on WhatsApp now. To get the latest step-by-step guides, news, and updates, Join our Channel. Click here. HTMD WhatsApp.
Author
Snehasis Pani has 7+ years of IT Support experience and is currently a macOS Administrator. He loves to help the community by sharing his knowledge of Apple Mac Devices Support. He is an M.Tech graduate in System Engineering. Do check out his profile on Twitter and Linkedin.
