Let’s learn how to resize Cloud PC Windows 365. The Cloud PC Resize remote action from the admin center lets you upgrade a Cloud PC’s hardware configuration. You can change the RAM, CPU, and storage size of Windows 365 Cloud PCs. Cloud PC Resize action is nothing but changing the SKU of the Azure VM that Microsoft manages.
Resize Cloud PC feature helps IT admins to change the VM SKU without any friction. The management overhead will get greatly reduced with this feature. As you might know, changing the SKU of Azure Virtual Desktop (AVD) VM is not very easy, and it’s not supported to have different SKU types in a host pool.
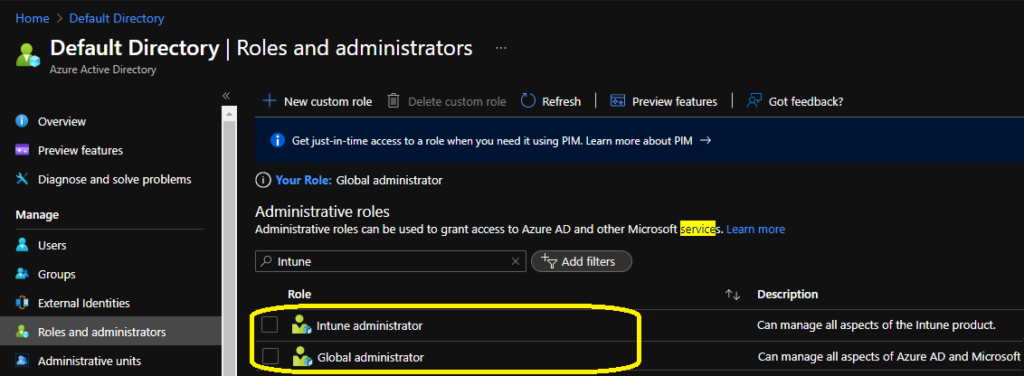
You will need appropriate access rights/permission to perform the Resize of a Cloud PC function. The resize option is enabled only for the Cloud PCs that are in provisioned status. The two permissions required for this feature are:
- Global Administrator
- Intune Service Admin (a.k.a Intune Administrator)

Where is Cloud PC Resize Option
The cloud PC resize option is a straightforward option. Yes, but it can be easier for admins if this option is available in Windows 365 node within the Endpoint Manager Admin Center portal. But unfortunately, it’s not available in that node at all.
There are multiple ways to get to Resize Cloud PC remote action. I felt the following method is more helpful for Cloud PC admins. The other option (all devices -> search for cloud PC record) is a bit more tedious, at least from my perspective.
- Launch MEM Admin Center portal -> https://endpoint.microsoft.com/
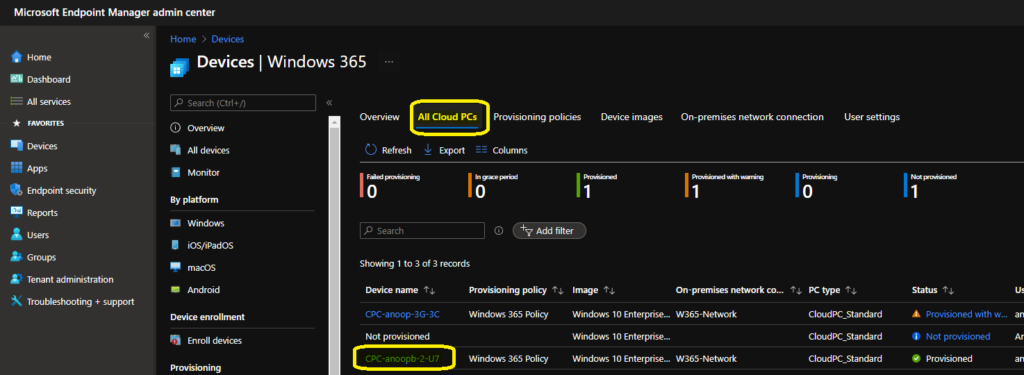
- Navigate to Devices -> Windows 365 node.
- From Windows 365 node, you can click on All Cloud PCs tab to view all the available cloud PCs.
- Click on the Cloud PC name that you want to change the SKU or resize -> CPC-anoopb-2-U7.
NOTE! – The resize remote action is available for both provisioned with warning and provisioned status Cloud PCs.

Once you click on the Cloud PC name from the previous page, you will get redirected to Devices -> CPC-anoopb-2-U7 -> Overview page in MEM admin center portal. This is the place you can see all the remote actions including Resize.
- From the Overview page of Cloud PC device, Click on Resize action. The resize action is under public preview now.
- The new blade gives you the option to select a new size for this Cloud PC.
- 2vCPU – 8 GB -> 256 GB SKU is selected from the resize blade.
- Click on Resize button to start the action.
- Reboot is needed.
NOTE! – The user should be assigned with the appropriate license to perform resize action to take place. Resize action is available only for cloud PC devices.

Cloud PC Resize Action License Error
When you don’t have enough licenses in the inventory, the resize action can’t be performed. You also get the following error message in the MEM portal.
The selected license is not available in inventory. Please get in touch with your billing administrator to purchase and assign the needed license and return it to perform the resize.

Resources
- How to Reprovision Cloud PC Windows 365
- Cloud PC Provisioned with Warning Status
- Windows 365 Cloud PC Deployment Provisioning Process Step by Step Guide
