Hello Guys. We are back with Part 2 of “Microsoft 365 Defender Attack Simulation to Educate Users about Phishing Emails“. In our Part 1 post, we have discussed What Attack simulation is, Various Social Engineering techniques available for Simulating the Attack, and How to create an Attack Simulation.
In part 2 of the post, we will discuss how to monitor the Attack Simulations and insights provided by Defender Portal, and we will discuss end-user experiences like what happens when the user clicks on the Phishing email and how this will be captured in M365 Defender portal. We will also discuss how to Automate this Attack Simulation for your organizations.
The Microsoft Defender provides a lot of insights regarding the Simulation. It provides a dashboard showing how many users received and saw the Email and clicked. It also provides information regarding how many users completed the training. It also sends users to remainders to complete the training for offenders who have fallen prey to the Attack.
- Microsoft 365 Defender Attack Simulation to Educate Users about Phishing Emails – Part 1
- How to Block OS Updates on iOS Devices using Intune
View Microsoft 365 Defender Attack Simulation Details
As mentioned above, Defender provides a detailed dashboard on Simulations like User Compromised, Activity status, and User Activity. This helps us better understand the list of compromised users and users who reported the emails. To view details, please follow the steps below
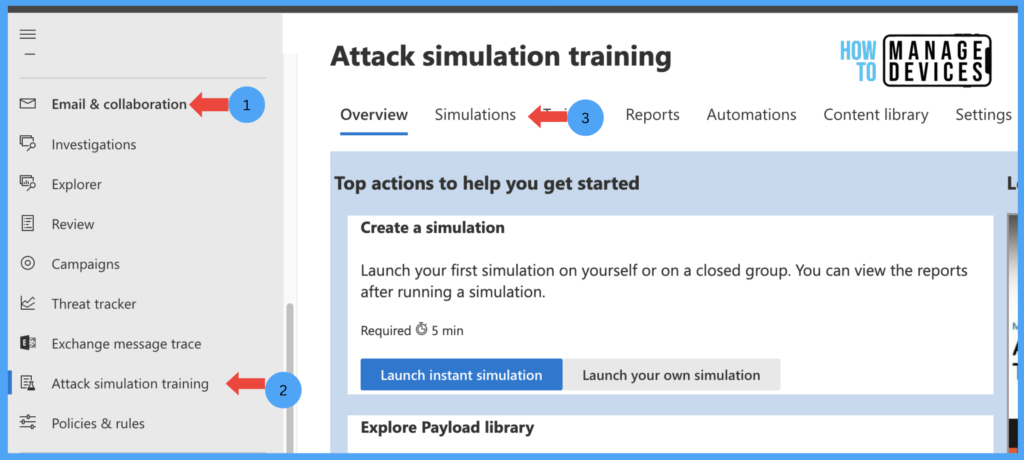
- Log in to the Microsoft 365 Defender Portal using the admin account
- Click on Email & Collaboration
- Click on Attack Simulation
- Click on the Simulations tab.
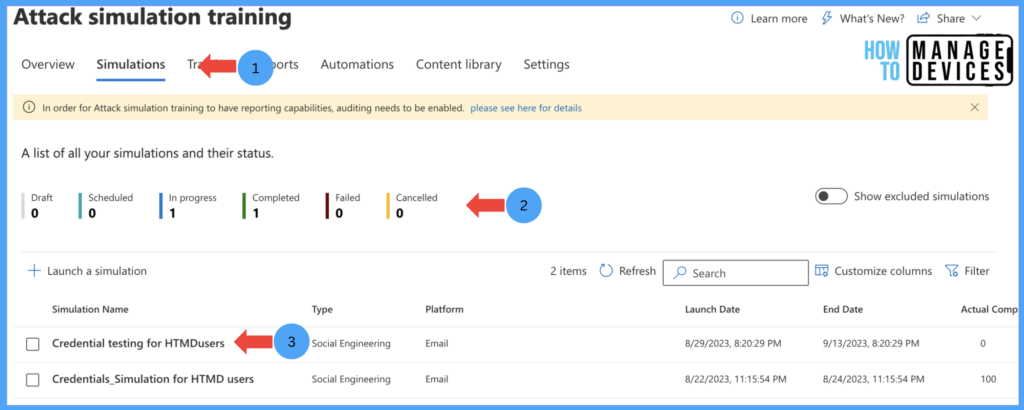
Under the Simulations tabs, you can view the Simulations created for your organization. It provides a Dashboard of how many Simulations are in progress, Completed, Scheduled and in Draft state, along with the Simulation type, Launch date and Simulation End Date.
Now, Click on the Simulation that you want to view the details. It provides a detailed view of the Simulation details like how many users are compromised and reported. In the below screenshot, none of my users clicked on the Email, so it shows all values as 0.
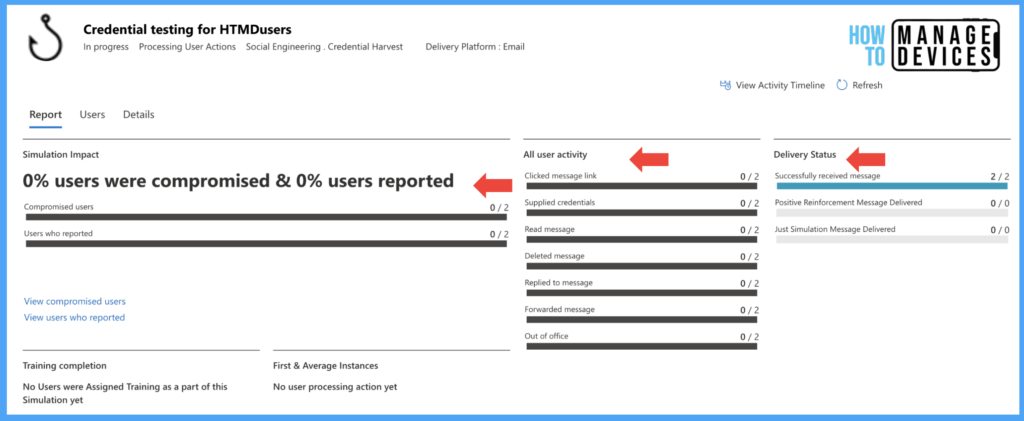
I have assigned the Simulation to 2 users. So, in the above screenshot, it shows delivered to 2 users. The Simulation Dashboard also provides the number of out-of-office replies received. I will show you the Dashboard once the users are compromised. Before that, let’s see what the user experience and emails look like.
End-User Experience
As soon as Simulation is created, the assigned users will receive an email as per the Payload we created. In our cases, we have chosen a password-related payload. The user will receive a similar Email asking for credentials. Let me show you the Email we received.
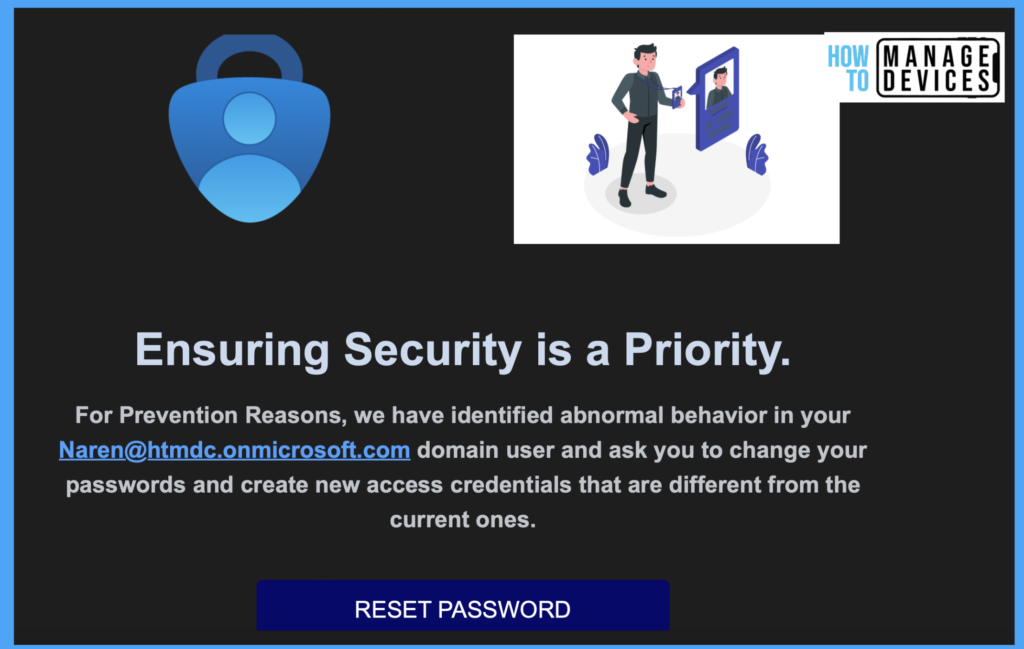
Let’s click on the Reset Password and see the behaviour. The website, which asks for credentials, will look genuine. Let me put on credentials.
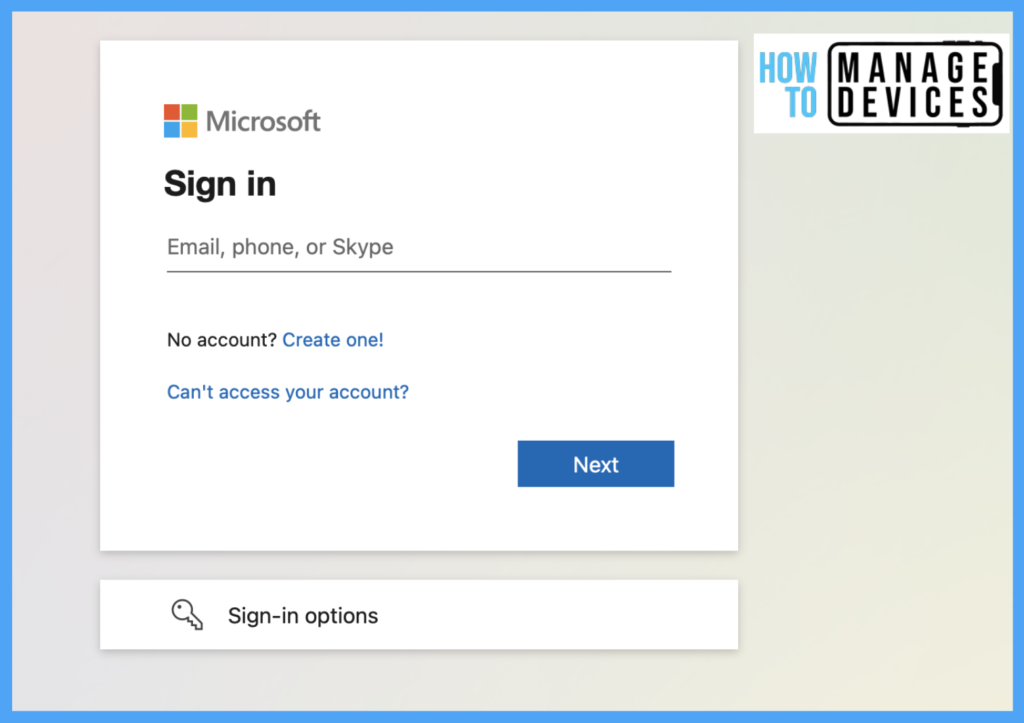
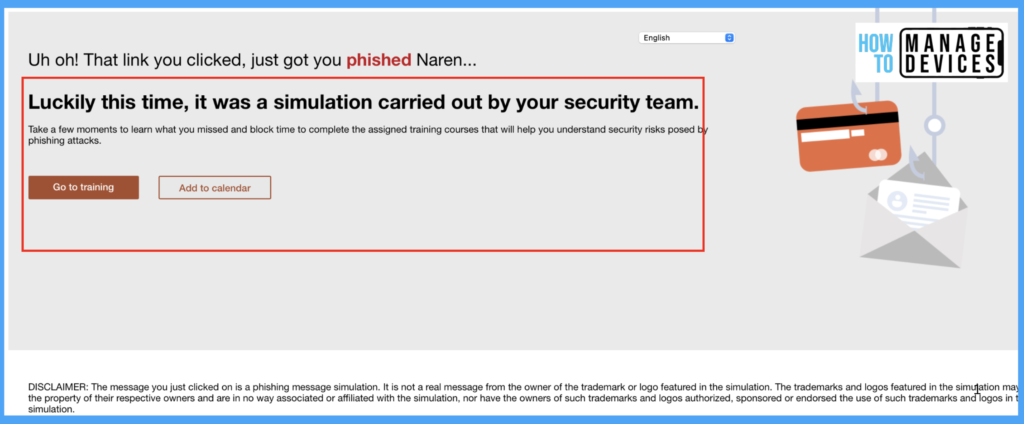
Once I input my credentials and authenticate, you will show the Phishing message we selected while creating the Simulation Attack.
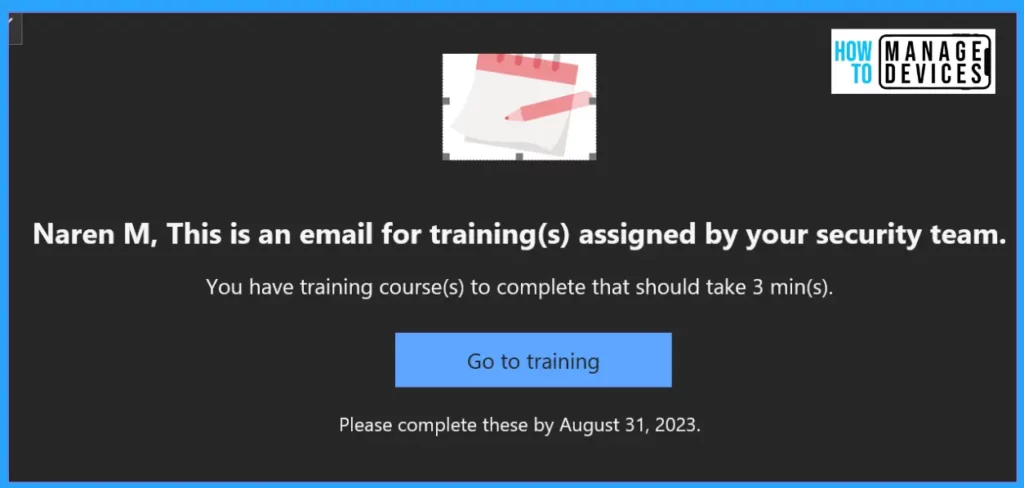
I will also receive the emails to finish the related training, which we have assigned while creating the Simulation in the defender portal. The Email also provides training URLs that we need users to complete.
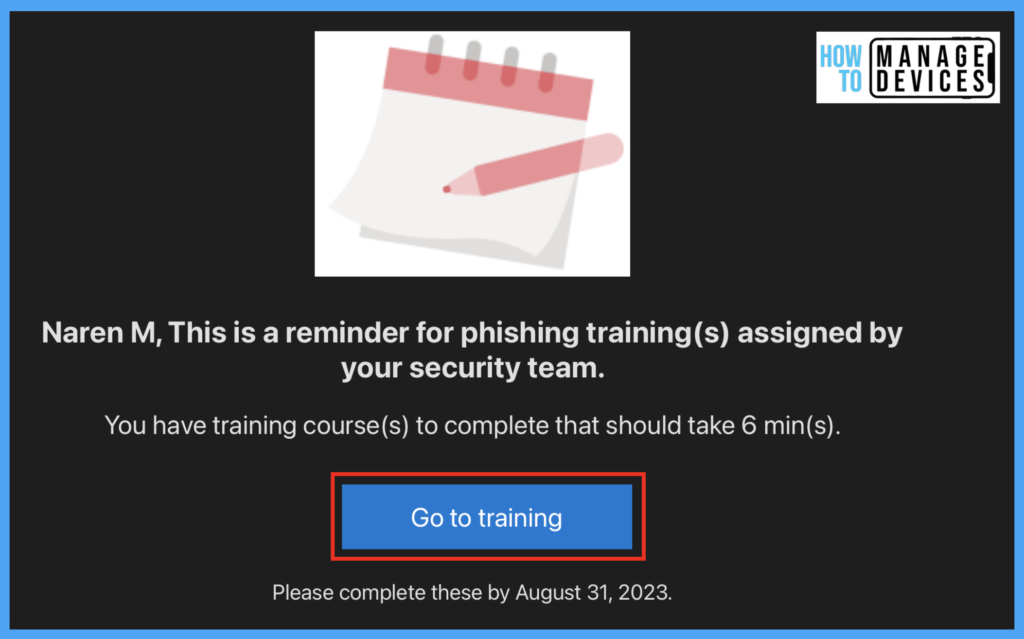
Microsoft 365 Defender sends the remainder of emails to finish the training till the simulation End Date. This will make sure that the users who are compromised complete the training.
Let’s Click on the ” Go to training Link ” we received in the Email. This will take us to the training page, where Microsoft provides a few tutorials to educate users about Phishing emails and how to identify and inform them of fraud.

The training is video tutorials with good animations that will create interest among the users. The short training provides a lot of information to compromised end users.

Now that I have clicked on the URL received, one of my users is compromised. Let’s see if the Dashboard will update with the details. This data is real-time data and can be used for tracking users.
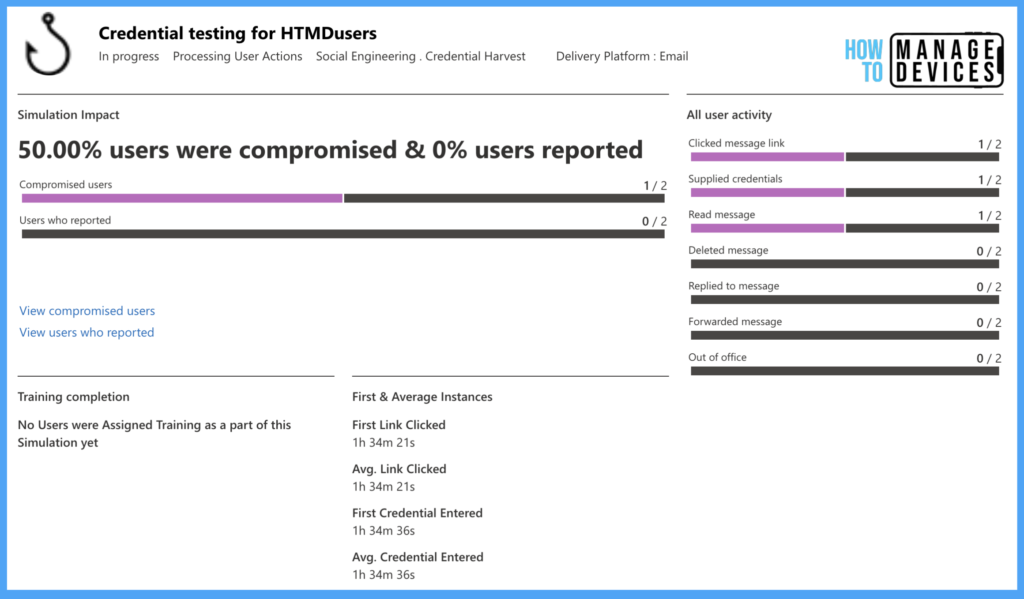
The Dashboard is updated with details on how many users are compromised and the number of user-provided credentials. These dashboard values might change based on your Payload. As we have selected password-related Payload, it will show you values-related passwords.
Automate Attack Simulation
To improve security posture, organizations plan to send these kinds of awareness to their users regularly. Creating Simulations regularly will add a burden on the admins. So Microsoft 365 Defender provides the option to Automate Attack Simulation. Let’s see how to create an Automation.
- Log in to the Microsoft 365 Defender Portal using the admin account
- Click on Email & Collaboration
- Click on the Automation tab
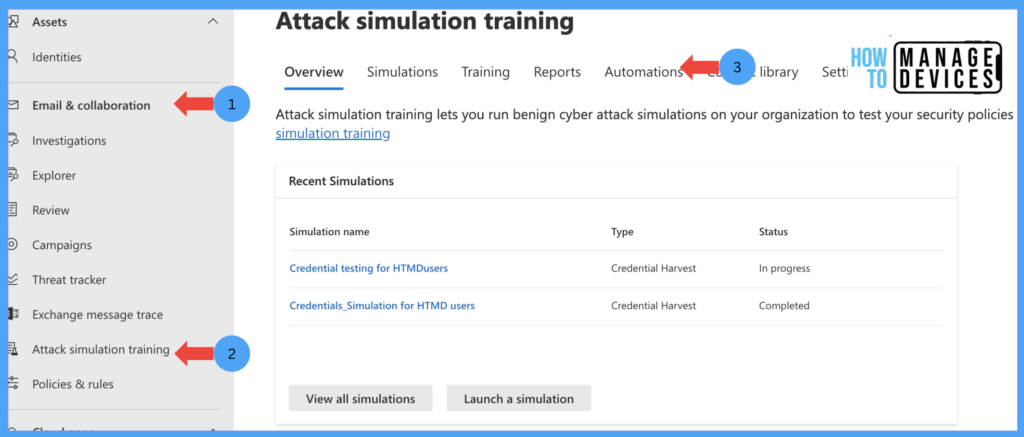
Now click on Simulation Automation and click on Create Automation. The Automation can be created based on different criteria per your organization’s requirements, and the Simulation will be launched once it meets the criteria.

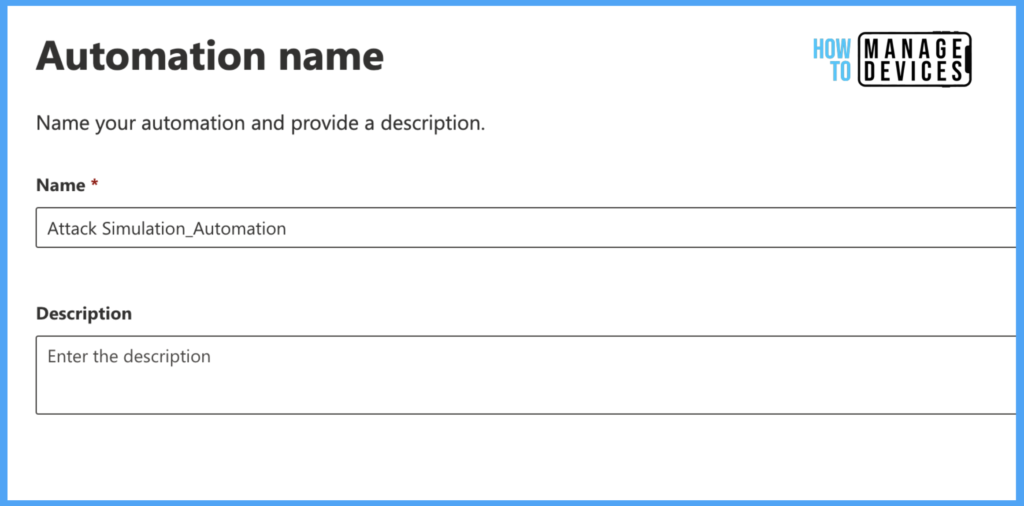
The entire process of creating an Attack Simulation is similar to that of creating an Attack Simulation that we discussed in Part 1, except for a few changes. Provide the Name and Description for the Automation and click on Next.
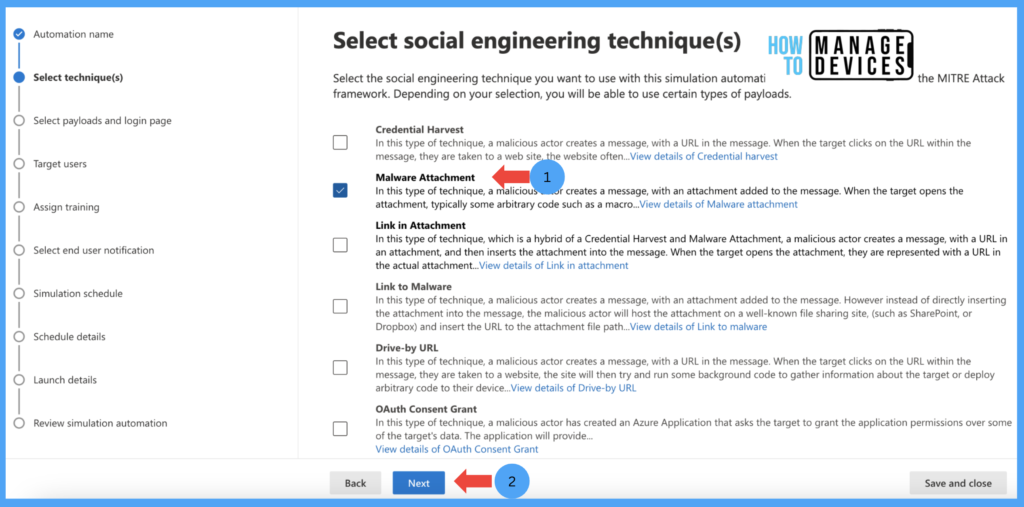
Under the social engineering technique, this time, I have chosen Malware Attachment. You can choose as per your requirement and click on Next.
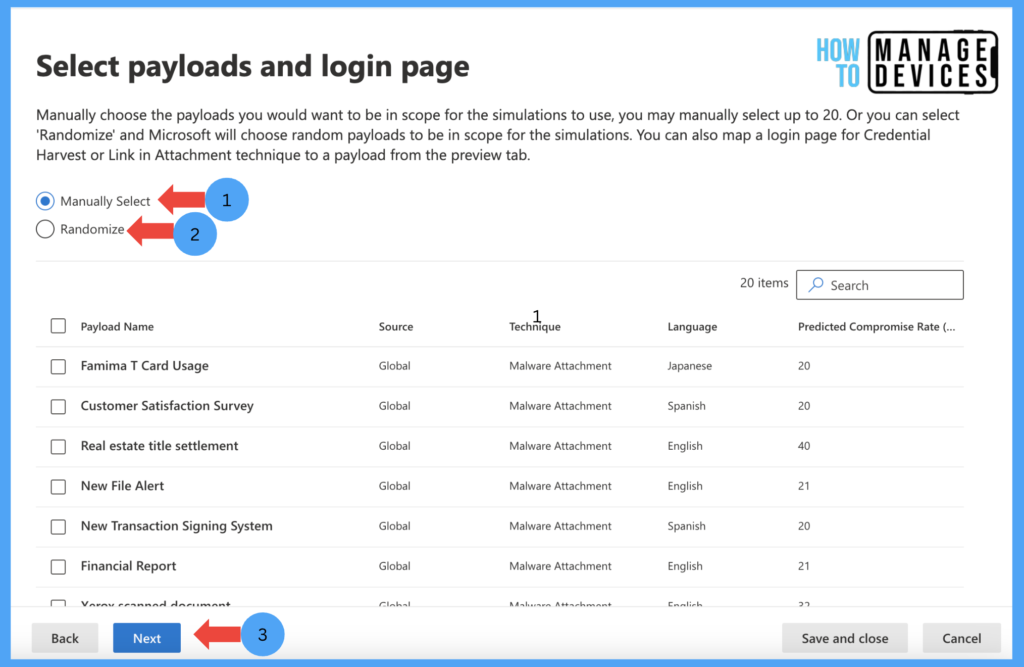
We must choose the payloads for the Automation on the Select payloads and login page. We can choose Manually or Randomize the payloads. When we select Randomized, Microsoft sends random payloads to the users. I have chosen the randomized option.
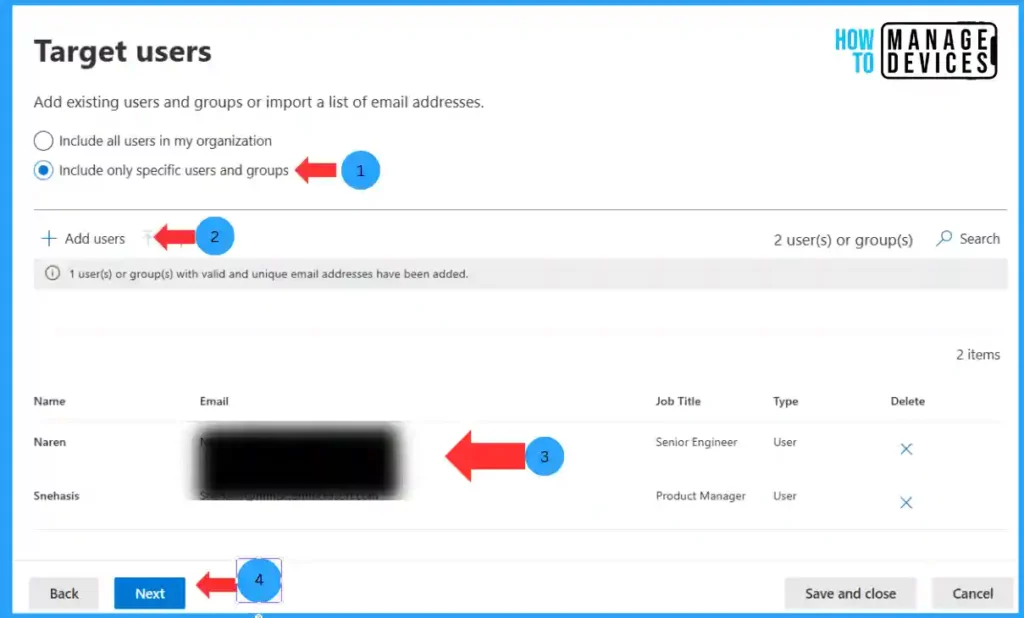
Now click Next to the Target users page, here, we can assign the Simulation to all users or specific users. Click on Add Users to select a few users.
Now, on the Assign training page, choose the mode of training. I have chosen Assign training for me. When we chose this, Microsoft provided training to users. You can refer to Part 1 for more details on this.
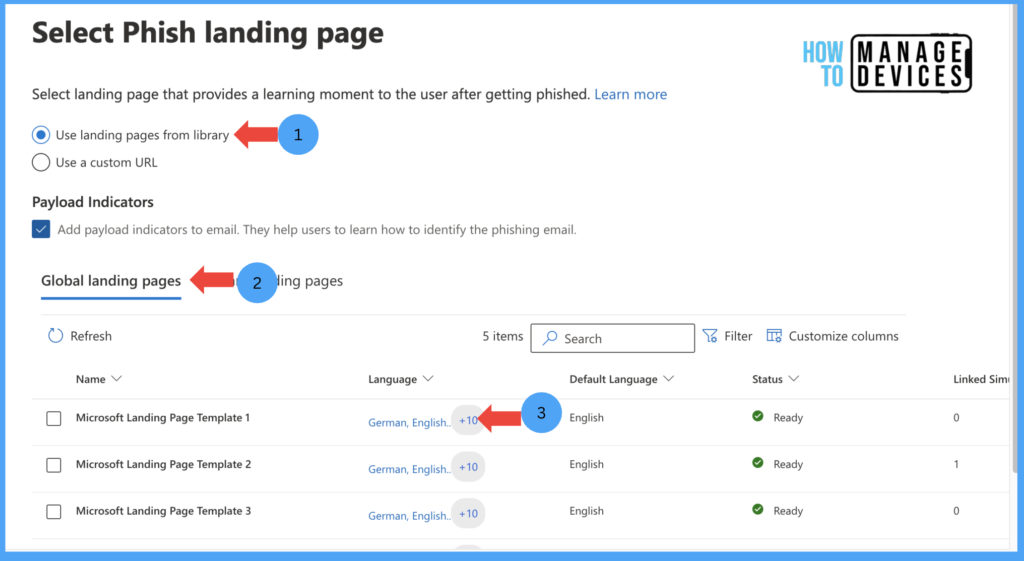
Now Select the Phishing Landing displayed when users click on phishing emails. After choosing, click on Next.
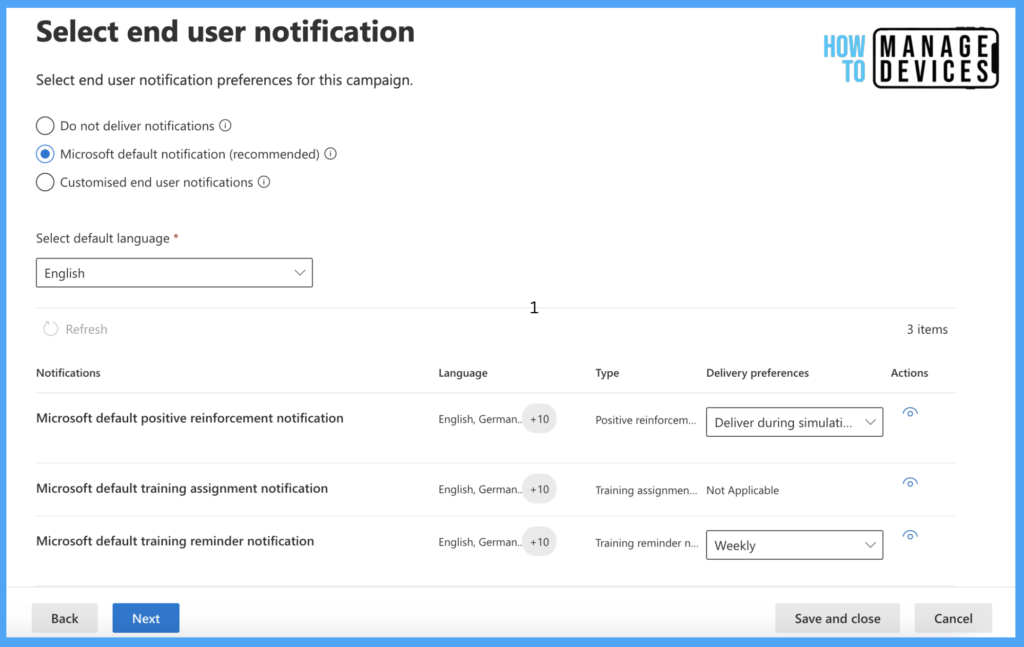
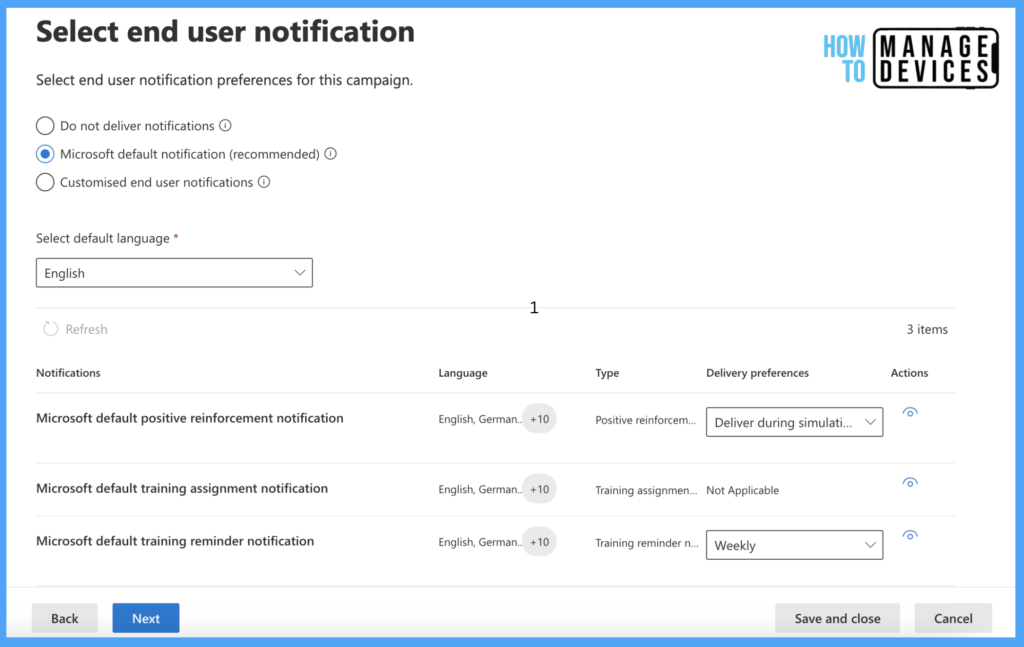
Select End User Notifications, and These are the Notifications that will be sent to users when they are positive reinforcement or remainders. Click Next
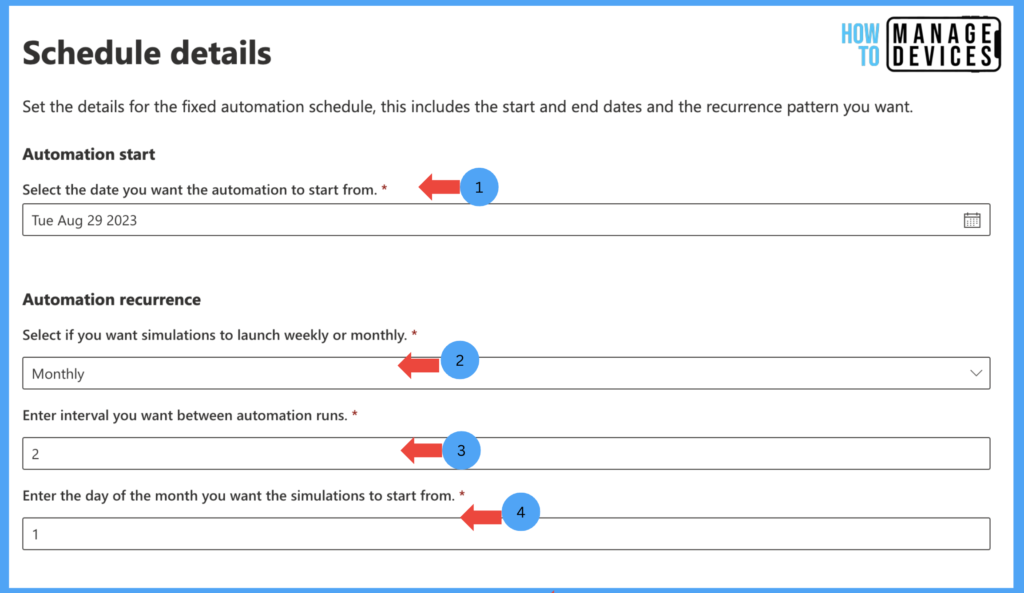
Here comes the change; this is where you define the Simulation schedule, which can be Fixed or Randomized. When we choose Fixed, Microsoft sends the Simulation in a fixed schedule per your schedule.

I have chosen Fixed Scheduled and clicked on Next; as I chose Fixed, we need to provide the Automation start date, when the Automation should start, and whether the Automation recurrence is either weekly or Monthly. Enter the interval between automation runs and the day of the month you want the simulations to start from.
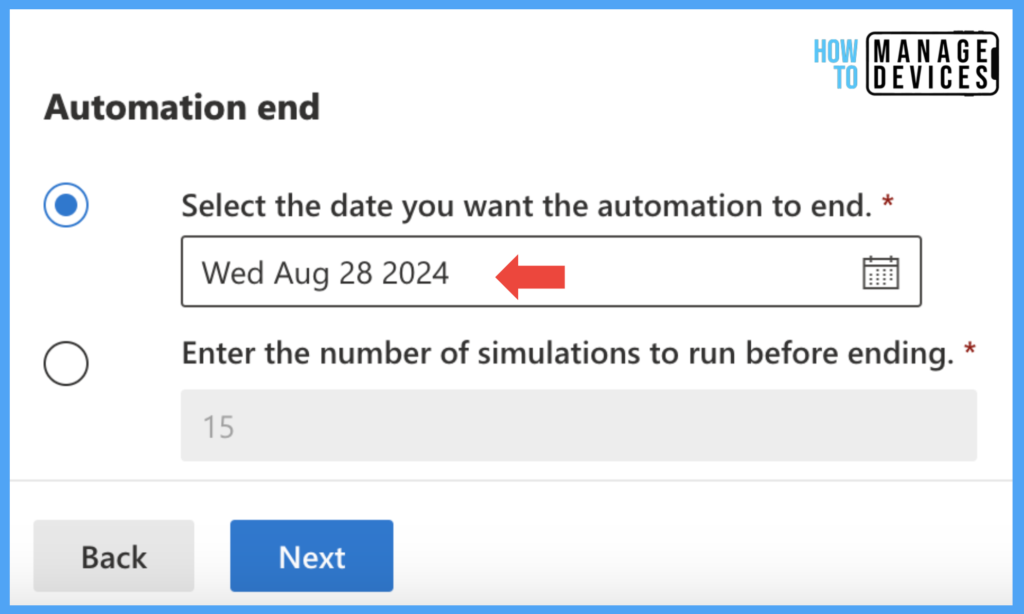
We need to choose when to end the Automation ends, select a maximum of one year, or choose the number of Simulations to run before ending.
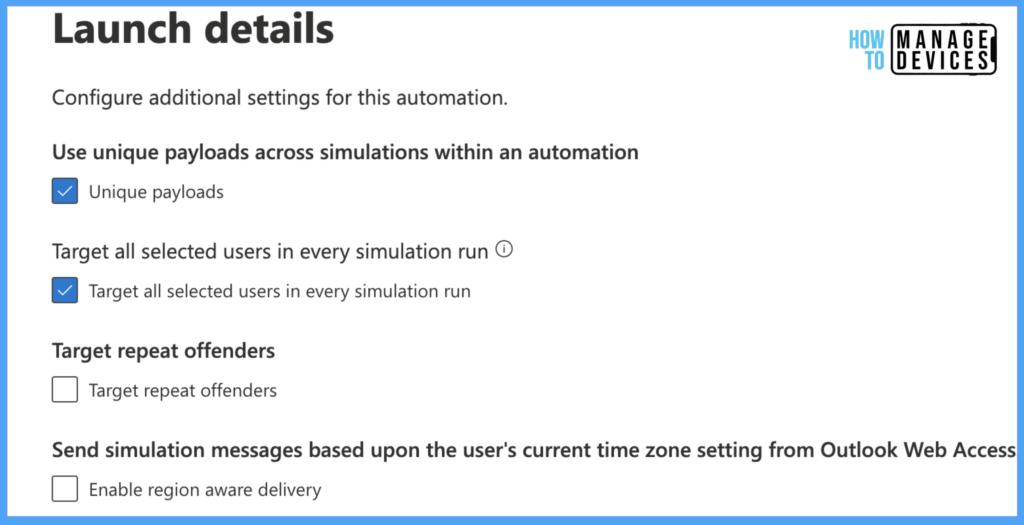
Click on Next to move to the Launch details page, where we can Configure additional settings for this Automation, and you can refer to the screenshot below.
Now click on Next to move to the Review and Submit page. As this is an Automation and scheduled for a fixed duration, we cannot send a test message to view before creating the Simulan. Now click on Submit to create the Automation.
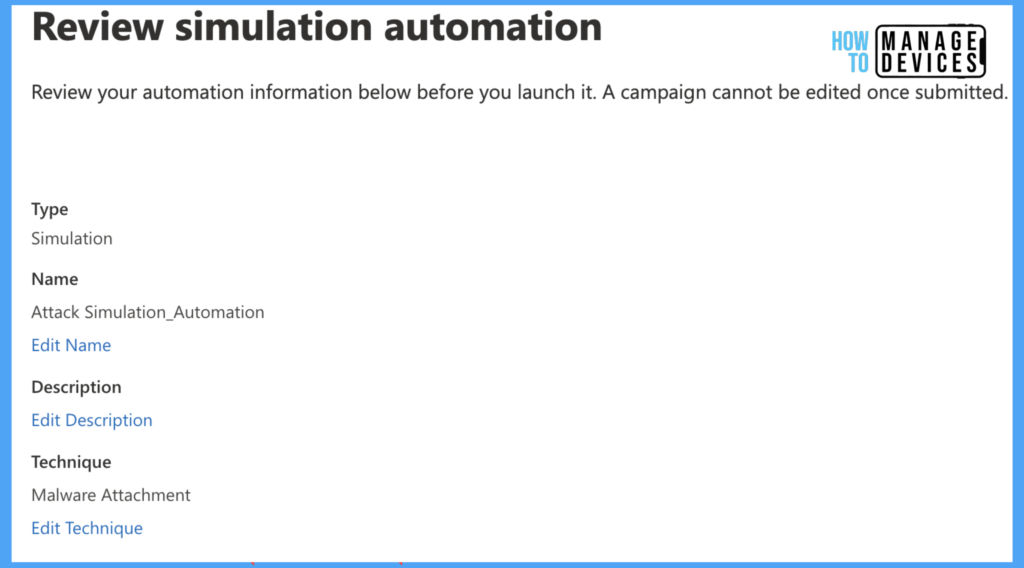
Now that we have created Automation for Attack Simulation, Microsoft sends emails based on our configurations during the scheduled time intervals we set while creating the Automation. We can also view the dashboard similar to Attack Simulation.
Conclusion
In this article, we have learned about the User experience, how to monitor the SImulation created and How to create Automation for Simulation. I hope you liked the article. We will be back with another interesting topic soon. Till then, happy learning.
Author
About Author – Narendra Kumar Malepati (Naren) has 11+ years of experience in IT, working on different MDM tools. Over the last seven years, Naren has been working on various features of Intune, including migration from different MDMs to Intune. Naren mainly focuses on Android, iOS, and MacOS.
