Today, I woul like to explore how to install NetLogo programming language using Intune App. Microsoft Intune is a cloud service that manages mobile devices and applications. Its Enterprise Catalog app helps IT administrators easily manage applications.
NetLogo is a programmable modeling environment that allows users to create models with multiple agents. It is used by many students, teachers, and researchers worldwide. NetLogo also supports HubNet participatory simulations. Uri Wilensky created NetLogo, which was developed at the Center for Connected Learning (CCL).
NetLogo is the next generation of the StarLogo and StarLogoT multi-agent modelling languages. It runs on the Java Virtual Machine and works on all major platforms such as Mac, Windows, Linux, etc. It is run as a desktop application. Command-line operation is also supported.
NetLogo commands agents to act, leading to a specific result. Reporters provide instructions for calculating a value, which the agent then shares with the client. Through this blog post, I will direct you on how to install NetLogo using the Enterprise Catalog app.
Table of Contents
In Which Programming Language was NetLogo Developed?

NetLogo is mainly written in Scala, with some parts in Java. Scala can be converted into Java bytecode, which works well with Java and other languages that run on the Java Virtual Machine (JVM).
How to Install NetLogo Programming Language
NetLogo provides clear documentation and tutorials. It also has a Models Library with many pre-written simulations in topics such as biology, medicine, physics, chemistry, mathematics, and social sciences. Several teaching programs using NetLogo are available, and more are in development.
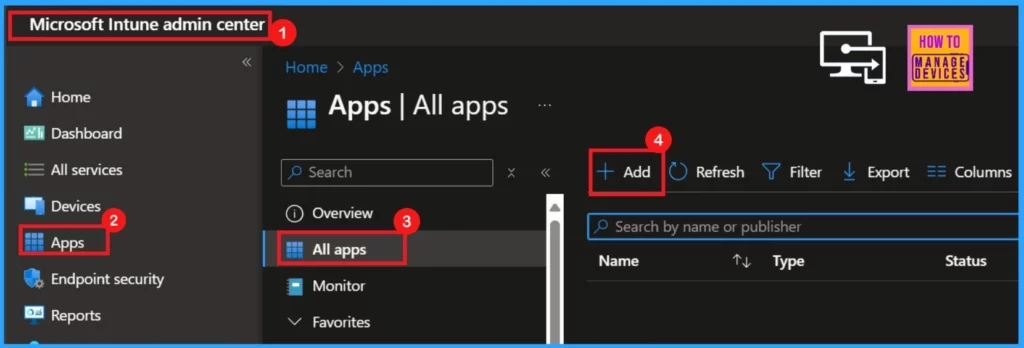
To install NetLogo, you should first log in to the Microsoft Intune admin center where you can see the Apps section. In the Apps, select the All-Apps.
- Click on + Add
- Top 75 Latest Intune Interview Questions and Answers
- 6 Exciting Features Coming To Intune Enterprise App Management
- Update 3rd Party Apps Using Intune Windows Catalog App
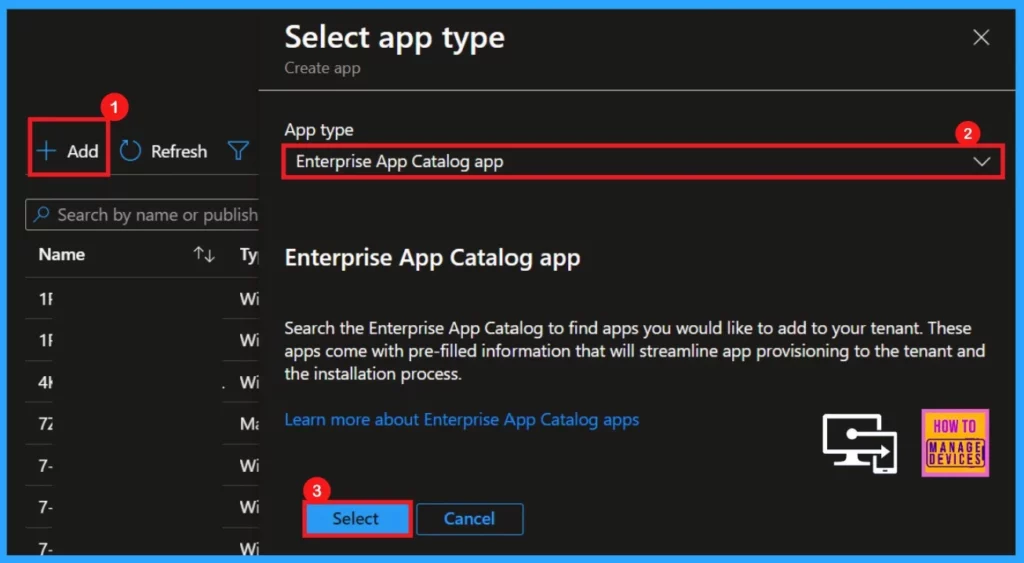
When you click on + Add option, a pop-up window will appeared where you can select App type from the drop-down arrow. Here, I select Enterprise App Catalog App.
- Click on Select.
App Information
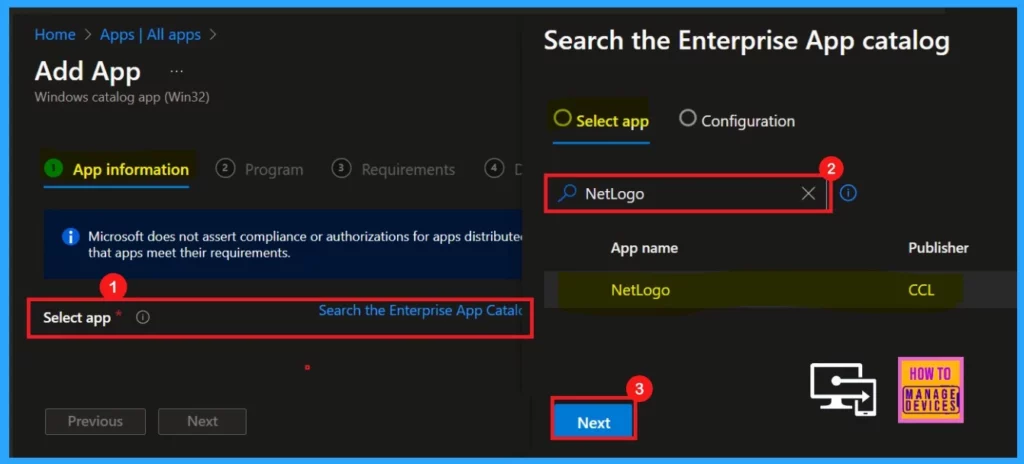
App Information is the first step, where we can search for the app that we want to deploy. There are two settings; Select App and Configuration.
- App Information >Search the Enterprise App Catalog>Select NetLogo>Next
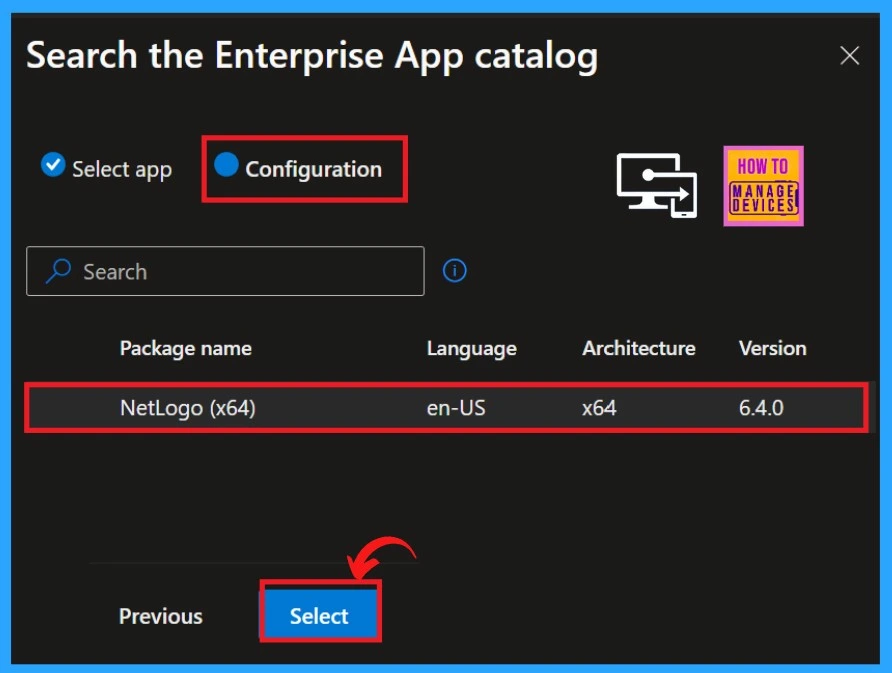
From the Select App page, we entered the Configuration, where we can see app information such as package name, language, architecture, and app version.
- Click Select
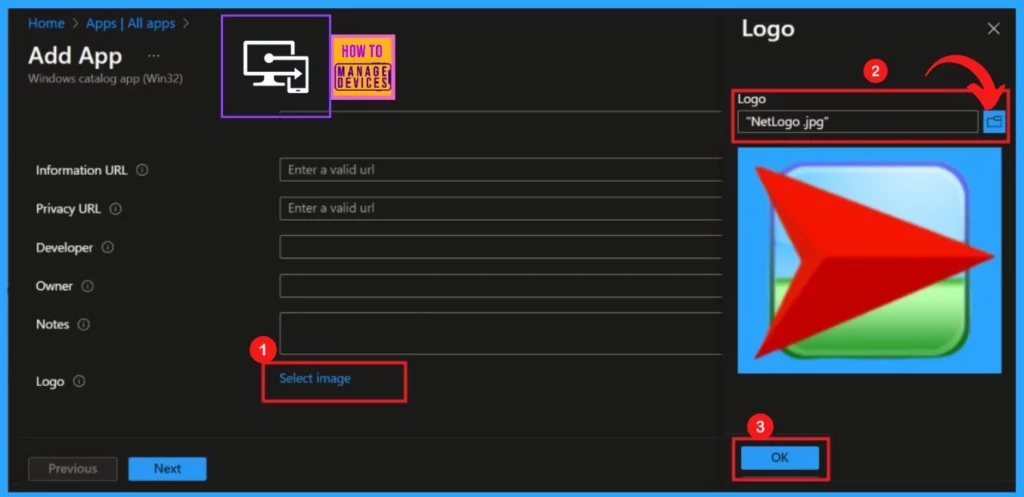
On the app information tab, scroll down to find the option to add the app logo. Click on Select Image. You can then choose an image from your files. After you select the logo, it will show up on the Intune portal.
- Click OK.
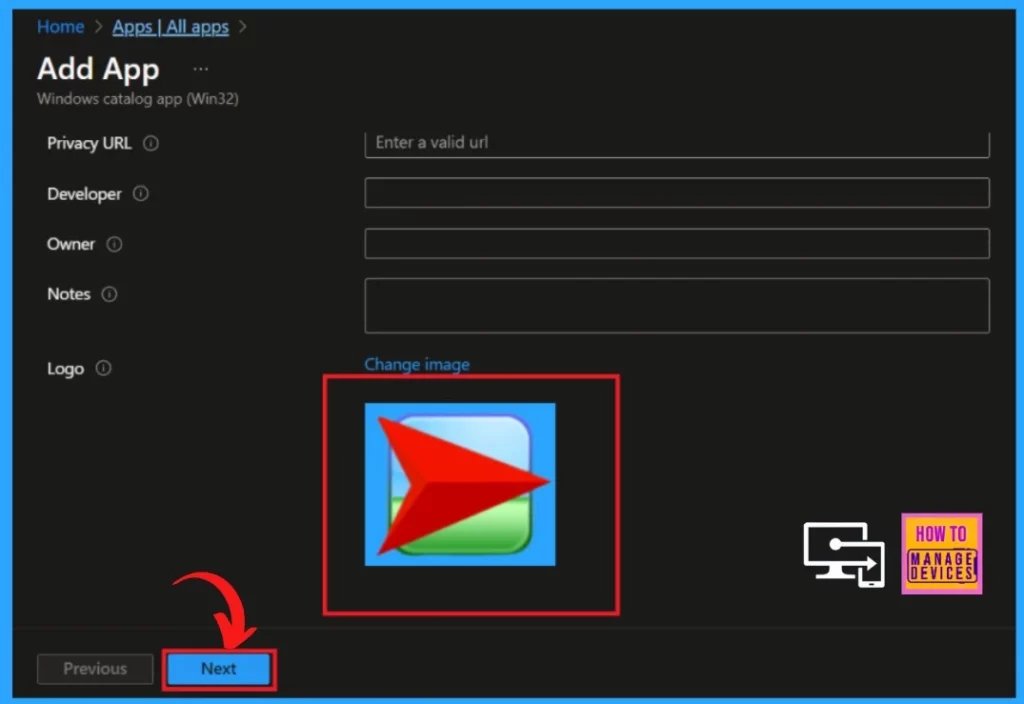
When we click OK, we can see the logo on the Intune portal. If you want to change the logo, you can easily click the Change image. Then, you can click on the Next option.
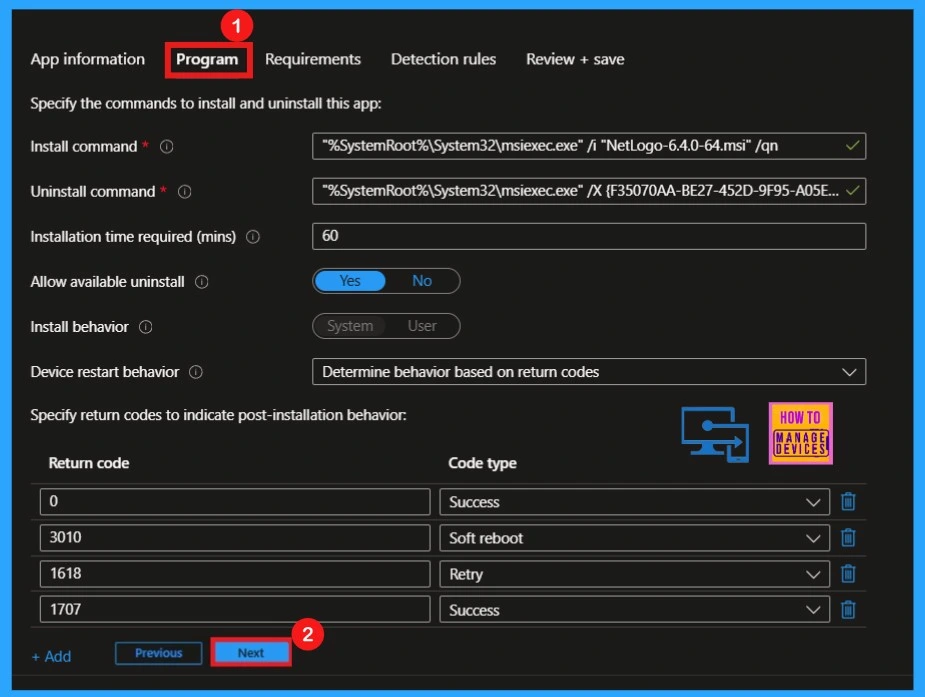
Program
After clicking Next, you will be on the Program tab. This tab displays the install and uninstall commands and the installation time. Select Yes to activate the uninstall option and select No to prevent uninstall option.
- Click Next to proceed.
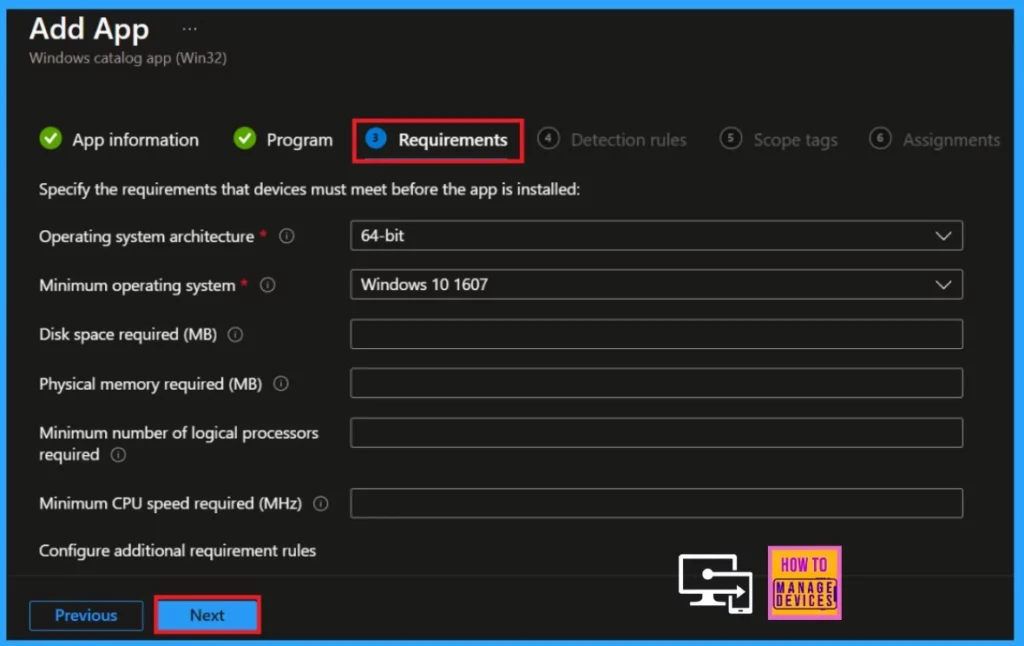
Requirements
In the Requirements, we can see the OS architecture and the minimum operating system details. Now select Next to proceeding the app deploying process.
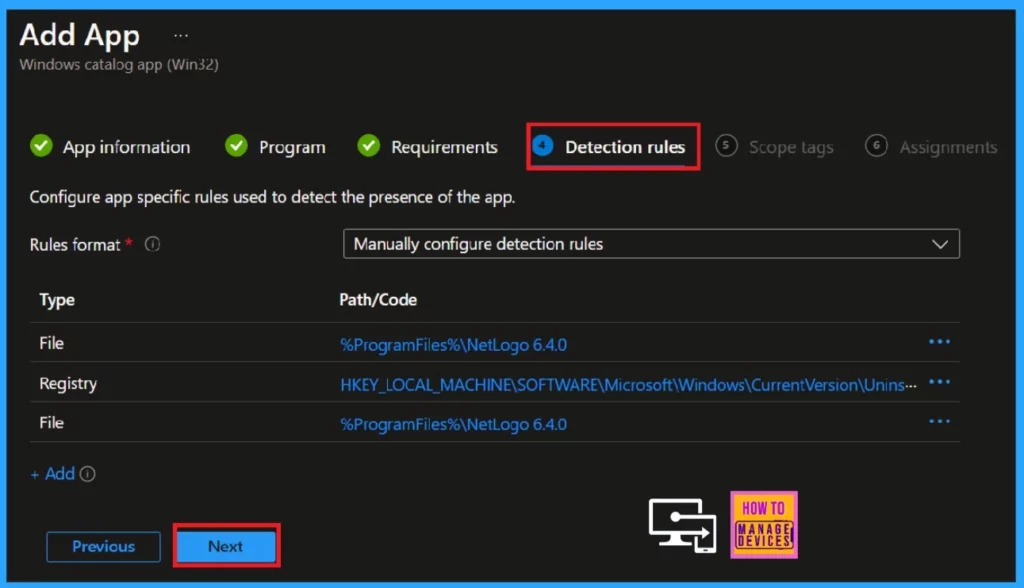
Detection Rules
The Detection Rules allows you to verify whether the app is installed on a device. This ensures the app is properly installed before proceeding with further actions or updates. You can skip this tab if you do not need to set up any rules.
- Hit Next.
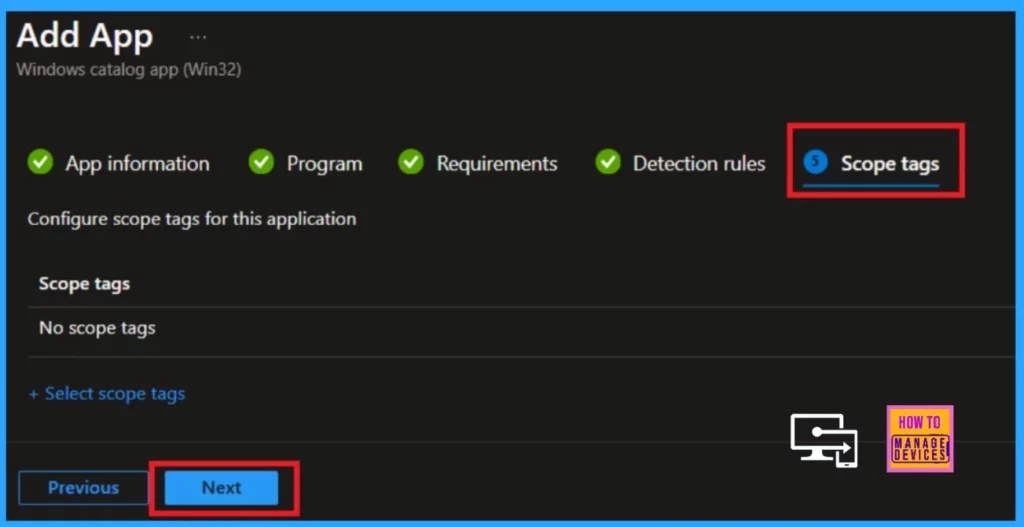
Scope Tags
Scope tags in Intune allow admins to label devices, profiles, and apps. This allows them to manage only the resources linked to those labels. The Scope Tags section is optional.
- Click to Next
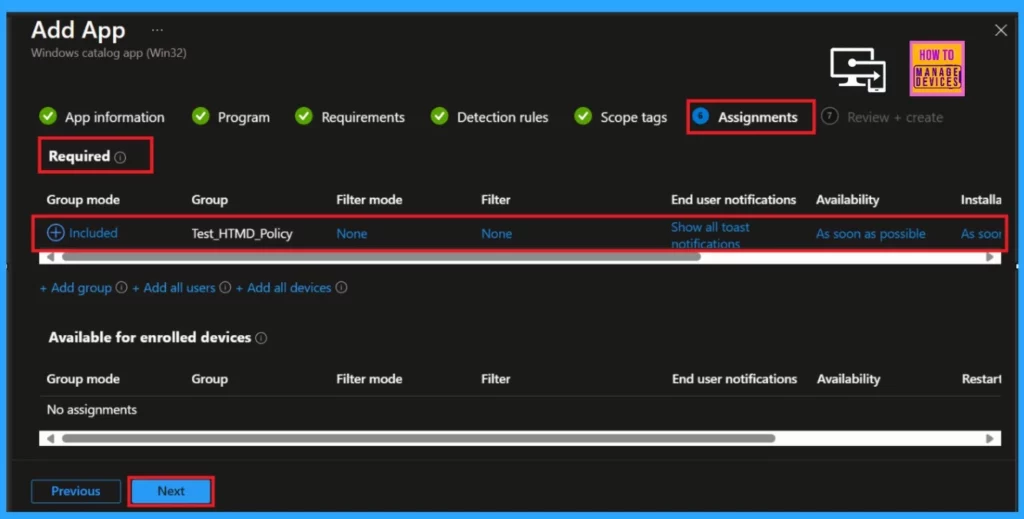
Assignments
In the Assignments section, you can choose the groups for your selected app deployment and specify which device groups or users will receive the deployed app.
- Click on the Included Groups in the Assignments section.
- Select Add group in the required category.
- Here, I select Test_HTMD-Policy as the group.
- Click Next.
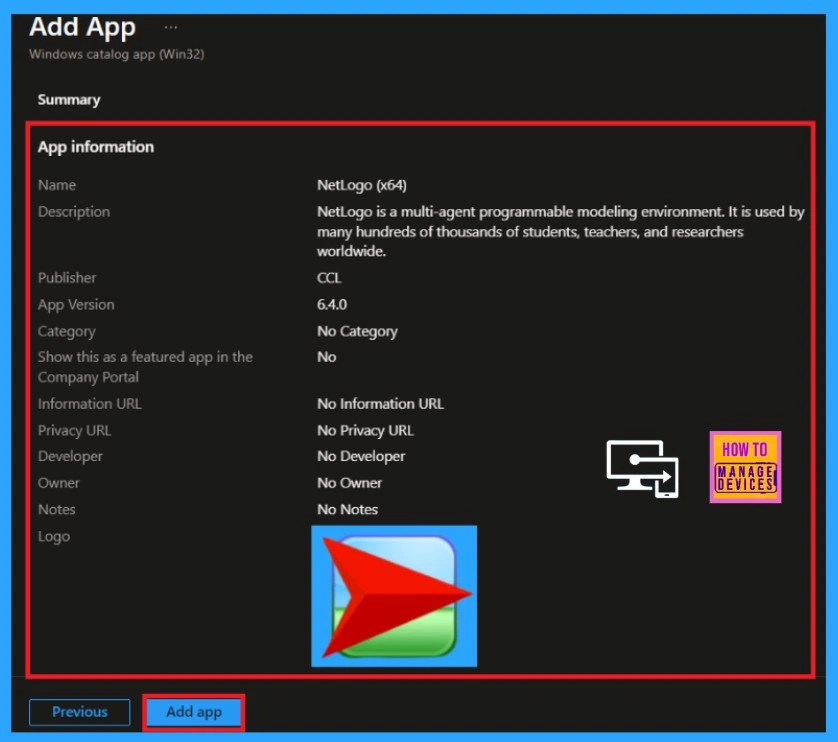
Review and Create
This is the final stage to deploy an app in Intune. The Review + Create tab summarises the app’s deployment settings before installation. Here, we can check important details about the selected app, such as its name, description, and assignment groups.
- After confirming the details, click the Add App button to proceed.
- Now, you will receive a notification that the application added and the NetLogo (x64) successfully created.
Monitor Status
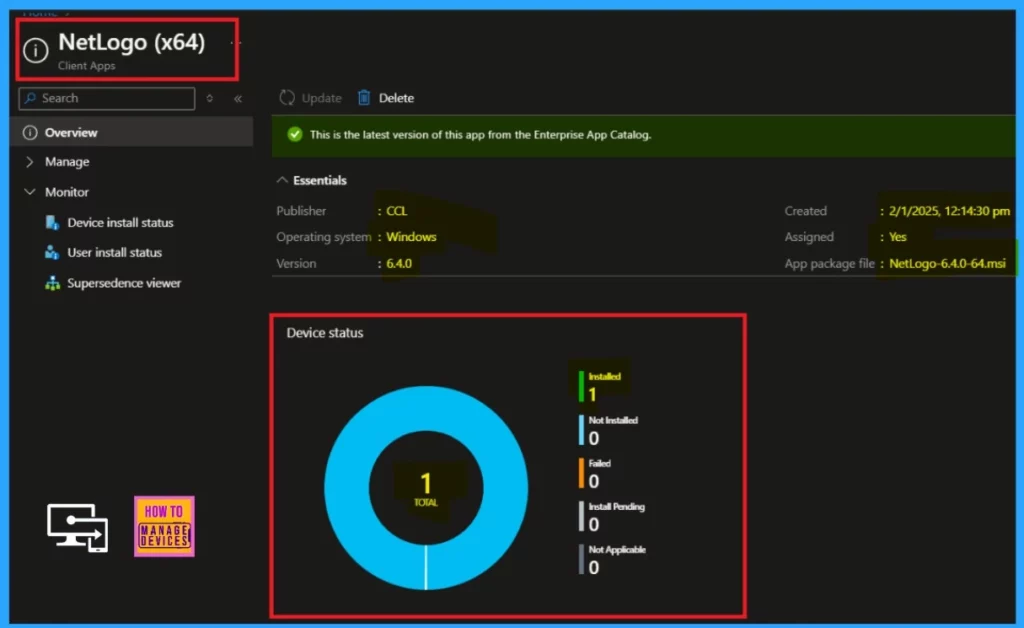
Monitoring the installation status is an integral part of the app deployment process. It confirms whether the app is installed on assigned groups or users. After assigning the app, the deployment may take up to 8 hours. So, you can manually sync the policy in the company portal.
- Go to the Company portal > settings and click on the sync.
End User Experiance
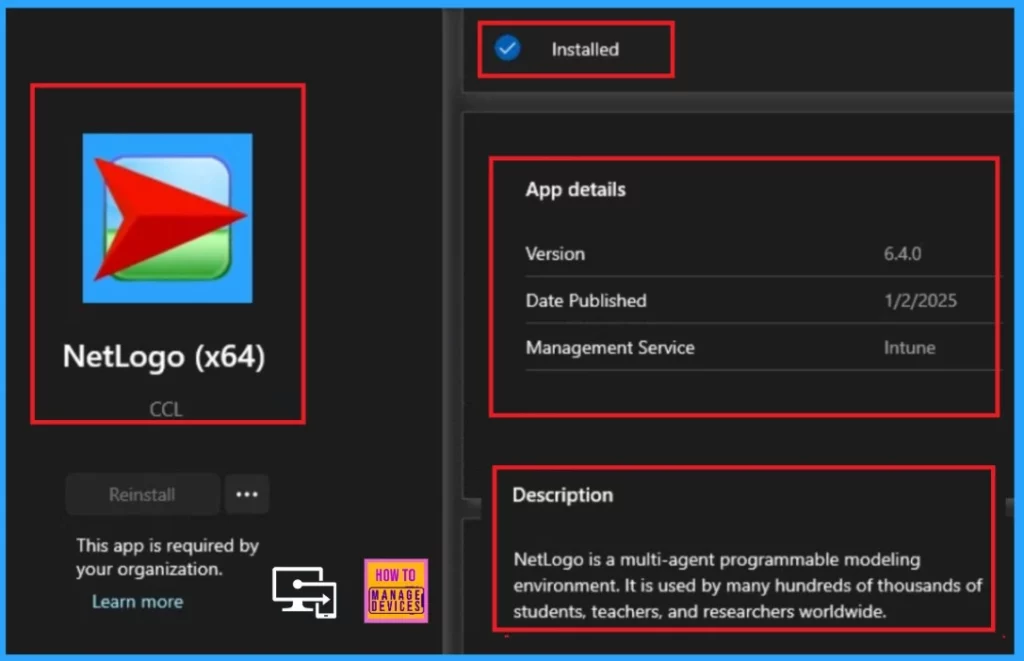
After completing the manual synchronization, the installation will automatically deploy to the workstation. To confirm the installation, open the company portal and navigate to the Downloads and Updates section. You can search the installed app to confirm successful installation.
Here is a table that shows the details of the installed apps for you to review. The image given below shows that the NetLogo is successfully installed.
| App Details | Description |
|---|---|
| Name | NetLogo |
| Version | 6.4.0 |
| Date Published | 1/2/2025 |
| Managemnet Service | Intune |
| Description | NetLogo is a multi-agent programmable modeling enviornment. It is used by many hundreds of thousands of students, teachers, and researchers worldwide. |
Need Further Assistance or Have Technical Questions?
Join the LinkedIn Page and Telegram group to get the latest step-by-step guides and news updates. Join our Meetup Page to participate in User group meetings. Also, Join the WhatsApp Community to get the latest news on Microsoft Technologies. We are there on Reddit as well.
Author
Anoop C Nair has been Microsoft MVP for 10 consecutive years from 2015 onwards. He is a Workplace Solution Architect with more than 22+ years of experience in Workplace technologies. He is a Blogger, Speaker, and Local User Group Community leader. His primary focus is on Device Management technologies like SCCM and Intune. He writes about technologies like Intune, SCCM, Windows, Cloud PC, Windows, Entra, Microsoft Security, Career, etc.
