Let’s learn the Easy Way to Recover Uninstalled Programs on Windows 11. If you uninstall or remove a program accidentally from your Windows 11 PC, there is a best way to recover it. When you terminate a program, you wonder how to recover it.
If you uninstall an app from your device, you can easily reinstall it through the Microsoft Store. However, removing a program from your device would be critical for your system. Removing important data or software from your device requires reinstalling it for your Device’s performance.
Reinstalling is easy, but you must apply the proper recovery method. When you delete a program, it does not remain for an extended period. There are many reasons why a user uninstalls apps and files, such as insufficient storage.
In this article, you will get the complete guide for recovering a program, and you can get to know how to view the uninstalled history. There is an easy method for recovering a program; you don’t need a third–party tool.
- Time and Language Settings in Windows 11
- How to Download and Use Microsoft Dot NET Framework Repair Tool
What are the Reasons Why a User Uninstalls Programs?
Users always remove unnecessary applications and files from the device. Sometimes accidentally delete any files that are very important to your system. There are many reasons why a user can uninstall a program, which are given below.
1. When the device storage goes full
2. There is no use for the software or files installed on your device
3. When the software trial period is over
Easy Way to Recover Uninstalled Programs on Windows 11
As a user we install many applications and software. If they don’t need it, the user uninstalls them. When you uninstall programs, accidentally uninstall the required application or programs. At that time, the user’s main thought was whether it could be reinstalled or not. Yes, it can be reinstalled easily.
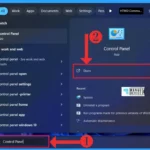
- In the Start Menu, search for the Control Panel
- Click on the Open
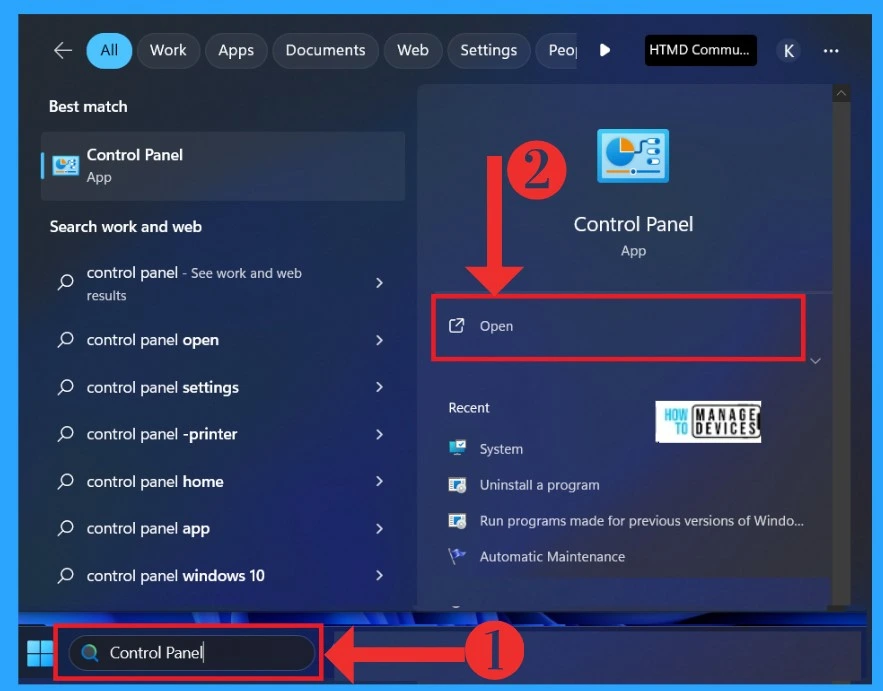
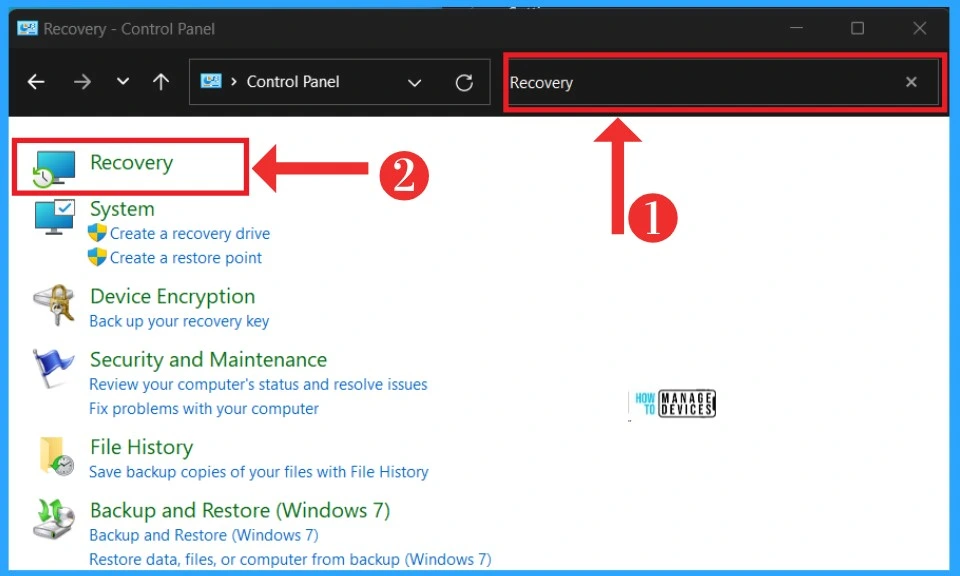
After clicking on the open button, the Control Panel will open. There will be many options available for you. There is a search box on the top of the right side. Click on there, and search for Recovery. After searching, you will get the recovery option.
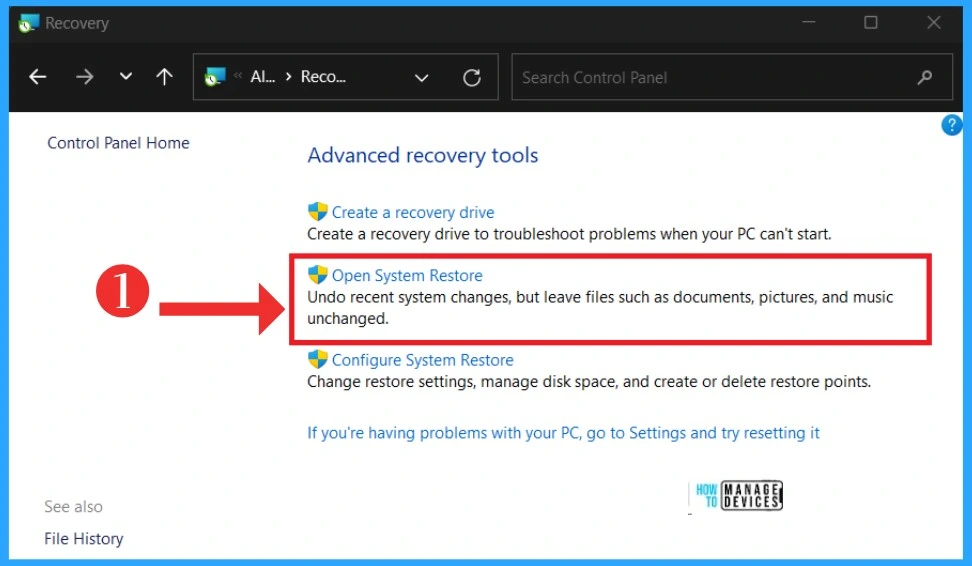
In another window, you will get the Advanced recovery tools options. There are many options available for the Recovery settings. Select the Open system Restore option from that. It will undo the system changes but leave files such as documents, pictures and music unchanged.
| Advanced Recovery Tool | Used to |
|---|---|
| Create recovery drive | Create a recovery drive to troubleshoot problems when your PC can’t start |
| Open system restore | Undo the system changes, but leave files such as documents, pictures and music unchanged |
| Configuration system restore | Change restore settings, manage disk space, and create restore points |
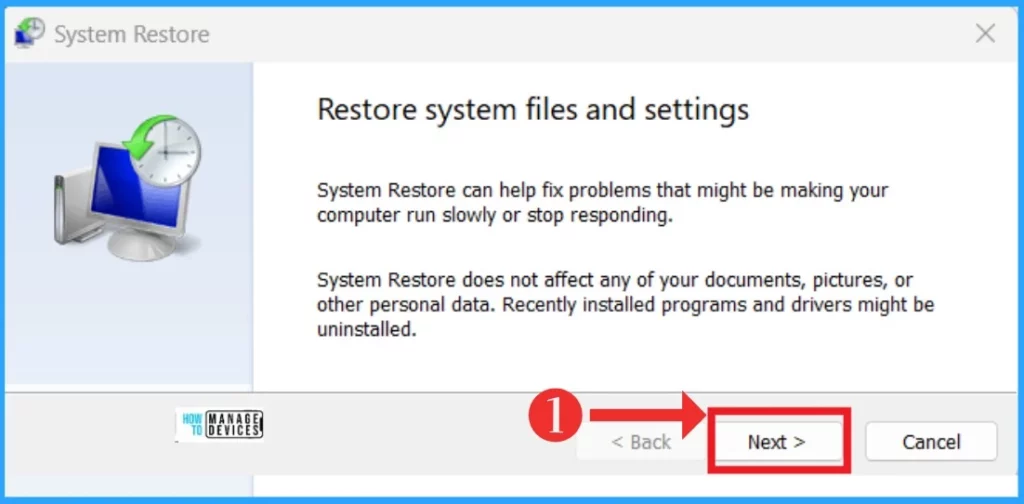
In the next window, which is called Restore System Files and Settings. In the window, you are having some approval for the next step. The system restore does not affect your documents, pictures or other personal data. Recently installed programs and drivers might be uninstalled. If you agree with this, click on the Next option.
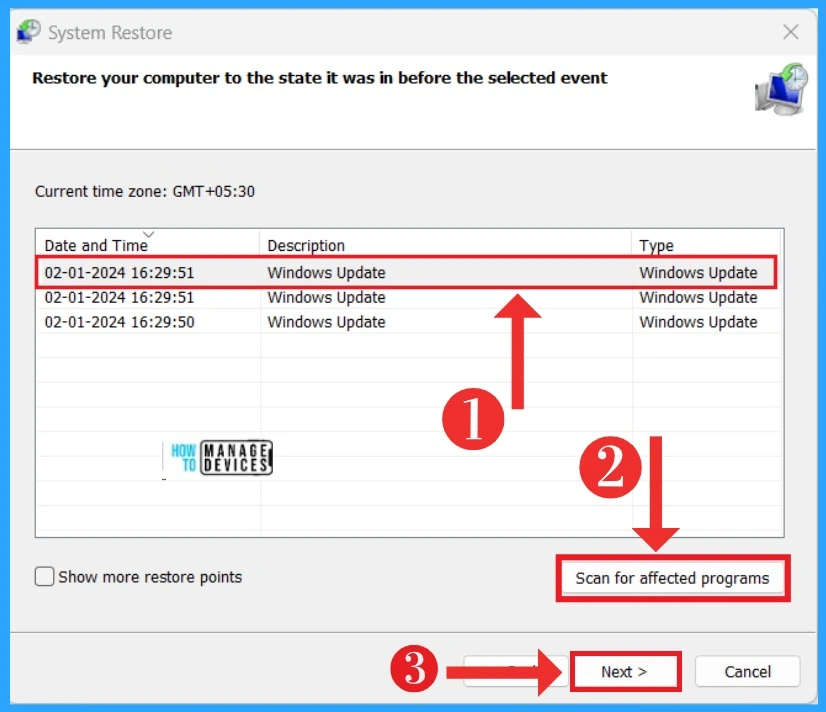
After clicking the Next option, you can see another window for ” Restore your computer to the state it was in before the select Event’‘.Click on the restoring program, click on the Scan for Affect program, and click on the Next option.
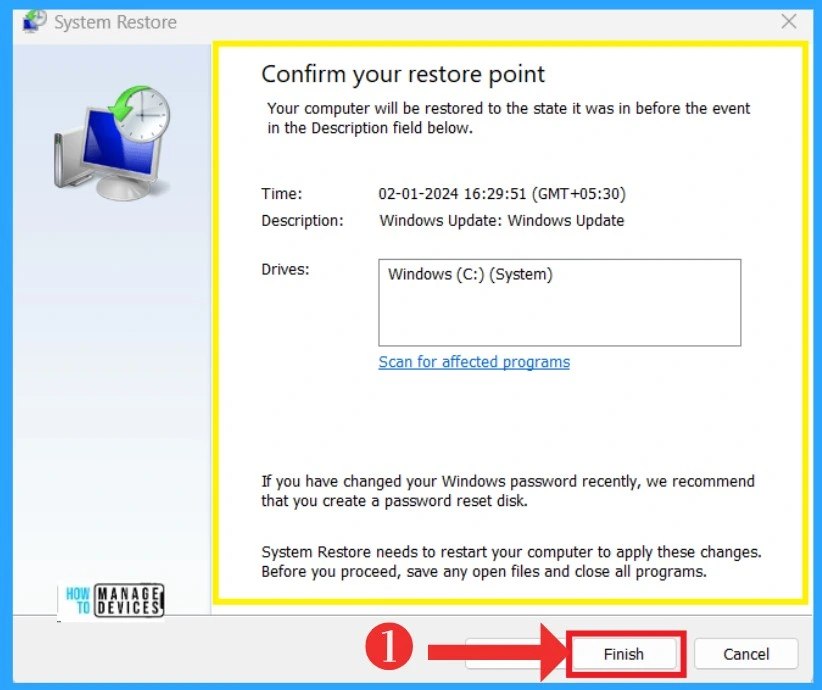
After that, a window will appear called Confirm your restore point. Here, your computer will be restored to its state before the Event. You can select the drivers in this step; if you recently changed your Windows password, you have to create a password and reset the disk.
Note: Restart your device to apply the changes when restoring a file. Save your open files before proceeding to restart.
- Click on the Finish button
We are on WhatsApp. To get the latest step-by-step guides and news updates, Join our Channel. Click here – HTMD WhatsApp.
Author
Krishna. R is a computer enthusiast. She loves writing on Windows 11 and Intune-related technologies. She likes to share her knowledge, quick tips, and tricks with Windows 11 or Windows 10 with the community.
